10 Things to Do With Chocolate Shot Glasses

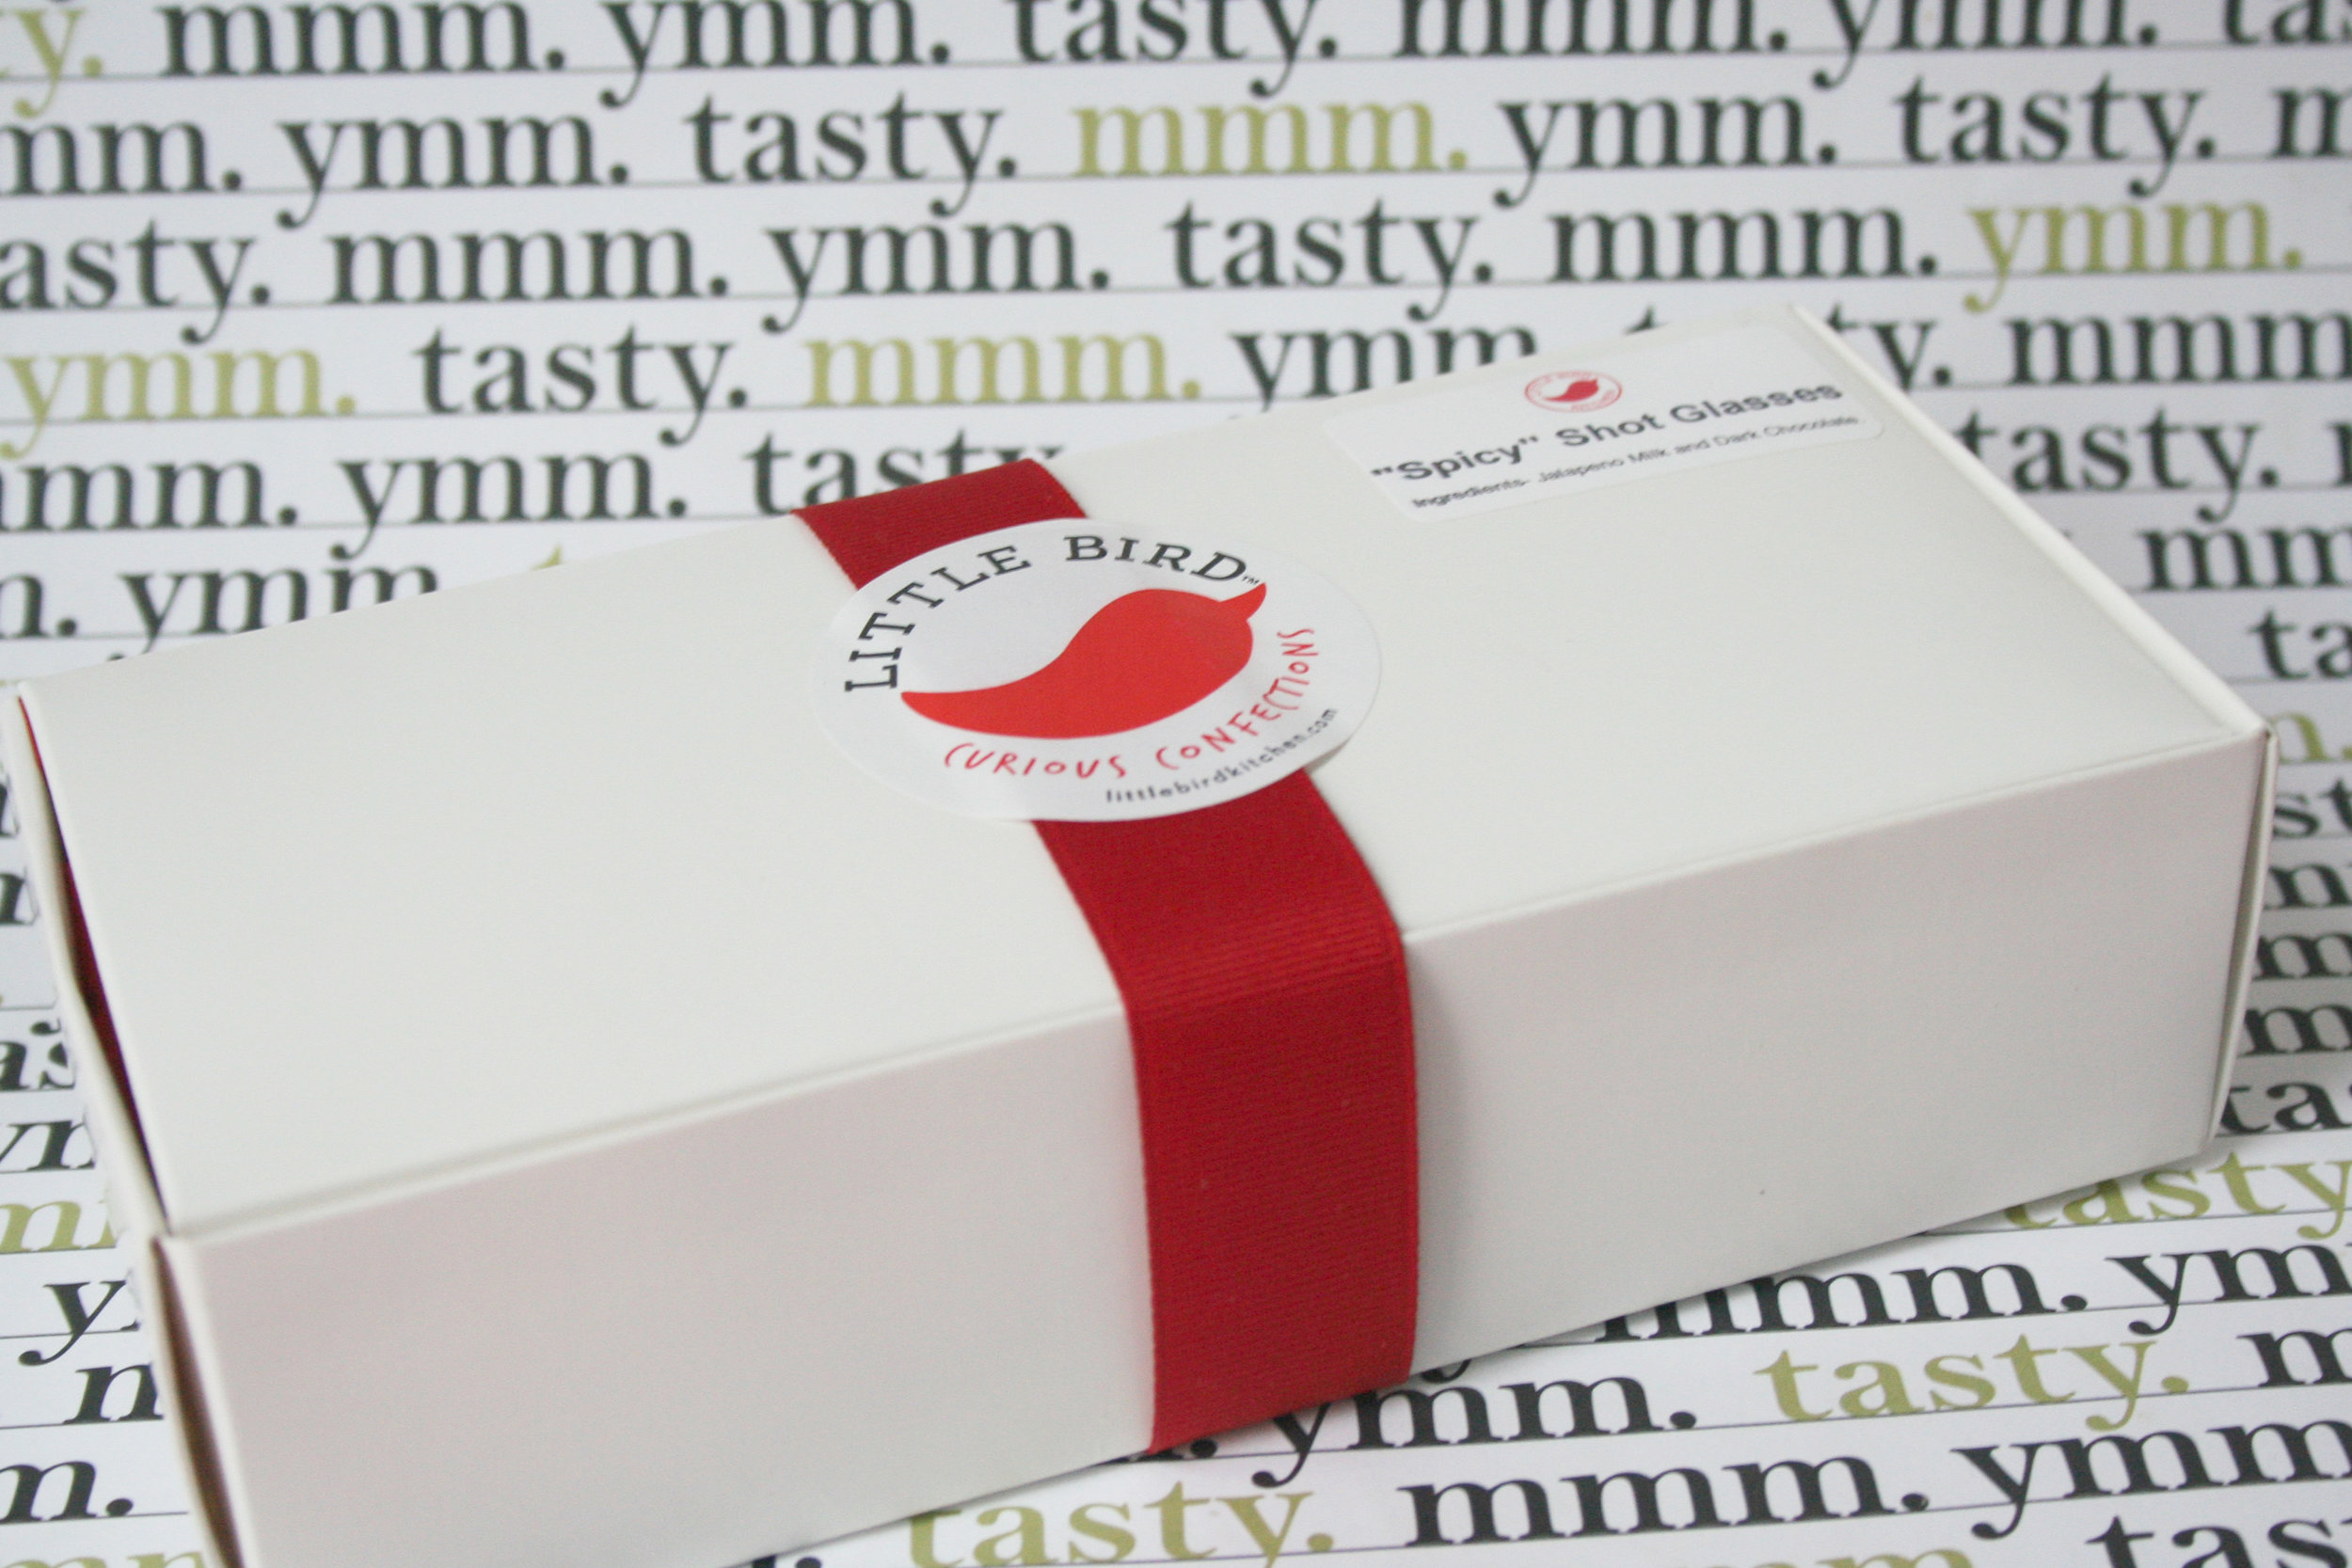
Guess what? Recently, I received a package containing CHOCOLATE SHOT GLASSES.

The package was sent to me by Little Bird, a purveyor of "curious confections". They sent me their spicy jalapeno chocolate shot glasses in milk and dark chocolate. Note: they haven't paid me to write this post, but they did send me the parcel at no charge. 

These shot glasses are alarmingly adorable, and delightfully edible. I am just tickled by the idea! The spicy version is great if you like your sweets with a contrasting kick.

But even more than the flavor, what I really got to thinking about with these chocolate shot glasses was the many ways in which they could be creatively used. So here, I'm going to detail 10 awesome ideas for what you could do with these shot glasses! 
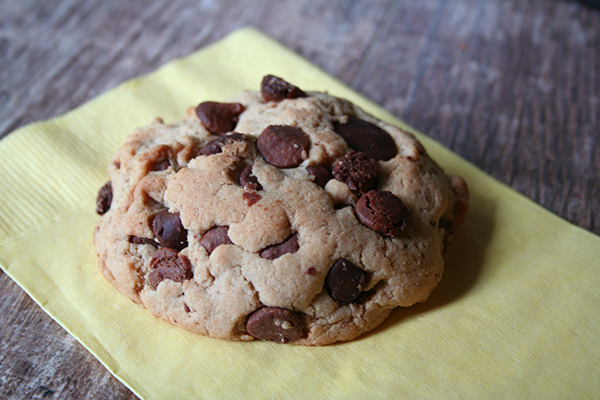
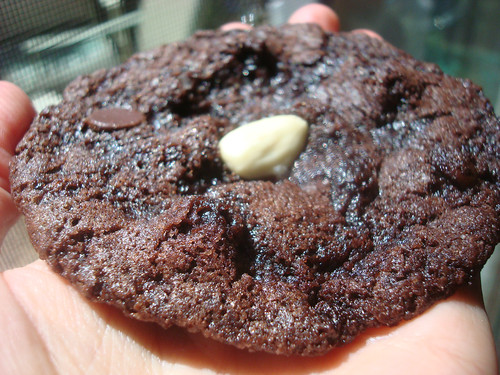
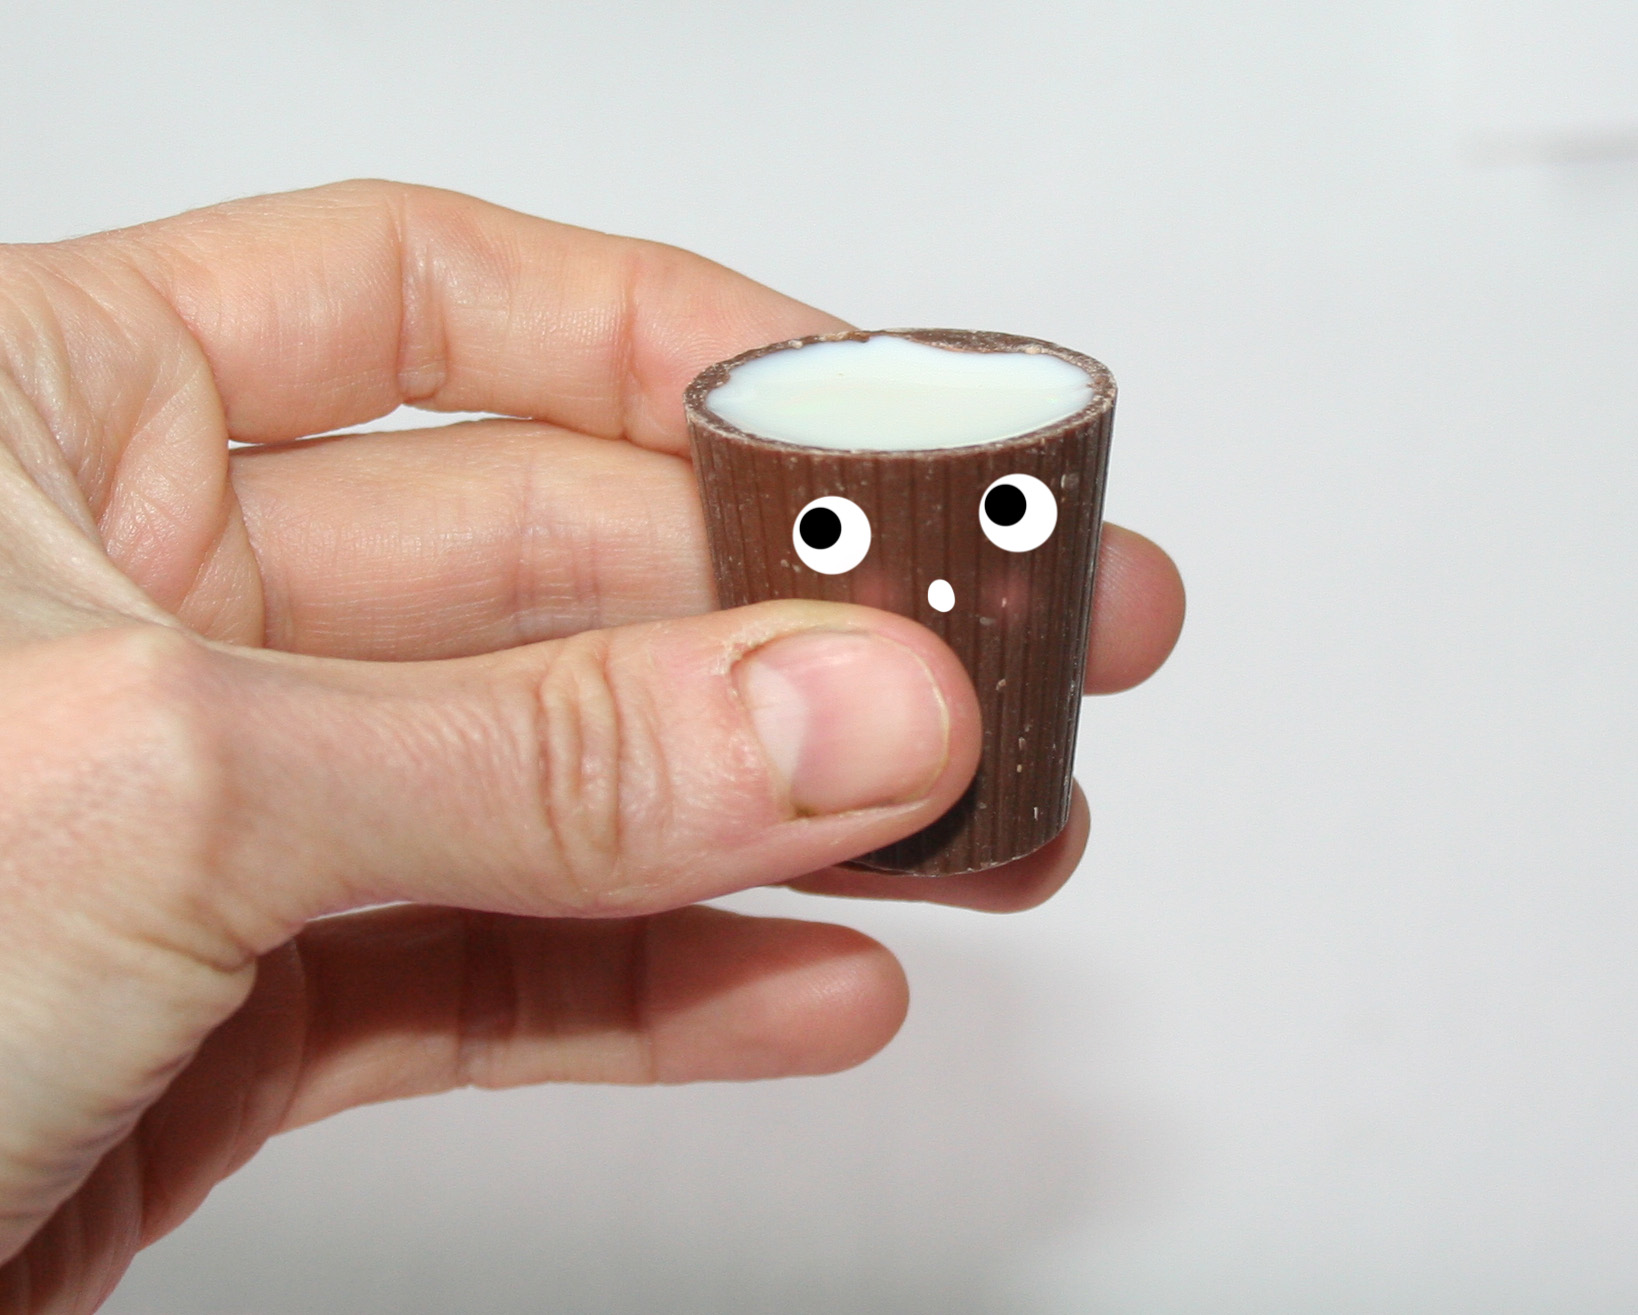
1. M-m-m-ilk shots!

Plain and simple, shoot the milk then eat the cup. Pictured at the top of the post.

2. Ganache shots. 

Good idea: fill your chocolate shot glasses with more chocolate. You're welcome.


3. Whipped cream shots. 

Forget eating whipped cream from the can, unless the can is made of chocolate! Eat it from a chocolate shot glass instead. 

4. Molecular gastronomy s'mores. 

I promise I wasn't high or anything, but I had this vision of toasting a marshmallow, doming a chocolate shot glass on top (to make it all gooey and warm) and then smashing it all between two graham crackers. It was a beautiful thought. 

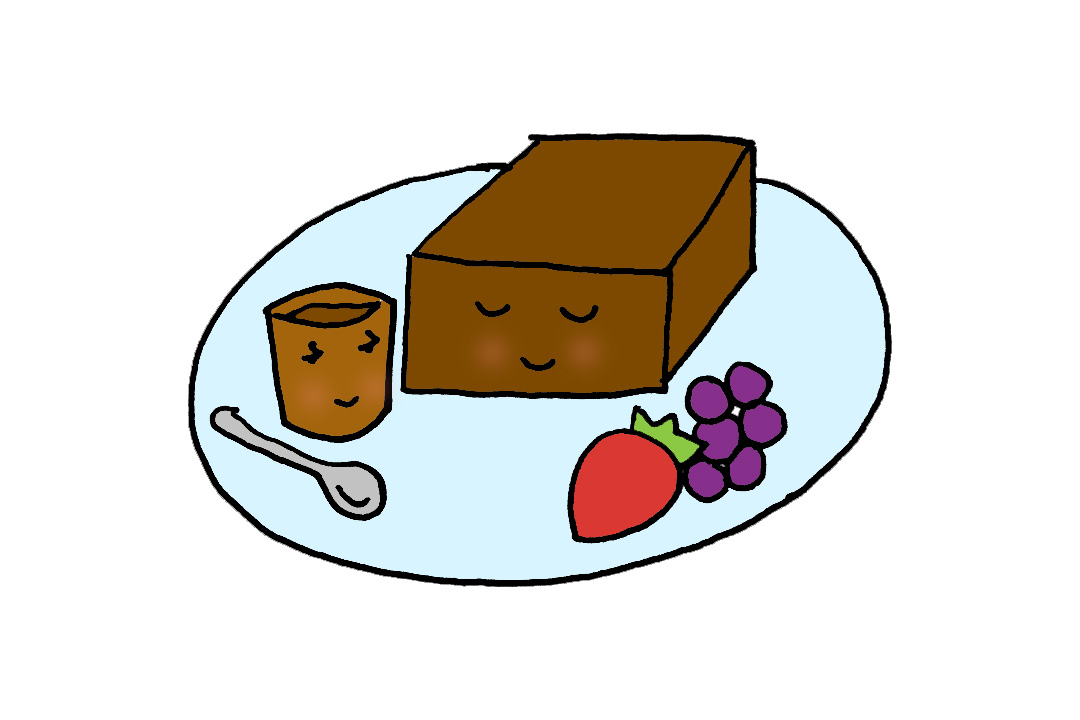
5. Tiny dessert servings.

My my, aren't you dainty. A tiny portion of cake would sit pretty in one of these shot glasses.

6. Fill them and then bake them in cupcakes. 

Perhaps inspired by my friend Megan Seling, I thought about putting one of these shot glasses (filled with candy of course) into some cupcake batter then baking it up. It seemed like a not-bad idea to me. 

7. Frosting shooters. 

I figured, some people (like my sister) just lick the frosting off of cake. Maybe this would be a better delivery system?

8. Drop a shot of marshmallows or whipped cream into your hot chocolate. 

I thought that this could be a great idea: fill a chocolate shot glass with marshmallows, then pop it into your hot chocolate. It seems like it could delay the melting and distribution of the marshmallows just enough to heighten the experience; plus, more chocolate. 

9. Ice cream topper. 

Well, that's a cute idea. 

10. Cute dessert serving sauce tool. 

What an elegant way to serve a little sauce alongside a dessert!

What's your favorite idea for using chocolate shot glasses?


Funfetti Explosion Birthday Ice Cream Cake

If you were a unicorn, what would you be eating at right this very minute? I can tell you what I'd be eating. THIS:

Reprinted with permission from Secret-Layer Cakes by Dini Kodippili, Page Street Publishing Co. Photo credit: Kodippili

This splendid and magnificent thing is called "Funfetti Explosion Birthday Ice Cream Cake," and it is featured in the new book Secret-Layer Cakes by Dini Kodippili. Oh, you might know her as the celeb blogger behind The Flavor Bender. I'm kind of friends with her. It's no big (it's totally a big!). 

I should also tell you that recently, Dini made some donuts inspired by MY recent book, Stuff Unicorns Love. Be sure to check out that post, too! 

Her publisher was kind enough to grant permission for me to share this incredible masterpiece on CakeSpy. Please, promise me you'll make it every day? Here's the headnote from Dini and then the recipe. Enjoy! 


Funfetti Explosion Birthday Ice Cream Cake

This cake looks like a funfetti cannon exploded all over it. Kids love rainbow colors and funfetti, so it'll be perfect for a summer birthday party! A fudgy blondie layer is packed with funfetti and topped with a cake batter-flavored funfetti ice cream layer. Top it with some sparklers to complete the look. 

Makes one 8-inch (20-cm) cake

Funfetti Blondie Layer

  • 170 g (6 oz) unsalted butter
  • ½ tsp salt
  • 250 g (8.8 oz) brown sugar
  • 2 eggs
  • 1 tsp vanilla extract
  • 175 g (6.2 oz) all-purpose flour
  • ½ cup (113 g) funfetti (rainbow) sprinkles

Funfetti Cake Batter Ice Cream Layer

  • ¼ cup (59 ml) whipping cream
  • ¼ cup (61 g) milk powder
  • 1 tsp vanilla extract
  • 1.9 L (64 oz [4 pints]) vanilla ice cream, softened
  • 1½ cups (339 g) funfetti (rainbow) sprinkles

Stabilized Whipped Cream

  • ½ cup (118 ml) water
  • 3¾ tsp (19 g) powdered gelatin
  • 5 cups (1 L) plus 1–2 tbsp (15-30 ml) chilled whipping cream, divided
  • 1 cup (130 g) confectioners’ sugar
  • Red, orange, yellow, green, blue and purple gel food coloring

To Decorate

  • Funfetti sprinkles
  • M&M’s® candies

Funfetti Blondie Layer

Preheat the oven to 350°F (180°C). Butter an 8-inch (20-cm) wide, 3-inch (8-cm) tall springform pan. Line the bottom with parchment paper and dust the sides with flour. Melt the butter, salt and brown sugar in a heatproof bowl in 30-second intervals in the microwave. Stir to form a smooth butter-sugar mixture. Set aside to let cool slightly.

Once the butter-sugar mix has cooled, add the eggs, one at a time, whisking well after each addition. Stir in the vanilla and the flour. Fold in the funfetti sprinkles.

Pour the batter into the prepared pan and bake for 25 to 30 minutes (the blondie should still be soft and fudgy in the middle). Let the blondie cool in the pan.

When it has cooled, line the sides with parchment paper or acetate paper. Refrigerate the blondie layer until the ice cream is ready.

Funfetti Cake Batter Ice Cream Layer

Microwave the cream until it’s warm, but not hot. Add the milk powder and dissolve it completely. Add the vanilla and stir to combine. Let cool.

Place the softened vanilla ice cream in a bowl, add the cooled milk powder mixture and stir to combine. Fold in the funfetti sprinkles. Spread the ice cream over the funfetti blondie.

Place the ice cream in the freezer until it freezes and hardens completely. This makes it easier to frost the cake quickly.

Stabilized Whipped Cream

Place the water in a small bowl and evenly sprinkle the gelatin over it. Set aside for 10 to 15 minutes to let the gelatin bloom. Microwave the bloomed gelatin in 10-second intervals, stirring in between, until the gelatin is completely dissolved (making sure that the gelatin does not boil).

Add 5 cups (1.2 L) of the chilled whipping cream and confectioners’ sugar to a cold bowl. Whisk with the whisk attachment of your hand mixer on medium speed. Add the remaining 1 to 2 tablespoons (15 to 30 ml) of chilled cream to the hot, dissolved gelatin and stir to temper the gelatin. Add this gradually to the cream that is being whipped (being careful to pour it near the whisk, so that the gelatin gets mixed in with the cream immediately!). Whisk gently until you get soft peaks that still hold their shape. Use immediately.

Work quickly to frost the frozen ice cream cake. Divide the whipped cream into 7 portions, then combine two to make one larger portion (so that you have 5 small portions and 1 double portion). Color the small portions with red, orange, yellow, green and blue gel food coloring. Color the double portion with purple.

Decorate

Remove the completely frozen funfetti ice cream cake from the freezer, and unmold from the springform pan.

Spread the whipped cream on the sides of the cake to create a rainbow pattern—either rainbow patches, or rainbow ombre stripes—starting with red at the bottom and purple at the top edge and on the top of the cake.

You can use the leftover whipped cream to pipe rainbow swirls on top of the cake as well.

Sprinkle some funfetti sprinkles and M&M's on top (in the center). Return the cake to the freezer until you’re ready to serve. 

Who in your life needs this cake? 

Mexican Hot Chocolate Piñata Bundt

Your New Year's health resolution is boring to me. Let's eat cake instead.

But not just any cake, friends: a Mexican Hot Chocolate Piñata Bundt Cake! This beauty is from the brand new book Beautiful Bundts: 100 Recipes for Delicious Cakes & More by Julie Anne Hession

OK, so this book is awesome. It delivers on the promise of the title, with plenty of beautiful bundt cakes in all shapes and sizes. However, it also has some unexpected recipes. From savory bundts to pull-apart options, there are creative options in addition to the classics. It's truly a book that will challenge the view of the bundt pan as one trick pony in the kitchen!

I'm delighted to have received permission to share this recipe for a Mexican Hot Chocolate Piñata Bundt cake on the blog. This happy cake is perfect for parties, Cinco De Mayo, or really, let's be honest, any day of the year that you crave chocolate and joy (which is most days for me!). 


Mexican Hot Chocolate Piñata Bundt

Photo credit (above) and headnote (below): Julie Anne Hession

A piñata Bundt? That sounds fun! Indeed. This Bundt is full of surprises and guaranteed to turn any occasion into an instant fiesta. Cut into the whole cake, pull out the first slice and you’re met with a cascade of colored chocolate candies spilling out onto your plate. Take your first bite, and what you thought was a standard chocolate cake hits you with notes of cinnamon and spicy cayenne. Whether or not you hit the dance floor, your taste buds will definitely be doing the salsa!

Makes 12 to 14 servings

Tips

After filling cake, it’s best to invert it onto a serving plate instead of a wire rack. Because sections of the cake have been removed and replaced, the cake should be moved as little as possible.

The ganache thickens quickly once poured over the cake. To coax it down the sides, firmly tap the cake-topped plate or wire rack on the counter a few times.


Before you bake:

  • Preheat oven to 350°F (180°C); dark pan, 325°F (160°C)
  • Get yourself a minimum 12-cup Bundt pan, and spray it with nonstick spray

Ingredients:

  • 2 1⁄2 cups all-purpose flour (625 mL)
  • 1 cup unsweetened cocoa powder, sifted  (250 mL)
  • 1 tsp baking soda (5 mL)
  • 1 tsp salt (5 mL)
  • 1 tbsp ground cinnamon (15 mL)
  • 1⁄4 to 1⁄2 tsp cayenne pepper (1 to 2 mL)
  • 2 1⁄4 cups  granulated sugar (560 mL)
  • 3⁄4 cup vegetable oil (175 mL)
  • 3 large eggs, at room temperature 
  • 1 tbsp coffee-flavored liqueur (such as Kahlúa) (15 mL)
  • 2 tsp vanilla extract (10 mL)
  • 1 1⁄2 cups  buttermilk (375 mL)
  • 1 3⁄4 cups mini candy-coated chocolate pieces (such as M&Ms), about 11 oz (330 g) 
  • 1 recipe Mexican Chocolate Ganache (see recipe below)    

Instructions

1.    In a medium bowl, whisk together flour, cocoa, baking soda, salt, cinnamon and cayenne.

2.    In the stand mixer bowl, beat sugar and oil on medium speed until blended. Beat in eggs, one at a time. Beat in liqueur and vanilla.

3.    With the mixer on low speed, alternately beat in flour mixture and buttermilk, making three additions of flour and two of buttermilk, and beating until incorporated. Transfer batter to prepared pan and smooth the top.

4.    Bake in preheated oven for 50 to 60 minutes or until puffed and a tester inserted in the center comes out clean. Let cool in pan for 10 minutes, then carefully invert cake onto a wire rack to cool completely.

5.    Prepare cake for filling as directed on page 88. Pour candies into the “moat,” filling it to about 1⁄2 inch (1 cm) from the top. Trim cut-out cake sections so that they fit snugly back together on top of the candies, pressing to adhere and completely covering up candies. Carefully invert cake onto a serving plate.

6.    Pour ganache over the cake, letting it drip down the sides (see tip). Let ganache set for at least 20 minutes before serving.


Mexican Chocolate Ganache

Makes enough for a cake baked in a 10- to 12-cup pan

  • 6 oz dark or semisweet chocolate, chopped  (175 g)   
  • 1⁄3 cup heavy or whipping (35%) cream (150 mL)
  • 1 tbsp unsalted butter (15 mL)
  • 1⁄2 tsp    ground cinnamon (2 mL)
  • 2 to 3 tbsp coffee-flavored liqueur (such as Kahlúa) (30 to 45 mL)

1. In a small saucepan, stir together chocolate, cream and butter over medium-low heat until melted and smooth. Remove from heat and stir in cinnamon and liqueur to taste.

Have you ever made a creative bundt cake?

Like Whoa: Sorghum Marshmallows

What happens when you make marshmallows with sorghum?

Very good things, as I learned in the brand-new book The Southern Cookie Book. This totally awesome book comes at you from the editors of Southern Living, and it is full of not only cookies but all sorts of interesting confections, too--including sorghum marshmallows.

Sorghum syrup is a unique thing--somewhat similar in texture to molasses, but definitely not molasses flavor-wise. It is derived from sorghum grass, a type of cereal grain.

Sorghum itself is pretty fascinating - you can learn more about it here.

The book's description only adds to their appeal: "Pillowy and sweetened with flavorful sorghum syrup, these marshmallows can float atop a mug of cocoa or be wrapped up for holiday giving."

Sorghum Marshmallows

Hands-on 40 min. Total 8 hours, 50 min. / Makes 8 to 9 dozen

ingredients

  • 3 envelopes unflavored gelatin
  • 1⁄2 cup cold water
  • 11⁄2 cups granulated sugar
  • 11⁄4 cups sorghum syrup*
  • 1⁄4 tsp. kosher salt
  • 1⁄4 cup cornstarch
  • 1⁄4 cup powdered sugar
  • Butter
  • Vegetable cooking spray

1. Sprinkle gelatin over 1⁄2 cup cold water in bowl of a heavy-duty electric stand mixer. Stir together granulated sugar, next 2 ingredients, and 1⁄2 cup water in a 41⁄2-qt. saucepan over medium-high heat; cover and cook 3 minutes, bringing to a boil. Uncover and boil, stirring often, until syrup thickens and a candy thermometer registers 240°F (about 8 to 12 minutes; lower heat as necessary to prevent mixture from boiling over).

2. Gradually add hot sugar mixture to gelatin mixture, beating mixture at low speed, using whisk attachment, 30 seconds or until blended. Increase speed to high (cover bowl with a towel to prevent splattering); beat 10 to 12 minutes or until mixture cools to room temperature and is thick but still pourable.

3. Whisk together cornstarch and powdered sugar. Dust a buttered 13- x 9-inch baking dish with 1 Tbsp. cornstarch mixture. Pour gelatin mixture into prepared dish; smooth with a lightly greased (with cooking spray) spatula. Dust with 11⁄2 Tbsp. cornstarch mixture. Cover remaining cornstarch mixture tightly, and reserve. Let marshmallow mixture stand, uncovered, in a cool, dry place 8 to 14 hours or until dry enough to release from baking dish and no longer sticky.

4. Invert marshmallow slab onto cutting board; cut into squares (about 1 inch each). Toss squares in reserved cornstarch mixture to coat. Store marshmallows in an airtight container at room temperature up to 2 weeks.

*Cane syrup may be substituted for sorghum syrup.

Have you ever made creative marshmallows? 

April 5: National Raisin and Spice Bar Day

Today is National Raisin and Spice Bar Day. While they have a different name, I'm gonna say that these interesting bars fit the bill as they do contain raisins and spices: the "1812 Cookie Bar" by Matthews 1812 House

webIMG_4458.jpg

A few weeks ago, I was contacted by a mail-order cookie and cake company called Matthews 1812 House. They asked if I would like to try some of their goodies. Well, twist my arm why don't you. I requested the "1812 Cookie Bar", because it seemed like an interesting item, and one unlike anything else I had ever seen.

The description of the bars goes like so: "Tangy apricots, crunchy pecans and chocolate chips are mixed into a honey and brown sugar batter, then baked on a buttery shortbread crust. Finished with our own special browned butter icing, you'll find these bars truly amazing."

While not specifically mentioned in the description, raisins and spices are listed in the ingredients, which is why I find them appropriate for today's national food holiday.

Actually, more than appropriate. Because look at these things. They look crave-worthy, right? Especially on my new custom tray, by Bags of Love

They taste crave-worthy, too. I love a good bar cookie, and these are indeed a fine specimen. The cookie base is sturdy and flavorful, with just the right amount of salt, butter, and sweetness coming together. My darling one didn't care for the apricot, but I told him to shut up because I thought it was great, and I'm the one with a food blog, so I win, right? 

But really, for me, what brought these bars together was the browned butter frosting. I don't know if they sneak an elixir of addictiveness into it somehow, but I could eat this stuff with a spoon from a jar and be very happy. It gives the sweet frosting a depth of flavor that lasts on the tongue for several moments after you've taken a bite, in the best way possible. 

I won't lie, these bars are not cheap. A 6x9 tray (a bit smaller than a sheet of printer paper) is $32 plus shipping (I calculated to my home; the total cost would be $44 or so). But they are interesting, and very well made, and they were securely packaged and arrived fresh. So...if you feel like you want a unique, artisan treat, I would say they're worth it for a special occasion. 

Also, I thought the story of the company, which is based in Northwest Connecticut, was cute (right from their site), if not revealing about why the company has its unique name:

"Matthews 1812 House was started in 1979 in the family farmhouse by Blaine and Deanna Matthews. Named after the year the house was built, they started with two fruitcakes (and had two small children at the same time)! Soon there were baking racks in the hallways and people sorting apricots and pecans on the dining room table.

In 1991 the business moved to a dedicated facility just a mile from the farmhouse. With a carousel oven (yes, it rotates), and more room, they expanded from their line of specialty cakes into cookies, bars, and other mouth-watering baked goods."

Check out these bars and the full offerings of Matthews 1812 House here.

Buy the Book, Make the Cake: 7-Up Cake via Grandbaby Cakes

Anyhow, my friend Jocelyn (she's kind of famous, you probably know her website, Grandbaby Cakes) wrote a book. It's called Grandbaby Cakes: Modern Recipes, Vintage Charm, Soulful Memories. And I think you should buy it. 

I could tell you about how funny and cool Jocelyn is, and how we clicked instantly when we met last year at the Pillsbury Bake-Off. I could tell you how we instantly decided that Oprah owed us both a check (for what, other than being awesome, I'm not 100 percent sure). 

But I'm sure that as fascinating as our mutual funniness and complete cuteness is to you, you're in it for the cake. So here, I present an excerpt from the new book, a fantastic recipe for 7-Up Pound cake. Enjoy!


Mama’s 7-UP Pound Cake

SERVES 12–16

This is a vintage recipe that has been in my family for decades. It was actually the very first cake I ever learned to bake, which I suspect is not only because it is my mother’s absolute favorite cake but also because it was an unintimidating induction into the baking world, with results that even a nine­year­old girl could master. If you are a beginner baker, this is an excellent recipe to start your journey with. You may even get bitten by the baking bug like I did. Mama’s 7-UP Pound Cake is a classic and decadent treat complemented by the subtle flavor of citrus soda. The juxtaposition of the crunchy crust to the moist inner texture makes this cake simply irresistible. It melts as soon as you taste it.

GRANDBABY NOTES

This recipe doesn’t have a leavening agent, but it doesn’t need one. A significantly longer creaming process adds more air to the batter, giving it the lift it needs. Don’t skip this step. The results are a golden­brown, perfectly filled-­out cake, no leavening necessary. My mother has always been adamant about using the original 7-UP and nothing else. She says you can really taste the difference. While I have used other lemon­lime soda brands ranging from Sprite to Sierra Mist, I try my best to follow my mother’s advice.

INGREDIENTS

CAKE

  • 1 1⁄2 cups (3 sticks) unsalted butter, room temperature 3 cups granulated sugar
  • 1 teaspoon salt
  • 5 large eggs, room temperature
  • 3 cups sifted cake flour
  • 1⁄2 cup 7UP soda, room temperature
  • 1 tablespoon lemon extract

GLAZE

  • 1 cup confectioners’ sugar
  • 3 tablespoons 7-UP soda
  • 1⁄2 teaspoon lemon extract

FOR THE CAKE

Preheat your oven to 315°F. Prepare a 10­-cup Bundt pan with the nonstick method of your choice.

In the bowl of your stand mixer fitted with the whisk attachment, beat the butter for 2 minutes on high speed. Slowly add the sugar and salt. Cream together for an additional 7 minutes, until very pale yellow and fluffy. Add the eggs 1 at a time, combining well after each addition and scraping down the sides and bottom of the bowl as needed.

Turn your mixer down to its lowest speed and slowly add the flour in 2 batches. Be careful not to

overbeat. Pour in the 7UP and lemon extract. Scrape down the sides and bottom of the bowl and mix the batter until just combined. Be careful not to overmix.

Pour the batter into the prepared pan and bake for 75 to 85 minutes, or until a toothpick inserted into the center of the cake comes out clean.

Let the cake cool in the pan on a wire rack for 10 minutes, then invert onto a serving plate. Let cool to room temperature. Lightly cover the cake with foil or plastic wrap so it does not dry out.

FOR THE GLAZE

In a small bowl, whisk together all the ingredients until the mixture is pourable. When the cake is completely cool, spoon the glaze over the cake and allow it to harden. Serve at room temperature.

Reprinted with permission from Grandbaby Cakes by Jocelyn Delk Adams, Agate Surrey, 2015. 

Intoxicating: Tipsy Cakes Class on Craftsy

I want to tell you about my friend Krystina Castella's new class, Tipsy Cakes, on Craftsy. Actually, I'll let her tell you about it. Seriously--it's such a fun class! Booze and cake, what could be wrong? Read on to learn more, directly from Krystina:


Are you a fan of creating cake flavors that have a boozy touch?

I just launched a new class Tipsy Cakes for Craftsy.com (note: you can check out the class trailer here!). The class paired with my and Terry Lee Stone’s Booze Cakes book (Quirk Books) is now the most comprehensive assemblage of technique and tested recipes on baking with alcohol out there.


I had been noticing ads for craftsy.com popping up in my browser over the past several months due to my 3­year­old sons obsession with watching sewing videos. So when a food anthropologist friend of mine who currently works for the company called me and said they have launched into cakes and asked me to develop a course based on the Booze Cake book for them I jumped at the chance. I was excited to have the opportunity to give Booze Cakes book fans more and something different. So what I decided to focus on is adding the collection of already creative and tasty recipes in the book with a behind the scenes focus on technique.


Why is baking with alcohol so much fun?

There are so many uncommon and interesting flavors that you can’t get with the typical vanilla and chocolate flavorings. When I started baking with alcohol it opened up a whole new world of ingredients and flavor profiles to experiment with and a whole set of recipes.

I worked out the curriculum and tested new recipes for months to get the techniques down. In the dead of winter I left the 87­degree temperature of Los Angeles for a week of the beautiful snowy streets of downtown Denver. The space where we baked and shot the class was great old cooking school. The support team from Craftsy that I was provided for the class was top notch.

Although I have written 8 cookbooks (7 on baking) and have worked as a professor teaching in front of people for over 20 years, shooting an on­line cooking class was something new for me. When on a photo shoot for a cookbook I am the producer­ the behind the scenes person and the food is in front of the camera­ not me­ and I was a bit nervous. Although after a day of practicing my jitters faded away and I got the hang of it and loved every minute of it.

My goals in Tipsy Cakes is to:

  • Take the mystery out of baking with alcohol, even for a beginning baker.
  • Teach how to incorporate almost any alcohol into cakes.
  • Show students how much flavor can be added with alcohol and discover what flavor profiles are the best with different alcohol types.
  • Offer base recipes with endless variation possibilities so students can adapt their own recipes to include their favorite booze.


In order to help student create their own recipes I created a flavor profile chart for the class. On it I mention suggestions of flavors to try out for your own recipes.


Pairing alcohol with cake: some basics

  • The first place to start is to look at popular cocktails. The White Russian Cake I developed for the class is made with similar ingredients as a White Russian drink: vodka, cream and coffee liqueur.
  • Alcohols paired in cocktails also make great inspiration for cakes. For instance, the B­52 drink is made with Coffee liqueur, Irish cream and Triple sec; you might try to make a B­52 cake with coffee liqueur cake with Irish Cream Buttercream and a Triple Sec Soak.
  • One good rule of thumb when thinking about how to pair alcohols with both sweet and savory flavors is to think about what you like to eat with a favorite alcohol.
  • Do you like to snack on cheddar cheese or eat other salty flavors such as salted nuts when you drink beer? Adding them to a beer cake will also taste good.
  • Another place to look for inspiration are the flavor overtones in the alcohol. For example white wine have citrus, apple, plum and mango, hazelnut overtones. Therefor orange, lemon, apple, plum and mango cakes will taste great with white wine added. 

Other things you'll learn in the class

The course consists of 7 classes, each focusing on what to consider when baking, soaking or adding to frostings and making garnishes. In each class students learn how to get the most flavor in their cake from specific classifications of alcohol.

In the Rum Lesson students learn how to make a soak.

In the Fruit and Nut Liqueurs Lesson students learn to add sweetened fruit­ and nut­flavored liqueurs into fillings and frostings. In the Coffee and Cream Liqueurs lesson students learn how to retain alcohol in baking while still giving the cake enough time to bake through.

In the Hard Alcohol lesson students learn to exercise moderation, and incorporate small amounts of hard liquor to create surprisingly subtle flavors.

In the Beer Lesson I discuss different types of craft beer and explore some exciting flavor combinations that work with each.

 In the Wine Lesson students learn the benefits of reduction and how to create powerful and complex flavors.

Finally in Cocktail Cakes, the most fun lesson, I pull together the techniques demonstrated throughout the class and show a collection of cakes based on favorite mixed drinks.

Along the way students learn about flambé sauces, how to make a poke cake, an ice cream cake, and edible cocktail garnishes including chocolate and strawberry shot glasses. Also on craftsy.com you can ask me any questions you have about baking with booze and post your creations. I hope to hear from and see what you make there – Happy baking and good eating.

Special for CakeSpy readers: get 50% off the class here! 

Note: if you think Krystina is cool (she is!), you can follow her (and the class) on Facebook.

Sweetapolita Dreams

Sweetapolita bakebook

A cupcake, robot, bunny, and unicorn all agree: you should buy The Sweetapolita Bakebook: 75 Fanciful Cakes, Cookies & More to Make & Decorate.

Let me explain.

A few weeks ago, a package arrived in the mail. It was addressed as follows: "to Cuppie the cupcake and his friends robot, bunny, and unicorn, and CakeSpy is under no circumstances allowed to peek".

Ouch, that hurt. Usually the review copies come to me! But I let the cupcake and his friends have the package, and I could see from across the room the book looked like this.

Why would they keep it from me? It looked like my dream book. 

A couple of weeks later, I was contacted by the publishing PR company, asking if I wanted to be part of the author, Rosie Alyea's, blog hop, which includes tons of awesome prizes. 

Hey! What about the strange address on the package?

Turns out, Cuppie had done that so he could have the book all to himself (and, you know, to share with his illustrated buddies).

Happily, at this point, Cuppie and friends shared, indicating that the book had reached the highest possible level of approval in the illustrated world:

So I decided that for my entry in the blog hop, instead of making a recipe, I would ask all of the characters what they liked best from the book. 

What CakeSpy characters like best from the Sweetapolita Bakebook:

Cuppie

Sweetapolita bakebook

Cuppie, who decided to channel Rosie with his apron (let's just not go into the cross dressing aspect of this, OK?), simply loves the rainbow and sprinkle cake, which is composed of multicolored cake layers frosted with blue buttercream and completely smothered in sprinkles.

Cuppie's pick:


Robot

Sweetapolita bakebook

Robot, who you would think would like the robot pop rocks truffles best, did indeed enjoy those--but his first recipe to bake from the book will definitely be the pink cherry party cupcakes.

Robot's picks:

Bunny

Sweetapolita bakebook

Bunny loves the Coney Island Cheesecake. It's sort of like Funfetti plus a rainbow meet cheesecake. How could you not love it?

Bunny's pick:

Unicorn

Sweetapolita bakebook

You really shouldn't be surprised that Sprinkle the unicorn likes the sky cake on page . Especially the topper, which features a rainbow that reminds Sprinkle of the place he was born. 

Sprinkle the unicorn's pick:

This gives you a glimpse of the book, but by no means the full scale. You simply must buy it! 

Buy the book here.

Which recipe are you most excited about?

Tapioca Pudding with Coffee Syrup and Caramelized Tapioca

Lucky you, dear readers! What we've got here is a guest recipe and excerpt from the fantastic new book Brazilian Food by Thiago Castanho and Luciana Bianchi

This is a really lovely book, with photos as vibrant as what I imagine Brazil to be (having never been, it's all imagination for me!). The recipes are accessible, flavorful, and interesting--and exotic. It's a cookbook to dream on, and I think it would make a nice holiday gift!

And, well. Even if none of that intrigued you, the fact is this: the cover features rainbows.

 Note: the photo and recipe in this post are used with permission from Brazilian Food by Thiago Castanho & Luciana Bianchi, Firefly Books 2014, $39.95 hardcover.

‘Bolo podre’ com calda de café e tapioca caramelizada 

Tapioca pudding with coffee syrup and caramelized tapioca 

This is a traditional pudding of the Amazon region. It does not contain wheat but granulated tapioca flakes, usually moistened with coconut milk. We eat it in the morning or late afternoon, but it is always accompanied by a cup of freshly brewed coffee. 

Serves 10 

* 2 vanilla beans   

1/2 cup (50 g) unsweetened, finely shredded dried coconut 

* 2 cups (500 ml) whole milk  

* scant 1 cup (200 ml) sweetened condensed milk  

* scant 1/2 cup (100 ml) unsweetened coconut milk 

* 1 cup (120 g) farinha de tapioca (granulated tapioca) or Farinha de Tapioca substitute (see page 82)  

* oil, for greasing  

Coffee syrup   

* 2 ¾  oz (80 g) rapadura or unleveled . cup (80 g) dark brown sugar 

* 1 cup (250 ml) hot espresso coffee 

Caramelized tapioca 

* unleveled . ¾ cup (100 g) farinha de tapioca (granulated tapioca) or Farinha de Tapioca substitute (see page 82) 

* unleveled . ¼ cup (60 g) superfine sugar 

1. Cut the vanilla beans in half lengthwise, and scrape out the seeds with the tip of a knife. Put the seeds, bean pods, shredded coconut, and all the milks in a saucepan. Place over medium heat, and cook, stirring constantly, until the mixture reaches scalding point. Discard the vanilla bean pods. 

2. Put the farinha de tapioca in a large bowl, and add the hot milk mixture. Stir well. Pour the pudding batter into a generously oiled 12 x 4.-inch (30 x 11 cm) loaf pan, and refrigerate it for 3 hours, or until it is firm. 

3. To make the coffee syrup, combine the rapadura and . cup (60 ml) of water in a saucepan. Heat for 2 minutes, stirring until the rapadura has dissolved. Add the coffee and remove from the heat. 

4. For the caramelized tapioca, combine the farinha de tapioca and sugar in a saucepan, and heat gently, stirring constantly, to melt the sugar. Cook until the caramel is a light golden brown. Pour the mixture into a nonstick baking pan and let cool. Store in an airtight container. 

5. Transfer the chilled cake to a serving board, and sprinkle with the caramelized tapioca. Serve in slices, accompanied by a drizzle of coffee syrup. 

Tips from Thiago: When pouring the pudding batter into the pan, press it down gently to pack it together and prevent it from falling apart when it is removed from the pan. 

Great for Holiday Baking: Plush Puffs Marshmallows

Commercially made marshmallows aren't a go-to confection for me, because so many are inferior in quality and flavor. However, a homemade marshmallow is a different thing entirely: pillowy, sweet, and just begging to be popped on top of a rich cup of hot chocolate.

I was happy to discover a company that creates marshmallows that really do approximate that unique homemade flavor and texture: Plush Puffs. They sent me a package of samples, and I was very impressed with the quality (note: the samples were free to me; I am not being paid to write this post).

They sent me their holiday flavors, which included Gingerbread spice, pumpkin pie, and peppermint marshmallows. Each of the flavors tasted season-appropriate, and had a wonderful, pillowy yet holds-its-shape texture. In looking at their website, I was delighted to see that they offer a huge selection of flavors, from vanilla bean to caramel swirl to lemon meringue to even a tantalizing-looking chocolate chip cookie inspired flavor. Oh, and they pride themselves on not using high fructose corn syrup.

While my experience to this moment has been eating the marshmallows out of hand, I can definitely see them playing a role in holiday baking, be it gingerbread s'mores, minty cocoa, or maybe a homemade holiday s'mores pop-tart? Hmmm....

What do you think I should bake with these seasonal marshmallows?

If you're intrigued, shop for your own marshmallows on the Plush Puffs website.

Nutty Good: Candied Walnuts by Old School Favorites

Old School favorites candied walnuts

I get samples of products in the mail sometimes. Some I test out and forget. Others, I feel that I need to tell you about because they make me so incredibly happy.

Here's how it went down. This company called Old School Favorites tells me they'd like to send me some of their products: either their "Szauce", described as "an indulgent gourmet chocolate sauce that's handmade using a blend of Hudson Valley Fresh CreamNorth Fork sea saltMadagascar vanillaValrhona cocoa and organic stone ground Taza Chocolate", or their "Nutsz", described as "premium quality California walnuts blanketed in a sweet shell made from the finest organic New York State maple syrup and a pinch of North Fork sea salt. "

I probably responded with something like "sure, surprise me". And a few weeks later, I received a vacuum-packed bag of nuts. I'm sorry--nutsz.


I opened the pack and tested one out. Old School favorites candied walnuts Good golly, that tasted good. It was softer than most candied walnuts I've tried before, but not like, soggy soft. Maybe I'm not a candy purist, but I actually liked that it didn't threaten to tear the roof of my mouth or break my teeth. The maple flavor was a little different than what you'd expect in a candied nut--it made them a little more complex and cozy-tasting. I loved the salt--for me, something like maple syrup, which is so sweet, needs a little touch of salt to balance it out. I would have added it if they hadn't, so they saved me the trouble. 

Old School favorites candied walnuts

Before the end of the day, I was basically using them on everything: atop ice cream, to make my Nanaimo bars even richer by serving them with a nut or three on the side as garnish, heck, even on a slice of toast with butter and a pinch of sea salt.

Old School favorites candied walnuts

In short: I was impressed. The nuts (sorry, nutsz) are not cheap at $12 plus shipping, but you need a treat every now and again, don't you? And in a world where lattes are regularly over $5 now (when did that happen, btw?) it's not so terrible.

Buy online at the Old School Favorites website.

Sugar Cookie Dough Cups from Dessert Mash-Ups

I felt a shiver of excitement upon receiving a review copy of the new book Dessert Mashups by Dorothy Kern of Crazy For Crust (a site well worth checking out if you ask me). Before I even opened the book, I already loved the concept. Upon opening it, I just got more excited: s'mores cakes, cheesecake cookie dough truffles, carrot cake-coffee cake...the tasty mashups prove that if some is good, more is amazing (something I have long suspected).

Basically, I'm going to tell you that if you liked my first book, CakeSpy Presents Sweet Treats for a Sugar-Filled Life, then you absolutely need to buy Dessert Mashups

In case I haven't made myself clear enough, I'll bring the point home with an excerpt from the book, for sugar cookie dough cups. This excerpt, including headnote and photo, is reprinted with permission from Ulysses Press. Thanks dudes!

Sugar Cookie Dough Cups

My father-in-law was a sugar-cookie fanatic. Every Christmas I’d make our family sugar cookies and I’d have to make him his own extra batch so he wouldn’t eat all of ours (and he would have!). Over the years I started making lots of other sugar-cookie treats, from bars to candy, to give him for every holiday and birthday. I made these in his memory, and I know that he would have loved them (and eaten them all without gaining an ounce).

  • Yield 12
  • Prep Time 45 minutes
  • Chill Time 1 hour 15 minutes

Ingredients

  • 1⁄4 cup (1⁄2 stick) unsalted butter, softened
  • 1⁄2 cup granulated sugar
  • 1⁄2 teaspoon vanilla extract
  • 2 teaspoons whole milk
  • 1⁄2 cup all-purpose flour
  • 12 to 16 ounces vanilla-flavored melting chocolate
  • Sprinkles (optional)

Procedure

  1. In the bowl of a stand mixer fitted with the paddle attachment or with a hand mixer in a large bowl, cream together the butter and sugar. Beat in the vanilla, milk, and flour.
  2. Form the dough into a disk. Place between two sheets of waxed paper on a cutting board. Roll out to 1⁄4 inch thick. I like to peel the waxed paper off the top, then flip the dough over and peel it off the bottom after every few rolls so that it doesn’t stick. Refrigerate for at least 15 minutes.
  3. Using a 2-inch round cookie cutter, cut 24 circles of dough, rerolling as necessary. Place half the dough rounds on top of the other half, for a total of 12. Refrigerate until ready to assemble cups.
  4. Melt the melting chocolate according to the package directions. (See Candy Dipping Tips.)
  5. Line a standard 12-cup muffin pan with paper liners. Spoon about 1 tablespoon of melting chocolate into the bottom of each liner, enough to coat the bottom. Tap the pan to settle the candy and release any air bubbles.
  6. Place one cookie dough round in each muffin liner. Top with
1 to 2 tablespoons more melting chocolate, spreading as necessary to make sure that the two edges of chocolate meet. Tap the pan again to release air bubbles. Top with sprinkles. Refrigerate until set, about 1 hour. Store in an airtight container in the refrigerator for up to one week. These can also be frozen.
  7. Tip: These are a big dose of sweet! To make them more bite-size, use a mini muffin pan, with mini muffin liners and a 1-inch round cookie cutter. You can also make these with your favorite flavor of cookie dough. Just substitute 1 tablespoon of milk for each egg called for in the recipe to make an eggless cookie dough, and you can omit any leavening that is called for. Use vanilla or chocolate candy melts, depending on your cookie dough flavor.

Someone come over my house, because I feel like I could eat the whole batch!

Something I Love: Hahn's Crumb Cake

Hahn's old fashioned crumb cake

If you were here right now, you might say: "I wonder why CakeSpy is singing 'Circle of Life' from The Lion King in her outdoor voice right now?". 

Well. I am singing that song because sometimes, life comes full circle in beautiful and delicious ways. Let me tell you about one such instance.

Way back in 2007, when I lived in Seattle and CakeSpy.com was a baby, I came across (and wrote a feature about) Hahn's Crumb Cake. Being a misplaced east coaster in the wild west, I was delighted to come across a company that shipped what is probably my single favorite childhood (and adult, let's be honest) treat. 

Note: if you are confused about what crumb cake is and is not, please check out this post.

Then, several years passed where a lot happened, but none of it involved Hahn's.

And then, suddenly, a few weeks ago, they e-mailed me and asked if they could send me some samples of their cake. I typed my address with haste, lest they change their mind.

Hahn's old fashioned crumb cake

A few weeks after that, a glorious package arrived with a pleasing heft to it. Inside, it was crammed with crumb. Cake, that is. Oh-emm-gee.

Now, I am going to try to be careful with how I say this, because I don't want you to get the wrong idea.

This crumb cake is perfect. But it's not because it's fancy. It's perfect because it's an ideal specimen of a truly quotidien (at least in the NY metro area) foodstuff. 

Hahn's makes a higher quality version than you'll buy at most delis, but it still has that simple, unfussy quality about it that makes crumb cake so great.

Crumb cake does not aspire to be a gourmet food: its goal is to feed you and make you happy.

Lots of butter and brown sugar help ensure that it is able to do its job. The art of the cake is in the crumb: you don't want them too streusel-y. While in my opinion the crumbs simply can't be too big, they can be too hard. You want a crumb that is firm, but that will yield when you bite into it, exuding a buttery-brown-sugar-slightly salty flavor in your mouth. 

Hahn's old fashioned crumb cake

If you love a classic NY-style crumb cake or have fond memories or thoughts regarding the Entenmann's crumb cake from supermarkets, you will probably love Hahn's crumb cake as much as me.

Hahn's old fashioned crumb cake

The package I got included a classic, chocolate, and raspberry variety. All were good; I say it just depends on your mood. I tend to veer toward the former, because it has confectioners' sugar.

Maybe I like looking like I have a cocaine problem after I eat a slice of crumb cake?

(this may be the first review Hahn's has ever gotten that mentions cocaine. I am proud to be the first.)

So--my review is, buy crumb cake from Hahn's if you want a taste of nostalgia, or if you've never tried a classic crumb cake but would like to do so. 

Enjoy! 

Buy online at crumbcake.net.

Hey! These posts may also be of interest:

Behemoth crumb cakeHow to make crumb cake

Crumb cake shake


Immaculately Delicious: Immaculate Baking Company Mixes

Immaculate Baking Cookie Mix test

Not so very long ago, Immaculate Baking Company contacted me and asked if I would like to try some samples of their new, fairly virtuous cake mixes. Sure, I said. I love cake mix, it's true.

I was surprised when not long later, a huge box arrived. There was a lot of mix coming my way, I could plainly see.

Immaculate Baking Cookie Mix test

LOTS!

Immaculate Baking Cookie Mix test

And flour, too!

Immaculate Baking Cookie Mix test

Well, I figured I'd best get to baking to see what these cookies were all about. I got mildly bummed out by this: Immaculate Baking Cookie Mix test

Because truthfully...

But anyhow, I decided to start with cookies. Chocolate cookies, and they were gluten-free to boot. I don't know about you, but I actually get super excited about gluten free chocolate stuff. That means there's less "texture" getting in the way of my chocolate experience. 

So, I added the requisite ingredients (oil, eggs, etc).

Immaculate Baking Cookie Mix test

I mixed it all, and a nice dough formed. Immaculate Baking Cookie Mix test

I lined a baking sheet and set it up with rounds of dough. Aren't they beautiful?Immaculate Baking Cookie Mix test

For no particular reason, I added almonds on top of some of them. Immaculate Baking Cookie Mix test

I baked 'em up and here's how they looked.Immaculate Baking Cookie Mix test

The cookies were VERY soft after baking and tough to transfer until a few minutes had passed, but after 30 minutes on a wire rack, they had solidified and were ready to eat. Immaculate Baking Cookie Mix test

The gluten-free chocolate cookies came out very nicely. I loved how they became crispy on the edges but still retained a chewiness on the interior. The taste was assertively but not aggressively chocolate, which made it a nice cookie to combine with other dessert-stuffs: for instance, perfect bookends for an ice cream sandwich. I found that for stand-alone eating the cookies were a nice base, but benefitted from bonus additions: the almonds, and a sprinkling of sea salt, really made them come to life. But I should tell you: I'm a salt freak. It's true:

I also tried out the pancake mix as I was developing a recipe for bacon-filled pancakes, and I can't share that one yet, but I can tell you the mix was really quite good. 

Bacon pancakes

I say that Immaculate Baking Company's mixes are well worth a try--I can't wait to try out the cake mix to make Gooey butter cake!

Check 'em out: Immaculate Baking Company.