Baker's Dozen: A Batch of Sweet Links

Hello, weekend! It's off to a sweet start, with links like these:

Like push-up pops, only awesomer: Cake Shooters!

Because stuff baked in stuff is awesome: cakes and pies, all at once!

OMG: Cake in a Jar? Yes, Patty. Cake in a Jar. (for Serious Eats!)

Cakesplosion! The God of Cake. (thanks Jason!)

In case you've never heard of it: marvel at the Pretzel Croissant from City Bakery.

Twix Cheesecake Pie. Forget "I love you", these are the three most beautiful words.

Pumpkin Challah? HOLLA!

Cupcakes Take The Cake is turning six! There's gonna be a party! Guess who did the artwork for the invite? Right here. (pictured top)

Fact: I recently enjoyed browsing this collection of dessert quotes.

OMG: Chocolate Glazed Doughnut Muffins, by Joy the Baker.

Double OMG: Hot Fudge Sundae Cupcakes, also by Joy the Baker. I love you, Joy the Baker.

Dudes, dudettes, have you shopped the totally sweet Jill Labieniec art available at CakeSpy Shop?

Sweet memories: remember when I did this interview with my mom? 

Guest Post: How To Make Homemade Sugar Decorations by Nellie Cakes

CakeSpy Note: This is a guest post from Nellie Cakes, a blog written by Nell, a mom who taught herself how to bake so her daughter could have way cooler cupcakes on her birthday than anyone else in school. 

I was originally going to write about how to make your own sanding sugar, which is cool in and of itself, but while I was coloring the sugar for the photos I was going to post I got inspired and decided to make some home made sugar decorations too (finished product pictured top left).

The cupcake is plain old chocolate, the icing is Swiss Meringue buttercream and the flower is completely made out of sugar. It’s a cute little thing, isn’t it? I’ve also decorated a cake with sugar stars and an owl.

To make your own colored sugar, you’ll need a cup of regular granulated sugar, some liquid food coloring and a very tight sealing container. I’m not messing around on this point. If it’s not super air tight you’re going to end up with sugar all over your kitchen and ants may or may not invade your home and eat your kitchen down to the floor beams. If this does happen, I will not be held responsible!

All of your stuff should resemble this:

If your stuff doesn’t resemble this stuff, you have already screwed up too badly to go on. Disregard the rest of the post if you can’t put some sugar in a container.

Next, put a few drops of whatever color you’d like into the bowl. I decided on pink for the flowers, but you can make them any color you’d like. Or you don’t have to make flowers at all. I guess it just depends on what cookie cutters you have. Or what food coloring. Anyway, it should look like this now:

Start out with only a few drops because it’s harder to lighten the sugar than it is to darken it. If you try to lighten it you’ll have a more speckeld effect.

I have to warn you, your colored sugar isn’t going to look like the store bought kind. That stuff has something in it to make it shiney. This stuff will be a little less sparkly, but still very pretty. It works out though, because when you make the sugar decorations, using the store bought stuff makes it harder to get a clean edge on your design. The crystals on the store bought stuff are bigger, which is a pain when you try to put the cookie cutter through it.

Once you have a few drops in, close up the lid nice and tight. You might even want to put the container in a zip lock bag just to be safe. After you’ve made sure it’s on lock down, shake theshit out of it. Really go crazy! The harder you shake it the faster the color will disperse. You have to change the dirrection of your shaking every so often too. The goal of the shaking is to break the ball of wet sugar into a bunch of tiny pieces so the color can be mixed around. Is your arm tired yet? Does it look like this?

If it looks like this, you’re not done. You can either close it back up and shake the shit out of it some more, or you can take a fork and break up the little balls of food coloring, then close it up and shake it some more. When it’s finally finished, it will look like this:

But less wet. The wet comes later.

Isn’t that pretty? I used about 8 drops of the neon grocery store food coloring for this pink.

Now that you have your pretty sugar, it’s time to make the decorations. Get out your trusty 1/2 teaspoon measuring spoon, some wax paper, something nice and flat (I’m using the bottom of my 1 cup measuring spoon), and tiny cookie cutters of your choice (or random house hold objects like a bottle cap for a circle).

Measure out 1/2 a teaspoon of water for each cup of sugar you colored and pour it into the container. Close it up and shake the shit out of it again. All of the same rules apply. You still want to break that ball of sugar up so the moisture spreads itself around. Once you’re done, it should feel like wet sand. Squish some of it between your fingers. If it holds a shape, you’re good. If it doesn’t, try adding a tiny bit more water, drop by drop and then reshake it until it does.

Once you have some wet sugar, lay out a big piece of wax paper and dump some of the sugar on top of it. Take the flat thing you have and push it down so you have a layer that’s about 1/4 inch. If it’s thicker, that’s ok too. You just want it to feel like it’s packed down.

Take your cookie cutter and press it into the sugar like you’re cutting out cookies but don’t lift it back out! Instead, keep the cookie cutter flat on the surface and drag it to the side, like so:

Keep it on the waxed paper, and start a line of sugar cut outs as far away from your mound of sugar as possible to allow yourself more room. Once you get however many you will need, make a few more. You will end up breaking some, I promise. I know you guys know what a line of these will look like, but here’s a picture of them anyway.

Aren’t they pretty? I made some leaves and yellow dots for the centers, but the flowers look cute without all that too. Here are my leaves and dots:

Once you have a billion of these things cut out, let them sit there for a few hours. The longer the sit there, untouched, the sturdier they’ll be. I left mine over night. If you don’t end up breaking a few of these like I did, they’d make super cute sugar cubes for a little girl’s tea party or a baby shower.

If you made them a really dark color, they will make your coffee look funny. One time, I made WAY too much blue sugar so my husband was forced to put it in his coffee. It looked really gross when it dissolved. Coffee should never look that way.

Anyway, after they’re all set and hard, just push them into the icing on your cake or cupcake, like this:

For the yellow dots, I used a little bit of the icing (not too much! You don’t want it to squish out the sides!) and glued them onto the flowers:

I stuck a couple of the leaves in there, and ta da! Pretty, completely edible decorations! I like how they look home made and perfect at the same time.

Good luck! I’d love to see pictures if you end up making some! You can email them here (and I’ll probably end up posting them)! Happy decorating, and I wish you the best with the herd of ants.

Apple of My Pie: A Brief Look at the History of Apple Pie

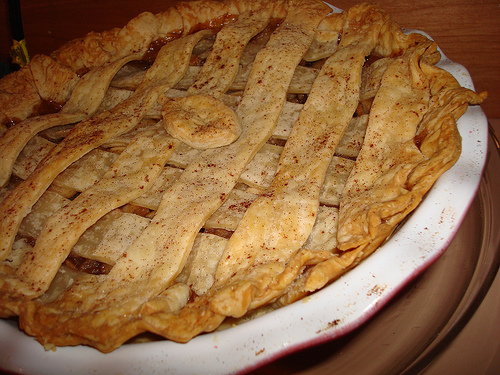
Undoubtedly, one of the pleasures of autumn is that classic crusted piece of American cookery, the Apple Pie.

But how American, really, is Apple Pie?

Do you want the short answer or the long answer? How 'bout both?

The short answer: Apple pie is all-American, in the same way that the nation plays host to all sorts of ethnicities and influences: that is to say, a real melting pot.

...and that brings us to the long answer.

To really consider the humble pie's beginnings, we've got to go back--way back. As you learned so long ago on this very site when we discussed the history of Pumpkin pie, it's probably best to look at most American pies starting from the bottom up (that is to say: consider the crust). Per aforementioned writeup:

The origins of the pie stretch way back to ancient Egypt, where an early version of the pastry was made with honey and nuts in bread dough, in our opinion they came into their own during medieval times. Pies (charmingly called “coffins” then) became popular for being both a food and a vessel—easy to transport, hearty and filling. Of course, being baked without a pan at the time, the crust was...well, pretty crusty and inedible. But, it did protect the (usually savory) contents on jousts and voyages to and from the castle. Over the years, the piemaking method improved, and the size of a typical pie increased—they had to be pretty big after all to fit four and twenty blackbirds.

But there was also a pleasant and perhaps unexpected side effect to these advances in baking: the crust also started to taste good (or at least to merit attention). Per What's Cooking America:

It wasn't until the 16th century that cookbooks with pastry ingredients began appearing. Historian believe this was because cookbooks started appearing for the general household and not just for professional cooks.

From the same source, a recipe from 1545 seems to pay attention to details which are meant to yield a tasty crust:

To Make Short Paest for Tarte - Take fyne floure and a cursey of fayre water and a dysche of swete butter and a lyttel saffron, and the yolckes of two egges and make it thynne and as tender as ye maye.

...OK, so you probably see where I'm going with all of this crusty talk. Basically, while crust was initially seen as a vessel, a method of transport, it basically turned into "Hey, we might just have something here."

Which brings us to the big question: What about apples?

It was my belief that like Pumpkin pie, apple pie didn't make its sweet entry on to the pastry scene til Colonial times in America--after all, in the 1500s and early 1600s, pies in Europe were almost savory. But believe it or not, there is evidence of apple usage in pie form from as early as the mid-1500s (A Proper newe Booke of Cokerye, as discovered here)

To make pyes of grene apples - Take your apples and pare them cleane and core them as ye wyll a Quince, then make youre coffyn after this maner, take a lyttle fayre water and half a dyche of butter and a little Saffron, and sette all this upon a chafyngdyshe tyll it be hoate then temper your flower with this sayd licuor, and the whyte of two egges and also make yourcoffyn and ceason your apples with Sinemone,Gynger and Suger ynoughe. Then putte them into your coffin and laye halfe a dyshe of butter above them and so close your coffin, and so bake them.

Nonetheless, it seems that when the concept of Apple Pie made the leap stateside with the Pilgrims, it truly came into its own as a uniquely American treat. Not right away, of course--initially only crabapples could be found, but ultimately the timing of the advent of apples as a US crop seemed to time out nicely with sugar becoming more readily available, and as anyone knows, apple pie is much better when made with sugar. Pies in general were quite popular during the settlers' first lean years in the US, filled with produce from the New World -- this is the time during which pumpkin pie became a "thing", for instance. But the popularity of apple pies and puddings is not a big surprise--after all, apples keep well, and can be dried for use year-round, so it makes sense that they would become a go-to item in the Colonial kitchen.

What's on top?

 So, there is some argument about how to best enjoy apple pie (and we won't even go into family arguments about the pie recipe itself). Double or lattice crust, crumb or streusel topping? A la mode, or with a slice of Sharp cheddar?

Not that you asked, but here's my stance.

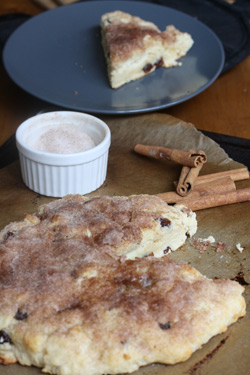
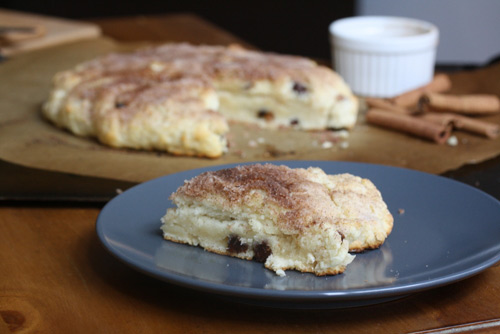
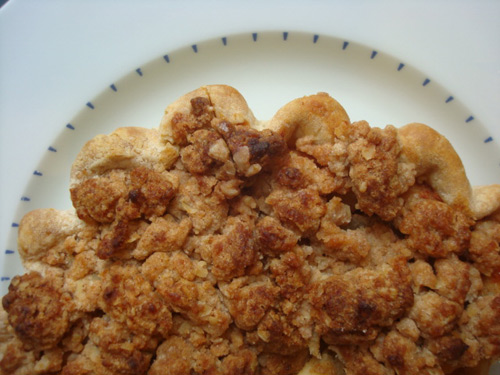
While double crust varieties are undoubtedly the oldest and most traditional way of preparing apple pie, I'd like to humbly make a case for crumb. I've always called this variation "Dutch Apple Pie", although it seems that technically "Dutch Apple Pie" tends to refer to copious amounts of cinnamon in the recipe as opposed to the crumb topping. For the purposes of this entry, though--let it be known I am talking about the crumb-topped version, which is often seen in Pennsylvania Dutch country. 

It's hard to understand why anyone who has ever had a crumb-topped apple pie would ever go back to double crust. It's got a delectable crunch! The top crust isn't too hard, and doesn't crack away unevenly with the filling! It's sweet, salty, rich in flavor, and delicious! Please, tell me why I'm wrong about this--I dare you.

In my mind, the only reason you'd ever choose double crust over crumb or streusel topping is if you're eating your pie New England style--with a slice of sharp cheddar cheese. That tradition is interesting--as I discovered on Food Timeline,

The practice of combining cheese, fruit, and nuts dates back to ancient times. These were often served at the end of a meal because they were thought to aid in digestion. From the earliest days through the Renaissance, the partaking of these foods was generally considered a priviledge of the wealthy. This practice was continued by wealthy dinners composed of many courses up until the 19th century. Apples and cheesemaking were introduced to the New World by European settlers. These people also brought with them their recipes and love for certain combinations. This explains the popular tradition of apple pie and cheddar cheese in our country.


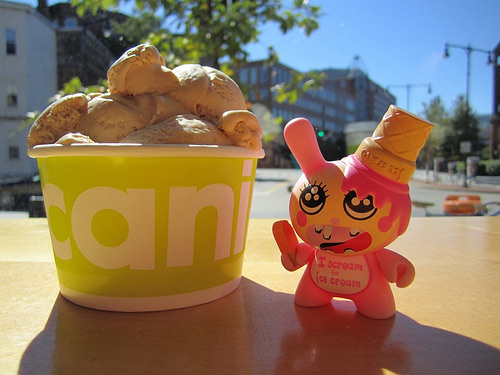
Of course, I'd be remiss at this point to not touch upon what is undoubtedly the most popular accompaniment for apple pie--ice cream. Serving pie "A la mode", or  "in the current style or fashion", means that you're serving it (usually warm) with a big ol' scoop of ice cream on the side. Where does the term come from? Can't say whether it's true or not, but there is a rather sweet story attached to it, via a reprint from Sealtest Magazine, which I discovered via Barry Popik:

We have it that the late Professor Charles Watson Townsend, who lived alone in a Main Street apartment during his later years and dined regularly at the Hotel Cambridge, now known as the Cambridge Hotel, was wholly responsible for the blessed business. 

One day in the mid 90’s, Professor Townsend was seated for dinner at a table when the late Mrs. Berry Hall observed that he was eating ice cream with his apple pie. Just like that she named it “Pie a la Mode”, and we often wondered why, and thereby brought enduring fame to Professor Townsend and the Hotel Cambridge. 

Shortly thereafter the Professor visited New York City, taking with him a yen for his favorite dessert new name and all. At the fashionable Delmonico’s he nonchalantly ordered Pie a la Mode and when the waiter stated that he never heard of such a thing the Professor expressed a great astonishment. 

“Do you mean to tell me that so famous an eating place as Delmonico’s has never heard of Pie a la Mode, when the Hotel Cambridge, up in the village of Cambridge, NY serves it every day? Call the manager at once, I demand as good service here as I get in Cambridge.” 

But no matter whose story you believe, one thing is for sure: apple pie served with ice cream is delicious. Especially when it's crumb-topped pie.

No doubt about it: Apple pie certainly serves up a thought-provoking slice of American history. But as for the final word? I believe that this quote I found on Food Timeline seems to sum it up nicely:

"When you say that something is "as American as apple pie," what you're really saying is that the item came to this country from elsewhere and was transformed into a distinctly American experience." --As American as Apple Pie, John Lehndorff, American Pie Council.

Sweet Giveaway: Win a Copy of Doughnuts by Lara Ferroni!

So, anyone who writes and photographs a doughnut recipe book--oh, Doughnuts: Simple and Delicious Recipes to Make at Home, from Sasquatch Books, for instance--is pretty much tops in my book.

But really, as awesome as you might figure such a person to be, author/photographer/doughnut maker Lara Ferroni is even better.

From the day I learned she was working on this project, I couldn't stop myself from constantly saying things like "Doughnut Stop Believing!" or "Just Donut!" whenever I saw her. And--bless her--she never got terse with me or punched me or anything.

And now the book's out! And it's full of amazing doughnut lore, factoids, recipes and mouthwatering photos. Which one to try first--a classic raised doughnut? Or perhaps something more exotic, like a Margarita, Red Velvet, or S'mores Doughnut? Here, preview it all in the promo video:

Well, one lucky reader can choose their own doughnut adventure, because I've got a copy to give away!

How do you put yourself in the running? Simply weigh in on this holey issue in the comments section below:

Doughnuts: Yeast or Cake?

US and Canadian entrants only, please. This giveaway will close one week from today, on Tuesday, October 19th at 12pm PST!

Fall into Delicious: Pumpkin Cake in a Jar Recipe for Serious Eats

If you really want to see something horrifying this Halloween season, try shipping a cupcake. Trust me, it's not pretty.

However, if you want to share some sweetness with friends and family who may be far away, there is a solution: bake your cakes in jars. Yup, that's right: bake up some delicious pumpkin cake directly in jars for contained, easy-to-ship parcels which can be topped with whipped cream or frosting when they've reached their destination, making for a sweet and thoughtful treat.

Note: You can choose your own adventure when it comes to the size of your jars. I tried a variety, including 8-ounce, pint-sized, and even baby food jars (smaller jars will require less baking time). The key is to choose jars with a fairly wide mouth, so that the cake will be easy to scoop out with a spoon when it's time to eat.

When it comes to frosting or whipped cream topping, I don't suggest topping the cakes before shipping, but you can frost or top them and then put the lids on for short-term transit (for instance, if they're packed in a lunch).

For the full entry and recipe, visit Serious Eats!

Sweet Inspiration: Dessert Travels with Cake Gumshoe Nicholas

So, I have a totally sweet customer named Nicholas. He's basically the ideal customer: he comes in and buys stuff, and then tells me all about the delicious sweets he eats when he travels the world. Just looking at his pictures is bound to evoke some seriously sweet wanderlust. Here's where he's been recently:

First, how about some macarons from Per Olsson Choklad & Konditori, in Stockholm? Nicholas picked a very nice duo of Raspberry (pictured at the top of the post) and Licorice (pictured below)--don't you wish you could have been there, too?
But if macarons aren't your thing, he also took another totally sweet shot at Gateau (which he previously reported on) of the bakery case, just to give us all something to dream on.

Sweet armchair travels to all! Rumor has it that Nicholas is off to Turkey next, poor thing--can't wait to see the photos!

Better Together: Beer Cupcakes With Chocolate Covered Potato Chips Recipe from Bredenbeck's Bakery, Philadelphia

Sweet or salty? Why decide, when you can have both--and beer, too--in one deliciously decadent cupcake parcel? Yup, that's right: Beer Cupcakes. Topped with Chocolate Covered Potato Chips. It's a recipe kindly donated by Bredenbeck's of Philadelphia. Awful or awesome? Maybe a little of both, in the best way possible. Make it happen at home thusly:

Beer Cupcakes Topped With Chocolate Covered Potato Chips

Ingredients for cupcakes:

  • 1 cup of Guinness® Draught
  • 1 stick plus 1 tablespoon unsalted butter, cut into pieces
  • 3/4 cup unsweetened cocoa powder
  • 2 cups dark brown sugar
  • 3/4 cup sour cream
  • 2 eggs
  • 1 tablespoon vanilla extract
  • 2 cups all-purpose flour
  • 2 1/2 teaspoon baking soda Pinch of cinnamon

Glaze:

  • 8 ounces cream cheese
  • 1 1/4 cup confectioner’s sugar
  • 1/3 cup Guinness® Draught

Chips:

  • 1⁄2 pound high quality milk chocolate, chopped
  • 4 cups ridged potato chips

Procedure

  1. Make the cupcakes. Preheat oven to 350 degrees. In a large sauce pan over low heat, combine Guinness® and butter, stirring until butter melts. Remove pan from heat and whisk in cocoa powder and brown sugar. In a medium bowl, whisk together sour cream, eggs and vanilla. Combine with beer mixture. Sift together flour and baking soda, then fold into batter. Pour into greased muffin tin, filling each cup about 2/3. Bake for 20-25 minutes. Cool in tin for 10 minutes, then remove from tin and place on a wire rack to finish cooling.
  2. Make the glaze. With a mixer, whip cream cheese until smooth. Sift confectioner’s sugar into cream cheese, and beat. Add Guinness®, and beat until smooth. Apply to cupcakes using a flat spatula.
  3. Prepare your garnish. Place 3/4 of the chocolate into a heat safe bowl, and place over the top of a pan of simmering water. Heat, stirring occasionally until the chocolate has melted, then continue to heat the chocolate to 110F degrees, stirring occasionally. As soon as the chocolate reaches this temperature, remove from heat. Stir in remaining chocolate until melted. Using tongs, dip potato chips one at a time into the chocolate. Place on waxed paper to cool. Once cooled, place atop cupcakes. Enjoy!

Of course, if you have no time—or desire—to bake your own Beer Cupcakes, you can stop into Bredenbeck’s Bakery and try their version! They're also busy baking all your favorite fall confections: pumpkin bread, caramel apple cheesecake, pumpkin cheesecake with cinnamon whipped cream, carrot cake, s’mores pie and much, much more.

Well-Bread: Hot Raisin Bread Recipe from Big Girls, Small Kitchen

CakeSpy Note: This is a guest entry from Cara, a co-author of Big Girls, Small Kitchen, a blog devoted to "quarter-life" cooking (and the home of the Watermelon Ice Cream Cake). Per the writer, "this article is about the fantastic, nostalgic Hot Raisin Bread that my mom always made me for breakfast when I was growing up. And is it sweet? you may ask. Not only is it sweet, but it's topped with the most delicious crust of butter, sugar, and cinnamon."

My Breakfast of Champions

My mom made us breakfast every single day while we were growing up, before we piled into the car and she dropped us off at school on her way to work. When I say I don't understand people who don't eat breakfast, I say this with the perspective of someone who ate scrambled eggs, pancakes, French toast, corn muffins, and hot raisin bread every morning, not just someone who ate, you know, a bowl of cereal. Later, in middle and high school, we did sometimes eat just cereal or yogurt and fruit, but even then there were occasions when we'd get the full breakfast treatment.

On one of these days late in high school, my mom made hot raisin bread. She took it out of the oven, I cut myself a wedge, and when I drove my fork down through the cinnamon-sugar crust on top into the biscuit-like interior, I remembered why this was always one of my favorites. It's decadent in the way that Frosted Mini Wheats are decadent--a layer of sugar, in this case cinnamon-sugar and butter, bursts in your mouth, distinguishing the relative plainness of the inside. I was a junior or senior, and we had a field hockey game that afternoon against one of our rivals. The tradition was to dress up in funny outfits on game days, and I can only imagine what Phoebe and I and the rest of our teammates were wearing. Whether it was my breakfast or my outfit, I played one of my best games ever as forward, scoring a hat trick. Three goals. These days, that kind of athleticism feels like it belonged to another person completely.

Anyway, some other parent came up to my mom and was like, "What do you feed her for breakfast?!"

And my mom, I think, answered truthfully, "Well, it's this dish called Hot Raisin Bread..."

I wasn't eating my Wheaties. I was eating my mom's home-cooked food and apparently it did me better than any cereal.

When I baked this recently, I ate it as an afternoon snack. The cinnamon-y scent filled my apartment. I cut a wedge, poured some some tea, and waited for something to happen. Sure I wasn't playing hockey, but wouldn't mom's magic breakfast work in my Brooklyn apartment too? I did some work on the book, researched my summer vacation, and kept on waiting. And waiting. I haven't found out yet if the Hat Trick Raisin Bread does anything for no-longer athletic adults, but it definitely still tastes really good.

Hot Raisin Bread
Makes 1 bread, serves 6-8
from Quick Breads by Beatrice Ojakangas

Ingredients
  • 2 cups flour
  • 2 teaspoons baking powder
  • 1/4 teaspoon salt
  • 1/4 cup vegetable oil
  • 3/4 cup milk
  • 1/3 cup raisins
  • 2 tablespoons sugar
  • 2 tablespoons butter, melted or soft
  • 1/4 cup cinnamon sugar (1/4 cup sugar plus 1/2 teaspoon cinnamon)
Procedure
  1. Preheat the oven to 450°F. Line a baking sheet with parchment.
  2. Combine the flour, powder, salt, raisins, and sugar in a medium bowl. Add the oil and milk and mix into a soft dough.
  3. Spread with the butter and sprinkle with the cinnamon sugar.
  4. Bake for 10-12 minutes, until just golden. Cut into squares and serve hot--this doesn't really weather well, so make it when you plan to eat.
  5. Transfer it to the baking sheet and pat the dough into a rough 8-inch square, about 1/2-inch thick.

Keep up with Cara's baking adventures on Big Girls, Small Kitchen!

CakeSpy Undercover: Toscanini's, Boston

CakeSpy Note: Recently I heard a rumor (well, in the NY Times, so I guess that's not really a rumor) that the best ice cream--like, in the world--was to be found at a place called Toscanini's in Boston. Boston! So far! But happily, Cake Gumshoe Jen lives there, and she was more than happy to case out the joint on a spy mission. Here's a piece from her spy diary (she took the photos, too!):

Having only one year left in law school and uncertain of where I would be post-graduation, I decided to make a “Massachusetts Bucket List” of all the places I needed to go or things to do before I graduate. On the list was Toscanini’s, an ice cream place in Cambridge that has been touted as having the best ice cream in the world by the New York Times. I grabbed a friend on a beautiful Saturday morning and ventured out.

My first impressions of Toscanini’s upon arriving were that it was small but cozy and crowded but friendly and relaxed.  The lines moved quickly and we didn’t have to wait very long before placing our order. Toscanini’s serves brunch on Saturday, so we decided to try that first. I had their Open Faced Sandwich, which was ricotta scrambled eggs, figs and prosciutto on toasted bread, while my friend had their Toasted Bagel, which had mascarpone plum preserves, and sea salt. Both were very delicious, and despite the busyness of the place the food arrived quickly.

After brunch it was time for the most important part of the meal – dessert. Gus Rancatore, one of the co-founders of Toscanini’s, was at hand to help me make the difficult decision of which ice cream flavors I was to ultimately consume. He was very friendly and helpful, asking me what kinds of ice cream I liked and giving me generous samples of several of his recommendations. I ultimately went with the caramel apple and the hazelnut, although I had also sampled the green tea Kit Kat and the burnt caramel (which were also delicious, but alas my stomach can only hold so much ice cream at one time). 

All in all, I definitely had a great time at Toscanini’s – the staff was friendly, the food was delicious, and there was a great atmosphere about the place. I’m looking forward to going back more often and trying all of their flavors.

Check it out yourself--find the location, menus, and more at tosci.com.

Toscanini's Ice Cream on Urbanspoon

Baker's Dozen: A Batch of Sweet Links

What's today again? Oh yeah, FRIDAY! Let's celebrate by wasting--er, spending quality time--on the internet together. Click away at these:

When you really care...give bacon.

Australia: It's not just for Pavlova anymore. Buy my stuff in Australia!

Seeking delicious doughnuts in Naples, FL? Look no further: Bennett's, as reviewed by Leandra!

Totally sweet: new Thanksgiving-themed rubber stamps featuring CakeSpy artwork, by Taylored Expressions!

Decree from a Minnesota-based reader: "Next time you're in MN, you MUST visit CupCake! They have boozy cupcakes!". I hear you, friend.

Much ado about Muffin: the phrase "no need to serve...with butter and jam, since they're already baked into the muffin in lavish proportions" has me thrilled about these upside-down fruit muffins.

Too early for Christmas ornaments? Not a chance, when they're as sweet as these. (thanks Anne for the tip!)

In Seattle, ART Restaurant is serving up dishes inspired by the Picasso exhibit at SAM--including a Picasso-esque "woman's face" dessert plate (pictured left).

Making the world sweeter: reader Jenna was so inspired by my cupcake art installation that she re-created it in DC! See the video here.

Check out my sweet friend Bakerella's roundup of CupcakeCamp Newport, OR, here.

Speaking of Bakerella, please, please tell me you've already bought her book, Cake Pops: Tips, Tricks, and Recipes for More Than 40 Irresistible Mini Treats. If not, do it now, please.

Matryoshka measuring spoons?!? Cute, cute, cuuuuute!

Sweetness overload: hope to see you this Saturday at CakeSpy Shop for the sweetest Halloween party ever!


Sweet Giveaway: Win a Copy of Mitford Cookbook by Bestselling Author Jan Karon

Who doesn't love having a sweet new recipe book? 

While you mull that one over, let me introduce a totally sweet giveaway: one lucky reader will receive the gorgeously designed Jan Karon's Mitford Cookbook and Kitchen Reader: Recipes from Mitford Cooks, Favorite Tales from Mitford Books. In case you're not familiar, Jan Karon is the # 1 New York Times bestselling author of the Mitford Series (35 million copies in print). But even more importantly, this book is filled with over 150 delicious Southern recipes, including Esther Bolick’s delicious Orange Marmalade Cake, The Irish Lady Rhubarb Tart, and more! And, since we all love a good backstory, this four-color cookbook features Jan’s personal reminiscences, dozens of beloved scenes from the Mitford books, jokes, cooking tips, and a story never before published in the novels.

How do you put your name in the hat? It's easy. Simply answer in the comments below telling me what your favorite Southern dish is (either sweet OR savory, I am feeling generous!).

Details: The giveaway is open to US entrants only, please--the giveaway will close at Midnight next Friday, October 15.

Baker's Dozen: A Batch of Reasons Why You Should Visit Cupcake Royale in Bellevue

Being firmly planted in the camp of "Bad Things Happen When You Leave The City", I never thought I'd find myself saying this, but...

...you've got to get your sweet self over to Bellevue to check out the new Cupcake Royale.

Don't just pack up based on my simple statement, though, because I've got a baker's dozen of reasons to back up this suggestion of an epic crossing-the-water journey. Here goes:

  1. First off, let's just say it: Cupcake Royale rules. They are cool, they have good cupcakes, and now they're in Bellevue. You owe them a visit.
  2. OK, and on to the specifics. Ye Olde Exterior. I've got to say that (no offense) when I think "Bellevue", I think of malls, chain stores, and confusing underground parking. But somehow Cupcake Royale has managed to find its own unique niche--a place as unique and special as their cupcakes.
  3. Ye Olde Interior. Formerly the home of an IHOP, I suspect that their may be elves lurking in the kitchen (actually, I can confirm that there are. I met one, and her name is Rachel.)
  4. Ye Olde Interior, continued: it has a storybook-worthy back room. I want grandma to read me stories back here, while I stuff myself silly on cupcakes and Stumptown Coffee.
  5. Speaking of Stumptown, this is the first joint on the Eastside to be serving it, I believe. Woot!
  6. They have an expanded variety of morning sweets and cookies, from Macrina and also from another local Bellevue bakery. Yes!
  7. They have the most adorable little dumbwaiter-esque system by which they slide cupcakes through the wall from the kitchen to the retail area. OMG!
  8. New Fall Flavors: OK, so you could get it at the other locations too, but wouldn't a pumpkin cupcake with maple frosting taste just a little more magical in a place where you might see an elf?
  9. They have this super sweet campaign: "Practice Random Acts of Cupcakes". Is this not the most delightful thing you've ever heard?
  10. I swear, owner Jody Hall gets cuter with every new location she opens.
  11. They have an expanded retail space at this store, which means that you can get even more of their totally sweet tongue in cheek tees ("Rock Out With Your Cupcake Out", "Legalize Frostitution"--you know, cute).
  12. The cupcakes are baked on-site, and are already making Bellevue sweeter, based on the crowds!
  13. Hint, hint: You may be seeing some CakeSpy stuff there in the future! 

Seriously, what are you waiting for? Find directions and details at cupcakeroyale.com.

Cake Byte: New Thanksgiving Rubber Stamp Designs by CakeSpy for Taylored Expressions

We're entering that totally sweet time of year when delicious sweet foods abound--Halloween Candy! Thanksgiving pie! Christmas cookies!

And this Thanksgiving, I know how you can help digest all that awesome: get crafty with these super cute new rubber stamps featuring my artwork, released by the always amazing Taylored Expressions!

Here's the 411:

Gobble Gobble is a set of 16 images and sentiments made from deeply etched rubber in a *cute* shade of pink! The cling-mounted stamps are packaged on a 5.5" x 8.5" storage panel with a color printed index and come already die cut so they're ready to use as soon as they arrive on your doorstep. Check out all of the inspiration in the Gobble Gobble Gallery!

So what are you waiting for? Go buy them now. And don't forget to check out the super sweet gallery of project ideas!

Coffee Cake Break: Brown Sugar and Almond Coffeecake Recipe from Macrina Bakery

Image c/o Macrina BakeryThings to dislike about the beginning of the month: paying rent, receiving phone and credit card bills, and remembering to write a different month when you date everything.

Things to adore about the beginning of the month: Macrina Bakery's monthly newsletter, which always includes a recipe.

This month's? The most delectable Brown Sugar and Almond Coffeecake recipe. Theirs has raspberries, but as a die-hard lover of desserts devoid of altogether too-healthy fruit, I'm curious to try it with cream cheese or maybe cookie dough instead.

Oh, and it is worth noting that we are headed into a very exciting season at Macrina. Coming soon? Brown Sugar Spice Cake, Maple Pecan Pumpkin Pie, Pumpkin Cheesecake With Gingered Cranberries (all Thanksgiving specials!).

Brown Sugar and Almond Coffeecake

From Leslie Mackie's Macrina Bakery and Cafe Cookbook: Favorite Breads, Pastries, Sweets and Savories

Ingredients

  • 4 cups all-purpose unbleached flour 
  • 2-1/2 teaspoons baking powder
  • 1 teaspoon baking soda
  • 1 tsp salt 
  • 10 ounces (2-1/2 sticks) unsalted butter, at room temperature 
  • 1-3/4 cups light brown sugar
  • 5 eggs 
  • 1/2 cup whole milk
  • 2 tsp pure almond extract
  • 2 tsp pure vanilla extract
  • 1 cup buttermilk
  • 2 cups fresh or frozen raspberries
  • 1 cup whole almonds, coarsely chopped
  • Powdered sugar

Procedure

  1. Preheat oven to 325° F. Oil a 9" square pan
  2. Sift flour, baking powder, baking soda, and salt into a large bowl. Toss with your hands and set aside.
  3. Combine butter and sugar in the bowl of a stand mixer. Using the paddle attachment, mix on medium speed for 5 to 8 minutes to cream the butter. The mixture should be smooth and pale in color.
  4. In a medium bowl, combine eggs, milk, and almond and vanilla extracts. Mix with a whisk. Add a small amount of egg mixture to the bowl of creamed butter and mix on medium speed until fully incorporated. Continue adding small amounts until all of the egg mixture is mixed into the butter. Scrape down the sides of the bowl with a rubber spatula and mix for another 30 seconds.
  5. Remove the bowl from your stand mixer. Alternately add small amounts of the flour mixture and the buttermilk to the bowl, mixing with a wooden spoon just until all the ingredients are incorporated. Fold in the raspberries, taking care not to smash the fruit. Pour the batter into the prepared baking pan and spread evenly. Sprinkle chopped almonds over the top.
  6. Bake on the center rack of your oven for about an hour, or until golden brown. Test center of cake with a cake tester or toothpick--it will come out clean when the cake is done. Let cool for 20 minutes on a wire rack, then dust with confectioners' sugar and cut into pieces. The cake will be fragile until fully cooled, so remove slices carefully.

Hummingbird Chronicles: Lemon Cupcakes Recipe from Hummingbird Bakery

English cupcakes come stateside!CakeSpy Note: This is an ongoing series of entries about (and recipes from!) London's Hummingbird Bakery by Cake Gumshoe Alexandra Levert, who is an assistant director for a French television network in Toronto, Ontario, Canada. She loves cooking and baking because she finds it comforting and yet challenging at the same time. She tries to combine her love of food and her love of travel as much as life will let her.

 One Sunday afternoon, my boyfriend, who has never been into cupcakes, decided to finally take a look at my Hummingbird Bakery Cookbook. He started flipping the pages and landed on the lemon cupcakes page. He suddenly got all excited and said he wanted to make them. And right now. I was surprised, yet I wasn’t: he can never say no to a dessert with lemon. Suddenly, I was the one who wasn’t too excited about the idea of making them. Don’t get me wrong, I love lemon, but I always prefer chocolate to fruit in a dessert. This time though, I let him convince me and we went to the grocery store. 

Hummingbird Bakery Lemon Cupcakes

Recipe by Tarek Malouf, from Hummingbird Bakery Cookbook 

For the base:


  • 120g of plain flour
  • 150g of caster sugar
  • 1½  teaspoons of baking powder
  • 2 tablespoons of grated lemon zest, plus extra to decorate
  • 40g of unsalted butter (at room temperature)
  • 120 ml of whole milk
  • 1 egg 


For the lemon frosting:


  • 250g of icing sugar (sifted) 
  • 80g of unsalted butter (at room temperature)
  • 2 tablespoons of grated lemon zest
  • A few drops of yellow food colouring (optional but pretty!)
  • 25 ml of whole milk 


For the cooking process:


  • A 12-hole cupcake tray lined with paper cases 


So here is what I did:


  1. First, I preheated the oven to 325°F or 170°C. 
  2. Second, I sifted the flour and put it in a large bowl with the sugar, baking powder, lemon zest and butter. Then I used a handheld electric whisk, although you can also use a freestanding electric mixer with a paddle attachment, to beat the first batch of ingredients together. I beat them on slow speed until I was certain all the components were combined. I gradually poured the milk in and continued beating so that everything was mixed in well. I added the egg to the first mixture and beat it in with the rest for a few minutes until it formed a nice, smooth blend. Now the next part tested my cupcake skills for the first time: spooning the mixture into the paper cases. To do so, I took two spoons: one to pick up a bit of the blend and the other to push it out of the first spoon and into the mold. I repeated that same action until all 12 paper cases were about 2/3 full. The tricky part was to try and keep the tray as clean as possible, by not letting any of the mixture fall anywhere but in the cases. It was harder than it looked, but I did it. One cupcake point for me! 
  3. I put the tray in the oven for 22 minutes, since the recipe said to leave it in for 20 to 25 minutes. What I did was I set my timer for 20 minutes, and then when it rang, I took a fork and inserted it gently into one of the cakes. When I took the fork out, there was a slight trace of cake on it, so I knew I had to leave them in for a few more minutes. So I waited a little bit, checked again and they were fine. I took them out of the oven and let them cool down completely. 
  4. After about 30 minutes, it was time for me to make the icing. First I beat the icing sugar, butter, lemon zest and food colouring with the same handheld electric whisk, but this time on medium-slow speed until the ingredients were well combined. Then I turned the whisk down to a slower speed while I poured the milk. After that, I turned it to high speed and beat the mix for about 5 minutes, until the frosting became fluffy enough. As Tarek Malouf said in his book: “The longer the frosting is beaten, the fluffier and lighter it becomes.” 
  5. Then my now-favourite, yet the riskiest part of the whole process finally arrived: it was time to put the frosting on the cakes. The thing about cupcakes is that they are supposed to look pretty and appetizing, and this was my first time trying to do so. The best advice I can give you is just dig in but do it gently. Take a good amount of the frosting with a spoon, a knife or a small spatula and spread it evenly while rotating the cupcake. This will give you more control over what the end result will be like. And voilà! Your first cupcakes. MY first cupcakes! 


So what do they taste like, you ask? Well, the thing about Hummingbird cupcakes is that they are never too sugary, which is good for people who don’t have a sweet tooth. I found the lemon ones very flavorsome, yet quite subtle in taste. Lemon is not something you need a lot of in order to get the full taste experience. And it was the case with these cupcakes. 

Final words: In order to make the recipes with as much precision as possible, I would recommend using a weighing scale in order to measure some of the ingredients. I didn’t have one when I made this recipe, and I found it really affected the texture and consistency of the frosting. It was a bit too liquid, not overly but just enough for it not to stick to the base properly. Remember: You need good tools to make great cupcakes!

Trick or Sweet: Candy Corn Kaleidoscope Cookies for Serious Eats

It's October, and you know what that means: it's officially candy corn season.

But if you appreciate the iconic look more than the mellowcreme taste of the stuff, here's a solution: a reconfiguration of the Kaleidoscope Cooky (yes, cooky) from the Betty Crocker's Cooky Book, made to resemble the tricolor confection. Lightly crumbly, very buttery, and extremely crowd-pleasing, these cookies are a totally sweet tricked-out treat.

Note: This recipe is designed to feed a crowd; I have in the past halved it with fine results. Also, if shaping the dough into the candy corn shape seems too fussy, they're just as festive as Halloween-hued rounds.

For the full entry and recipe, visit Serious Eats!

Whoopie Pie Frozen Custard from Old School Frozen Custard, Seattle

Three guesses as to what was the most decadently delicious thing I tasted this week.

That's right: Whoopie Pie Frozen Custard. 

This bit of sweet manna was the special flavor of the day on Thursday, September 30th at Old School Frozen Custard in Capitol Hill. Now, if you don't know much about Old School, then let me learn you a bit about their M.O.: they generally have only three flavors available daily--vanilla, chocolate, and a special flavor of the day. Naturally, Audrey (who is also the one who inspired these cupcakes) and I had to walk over to sample this one.

So what exactly is Whoopie Pie frozen custard? Well, according to Old School's site, it's comprised of "Our Chocolate Cake Batter frozen custard with a delicious butter cream varigate folded into it".

But really, this description doesn't tell you much about the exquisite joy of eating it. While eating it, the first flavor that hits is chocolate--but then something happens. A slightly tangy, rich-sweet undertone to the taste--that's the cake batter. And then--little nubbins of vanilla buttercream swirled throughout--something that isn't really necessary, but sure is nice. 

While had I been given this custard blindly and asked what flavor it was, I might not instantly guess "whoopie pie", but I certainly would have finished it and licked the bowl. Yes, indeed.

The final word? A fine flavor of the day. Bring it back soon!

Old School Frozen Custard has locations in Seattle and Bonney Lake; visit their site for details.

Candy-Coated: Delicious Sweets from Dufflet

I want to tell you about the most recent series of confections that I can't stop cramming into my mouth: Dufflet Small Indulgences.

A couple of weeks ago the fine folks at Dufflet asked if they could send some samples of their products, and being the good sports we are when it comes to sweet treats, we said sure.

But we weren't prepared for the total awesomeness that came our way.

First, the caramel crackle. It doesn't look too glamorous--kind of like a cross between brittle and crackers. But when you bite into it, something happens: a dance party starts in your mouth. Sweet and salty, crumbly and chewy, this falls somewhere between cookie and candy, in the best way possible. It's delicious alone, but it's perfection atop vanilla custard or ice cream.

But oh, the "Marvelous Morsels". We received two types--the Cherries and Madagascar Vanilla ("seductively tart cherries scented with fragrant Madagascar vanilla, enrobed in smooth milk chocolate and tinted with entirely natural colour") and the Crunchy Caramel Crusted Pistachios in Milk chocolate ("perfect pistachios coated in hard crack-caramel, enrobed in smooth milk chocolate and dusted with confectioners’ sugar"). 

And similarly, both varieties disappeared quickly. The cherries were deliciously sweet and tart, and made beautiful (and tasty) cupcake toppers; the crunchy caramel crusted pistachios are like another party in your mouth, with a variety of flavors crashing together beautifully in each bite. 

So we've got to say: free samples aside, we were very, very impressed and I'd definitely buy them with my own money.

Find out more, seek out a store, or browse the collection online at dufflet.com.

Baker's Dozen: A Batch of Sweet Links

I hope you're not counting, because this isn't actually a baker's dozen of links, but they're so sweet you'll forgive me an extra, right?

Like you needed a reminder: CupcakeCamp in Newport, OR this weekend! CakeSpy! Bakerella! MORE!

Food News You Can Use: Bonbon Jovi Truffles are featured on WCP!

Honey, I'm Home: Honey Cake with Sour Cream Frosting, by Moscow Gourmet Kitchen!

Don't understand a word, but love everything I see: Objetivo Cupcake!

Beer? Brownies? How 'bout both? At once?

Sweet cupcakes, sweet cause: CupcakeCamp goes to London!

Sweet bakery find: a reader suggested Muscoreil's Fine Desserts and Gourmet Cakes in North Tonawanda, NY. I am not sure when I'll get there, but I love that they have a full selection of "Finger Desserts".

I've heard of 7-Up Cake...but 7-Up biscuits? Unheard of!

Speaking of biscuits, you can find a gluten-free recipe here (and see a peek of my card designs!) via Good Chemistry Baking.

I'm just saying, I love this gumball t-shirt.

These robots are ready to serve you...sweetness! Yumbots by Fred!

All of the visual appeal of watermelon, but none of the healthiness: watermelon cupcakes!

Tis the season...for pumpkin cookies! And these ones look amazing.

Sweet memories: ugly-but-delicious Praline Squares!