5 Things I Learned from Craftsy Course French Pastry Classics

Photos via Craftsy course French Pastry Shop Classics

As youse-all know, I am a frequent contributor to Craftsy, a fantastic website which offers all sorts of crafty content.

And (get jealous) as a perk, I occasionally get a screener of one of their classes. 

Actually, their classes are amazingly cheap for all that they offer--I have taken a few and they're all insanely informative. 

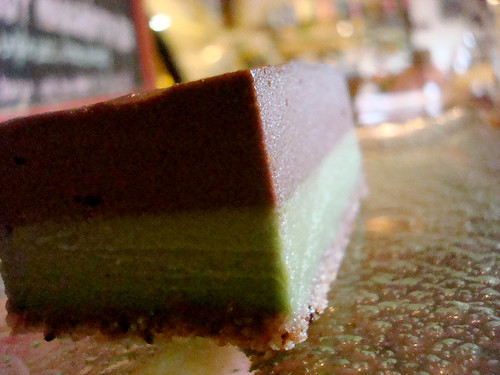
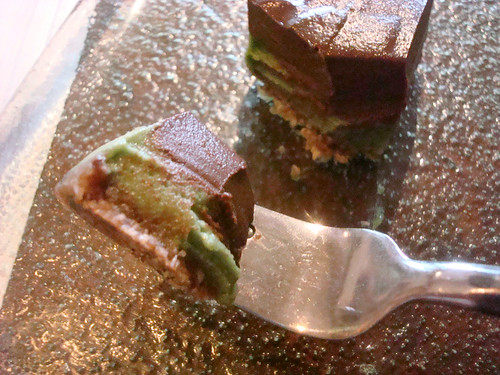
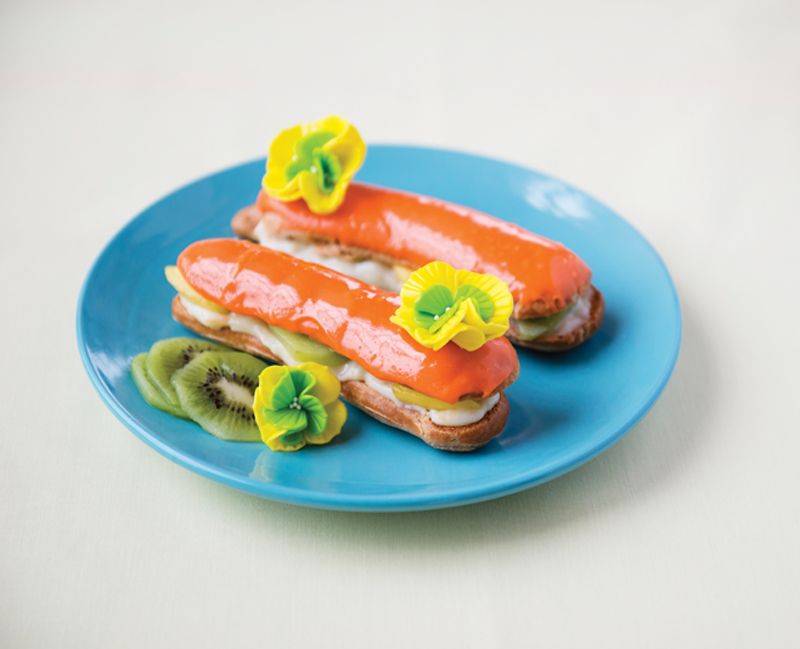
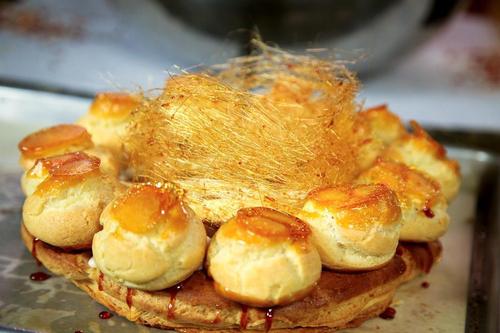
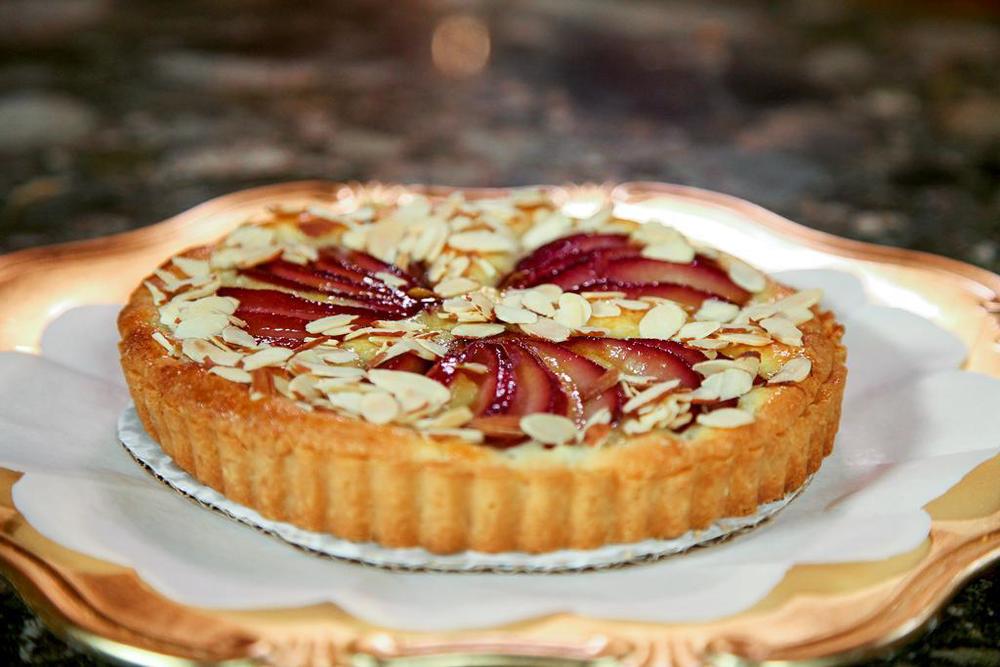
After having taken the new-ish course French Pastry Classics, I feel more confident and better versed in baking French sweets after watching instructor Colette Christian go over the ins and outs of making pastry cream, ganache, cream puff pastry, gougeres, and a sweet fruit tart. 

I can't tell you everything I learned, because I am trying to tell you that the class is worthwhile to buy, but I can tell you some interesting things I learned while taking the course. These were just a few things I jotted down during the course that I thought were interesting little tidbits - there are many more in the course. Let's go:

I choux you:

Pâté à choux is the only pastry dough that you make on the stove. It's a stovetop wonder! Also, because of how the dough is created, you don't have to sift the flour first. Bonus for people who get lazy about sifting!

Chantilly, but not lace

When making chantilly cream (a sweet whipped cream), you need to attain some structure in the cream before adding the yummy stuff that gives it flavor. The reason is that if you add sugar or vanilla too soon, it will be weighed down. For best results, mix the cream until it has a yogurt-like consistency but not quite whipped cream-y, and then add in the vanilla and sugar. Mix until you attain the peaks you're seeking. 

Ganache and yum

Ganache is a simple thing: it has only two ingredients, chocolate and cream. This means that you can taste each ingredient really clearly, and it's worth investing in good quality stuff. In the course, you get specific suggestions. Seek out a cream with 38-40% butterfat for the perfect rich creamy flavor and texture; as for the chocolate, go for one that has 32 percent cacao or higher. This will ensure that it attains a perfectly fluid texture. 

What a tangled web..

You know those weird bits inside of a cream puff when you cut it in half? There's a word for it: WEBBING. It doesn't mean you've done anything wrong; it is caused because the egg can't help but create a bit of leftover structure while it's chemically weaving the awesome cream puff exterior. It's no big: simply spoon it out to make room for the pastry cream.

Bonus: Par-baking versus blind baking

In the course, I got a fantastic explanation of the difference between par-baking and blind baking. Finally! I have been using the terms (incorrectly) interchangeably for years. No more. Thank you, Colette Christian!

Check out the course here.

Have you ever taken a Craftsy course? If so, how did you feel about doing a cooking course online?

Recipe for Unicorns: Rainbow Gelatin Squares

Unicorn food

Good news for me: I got a review copy of a book in the mail. My bookshelf is happy!

Good news for you: in this book, entitled The 250 Best Brownies, Bars and Squares, there is a recipe for UNICORN FOOD! 

Now, in the book they call it Rainbow Gelatin Squares, but I'm not fooled. And happily, I'm allowed to share the recipe! Here it is, courtesy The 250 Best Brownies, Bars and Squares. So here it is for you, so you can create this magic at home!

Unicorn food

Makes 30 or so

For the clear / translucent layers

  • 4 packages (4 servings each) gelatin mix, assorted flavors
  • 3 cups boiling water, divided
  • 3 cups cold water, divided

for the creamy layers

  • 3 packages (4 servings each) gelatin mix, assorted flavors
  • 2 1/4 cups boiling water, divided
  • 3/4 cup cold water, divided
  • 1 1/2 cups evaporated milk, divided

whipped topping and fruit to top, if desired.

You need: 13x9-inch cake pan, greased

  1. Prepare the clear/translucent layers. In a bowl, combine gelatin dessert mix with 3/4 cup boiling water, stirring until completely dissolved. Add 3/4 cup cold water and mix thoroughly. Pour into a prepared baking pan and refrigerate for 35 to 40 minutes, or until almost set. 
  2. Prepare the creamy layers. In another bowl, combine gelatin dessert mix with 3/4 cup boiling water, stirring until completely dissolved. Add 1/4 cup cold water and 1/2 cup evaporated milk. Mix thoroughly. Spoon over chilled translucent layer and refrigerate until almost set.
  3. Repeat the translucent and creamy layers, making 7 in all, chilling each layer before adding another. You can stack colors in whatever way you'd like. 
  4. When all of the layers are completed and the gelatin is set, cut into squares. Decorate squares with topping and garnish of your choice.

Spring Cleaning: Amazing Savings on CakeSpy Products

I've been at the artwork game for a while, and I feel like it's time for a change. I've decided to debut some awesome new designs, but first, I need to clear out the old to make room for the new!

This is great news for you, because I am selling onesies, cards, and other products at AMAZING savings.

A sampling of what you could get in the online store:

Onesies or toddler tee shirts for just $2 each! 

50 (yes, 50!) assorted CakeSpy cards for just $10. When's the last time you bought a greeting card? You're lucky to buy 2 cards for $10 these days. You'll be stocked up for quite some time!


Mugs for just $3. 


Seriously--great values! I will be having this sale until the items are gone; I'll have another sale in July when I empty out my storage unit. But don't delay, because when they are gone, they're GONE.

Give it a shop at cakespyshop.com.

Millionaire's Shortbread Using Cookie Dough From a Tube

I know, I know--I'm amazing. I figured out a way to streamline the process of making Millionaire's shortbread by employing sugar cookie dough from the refrigerated tube. I win at life!

This easy Millionaire's shortbread recipe comes together quickly, and tastes awesome. How could it not--it has all of the major food groups: cookie, caramel, and chocolate! I strongly suggest you give it a try. Recipe here. 

Six Fascinating Facts About Easter Candy

Happy Easter, my sweet friends! I thought you might like to take a break from all the family time to learn some interesting candy facts. Here are 6 fascinating facts about Easter candy!

  • Americans have strong opinions on the order in which chocolate bunnies ought to be eaten. According to one study, 76 percent of Americans think the ears should be eaten first, 5 percent say feet first. Does that mean the remaining 19 percent will bite off any part that isn’t hopping away?
  • When Marshmallow Peeps made their debut in 1953, it took 27 hours to create each Peep (including moments of stopping while they dried, etc). Today, they are made in 6 seconds, and produced out at a rate of 4 million per day.
  • Peeps are the most popular non-chocolate Easter candy: Americans buy more than 700 million per season.
  • Cadbury Creme eggs are smaller in the US than they are in the UK! They are distributed by different companies in both nations. In England, the eggs weigh 40 grams. In the USA, they’re 34 grams.
  • Each year, about 16 billion jelly beans are produced for Easter. In case you’re wondering...that’s about enough to circle the world three times over.
  • Easter is the #2 candy-eating holiday of the year, with an estimated consumption of 71 million pounds worldwide. Halloween takes the cake, though, with 90 million pounds of candy.

Hoppy--er, happy--Easter, sweeties!

Baker's Dozen: A Batch of Sweet Links!

Awesome interview with me on Vanilla Sugar blog.

Did I mention that you can win my books via said interview post?

Tasty grilled cheese picks in LA!

This might be my last recipe post ever on Serious Eats as they are changing their website format. Luckily it's a good one.

A fantastic article about "where is she now" involving former Seattleite and current pastry superstar Dana Cree.

OMG even though they are savory they are still baked and highly awesome. Biscuit time!

Imploding honey cake!

OooooooOOOOooooOOOOooo Funfetti gooey butter cake!

A date with me...for charity!

The experience of visiting a marijuana bakery, plus a recipe. Involves baking with marijuana.

Actually, I don't care that St. Patrick's day is over. I want everything featured in this post about St. Patty's Day-friendly sweet fare.

Gluten-free tart crust! Yes.

Fun with Peeps. Starry Night included.


Bali Diary: How to Make Black Rice Pudding

Homemade black rice pudding

During my time in Bali, it didn't take too long for me to become obsessed with black rice pudding.

So you can bet your bottom donut that as soon as I got back stateside, I set forth to recreating this bali magic in my own kitchen.

As it turned out, the most difficult part was sourcing the ingredients. I assumed (with a typical American sense of entitlement, I suppose!) that I could get all of the typical Balinese ingredients at my local grocery store or Asian grocer. Ultimately, I was able to find almost everything, but it took a number of stops.

Homemade black rice pudding

The coconut cream was easy; that was in the grocery store. The black rice, in theory, shouldn't have been difficult to locate, but they happened to be out of it at the Asian grocer, so I had to buy it at Whole Foods for a slightly more premium price. As for the bananas, I sought out firm, ripe ones that I felt could best replicate the dense and super-sweet variety I tasted in Bali. 

Homemade black rice pudding

The two hardest ingredients to find were the palm sugar and panadus. After searching a number of stores for dark palm sugar I still came up dry, so finally I settled on this more honey-toned version, which did work just fine. But keep in mind that if you shave it, don't shave too much, as the sugar will harden in a couple of hours. If you couldn't find palm sugar or just can't be bothered to go and seek it out, brown sugar would do.

The panadus leaves, often used as a flavoring, were tougher to source. After scouring the web for possible substitutes I couldn't find any that quite sounded right, so I just used vanilla extract for flavoring. Maybe not traditional, but highly delicious. 

Homemade black rice pudding

Whew! That having been said, this recipe is worth seeking out the ingredients. This lovely morning porridge is almost caramelly when the sugar meets the rich coconut cream; the bananas bring all of the flavors together into an earthy, creamy, caramelly form of edible bliss.

Here's how you make this traditional Balinese treat. 

Black Rice Pudding (printable version here)

adapted from Indonesian Cakes and Desserts, a Periplus Mini Cookbook

6 servings

Ingredients

  • 1 3/4 cups uncooked black glutinous rice (or Asian black rice)
  • 6 cups water
  • 2 panadus leaves, tied into a knot (I used 2 teaspoons vanilla extract)
  • 1/4 cup (or more, to taste) shaved palm sugar
  • 1 can coconut cream (14 ounces or so) 
  • pinch of salt

Procedure

  1. Rinse the rice in two to three changes of water, or until the water runs clear. Once clear, place the rice in a bowl and cover with clean water. Let it soak overnight (I did this on the countertop).
  2. Homemade black rice pudding
  3. In a saucepan, bring the rice, along with 6 cups of water and the panadus leaves (if using vanilla extract don't add it yet, though), to a boil over medium heat, and simmer uncovered for about 40 minutes, stirring occasionally until the rice is softened to a slightly al dente consistency. Discard the panadus leaves, if using. Add the sugar and vanilla (if using) and let the mixture continue to simmer on low heat for about 5 more minutes. 
  4. Homemade black rice pudding
  5. Remove from heat. Set to the side for the moment.
  6. In a bowl, combine the coconut cream with a pinch of salt and mix well.
  7. Homemade black rice pudding
  8. To serve, place a healthy spoonful of the rice mixture into a bowl. Homemade black rice pudding
  9. Spoon coconut cream on top to taste. Enjoy immediately. 
  10. Homemade black rice pudding

If storing, keep the coconut cream and the rice separate, and combine before serving.

Have you ever tried black rice?

Baker's Dozen: A Batch of Sweet Links!

bunny and peanut butter

A history of chocolate bunnies.

Interesting Easter insights.

Much ado about muffin: a sweet video game.

I love this collection of trompe l'oeil cakes that look like food.

Interview with a Cadbury Creme Egg.

Blueberry muffins from pancake mix! Interesting.

Take a tour of regional and seasonal US pies with the wonderful new book Teeny's Tour of Pie: A Cookbook.

The best homemade marshmallows...ever!

Lemon meringue angel food cake.

Olive oil cake.

Pineapple orange layer cake. Yum.

In case you missed it: what is palm sugar?

Also in case you missed it: rainbow dessert bowls made of candy.

The question that really matters: which girl scout cookie makes the best milkshake?

Bali Diary: What is Palm Sugar?

Bali

When you go to Bali, you'll probably notice pretty quickly that the sugar is different there. 

Personally, I noticed it the first time that I was brought a coffee in a cafe. They delivered it with a small dish of what looked like the darkest brown sugar I'd ever seen. 

As I was looking at it, fascinated and slightly confused, someone who had been in Bali longer than me looked over knowingly. "Palm sugar," she said. "I never use refined sugar at home, but this doesn't seem to affect my blood sugar as much." (People in Bali, usually tourists, talk like this).

Palm sugar. Interesting. I started to notice that it was everywhere. See it behind that lovely (cookie-included) latte?

Bali

At some cafes, palm sugar was served as a simple syrup, which resembled pancake syrup. At others, in a dish, like my first experience. Interestingly, in stores and at open air markets, it was sold in thick, fat little cakes, sometimes dome-shaped, sometimes in cones. It was shaved or cut into portions, which reminded me of a story I'd heard about the early United States, wherein Colonial ladies of the house would have special shears specifically designed to cut sugar, which was at the time purchased as large cones. 

So what is palm sugar, exactly?

Palm sugar is derived from the palmyra or sugar palm (and has a relative, coconut palm sugar, which is made from the coconut palm--so if you look it up, you may come across this term, too). Once cut, the flower buds produce a sweet yet very liquid sap; this sap is collected and boiled until it has reduced to a sticky sugar consistency. From that point, it can be either bottled as a liquid, or whipped and then dropped into molds so that it will solidify. Sound familiar? In my opinion, this process has quite a similarity to the process of making maple syrup or sugar.

Taste-wise, palm sugar is slightly mellower than granulated sugar, and in my opinion, has a flavor that is like molasses-meets-honey. It's very flavorful, and is a singular flavor when used simply, as in the coconut pancakes served at Seniman Coffee, where only a few ingredients allow every flavor to shine.

Photo via Wikipedia commons

Why are there so many variances in color?

Another thing I noticed is that palm sugar can have quite a large variance in color, from honey yellow to a deep, dark brown. Basically, this boils down to (ha ha) how long and how high the temperature was when the sap was reduced. As I observed, even the same brand or vendor would have no two portions of sugar that were completely "cookie cutter"--because this isn't a highly processed sugar, there is a little bit more variation from batch to batch. 

At home, I found it easier to find the lighter colored palm sugar. Personally, I found the difference in flavor subtle; when using it in a dish that employs the sugar for sweetness in addition to other flavors, the type wasn't important. However, when using it in coffee or in a recipe where it is a primary flavor, the difference from light to dark palm sugar would be like the difference between light and dark brown sugar; the darker the sugar, the more caramelly and intense the flavor. 

Seniman coffee, Bali

How to use palm sugar

To the best of my research, you can swap equal amounts of palm sugar for granulated or brown sugar. Because of its different density, however, for best results you will probably want to weigh your ingredients rather than packing in a cup. This is for baking, however; if you're using the palm sugar in coffee or to sweeten your oatmeal, say, just use to taste. Consider the recipe you're using, as the palm sugar will impart a flavor. 

Is palm sugar healthier?

In Bali, a whole lot of people seemed to think so. Here's an article about it, if it interests you. I'll be honest, it only interests me marginally, as I don't necessarily think people eat sugar of any sort for its health benefits, anyway!

Have you ever used palm sugar in baking? I'd love to hear what you made and how it came out. 

Love from Bali, 

CakeSpy

Bali Diary: Love Letter to Magnum Gold

Uluwatu and Padang Padang

I realize that it may sound funny that I had to travel so far to find something which has apparently been under my nose for some time in the United States.

But sometimes fact is stranger than fiction, and it took me going all the way to Bali to discover the Magnum Gold.

Actually, technically, it's the "GOLD?! Magnum Ice Cream Bar". GOLD?! might, upon first thought, seem like a deeply stupid name. Truthfully, it did to me. But my tune has changed.

Because as it turns out, it's quite accurate to the experience of eating a bar. Because here's what happens, in simplified terms:

Step 1: You wonder "Gold? What's so gold about it?". Shake your head. It's just an ice cream bar, man.

Step 2: Open the bar and take a bite. Exalt as you take the initial bite and discover that the yellow chocolate covers dark chocolate, which gives way to ice cream with delicate swirls of salty caramel. Think, "holy sundae, is this good." Exclaim "GOLD!".

Uluwatu and Padang Padang

So really, the name does make a lot of sense after you try the bar.

The weird thing is that while they exist in the US, I had never heard of them. But apparently Bali has caught the news that something good is happening with this bar, because they are EVERYWHERE there. There are signs in the supermarkets for them, and they are a prominent offering at mini-marts, ice cream vendors, and food markets.

At the Padang Padang beach, there was even an ice cream vendor toting them in a cooler full of dry ice. My friend and teaching BFF in Bali, Jan, flagged him down and bought one. She offered to get me one, too, but I felt that the name was kind of stupid and declined, instead electing to pose for a photo in front of a particularly large rock.

Uluwatu and Padang Padang

But the moment I saw her dig into the treat, I knew I must have my very own. So later that day, at a pit stop on the way to Uluwatu, I grabbed my own Magnum Gold.

Uluwatu and Padang Padang

Upon first bite, I was hooked. Rich chocolate that melted in your mouth, with a satisfying white and dark chocolate flavor. The chocolate flavor subsiding into and melding with the creaminess of the inside. No mere vanilla bean ice cream in here--it was swirled with salted caramel. They were delicate swirls, but certainly they were the certain something that took the bar from "good ice cream truck offering" to "I want to eat my weight in this thing".

After I got a Magnum, many of my other Bali BFFs followed in kind. You see, it's the type of thing that you want once you see someone else eating it. 

Uluwatu and Padang Padang

The experience made watching a beautiful sunset with monkeys all around even sweeter.

Thank you, Bali, for so much. But at this moment, thank you most for introducing me to my newest love. Because you know what they say: "Make new desserts, but savor store-bought, one is silver but the other's Gold."

Actually, nobody's ever said that until now, but the main point here is that you have to try this ice cream bar.

Love from Bali,

CakeSpy

Baker's Dozen: A Batch of Sweet Links!

Remember these? Hoppy easter, indeed.

High calorie treats: consider it a to-do list.

Helpful: a guide to different types of sugar.

Interesting facts about the invention of Jell-O.

Tutorial for children: how to steal Easter candy.

Tips for making Peeps at home.

How to make perfect flan

Ice cream mashups are all the rage. I like this trend.

Sweet and saltines. Maybe don't make them. They're addictive.

How to make isomalt jewels.

Chocolate peanut butter eggs. Happy, happiest Easter.

Hazelnut dessert noodles: I am intrigued.

How to make waffles without a waffle iron. Srsly.

Magic in the Airheads: Magical Rainbow Candy Bowls

Rainbow candy baskets

April showers bring May flowers. But let's not get all doom and gloom and April-is-the-cruelest month, OK? Because where there are rain showers, there is bound to be a rainbow or two. Or ten!

To celebrate this magical rainbow-filled month, I would like to present a project sponsored by Airheads candy which has attained this site's highest status as unicorn-approved: rainbow candy dessert bowls. 

Rainbow candy baskets

These confections are woven from candy, and are a perfectly magical setting for all of your favorite desserts. You could fill them with whipped cream or marshmallow fluff for a light and sweet cloud-like treat, or you could place an entire cupcake inside. They could even be used as decorative candy bowls at parties for a sweet table setting. 

Rainbow candy baskets

I should tell you too that this project was inspired by my time in Bali. Perhaps not for the reason you think, though! 

You see, I had agreed to come up with a project for Airheads before I left, and I figured "meh, I'll find someone's oven to bake in.". Well, as it turns out, they don't have ovens in Bali! So I had to revise my plans and figure out a no-bake treat. I thought back to my friend Not Martha's bacon bowls and an idea was born--a sweet idea, indeed.

Rainbow candy baskets

I have to say, I was rather pleased with my experimentation. It took a little figuring out, because once I wove the rainbows I had trouble getting them to stay together while I shaped the baskets. By employing regular Airheads candy, I melted them down and then used them as a sort of sealant for the inside of the baskets. It helped keep the candy together, and as an added bonus, sealed the inside so that if eating ice cream or something of the like, it would stay contained in the basket. 

You could go for a plain, cloud-like look with the finished baskets, or include additional rainbows. Definitely not excessive.

Rainbow candy baskets

Anyhow, I know that you're probably keen to make this magic happen in the comfort of your own home, so here's how I did it. I realize it seems like a long process based on my writing, but it's really not; I just wanted to be thorough in my explanations. You're welcome!

Rainbow candy baskets

You'll need:

  • 1 cupcake tin
  • double boiler
  • a spatula for stirring, a spoon, and a knife

Rainbow candy baskets

Ingredients

(Per basket)

  • 10 strips Airheads XTremes Sweetly sour candy, in berry rainbow
  • 3 small Airheads candies, unwrapped (choose similar colors for best results)
  • 1 teaspoon water
  • 3 2 tablespoons confectioners' sugar

Procedure

Grab a work surface and let's get weaving. First, grab yourself 10 strips of the rainbow colored Airheads Extreme candy. Line five strips side by side, so that the ends are facing you. 

Leaving an inch of space on the top, begin to weave one of the remaining strips of candy horizontally, over and under the vertical rows.

Grab your next piece, and weave it directly below the previous one, weaving under-and-over so that it forms a basketweave pattern.

Continue alternating with the remaining strips. 

Here's a photo-collage of the process if that all seems confusing:

Weaving a rainbow

OK, set this woven piece of rainbow art to the side for the moment. 

Now, set up your double boiler. Place three Airheads candies (the regular kind) in the top, along with the water and confectioners' sugar. 

Heat on medium, stirring every few minutes. While at first the sugar, water, and candy will remain quite separate, as it melts, the mixture will become thick. You'll see now why it was a good idea to use candy in the same color scheme--the color melts together. It might be ugly if you use different colored candies (like I did the first time) but it will taste fine. Promise. But even so, this won't be the prettiest part of the process.

Rainbow candy baskets

Once the mixture is lightly bubbly, remove from heat. You'll want to work without hesitating at this point as the candy is easier to use while still quite liquid. Gently spoon the candy in the center of your basketweave square. Use a spoon or knife to spread it to cover the woven portion as thoroughly as possible. 

At this point, I decided that rather than slice off the extra bits, I would fold over the non-woven portions. This is easier to do if you start with the pieces which are "under". They will adhere easily to the still sticky candy.

The four corners, I sliced off.

Give it about five minutes for the candy to set slightly, and transfer the candy bundle to your cupcake tin. Gently place it, centered, on top of one of the cups. Using your fingers, gently finesse it into a bowl shape.

Once again, here it all is in pictures. My apologies again for the weird melted candy color. Folding basket

Rainbow candy baskets

Repeat, making as many bowls as you'd like.

To help the bowls "set", I put them in the freezer (right in the cupcake pan) for about 5 to 10 minutes. They easily popped out of the cupcake tin at this point.

Rainbow candy baskets

Fill the bowls with whatever toppings you'd like. If you're not using them immediately, keep them in the cupcake tin so that they will retain their shape.

What would you put in a rainbow bowl?

Bali Diary: This is Not a Nanaimo Bar

This is not a Nanaimo bar. I’m not messing with you. It’s really not.

It’s part of a strange phenomenon which has haunted me in Bali: I keep on finding Nanaimo bar lookalikes which are not actually Nanaimo bars.

These lookalikes are three layer bars with a crust, soft and custardy midsection, and a chocolate topping. But in spite of these compelling attributes, they are not Nanaimo bars. 

I realize that I probably sound crazy, or at least you think that I am having a mirage of sorts because I’ve been in Bali too long and all of the coconut juice is going to my head. But this is seriously happening. 

To illustrate with an example, take a look at this. Looks like tray of Nanaimo bars, right?


BUT THEY ARE NOT NANAIMO BARS. They are actually a raw food sweet, made with cashew and honey, coconut butter, cacao, coconut oil, and dates. You can get them at the hyper-stylish health food cafe Clear Cafe in Ubud.

Raw chocolate bliss bar

Weirdest of all? They taste nothing like Nanaimo bars. Not a nanaimo bar

This made for a very strange experience. I mean, imagine biting into what looked like a bar of chocolate and it tasting like an apple. That would be weird, right? Well, it was weird biting into something that looked so much like a Nanaimo bar that tasted nothing like it. 

Not a nanaimo bar

Initially, it tasted "wrong" to me--but not because it was not a well made treat. It was more a matter of shock, which made it difficult to determine at first if it was actually good. But don’t worry, I rallied. And a few bites in, once I had talked myself out of expecting the taste of Nanaimo bars, I realized that it was actually quite good. The dates and cashew coconut flavors came together in a naturally sweet treat with just a bit of bitterness (good bitterness) from the cacao to cut through the sweet and rich flavors.

But, you know, not a Nanaimo bar. 

Mint chocolate spirulina slice

The second one somewhat resembled a top heavy chocolate mint Nanaimo bar. But once again...it wasn’t a Nanaimo bar. 

It was a raw chocolate mint spiralina slice from Kafe, another healthy restaurant. Yup. Once again, hippie food. The crust was not as firm as a Nanaimo bar, and the fillings were quite soft. The chocolate in particular was mousse-like. It was a lovely dessert, and raw to boot. It was a highly pleasant dessert… 

Mint chocolate spirulina slice

but NOT a Nanaimo bar!

I don't know quite what to make of this phenomenon, my sweet friends. What can I say other than traveling is weird and wonderful? I can say resoundingly, though that it was an overall delightful and wonderful experience to encounter a whole new world of Nanaimo bar lookalikes so far away from home.

Love from Bali,
CakeSpy
- - -
Places mentioned:
Clear Cafe, Hanoman Street, Ubud.
Kafe, Hanoman Street, Ubud.

Make This: Tropical Fruit Medley Eclairs

I know, I know.

After I tortured you, absolutely tortured you, with a great interview with Ruth Clemens, baker extraordinaire who blogs at The Pink Whisk, and now author of Creative Eclairs: Over 30 Fabulous Flavours and Easy Cake Decorating Ideas for Eclairs and Other Choux Pastry Creations.

But I didn't give you even a hint of a recipe, I just talked about how great they were. 

Well, I am going to remedy that, sweet readers, because Ruth has been kind enough to share a recipe from the book, for Tropical Fruit Medley Eclairs. It being that I am in Bali at the moment, it seemed like an appropriate recipe to share. Enjoy!

This is part 2 of my entry as part of the book tour blog hop; to see the other entries, click here

Tropical Fruit Medley Eclairs

Makes 10–12 x 15cm (6in) éclairs

Ingredients

1 x quantity choux pastry (recipe here)

1 x quantity vanilla or tropical crème patissière (recipes follow) 

  • 60g (21/4oz) fresh pineapple, sliced
  • 70g (21/2oz) fresh kiwi, sliced
  • 50g (21/4oz) fresh mango, sliced
  • 1 x quantity regular or orange fondant glaze (recipes follow)

Decorations

  • Yellow and lime green sugarpaste (rolled fondant/ready-to-roll icing) (see Sugarcraft Techniques)
  • Small and medium pointed blossom cutters
  • Small pearl dragées (sugar balls)

Method

  1. Preheat the oven to 160°C (fan)/180°C/350°F/Gas Mark 4. Fill a piping (pastry) bag fitted with an 18mm (3/4in) nozzle (tip) with the chilled choux pastry. Pipe 15cm (6in) éclairs onto a baking sheet lined with non-stick baking (parchment) paper or a silicone liner (bake-o-glide). Spray the éclairs lightly with vegetable or sunflower oil and bake in the oven for 50 minutes until golden brown. Transfer to a wire rack and allow to cool completely.
  2. Roll out the yellow sugarpaste and cut out two medium-pointed five-petal blossoms for each éclair. Roll out the lime green and cut one small blossom for each. Using a cocktail stick (toothpick), imprint lines along each petal. Set the yellow blossoms on top of each other, slightly offsetting the petals, and place the green blossom in the centre. Carefully pick up the pieces and pinch together gently from the back to ruffle the petals. Set aside to dry in the recesses of an egg box.
  3. Assembly: Whisk the prepared tropical crème patissière with an electric hand mixer until smooth.
  4. Split each éclair with a sharp serrated knife (see Filling, Dipping & Splitting) and spoon the tropical crème patissière into the base of each.
  5. Top the crème patissière with a mix of sliced tropical fruits.
  6. Warm the orange fondant glaze gently until of a dipping consistency and place in an open shallow bowl. Dip the top of each éclair in the fondant to coat and place on top of the fruit filling.
  7. Apply a dab of water to the centres of the flowers and sprinkle on the dragées. Add a tropical flower to the top of each éclair and serve.

Vanilla Crème Patissière

Ingredients

  • 600ml (20fl oz) whole milk
  • Seeds scraped from 1 vanilla pod, 5ml (1 tsp) vanilla bean paste or 5ml (1 tsp) vanilla extract
  • 100g (3½oz) caster (superfine) sugar
  • 4 large egg yolks
  • 50g (1¾oz) cornflour (cornstarch)

Equipment

  • Large jug
  • Whisk
  • Medium-sized pan
  • Cling film (plastic wrap)
  • Large bowl
  • Electric hand mixer

How to make it tropical

Omit the vanilla and replace with the grated zest of 1 lime, half an orange and half a lemon. Before transferring to a bowl to cool, whisk in 15ml (1 tbsp) coconut liqueur.

Method

  1. In a large jug whisk together the egg yolks and caster (superfine) sugar until the mixture is light and foamy. Add the cornflour and whisk again until of an even consistency. Set to one side.
  2. Place the milk and vanilla in a medium pan and heat gently until just below boiling point. Whilst whisking the egg mixture continuously, add the warmed vanilla-infused milk a little at a time until both mixtures have been fully worked together. TIP: Make sure you whisk together the egg yolks as soon as the caster (superfine) sugar is added to them. This will prevent the sugar from pulling the moisture out of the yolks, which could result in ‘egg burn’, where you would have yellow flecks in your finished crème patissière.
  3. Transfer the mixture back to the pan and over a medium heat, whisking continuously, bring to the boil. Continue to cook the crème patissière for 2 minutes until thick and glossy.
  4. Remove the pan from the heat and transfer the mixture to a bowl. Contact-cover the top of the crème patissière with cling film (plastic wrap) to prevent a skin from forming, and allow to cool. Refrigerate once cooled.
  5. When you are ready to use it, transfer the chilled crème patissière to a large bowl and beat with an electric hand mixer until it is a smooth and even consistency.

Fondant Glaze

Ingredients

  • 300g (101/2oz) white sugarpaste (fondant/ready-to-roll icing)
  • 30ml (2 tbsp) water

Equipment

  • Heatproof bowl
  • Small pan or microwave
  • Electric hand mixer

Method

  1. Break the fondant into small pieces and place in heatproof bowl with the water.
  2. Heat gently in the microwave in short bursts, or over a pan of steaming water, stirring frequently, until the fondant melts.
  3. Mix with an electric mixer until the consistency is smooth and even and no lumps remain. The glaze will begin to set while it cools, so use while it is still warm. It can easily be reheated to pouring consistency if it cools too quickly for use.

TIP: Fondant glaze can be coloured with food gel pastes and easily flavoured with a wide range of extracts. Simply add a small amount of gel paste colour in the required shade to warmed fondant that is ready to be used. Make sure that it is evenly mixed to avoid any streaks before using to coat the tops of éclairs.

TIP: The temptation is to add more water to keep the fondant in a liquid state but if you do this the fondant will not set once the éclairs are coated. Gently warming the fondant before use is the best method.

Make it orange:

Add the grated zest of 1 orange  in 30ml (2 tbsp) hot water before adding to the fondant and heating together.

Enjoy!


Baker's Dozen: A Batch of Sweet Links!

Rainbow! Cake! A wonderful one.

Traditional Balinese sweets? A nice view for beginners.

In Detroit, they're baking up success in shared kitchens.

Sun Bakeries: an interesting way of enabling people.

I am intrigued by this Craftsy course in making edible wafer paper cake designs.

I googled "cupcakes with narwhals". I ended up finding a snowman cake. Still, cute!

Bread pudding from New Orleans. Yum.

Pink frosted cookies. You know you love them.

Need an idea for how to use your Pop-Tarts creatively? I love the recipe section on their site.

A nice roundup of Italian cookies.

Doughnut statistics and trends. Who knew?

This cake is amazing.

Buy my first book, because I am sure that you can think of someone who would love it. CakeSpy Presents Sweet Treats for a Sugar-Filled Life