Sweet Scenes from the Ybor Saturday Market Annual Cupcake Festival

Follow the Red Velvet Guest blog post

CakeSpy Note: this is a delicious dispatch from Cake Gumshoe Aditi, who blogs at Follow the Red Velvet Road. Do follow her sweet adventures, starting with this one:

Ybor Saturday Market Annual Cupcake Festival 

Saturday, October 18th, 10:00am – 3:00pm

Since I moved to Tampa, I have been looking forward to this day. As a cupcake enthusiast, I have been searching for a festival that honors the glory that is the cupcake. After returning to the U.S. from Uganda, I did a great deal of research, looking for festivals or special days for cupcakes. Unfortunately, I wasn’t very successful…until I looked in Tampa.

Follow the Red Velvet Guest blog post

Every Saturday, the city of Ybor hosts a Saturday market. Most Saturdays it a market where individuals promote their small businesses by selling items. There is also a fresh produce market and various food stalls. Once a year, in the fall, there is a special themed Saturday Market especially devoted to cupcakes. On this day, cupcake bakeries from all over the Tampa Bay area are welcome to show off their best and most delicious treats.

Follow the Red Velvet Guest blog post

This year amateur bakeries were also encouraged to join in the festivities, including a cupcake competition. Bakers were judged on presentation as well as taste.

Follow the Red Velvet Guest blog post

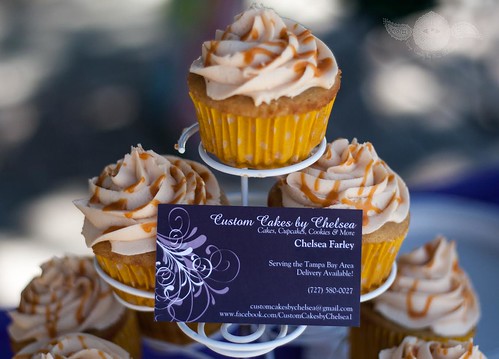
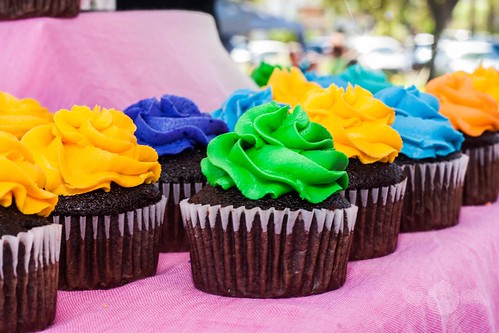
At the event this year, there were 17 local bakers competing. The bakers ranged from professional pastry chefs to at home bakers. Most had store-fronts or online order shops, but there were a few who did bake for fun, not necessarily for money.

Follow the Red Velvet Guest blog post

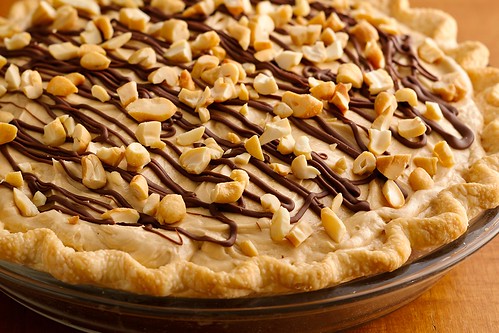
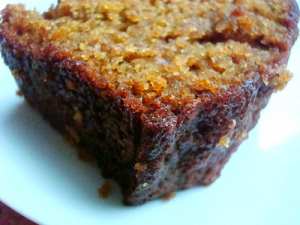
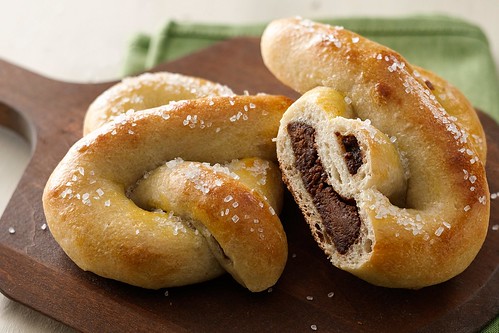
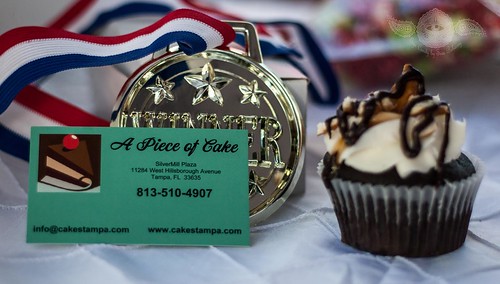
The competition was solid this year. The local bakers as well as the home-based first timers were really bringing their A game. Traditional cupcake flavors like red velvet and chocolate peanut butter were present along with some really unique tastes, like chocolate Reese’s cupcakes and a Guinness stout cupcake. Follow the Red Velvet Guest blog postI believe the judges had a hard time this year, but one baker came out on top. “A Piece of Cake” bakery, located on West Hillsborough Avenue, took the first prize for taste. They concocted a Guinness stout chocolate cupcake with buttercream frosting garnished with pretzels, caramel, and chocolate drizzle.

Follow the Red Velvet Guest blog post

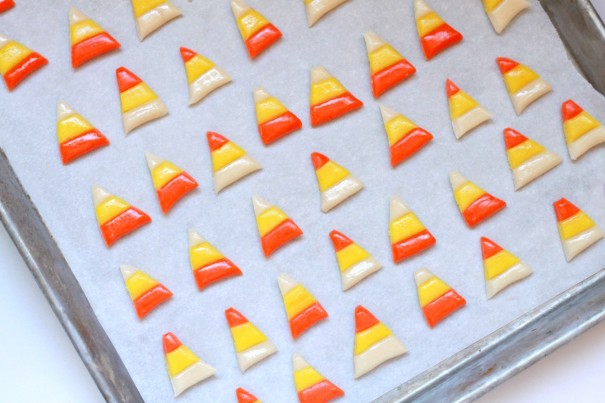
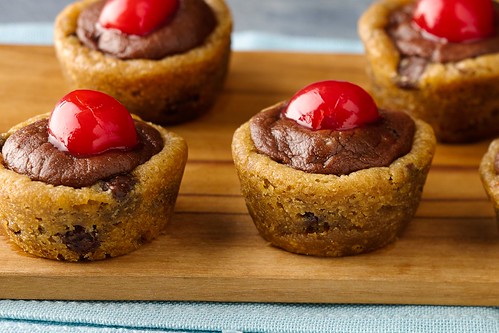
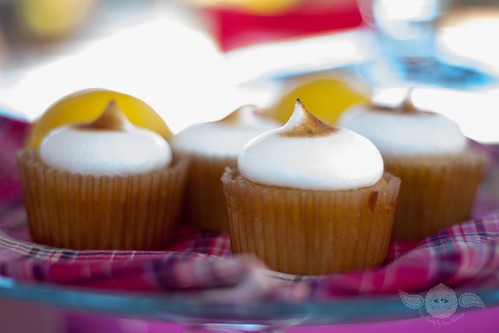
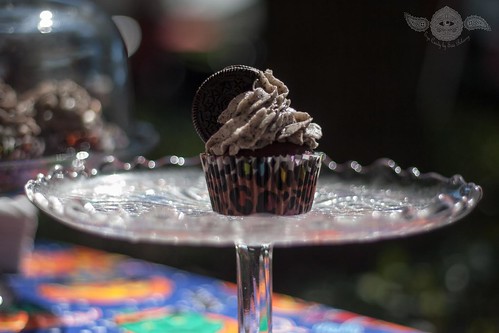
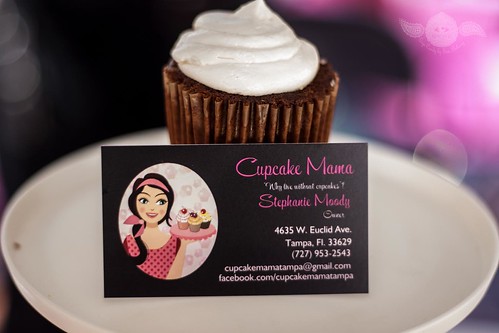
Compared to the other cupcakes, this one was moist, light, and the flavor combinations were delicious. Some of the other hit cupcakes were the Reese’s cupcake from the “Cupcake Mama” bakery located on West Euclid Avenue...

Follow the Red Velvet Guest blog post

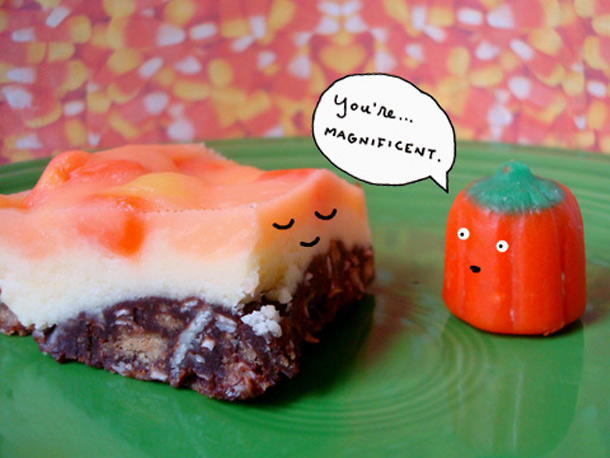
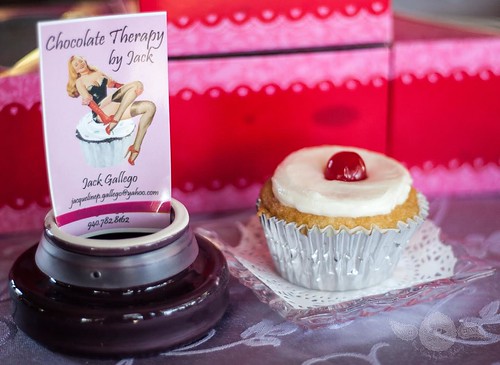
as well as the Tres Leches cupcake made by “Chocolate Therapy by Jack” which is an online based bakery.


Follow the Red Velvet Guest blog post

Overall the experience was great. I got more than my fill of cupcakes and got a taste for the cupcake bakery scene here in Tampa. I look forward to re-visiting the places I enjoyed or missed. There were only a couple that weren’t to my taste, but where there are cupcakes there will be customers!

Follow the Red Velvet Guest blog post

Now I anxiously await the 2015 Ybor City cupcake festival.

All photos credits go to Siva Beharry

Read more of Aditi's adventures at The Red Velvet Road, as well as on her tasty instagram feed!

What Happens When You Melt 15 Candy Bars in a Pie Crust

Have you ever wondered what happens when you fill a pie crust with 15 candy bars* and then bake it?

* = if we're talking about Fun-Size candy bars, which I personally so often am around this time of year, you want to make that 30-36 or so. 

Well, if you have ever found yourself plagued by this candy bar quandary, you're not alone. I too have been baffled-- but lucky for you, I recently rolled up my sleeves and proactively worked to find out. 

Not only was I seeking a piece of tasty pie--but peace of mind.

First, I made up a pie crust. I used the recipe and method I mastered via King Arthur Flour. 

Next, this is where I must make a confession. I didn't specifically have the number fifteen in mind with my candy bars. Basically, I just kept unwrapping the bars I had received in the mail from Legit Organics, cutting in half, and adding candy bars til the pie crust was full.

It was full at around 12 candy bars. But it occurred to me (I'm always thinking, see) that once the candy began to melt, it would reduce in volume. So to be safe, I added three more candy bars. I'm not going to keep you in suspense: it was the right decision.

I put the whole thing in a preheated 350 degree oven. At 30 minutes it looked mostly done, but at 35 it was perfectly toasty. 

When I took it out of the oven, it looked like this. What the picture doesn't convey is that it was making a snappy bubbling sound that lasted a good minute. It was beautiful. 

I can pretty much say this is the best use ever of 15 candy bars (more Fun-Size). The pie is one of those desserts that makes you say "oh, it's too much!" but then somehow you're reaching for your second slice. Don't say you don't know what I mean.

(note: This pic had a bit of ice cream on top but I wiped it off to get a clear shot of the pie (hence the small white mark on the front).

Here's how you do it.

15-Candy Bar-Pileup Pie 

  • 1 unbaked pie crust
  • 15 regular sized candy bars, cut in half, or 30-36 Fun-Size candy bars, in harmonious flavors

 Procedure

  1. Preheat the oven to 350 degrees F.
  2. Place your candy bars in the crust. Pile them high enough so that they slightly form a  crown over the edges.
  3. Just for safety, put the pie plate on top of a baking sheet. Place the whole thing in the oven.
  4. Bake for 30-35 minutes, or until the bars are melted and bubbly and the crust is browned to your liking.
  5. Remove from the oven and let cool to room temperature before serving. This can take up to an hour. 

Enjoy!

Do Good While Eating Chocolates: Seattle Chocolates for the Holidays

When I first moved to Seattle, I had a "real job" at an upscale furniture store. Truthfully, it wasn't very well suited to me, and it didn't last very long. But one of the real benefits of having the job (you know, aside from the money) was the fact that I was next to a store that sold bars by Seattle Chocolates

More often than was decent, I would purchase and eat an entire "Pike Place" bar--a deep, dark chocolate bar amped up with the addition of toasty ground espresso. It was so good that it made me float for as long as I ate it, and since I would slowly suck each piece, it would really last a good long while. 

That is a very happy memory for me, so I was really-really-really excited when Seattle Chocolates reached out to me to tell me about their new program for the holidays. Basically the idea is this (from an email from their marketing department):

Through our #ChocolateGives program, we are raising money to fight hunger through a network of local food banks. One of our partners is Northwest Harvest! We would like to send you a special gift of our Seattle-based, American made chocolate and information about the program. We know your readers will enjoy, because we are happy and colorful just like you.

So, they sent me a package and darn-straight, it was jam-packed with happiness and color.

So what does my awesome box of chocolate have to do with you?

Here's how you can get involved in goodness through eating chocolate.

Fact 1: I think that Seattle Chocolates are just great. I think you should buy them.

Fact 2: If you do buy them between November 1 through the end of the ear, for every item purchased on the Seattle Chocolates website and every post of #chocolategives on social media, Seattle Chocolates will donate a serving of fresh food to someone in need. The donations will be made through a network of food banks in New York City, Boston, SF-Marin, and Seattle. 

And that--along with the chocolate you're eating--is something to feel really good about.

So go ahead, get your chocolate on! Shop at Seattle Chocolates.

Pillsbury Bake-Off Countdown: Strawberry-Mascarpone-Hazelnut Chocolate Tart

Hazelnut strawberry tart - bake-off

What I love about this tart is...well, more than one thing. I love how it marries health food (strawberries) with dessert food (everything else in the recipe). I love how it looks super fancy but comes together rather quickly. And, I love that it has a cookie dough crust. YUM. Thanks to Pamela Shank of Parkersburg, West Virginia for coming up with this clever and pretty Bake-Off entry!

Strawberry-Mascarpone-Hazelnut Chocolate Tart

  • Prep Time: 30 Min
  • Total Time: 1 Hr 55 Min
  • Makes: 8 servings

Ingredients

  • 1 roll Pillsbury refrigerated chocolate chip cookie dough
  • 2 (8 oz) containers mascarpone cheese
  • 1/2 teaspoon vanilla extract
  • 1cup powdered sugar
  • 1/2 cup chocolate hazelnut spread
  • 3 cups halved large strawberries (about 2 pints)
  • 1/4 cup white chocolate candy melts or coating wafers (1 1/2 oz) or 1/4 cup white vanilla baking chips

Procedure

  1. Heat oven to 350° F. Press cookie dough evenly in bottom and 1 1/2-inches up side of ungreased 9-inch tart pan with removable bottom. Bake 15 to 25 minutes or until golden brown and edges are set. Cool completely in pan on cooling rack, about 1 hour.
  2. Meanwhile, in a large bowl, beat mascarpone cheese, vanilla and powdered sugar with electric mixer on medium speed, 2 minutes or until well blended; set aside.
  3. Reserve 2 teaspoons of the hazelnut spread. Spread remaining hazelnut spread evenly in bottom of cooled cookie crust. Spoon and carefully spread mascarpone mixture over hazelnut spread to within 1/4 inch from edge. Arrange strawberries over mascarpone.
  4. In small microwavable bowl, microwave reserved hazelnut spread uncovered on High 20 to 30 seconds or until drizzling consistency. Drizzle over strawberries. In another small microwavable bowl, microwave candy melts uncovered on High 30 to 60 seconds, stirring once or until drizzling consistency. Place melted candy melts in small resealable food-storage plastic bag. Cut off small corner of bag. Squeeze bag to drizzle melted candy melts over strawberries. Store in refrigerator.

Note: the Pillsbury Bake-Off is coming in November! Check out my coverage of the 45th and 46th Bake-Off, and follow the recipes posted so far by clicking the bakeoff tag below.

Pillsbury Bake-Off Countdown: Hummingbird Macaroons

Hummingbird Macaroons

You probably didn't need to be told that Hummingbird cake is simply the bomb. That might be a cheesy thing to say, but it's such a beautiful cake it moves me to corniness.

But did you know that hummingbird macaroons are also exceedingly amazing? If you didn't, it's time to give this recipe from Melanie Eichman of San Antonio, Texas a try. It yields soft cookies that are bound to make you hum with joy.

Hummingbird Macaroons

  • Prep Time: 20 Min
  • Total Time: 1 Hr 15 Min
  • Makes: 30 cookies

Ingredients

  • 1 roll Pillsbury refrigerated sugar cookie dough
  • 1/4 cup mashed very ripe banana (1 small)
  • 2 cups flaked coconut
  • 1/2 cup finely chopped dried pineapple
  • 1/2 cup chopped pecans
  • 1/2 teaspoon Watkins™ Ground Saigon Cinnamon
  • 1/2 teaspoon Watkins™ Original Double Strength Vanilla Extract

Procedure

  1. Heat oven to 350°F. Let cookie dough stand at room temperature 10 minutes to soften. Line cookie sheets with Reynolds® Parchment Paper.
  2. In large bowl, break up cookie dough. Add remaining ingredients; beat with electric mixer on medium-low speed 1 to 2 minutes or until well blended. Drop dough by rounded tablespoonfuls 2 inches apart on cookie sheets.
  3. Bake 11 to 16 minutes or until edges are golden brown. Cool 3 minutes; remove from cookie sheets to cooling racks. Cool completely, about 15 minutes. Store covered.

Note: the Pillsbury Bake-Off is coming in November! Check out my coverage of the 45th and 46th Bake-Off, and follow the recipes posted so far by clicking the bakeoff tag below.

Baker's Dozen: A Batch of Halloween Links!

Corn Summit

Happy Halloween!

A cultural history of candy. (Smithsonian Magazine)

What does Mellowcreme pumpkin think of Candy Corn? Find out here. (CakeSpy)

A brief history of candy corn. (CakeSpy)

The history of the jack o' lantern. (History.com)

Meringue skulls! (CakeSpy for Serious Eats)

America is addicted to PSL. Hilarious audio file! (Bob & Tom)

Pairing wine with Halloween candy. (Neatorama)

Happy Challah-ween! A Jewish tradition meets Halloween candy. (Tablet Magazine)

Fun infographic of pumpkin facts. (Sparefoot blog)

Cute pug Halloween costumes. You're welcome. (BuzzFeed)

Use up your leftover halloween candy like this. (CakeSpy for Serious Eats)

Pan de Muerto is a classic day after Halloween treat, for Day of the Dead. Why not try Frida Kahlo's recipe? (CakeSpy for Serious Eats)

What's the best Halloween candy? (ET Online)

What kind of Halloween candy do you give out and what does it say about you? (Post Grad Problems)

Book of the week: Sweet Treats for the Holidays: Edible Creations for Halloween, Thanksgiving, Christmas, and More. I will be talking a lot more about this adorable book, but for right now: BUY IT.

Pillsbury Bake-Off Countdown: Creamy Cashew Turtle Pie

Creamy Cashew Turtle Pie

Things that I love definitely include pie crust, chocolate, cashew butter, cashews, salt, cream cheese, and caramel. Guess what? This pie has them ALL. Thank you to Tina Repak-Mirilovich of Johnstown, Pennsylvania for coming up with such a gem of a recipe. Good luck at the Bake-Off!

Creamy Cashew Turtle Pie

  • Prep Time: 25 Min
  • Total Time: 1 Hr 50 Min
  • Makes: 8 servings

Ingredients

  • 1 Pillsbury Refrigerated Pie Crust, softened as directed on box
  • 3/4 cup milk chocolate chips
  • 1 1/3 cups cashew butter
  • 1 cup chopped salted cashews
  • 1 package (8 oz) cream cheese, softened
  • 2/3 cup caramel topping
  • 1 container (8 oz) frozen whipped topping, thawed

Procedure

  1. Heat oven to 450°F. Make pie crust as directed on box for One-Crust Baked Shell, using 9-inch glass pie plate. Cool completely on cooling rack, about 20 minutes.
  2. In small microwavable bowl, microwave 1/2 cup of the chocolate chips uncovered on High 30 to 60 seconds, stirring once, until chips can be stirred smooth. Add 1/3 cup of the cashew butter; mix well. Spread chocolate mixture over bottom of cooled pie crust. Sprinkle 3/4 cup of the cashews over chocolate mixture. In large bowl, beat cream cheese, remaining 1 cup cashew butter and the caramel topping with electric mixer on medium speed 1 to 2 minutes or until blended. Gently stir in whipped topping until well blended. Spoon and spread cream cheese mixture over cashews. Refrigerate 1 hour.
  3. In small microwavable bowl, microwave remaining 1/4 cup chocolate chips uncovered on High 30 to 60 seconds, stirring once, until chips can be stirred smooth. Place chocolate in small resealable food-storage plastic bag. Cut off small corner of bag; squeeze bag to drizzle chocolate over pie. Sprinkle with remaining 1/4 cup cashews. Refrigerate at least 30 minutes before serving. Store loosely covered in refrigerator.

Note: the Pillsbury Bake-Off is coming in November! Check out my coverage of the 45th and 46th Bake-Off, and follow the recipes posted so far by clicking the bakeoff tag below.

Monster Cereal Milk Smackdown

Recently, I received a box containing the holy trinity of sweet Halloween nostalgia: the re-issue of Monster Cereals: Count Chocula, Boo Berry, and Franken Berry. Any self respecting child of the 80's ought to be highly jealous of me, and also very excited about this re-issue, because you're an adult now and you can eat all the sugary cereal you want.

But let me cut right to the chase and tell you that my first thought upon receiving the parcel was this: which cereal yields the best-tasting cereal milk?

Long considered a by-product of the cereal eating experience, the residual cereal-soaked milk has come into vogue in recent years, with much thanks to the tireless work of Christina Tosi of Momofuku. It's become a beverage which can be appreciated as a stand-alone thing, not a sad liquid giving you pause about whether or not you want to pour in more cereal to sop it up.

This is all to say: cereal milk matters. And therefore, by pouring milk in a sample of each cereal and then tasting the results, I am doing an experiment that really matters. And one that my mother never would have let me do in the 80's, so I was delighted to do it as an adult.

Oh, and since the cereals were sent to me gratis, it's a good time to put this: Disclosure: The product, giveaway samples and information have been provided by General Mills. All opinions are my own.

The specifics

What:

A tasting of the milk left after steeping Monster cereals for an hour: Boo Berry, Count Chocula, and Frankenberry. 

How:

 I poured a sample of each cereal into a small bowl, and then filled it with milk, which I then left to steep for an hour before straining.

Because I have a naturally scientific mind, I also did some combinations:

  • Frankenberry and Count Chocula
  • Count Chocula and Frankenberry
  • Frankenberry and Boo Berry

and then, for fun, I made one bowl with equal parts of all three cereals.

The steeping process

I then let the cereals steep in milk for one hour. I figured an hour was a long enough period of time to get as much flavor as possible out of the cereal.

At the end of an hour, I strained out the cereal (I'd like to say I ate it, but it was at this point soggy and gross). 

And then I took a deep breath and set to tasting.

And here are my results.

Taste test: which Monster Cereal milk tastes best?

Stand-alone cereals:

Franken Berry:

This was undoubtedly the prettiest of the bunch, with a light pink hue. The flavor was like a gentle strawberry milk--and when I say strawberry milk, what I mean is the kind that contains no actual strawberry. It was pleasant, but perhaps not memorable.

Boo Berry:

The Boo Berry yielded an only gently blue-hued milk. The flavor was not very pronounced, and quite honestly tasted like Franken Berry milk but with slightly less personality. I was unimpressed by this milk.

Count Chocula: 

The color was a light cocoa hue, and the taste was like a milky chocolate milk, with undertones of Yoo-Hoo. It made for smooth drinking, and I thought it might be super nice when foamed and put on a latte. 

Mixed cereals:


Franken Berry and Count Chocula: 

The pink color and strawberry flavor remained dominant in this mix, even though it contained equal parts of each cereal. It tasted a little more interesting than the strawberry alone, but I found myself hoping for more chocolatey flavor.

Count Chocula and Frankenberry:

This milk had a sort of unpleasant purplish-brown hue, and the taste was just OK. It was not offensive, but it was like light chocolate milk with a soupçon of berry flavor. It was not memorable.

Franken Berry and Boo Berry:

This milk had a lightly purplish hue and tasted like a slightly enhanced version of the strawberry-flavored milk from Franken Berry alone. I liked the enhanced aspect, but I did not enjoy the color. Still, I would have this milk with a slice of cake.

Combo: 

All cereals together: Franken Berry, Boo Berry, and Count Chocula

I will confess, I was extremely surprised by the mix. I had thrown it into the mix mostly to be amusing, but I surprised myself by loving the combo. It had high notes of fruit, an extended strawberry flavor, and a lingering chocolate aftertaste. I surprised even myself by loving this mix. It was different, it was interesting, and I drank the entire little ramekin-full. 

The winners:

In spite of how horrifying it sounds, the mix of all of the cereals together, Franken Berry, Boo Berry, and Count Chocula, yielded the most interesting milk and the one I'd be most excited to drink again. 

Second place goes to the Count Chocula milk, which I think would taste great frothed and added to a latte. 

Third place goes to the Franken Berry and Boo Berry mix, which sounds like a Dr. Seuss creation and had a pleasing berry flavor. 

Happy Halloween! 

Trick or Sweet: 33 Amazing Halloween Recipes

Halloween is all about sweets, right? And costumes, I guess. But I am most concerned about the sweets.

Here is a collection of 33 (cos that's how old I am this year) Halloween recipes that are bound to make it a year of trick or SWEET for sure!

1. Mega fun-size candy bar.

What happens when you melt together a bunch of fun-size candy bars to make a mega mass of chocolatey goodness? Find out here. (CakeSpy)

2. Candy corn pecan pie.

What could make pecan pie even sweeter? How 'bout a nice serving of candy corn? (CakeSpy for Serious Eats)

3. Frankenstein monkey bread.

Monkey bread gets Halloween-ified with this spooky treatment. (Pillsbury)

4. Candy corn cookie cake.

It looks like a pie, but this spy knows the truth: it's a cookie coated with candy corn! (Culinary Concoctions by Peabody)

5. Candy corn cookies.

This clever adaptation of Kaleidoscope cookies is sweet and cute. (CakeSpy for Serious Eats)

6. Homemade mellowcreme pumpkins.

Because the homemade version blows store-bought out of the water! (CakeSpy for Craftsy)

7. Candy corn boston cream pie. 

Even fancy desserts like to play dress-up on Halloween. (CakeSpy)

8. Cake baked in a pumpkin.

Are you still eating cakes baked in pans? Not this month, sucker! Make yours in a pumpkin for Halloween. (CakeSpy for Serious Eats)

9. Microwaved halloween candy.

How do different treats fare when put in the microwave at high power? (CakeSpy)

10. Glow in the dark buttercream.

Illuminate your treats--um, literally. (CakeSpy for Craftsy)

11. Pumpkin bread.

Plain and simple. In case you like more wholesome treats, no tricks. (CakeSpy)

12. Homemade candy corn.

An awesome DIY version of everyone's favorite Halloween tricolor triangles! (Shauna Sever via CakeSpy!)

13. Creamy Candy Bar Sauce.

It's just such a good idea. (the Kitchn)

14. Candy corn Nanimo bars.

Nanaimo bars like to get dressed up for Halloween, too! (CakeSpy for Serious Eats)

15. Zombie graveyard cake.

Make a ghoulish cake for people, not zombies! No brains included in the ingredients. (CakeSpy for Serious Eats)

16. Deep fried halloween candy. 

Take Halloween candy...and deep-fry it. Like, whoa. (CakeSpy for Serious Eats)

17. Homemade halloween oreos.

They have orange filling = instant Halloween! (Smells Like Home)

18. Scaredy-cat brownies.

Oreos become cute cats on this adorable brownie presentation. (Martha Stewart)

19. Candy corn and spider web cake pops.

She's the queen of cute cake pops, and these ones are a good example of just why she's considered royalty. (Bakerella)

20. Creamed candy corn.

Yes, I went there. You'll like it more than you think you will, I promise. (CakeSpy for Serious Eats)

21. Candy corn milk.

If creamed candy corn is too thick, perhaps you will like the easy drinking quality of candy corn infused milk.(CakeSpy)

22. Candy corn cupcakes.

These are just adorable: tricolor delights of cake! (Chocolate Moosey)

23. Glittery pumpkin cupcakes.

Add a little glitz and plenty adorableness to a Halloween party with these dazzling cupcakes. (Real Simple)

24. Candy corn tuxedo cake.

I don't know if I can express how worthy this is of clicking over to see. It's truly stunning. --> (Sprinkle Bakes)

25. Pumpkin Pie Milkshake.

I say it's appropriate through all of the pumpkin holidays: Halloween thru Thanksgiving. (CakeSpy

26. Crescent witch hats.

These crescent witch hats are not only cute, but they're easy. Really! (Pillsbury for CakeSpy)

27. Ghost cupcakes.

These are ghoulish, but the taste is all sweet thanks to an enrobing of white chocolate! (CakeSpy)

28. Brownie spider web cake.

Yummy, easy, cute, Halloween-y, and brownies are included. What more do you need? (Heather's French Press)

29. Peanut butter haystacks.

It's the eyes that make them look like little monsters. Delicious little monsters, that is. (The Girl Who Ate Everything)

30. Candy corn upside down cake.

Like pineapple upside-down cake, but replace "pineapple" with "candy corn". Yes indeed. (CakeSpy for Serious Eats)

31. Halloween fudge.

It's not only super-sweet, but also highly adorable. (Crazy For Crust)

30. Halloween jell-o Jigglers.

These are amazingly easy to make, and they will make everyone happy when you serve them. (CakeSpy for Serious Eats)

31. Candy corn popcorn balls.

Like popcorn balls, but with the added Halloween joy of candy corn. Hooray! (CakeSpy for Serious Eats)

32. Bell pepper jack o'lanterns.

This savory treat is allowed because they LOOK so sweet (figuratively, of course). Promise me you'll check 'em out. (itsyummi.com)

33. Leftover halloween candy pie. 

It's awful and awesome all at once. Just like a horror movie. Gulp. (CakeSpy for Serious Eats)

Pillsbury Bake-Off Countdown: Tropical Honey Butter Breakfast Rolls

Honey butter tropical rolls (Bake-Off)

When it gets cool outside, I begin to crave foods that make me think of warmer climates. So these rolls are just perfect for me: kissed with coconut and pineapple, they make me feel like I'm back in Bali for a moment. Now that's sweet! This recipe is via Rhodora Keegan of Virginia Beach, Virginia.

Tropical Honey Butter Breakfast Rolls

  • Prep Time: 25 Min
  • Total Time: 55 Min
  • Makes: 8 rolls

Ingredients

  • 2 cups coconut (6 oz)
  • 1/2 cup well-drained crushed pineapple, patted dry with paper towel (from 8-oz can)
  • 1/3 cup packed dark brown sugar
  • 1/2 teaspoon Watkins™ Coconut Extract
  • 1 can Pillsbury™ Grands!™ Flaky Layers refrigerated honey butter biscuits (8 biscuits)

Procedure

  1. Heat oven to 350°F. Place 2-inch square of Reynolds® Parchment Paper in bottom of each of 8 jumbo muffin cups or 6-oz custard cups. Spray each cup with Crisco® Original No-Stick Cooking Spray.
  2. In medium bowl, mix coconut, pineapple, brown sugar and coconut extract until well blended. In small bowl, place 3 tablespoons coconut mixture; set aside.
  3. Separate dough into 8 biscuits. Press each biscuit to form 5-inch round. Spoon about 3 tablespoons coconut mixture onto center of each biscuit round. Fold biscuit in half over filling, stretching gently if necessary. Press edges firmly to seal; shape into ball. Place 1 ball in each muffin cup, seam side down. Spoon about 1 teaspoon reserved coconut mixture onto center of each biscuit; press lightly.
  4. Bake 18 to 22 minutes or until deep golden brown. Immediately loosen with tip of knife; gently remove from pan. Cool 5 minutes. Serve warm.

Note: the Pillsbury Bake-Off is coming in November! Check out my coverage of the 45th and 46th Bake-Off, and follow the recipes posted so far by clicking the bakeoff tag below.


Pillsbury Bake-Off Countdown: Strawberry-Cinnamon Roll Belgian Waffles

Cinnamon roll waffles

Breakfast is served. And is it ever beautiful: these "waffles" are made using cinnamon rolls! How's that for a decadent delight? Dressed up with strawberries and whipped cream, they're the perfect cold-weather breakfast to carb-o-load for a race you're never gonna run. This one comes from Kelly Humphreys of Vancouver, Washington. Good luck at the Bake-Off!

Strawberry-Cinnamon Roll Belgian Waffles

  • Prep Time: 30 Min
  • Total Time: 30 Min  
  • Makes: 5 waffles

Ingredients

  • 3/4 cup plus 2 tablespoons sugar
  • 2 tablespoons cornstarch
  • 3 cups fresh or frozen (thawed and drained) strawberries, coarsely chopped
  • 1 cup heavy whipping cream
  • 1/2 teaspoon orange extract
  • 1 can Pillsbury Grands! Flaky Supreme refrigerated cinnamon rolls with icing (5 rolls)
  • 3 tablespoons butter, melted

Procedure

  1. Place large bowl and beaters in freezer or refrigerator to chill.
  2. In 2-quart saucepan, mix 3/4 cup of the sugar and the cornstarch. Stir in strawberries and 1/4 cup water. Cook over medium heat, stirring constantly, until mixture thickens and boils (mixture will become translucent during cooking). Boil and stir 2 minutes. Pour strawberry sauce into heatproof bowl; set aside.
  3. Heat Belgian waffle maker. (Waffle maker without a nonstick coating may need to be sprayed with Crisco® Original No-Stick Cooking Spray before cinnamon roll is added.)
  4. Meanwhile, in chilled bowl, beat whipping cream, remaining 2 tablespoons sugar and 1/4 teaspoon of the orange extract with electric mixer on low speed until mixture begins to thicken. Gradually increase speed to high and beat just until stiff peaks form. Do not overbeat, or mixture will curdle. Refrigerate.
  5. Separate dough into 5 rolls; reserve icing. Place 1 roll in center of each waffle section. Close lid of waffle maker. Bake 2 to 3 minutes or until deep golden brown. Repeat with remaining rolls.
  6. Meanwhile, in small microwavable bowl, microwave reserved icing uncovered on High 10 seconds; stir in melted butter, remaining 1/4 teaspoon orange extract and 1/8 teaspoon salt.
  7. To serve, place each waffle on serving plate; drizzle with icing. Top with strawberry sauce and whipped cream.

Note: the Pillsbury Bake-Off is coming in November! Check out my coverage of the 45th and 46th Bake-Off, and follow the recipes posted so far by clicking the bakeoff tag below.

Rainbow Japanese (Onigiri) Rice Ball and Unicorn Cookie Bento Boxes

CakeSpy Note: You guys. I am so, so excited to feature a rainbow-rich guest post from Kim of Ninja Baking! I'll let her take it from here. Enjoy!

Rainbow Japanese (Onigiri) Rice Ball and Unicorn Cookie Bento Boxes

by Kim Watkinson, The Ninja Baker, NinjaBaking.com
 
Do you ever get dizzy whirling around on a planet where the bad news du jour is served 24/7? Isn’t it comforting that a tap or two of computer keys transports you to a realm where rainbows, unicorns, hearts roam freely? Plus a place where recipes for goodies we all secretly crave reign supreme!  Of course, I’m talking about the virtual home of the CakeSpy aka author/artist Jessie Oleson Moore.  
 
Perhaps I find particular comfort in the CakeSpy site because of my history. Although I’m an American of European descent, Japanese food and language were all I knew until age 5. Tokyo was my hometown until I entered UCLA’s Theatre Arts program at 18. The Japan I grew up in was akin to what I imagine the ‘50s were in the US. Innocence prevailed. (Yes, ignorance about important issues were also prevalent.) There was a sweetness and a modesty in 1970s Japan. It’s still there but diluted. The younger generation is bolder. For better or for worse, the influence of pop culture from abroad is evident in Japan.
 
A few Japanese characteristics and traditions, however, remain steadfast. Young girls still clamor over all things “kawaii” cute and pretty. Blinged out cell phones are adorned with Hello Kitty and other cuddly characters. Adults continue to tastefully display exquisite works of art and flower arrangements in their homes. Bento lunch boxes have also never gone out of style.
 
So as a thank you to the CakeSpy for her insistence on focusing on the whimsical and wonderful, I’ve created Rainbow Japanese (Onigiri) Rice Ball and Unicorn Cookie Bento Boxes.
 
Ninja Note: Before any sort of cooking or baking, mise en place, set up of needed ingredients and tools makes for a peaceful kitchen. 


For the Rainbow Japanese Onigiri Rice Ball Bento, here’s what you’ll need:
 
*Freshly cooked rice

*A small bowl of water for sticky fingers from shaping rice into triangles

Ninja Note: Japanese pickles will probably appeal to sushi lovers familiar with pink ginger shoga. The most kid-friendly of all the listed pickles is the slightly sweeter red beni shoga.

*A rainbow assortment of Japanese pickles:
Pink Sushi Ginger Shoga
Green ao-jiso no mi  (radishes, soy sauce, salt, sugar, vinegar)
Purple pickled perilla, ginger and egg plant
Red pickled ginger
Yellow daikon radish slices
Red pickled plums
 
Shape the rice into triangles and garnish with the desired Japanese pickles. Pack them into your bento lunch box. Include bell pepper slices or other veggies.


For the Unicorn Cookie Bento Box, here’s what you’ll need:

*Jessie Oleson Moore’s The Secret Lives of Baked Goods: Sweet Stories & Recipes for America's Favorite Desserts
*OR a pair of good eyes to see the modified Scout Butter Cookies recipe from the cookbook. (Courtesy of the CakeSpy.)

*M & Ms
*Rainbow mochi (Japanese pounded rice) candies or anything else delicious and multi-colored
*Unicorn Cookies: 
Adapted from Scout Butter Cookies in The Secret Lives of Baked Goods
 
Ninja Note: The sanding sugar crusted cookie gives way to a softer cookie inside a scrumptious unicorn-shaped delight!
 

*Unicorn Cookie Ingredients:

  • 2 cups all-purpose flour (plus extra for rolling out cookie dough)
  • ½ cup coconut flour
  • 2 pinches of salt
  • 1 cup unsalted butter, softened
  • 1 cup sugar
  • 2 large eggs
  • 2 tablespoons milk
  • ½ teaspoon vanilla extract
  • Pink and blue sanding sugar
  • Horse cookie cutter
  • A rolling pin
  • A large cutting board
  • Wax paper 
  • Japanese Pocky biscuits for unicorn horns
  • Vanilla frosting (to act as glue)


*Unicorn Cookie Directions:

  1. Cream the softened butter and sugar in the bowl of a kitchen stand mixer for 6 minutes or until light, fluffy and pale in color.
  2. Add the eggs one at a time. Scrape the bowl after each addition.
  3. Pour in the milk and vanilla extract. Incorporate into the mix.
  4. Sift together the flours, baking powder and salt. 
  5. Gradually stir in the flours, baking powder and salt.
  6. Divide the dough into two medallion balls.
  7. Cover the dough balls with plastic wrap.
  8. Refrigerate for 2 hours or overnight.
  9. Take the dough out of the refrigerator 15 minutes before you are ready to roll out the dough into unicorns.
  10. On a hard surface such as a large cutting board, roll out the dough between 2 pieces of floured wax paper to a ¼ inch to ½ inch thickness.
  11. Cut out (horse) unicorn cookies. Sprinkle with sanding sugar.
  12. Place the cookies on a parchment lined cookie sheet.
  13. Freeze for 2 hours or overnight.
  14. Bake in a 375 degrees oven for 10 minutes or until the edges are golden brown.
  15. Once cooled, attach Pocky tips onto the horses with vanilla frosting for unicorn horns.
  16. Place the unicorn cookies into the bento boxes with the M & Ms and rainbow mochi.

*For more info about Kim Watkinson, The Ninja Baker 


Pillsbury Bake-Off Countdown: Chocolate Hazelnut-Toffee Bread Pudding with Candied Bacon

Candied hazelnut bacon dessert - Pillsbury bake-off

The big question today is: does Chocolate Hazelnut-Toffee Bread Pudding with Candied Bacon exist, or was that just a dream?

The answer is yes...or no, it wasn't just a dream. This decadent dessert was dreamed up by Lynne Laino of Downingtown, Pennsylvania and is perfect for brunch because of the bacon, or all day long because it's delicious.

Chocolate Hazelnut-Toffee Bread Pudding with Candied Bacon

  • Prep Time: 30 Min
  • Total Time: 2 Hr 20 Min
  • Makes: 12 servings

Ingredients

  • 8 slices bacon
  • 1 cup toffee bits (8 oz)
  • 2 cans Pillsbury™ refrigerated cinnamon rolls with cream cheese icing (8 ct)
  • 3 cups heavy whipping cream
  • 1 cup packed brown sugar
  • 1 jar (13 oz) Jif® Chocolate Flavored Hazelnut Spread
  • 6 eggs

Procedure

  1. Heat oven to 375°F. Line 15x10-inch pan with sides with Reynolds Wrap® Aluminum Foil. Place wire rack on foil; spray with Crisco® Original No-Stick Cooking Spray. Arrange bacon in single layer on rack; sprinkle 1 tablespoon toffee bits over each slice.
  2. Bake 20 to 25 minutes or until bacon is cooked through and toffee bits are slightly melted. Cool on rack 10 minutes; remove to paper towel-lined plate. Cool completely, about 10 minutes.
  3. Meanwhile, bake cinnamon rolls as directed on can; reserve icing. Cool 5 minutes.
  4. Meanwhile, in 2-quart saucepan, heat 2 cups of the whipping cream, the brown sugar and hazelnut spread over medium heat 3 to 5 minutes, stirring constantly, until sugar is dissolved and spread is melted. Remove from heat; cool 10 minutes.
  5. In large bowl, mix eggs and 1/2 teaspoon salt with whisk. Slowly add cooled cream mixture, beating with whisk until smooth and well blended.
  6. Place 1/4 cup of the toffee bits in small bowl; set aside. Cut each roll into 16 pieces. Add pieces to egg mixture; gently toss to coat, lightly pressing pieces down to absorb some of the liquid. Stir remaining toffee bits into egg mixture until blended.
  7. Spray 13x9-inch (3-quart) glass baking dish with cooking spray. Spread bread mixture evenly into baking dish, pressing down slightly. Bake 35 to 45 minutes or until knife inserted in center comes out clean. Cool 20 minutes.
  8. Meanwhile, chop bacon into small pieces; sprinkle evenly over bread pudding.
  9. In large bowl, beat remaining 1 cup whipping cream with electric mixer on high speed 2 to 3 minutes or until soft peaks form. Add reserved icing; beat just until blended.
  10. Serve whipped topping with warm bread pudding; sprinkle with reserved toffee bits. Store covered in refrigerator.

Note: the Pillsbury Bake-Off is coming in November! Check out my coverage of the 45th and 46th Bake-Off, and follow the recipes posted so far by clicking the bakeoff tag below.

Be Healthy: Pumpkin Pie Juice Recipe

It's a funny thing about juicing.

I can always tell when someone has gotten into it, because (if you'll excuse me) they won't shut up about it. They start to resemble frankenstein robots to me: "My green juice makes me feel aliiiiive!" 

Oh, you know who you are.

But when Williams-Sonoma contacted me and was all "hey, want to make a juice recipe?" I was all, "OK. Can I use dairy?". What I should have asked is if they would pay me. Turns out they're not, but all they asked is that I mention their  juicer and blender  resources. So there you go!

But they did answer regarding the dairy, in the affirmative. So I decided straightaway that this dairy would be thick, creamy, whole milk, and that it would go into creating what I call Pumpkin Pie Juice.

It has all the flavorings that make pumpkin pie great, but because it is juice, it can be classified as healthy. I'll happily sip this while you enjoy that green juice, you zombie!

Note: if you wanna be really naughty, add a couple scoops of ice cream. YEAH!

Pumpkin Pie Juice

2 servings. Ingredients:

  • 2 cups of pumpkin, chopped up into 1-inch chunks 
  • 1 1/2 cups of apple juice (or use milk if you like it really milky!)
  • 1 teaspoon of honey (more or less to your liking)
  • 1 teaspoon pumpkin pie spice
  • 1/4 cup milk
  • more pumpkin pie spice, to garnish (if desired)

Procedure:

  1. Put the pumpkin, apple juice, honey, and pumpkin pie spice in a powerful blender. Set on the juice or blend setting, and blend until it has formed a thick liquid slurry.
  2. You're going to have to froth the milk now. If you, like me, own a milk frother (I AM SO FANCY!), go ahead and put it in your frother and froth until it's nice and firm and frothy. No frother? I included some tips for microwave frothing in this post!
  3. Divide the juice into two cups. Top each with a nice "head" of milk foam. Garnish with more spice, if you wanna.

Enjoy being healthy!

Homemade Grapefruit Soda

Grapefruit Slice

Grapefruit via Flickr member danzen

I am a seltzer FIEND. This is a fact.

So when Cascade Ice offered to send me some samples of their new flavored sparkling water line, I was happy to try them out. 

Very-very-very happily, one of the new flavors is grapefruit--I think this tart flavor is beautifully suited to sparkling water.

Of course, it's even better when you sweeten it up a bit. Here's a recipe for an easy homemade grapefruit syrup which you can mix into your seltzer as desired for a sweet "better than soda" treat! 

Homemade Grapefruit Soda

  • 4 ruby grapefuits, juiced 
  • Zest from said grapefruits
  • 2/3 cup honey
  • seltzer
Instructions
  1. In a small saucepan, combine the grapefruit juice, zest, and honey. Stir to combine. Bring the mixture to a boil over medium-high heat. Reduce the heat and simmer for 10 minutes or until the liquid has reduced by a third, stirring frequently. 
  2. Allow the mixture to cool slightly. It will become quite viscous. Strain the syrup through a cheesecloth or fine strainer to remove any large zest or pulp debris. Let cool completely, and put in a jar or airtight container to keep in the fridge. 
  3. To enjoy your soda, combine 1 part syrup with about 3 parts sparkling grapefruit water. You can increase the syrup ratio if you like it sweet. Either stir, or shake (in a covered container!) to combine. 

What's your favorite sweet beverage?

Pillsbury Bake-Off Countdown: Chocolate Hazelnut Truffle Tarts

Hazelnut truffle cups

Don't these little treats look darling? They taste just as good, since they're made with the following: chocolate chip cookie dough, chocolate hazelnut spread, sweetened condensed milk, and hazelnuts. The cherry on top is what kills me, though! Recipe via Doris Rizza of Scottdale, Pennsylvania.

Chocolate Hazelnut Truffle Tarts

  • Prep Time: 30 Min
  • Total Time: 1 Hr 30 Min
  • Makes: 24 tarts

Ingredients

  • 1 roll Pillsbury™ refrigerated chocolate chip cookie dough
  • 3/4 cup Jif® Chocolate Flavored Hazelnut Spread
  • 1/2 cup Eagle Brand® Sweetened Condensed Milk (from 14-oz can)
  • 1/4 cup chopped hazelnuts (filberts)
  • 12 maraschino cherries, halved, well drained

Procedure

  1. Heat oven to 350°F. Spray 24 mini muffin cups with Crisco® Butter Flavor or Original No-Stick Cooking Spray.
  2. Shape dough into 24 (1 1/4-inch) balls. Place 1 ball in each muffin cup. Bake 8 to 16 minutes or until light golden brown. Do not over bake.
  3. Meanwhile, in medium bowl, mix hazelnut spread, condensed milk and hazelnuts until well blended. Shape into 24 (1-inch) balls.
  4. Remove cookie cups from oven; cool 1 minute. Place 1 hazelnut ball in each cookie cup; press lightly. Top each with 1 maraschino cherry half. Cool completely in pan 30 minutes. Loosen with tip of knife; gently remove from pan. Store covered.

Note: the Pillsbury Bake-Off is coming in November! Check out my coverage of the 45th and 46th Bake-Off, and follow the recipes posted so far by clicking the bakeoff tag below.

Pillsbury Bake-Off Countdown: Chocolate-Peanut Butter-Filled Pretzels

Chocolate-Peanut Butter-Filled Pretzels

It's pretty safe to say I am obsessed with this recipe.

It includes all of the major food groups: carbs, chocolate, salt, and peanut butter. What's missing? Cream? Nope, they have that too. They have everything, delivered in twisty-turny-yoga-pose-pretzel form.

It's super sweet too that the recipe comes from Elizabeth Bennett of Seattle, Washington--my former hometown!

Chocolate-Peanut Butter-Filled Pretzels

  • Prep Time: 25 Min
  • Total Time: 45 Min
  • Makes: 6 pretzels

Ingredients

  • 3/4cup powdered sugar
  • 1/2 cup creamy peanut butter
  • 3 tablespoons unsweetened baking cocoa
  • 3 tablespoons heavy whipping cream
  • 1/2 teaspoon vanilla extract
  • 1 can Pillsbury refrigerated original breadsticks (12 breadsticks)
  • 1egg yolk

Procedure

  1. Heat oven to 375°F. Line large cookie sheet with parchment paper.
  2. In medium bowl, mix powdered sugar, peanut butter, cocoa, whipping cream and vanilla until well blended. Unroll dough on work surface; separate into 12 breadsticks. Pinch ends of 2 breadsticks together; repeat with remaining dough to make 6 long breadsticks. Press each breadstick to form 12x2-inch strip.
  3. Divide chocolate mixture into 12 equal portions, about 1 rounded tablespoon each. Roll each portion into 6-inch long rope. Place 2 ropes down center of each breadstick strip. Fold dough lengthwise over chocolate ropes; press edges firmly to seal. Stretch each breadstick slightly. Shape rope into U-shape; cross ends, and place over bottom of U to form pretzel shape. Place seam side down on cookie sheet. Repeat with remaining chocolate ropes and breadstick strips.
  4. In small bowl, mix egg yolk and 1 teaspoon water with fork. Lightly brush egg mixture over pretzels; sprinkle each with a pinch of kosher salt.
  5. Bake 13 to 18 minutes or until golden brown. Serve warm.

Note: the Pillsbury Bake-Off is coming in November! Check out my coverage of the 45th and 46th Bake-Off, and follow the recipes posted so far by clicking the bakeoff tag below.