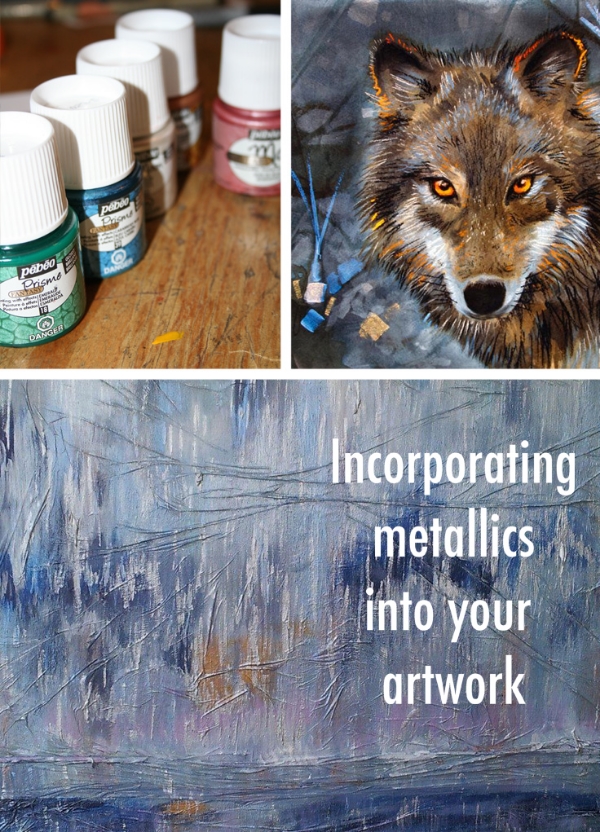
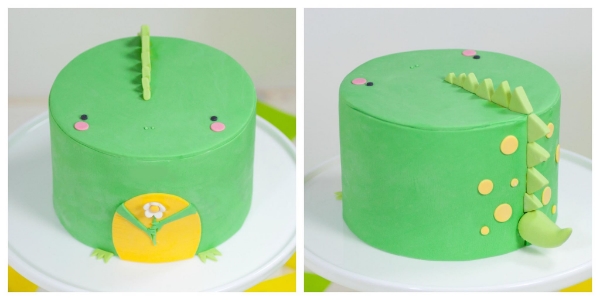
Let's take a break from cake (don't worry, it will be short) to talk about art. More specifically, how to make your art sparkle and shimmer. Literally.
Learn some easy and fun ways to add metallics to your artwork.

Your Custom Text Here
Let's take a break from cake (don't worry, it will be short) to talk about art. More specifically, how to make your art sparkle and shimmer. Literally.
Learn some easy and fun ways to add metallics to your artwork.
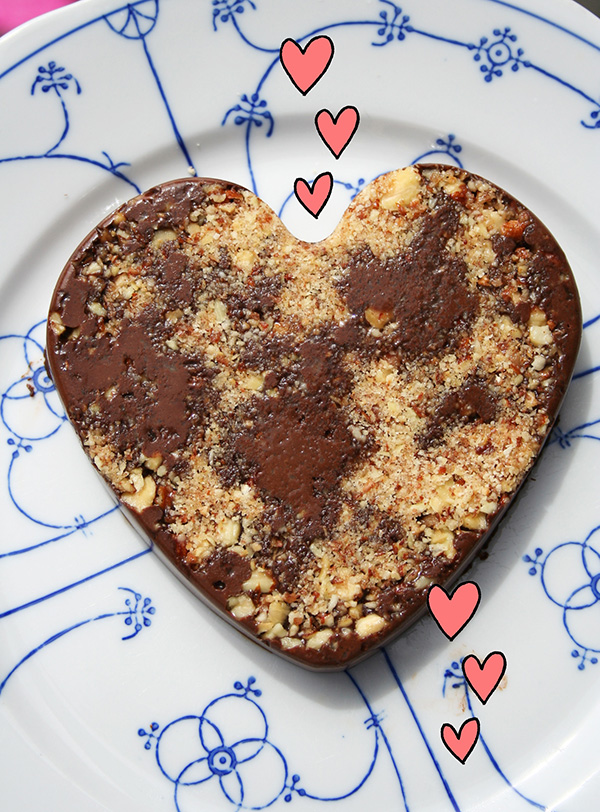
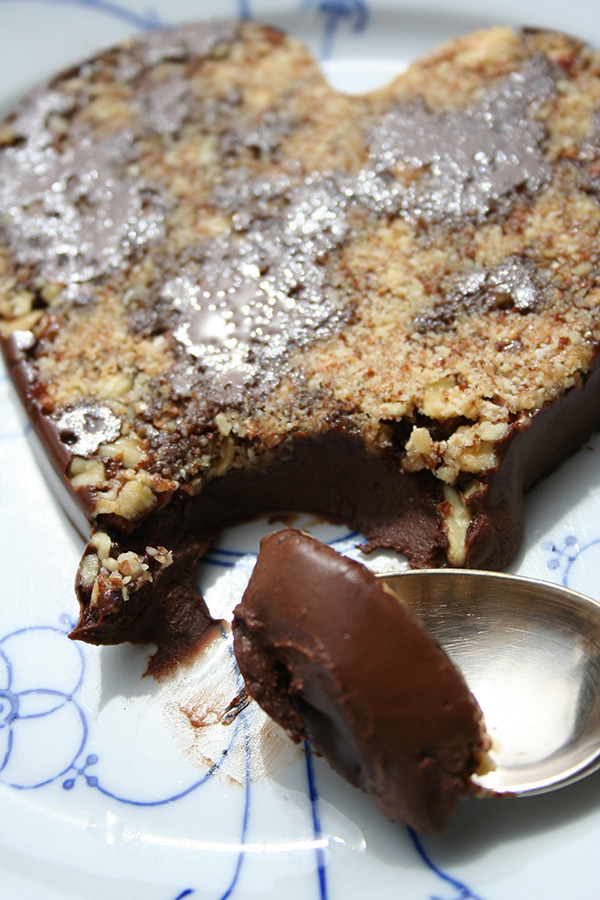
Why would I call such an easy to make dessert Pâté au Chocolat? Not because it's a crazy concoction featuring foie gras. I gave it this name because while it's actually quite easy to make, it tastes (and looks) fancy.
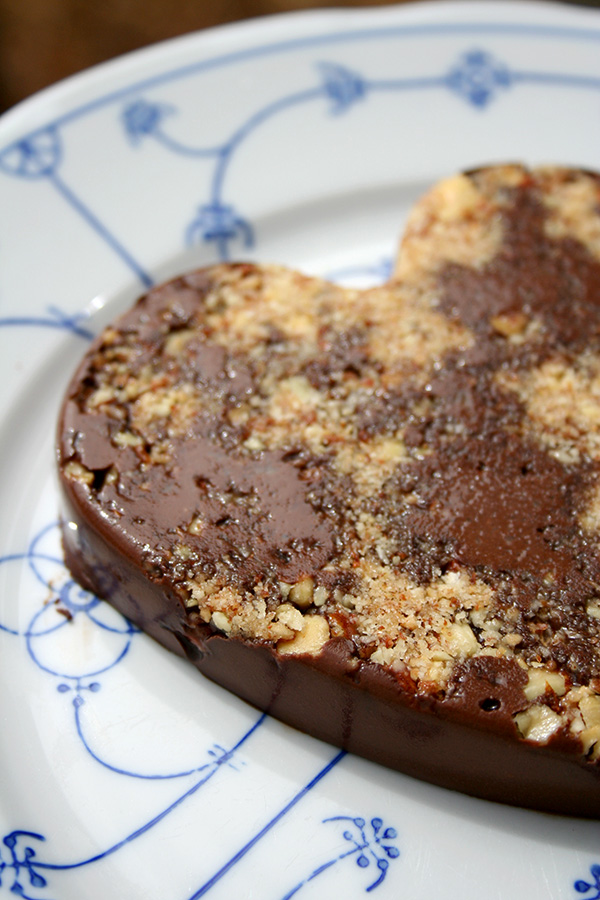
I felt that it deserved a name as fancy as its flavor. Plus, the texture is actually pâté-like: dense, creamy, and incredibly flavorful.
Here's some other stuff I think you should know about this dessert.
Maybe there's a thing called Pâté au Chocolat, but I don't know about it. I didn't google it, so as far as I am concerned, I invented this thing and will put my hands over my hears and say lalalala if you try to say otherwise.

It's a little lighter than pure ganache but heavier than a slice of flourless chocolate cake. Flavor-wise, it melds the best of both, with a little ooh la la from a dollop of sour cream. A little would probably do you, but in my house, it was two servings and they were devoured with no complaints that the serving was too big.
Use the good stuff here. OK?
I know I already said it, but it bears repeating. This dessert is easy to make. And tastes fancy! Make it for your next get together.
Makes two, or four - printable recipe here.
Grab your silicone molds or cupcake liners. Divide the nuts evenly between them.

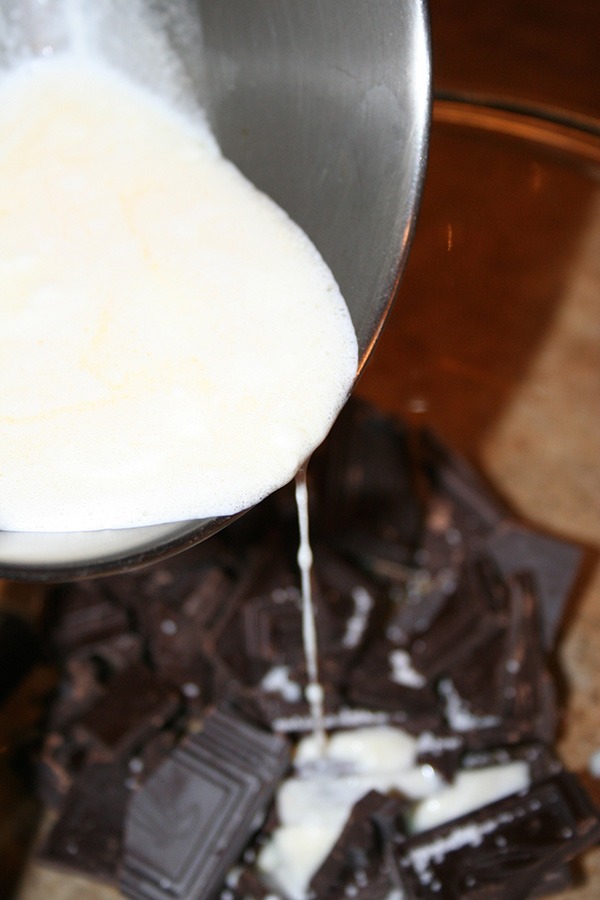
Place the chocolate in a heatproof bowl. Set to the side.
In a medium saucepan, combine the half and half, butter, and sour cream. Heat over low heat until the mixture comes to a simmer.

Remove the cream mixture from heat, and stir in the vanilla and salt. Pour the hot cream mixture over the chocolate. Stir until it becomes a cohesive mixture.
Pour in the cups with the nuts. Transfer to the fridge and let set for an hour or so, or in the freezer for less. This can vary depending on the heat and humidity - for instance, last night it was really hot here so I had to put them in the freezer to set.

Invert from molds, and enjoy.

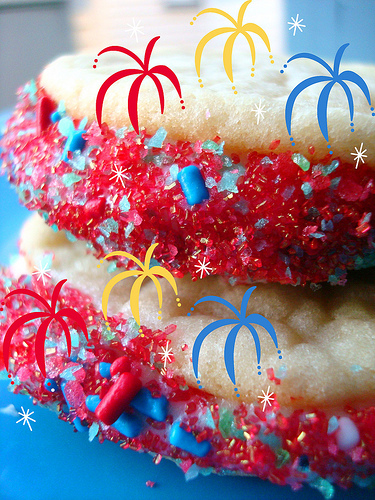
Guess what I did, you guys. Well, if you guessed "made Hawaiian rolls with mountain dew", you're right.

If you aren't familiar with Hawaiian rolls, let me briefly educate you. These are a puffy, egg-enriched, sweetened type of roll. They're squishy, and vaguely brioche-like in texture.
They're most famously sold in grocery stores, in a plastic bag, under the label "King's Hawaiian Sweet Rolls".
These rolls are oddly addictive. They can go sweet or savory, and are equally great for sliders as they are as an ingredient in bread pudding.
When I found a recipe for a homemade hack on King Arthur Flour's website, I got super excited...until I realized that I had no pineapple juice.
The idea of going to the store seriously bummed me out. I had baking mojo now! No interruptions!
So I looked around for something else to use, and my gaze settled on a can of Mountain Dew. It had been living in the fridge for quite some time--my other half sometimes indulges in the stuff along with popcorn while watching movies.
Well, it had been there long enough.

Other than the Dew, I stayed pretty true to the recipe. And here's how they came out:

Awwww, girl. Awwww, yeah. These rolls came out delicious!
Actually, the Mountain Dew mellowed out during the baking process, and gave the rolls a fascinating flavor. I have since made the traditional version of the rolls, with pineapple juice, for a post on Craftsy.com. Visually they were pretty much identical, but between you and me, I actually think that the Dew ones tasted better. They had a lightly sweet flavor, but something in the carbonation or the sugar in the soda condensed into a slightly malty, sweet flavor in the Mountain Dew batch of rolls.
The rolls tasted fantastic with a pat of butter, just out of the oven, but they were similarly delicious when lightly toasted and used to make mini chicken salad sandwiches later that day. They were also great for breakfast the next morning, served alongside eggs and bacon and with some butter and maple syrup. What versatile rolls! Who knew that Dew could do this?
Honestly, I consider these a great success. Who knew? Mountain dew in bread rolls = a very good thing.

Adapted from King Arthur Flour
Makes 16 rolls
For the sponge
For the dough
Not so long ago, I was invited to a potluck which was attended 100% by yogis. Now, in case you've never been to such a potluck, when baking for yoga people, it's often important to make dishes that are vegan, gluten free, and/or raw. I know.
But I wanted them to be eaten, not just become the subject of a conversation about food allergies and what people don't eat, so I went down that virtuous road.
Well, these truffles aren't raw because I'm pretty sure the temperature I used to melt the chocolate exceeded their cap of 118 degrees F. But they are vegan and gluten-free, and they're freaking delicious.

They're SO chocolatey, I don't even know if "chocolatey" does the trick. It's like you're eating the pure essence of chocolate. They're rich, and so smooth with the coconut oil. They taste way more decadent than they actually are!

A simple recipe for a why-is-everything-so-hard monday. Just keep in mind, the coconut oil in these truffles make them pretty sensitive to heat, so keep them in the fridge if it's hot out!
Makes 12 or so - printable version here

Procedure
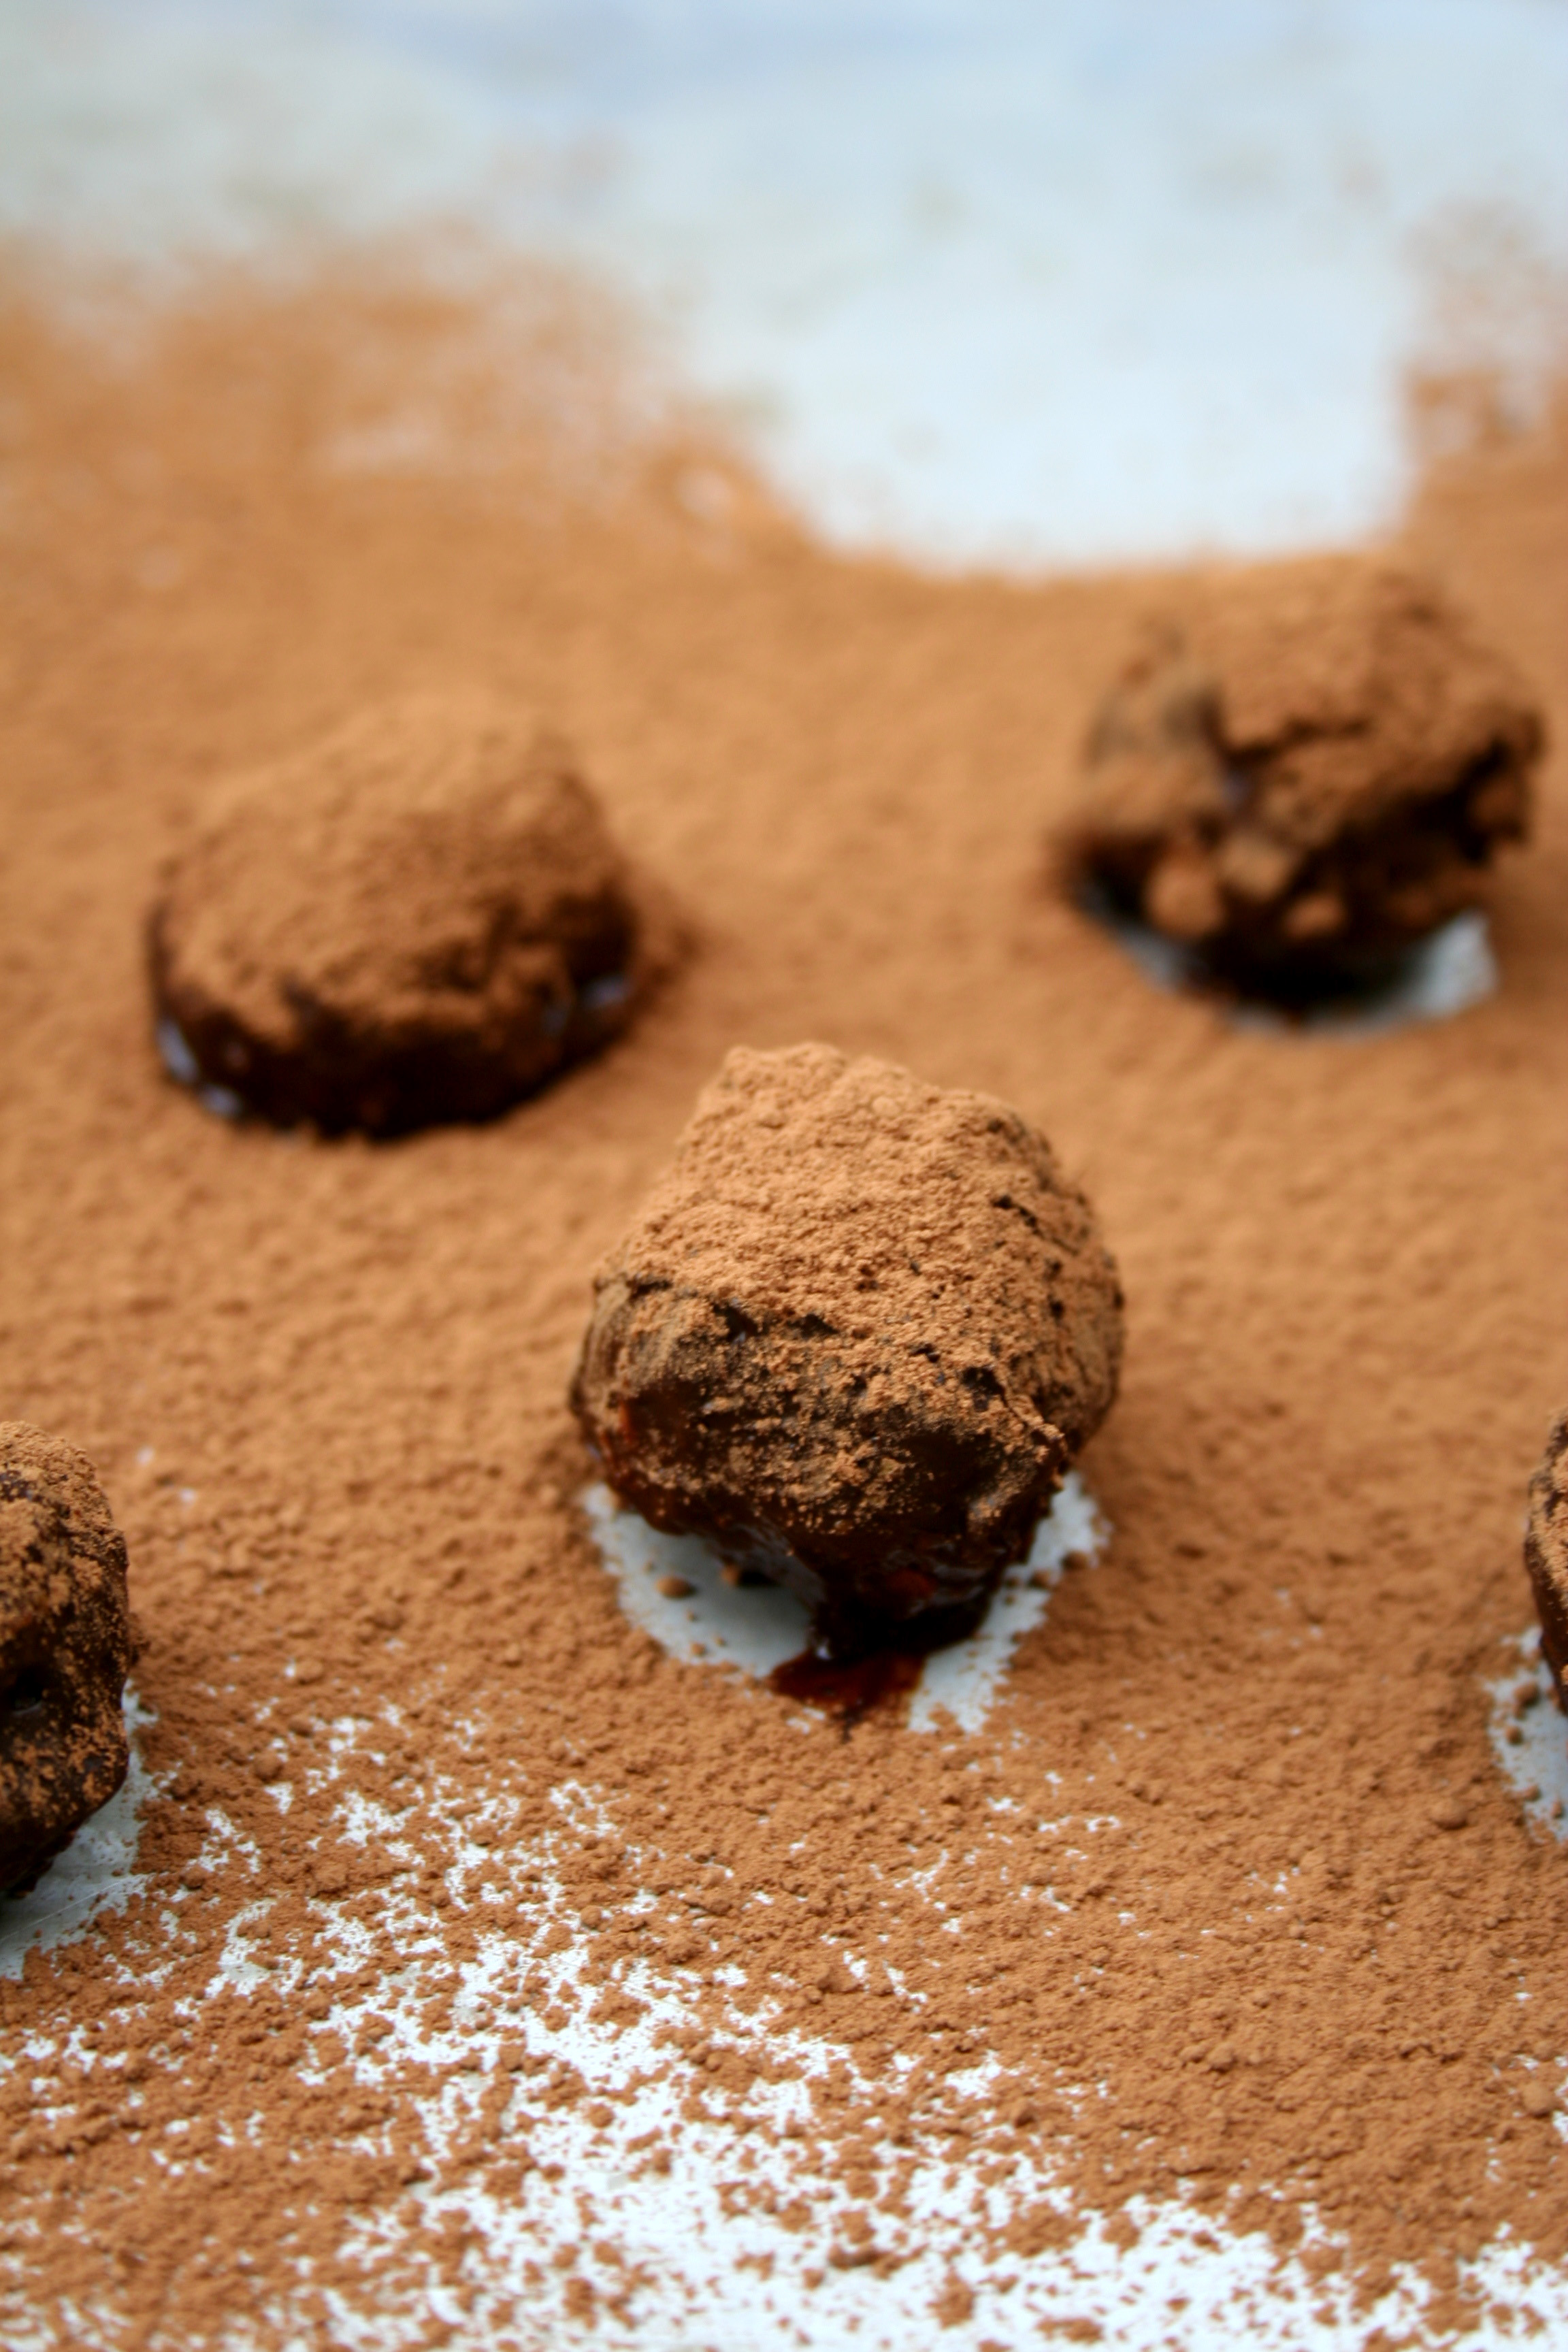
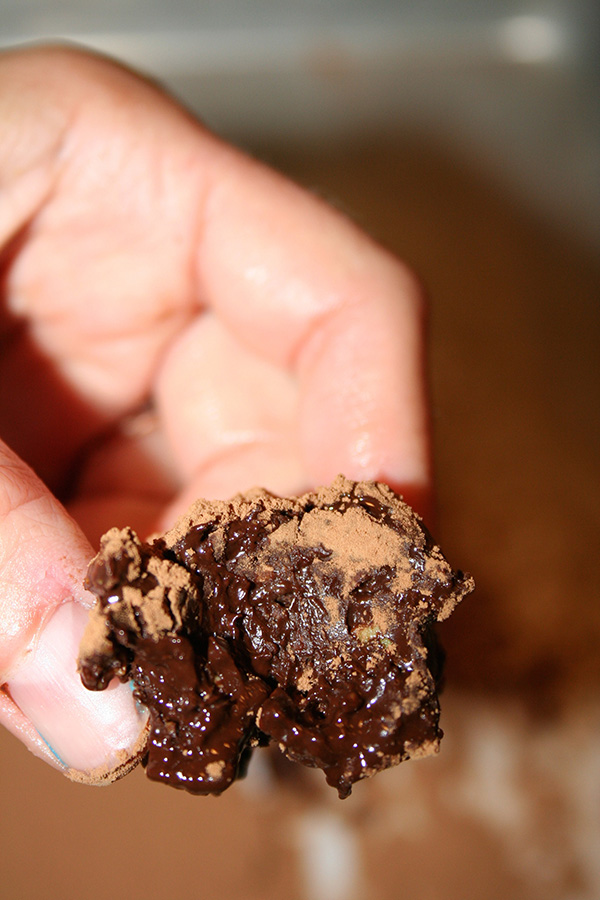
Melt together the chocolate, cocoa powder, and coconut oil in a double boiler. Once melted, remove from heat and stir in the pistachios. Let the mixture cool for 20 minutes or so in the fridge, or until solid enough to roll into balls. Don't let it chill out for too long or it will set.

Roll into balls. Dust with cocoa powder or roll in shredded coconut if desired.
Keep chilled until ready to serve. They can get messy if they get too warm (but still so good). Please, don't mind the remnant of blue nail polish on my thumb, I promise that's all it is, not something weird.
What are you waiting for?

Why decide between cake and breakfast when you can enjoy them both at once? These cake batter pancakes are easy to make, and will leave a sweet impression for sure.
Go ahead, get crafty.

This awesome collection of DIY painted gift ideas is bound to make a fantastic impression, and it will give you a sense of self accomplishment.
My artwork was featured on the James Beard website! Woo! (James Beard Foundation)
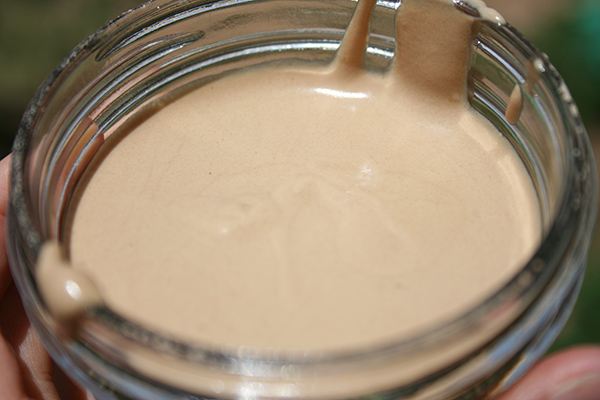
Snickerdoodle almond butter. I think yes. (Heather's French Press)
A brief history of Presidental food controversies. (NY Mag)
Fusion orange cheesecake. INTO IT. (Jaffars Feast)
Related: I'd never heard of mishti doi before. (Cook Like a Bong)
DIY marshmallows. You need to master this! (CakeSpy for Craftsy)
Dark chocolate ganache truffles. Delicious. (The Sweetest Menu)
Incredible and adorable cinnamon roll cookies. (Bake at 350)
Funfetti shortbread. YES! (Fork to Belly)
Oh hi, ever heard of Gil-e-Firdaus? It translates as "clay of paradise", and is in fact dessert. (Jaffar's Feast)
This is so clever: a watermelon "cake". (Buon Appa)
Grilled peanut butter pound cake. Yes yes yes yes yes. (Peanut Butter and Co)
Cookie cakes. You need these in your life. (CakeSpy for Craftsy)
Creative staircase ideas. No, not cake, but these ideas are clever, artistic, and sweet! (Country Living)
My rainbow bombe was featured in this awesome ice cream cake roundup! (My Cupcake Addiction)
AWESOME: CakeSpy is featured as one of the top 20 dessert blogs! (The Red Bow)
Book of the week: The Tassajara Bread Book. Wow, how have I not discovered this book before? First thing: you'll notice that it has this retro look of 70's cookbooks. Well, that's because it's a re-issue. Apparently it's been "a favorite among renowned chefs and novice bakers alike for more than thirty years" (thanks, Amazon). But aesthetic aside, it has wonderful, oddly kind instruction, and is a great intro book to the newbie bread baker. I think you'll love this book. I do. It's not just informative but also charming.
I'll tell you what I want, what I really really want. To share this recipe with the world!
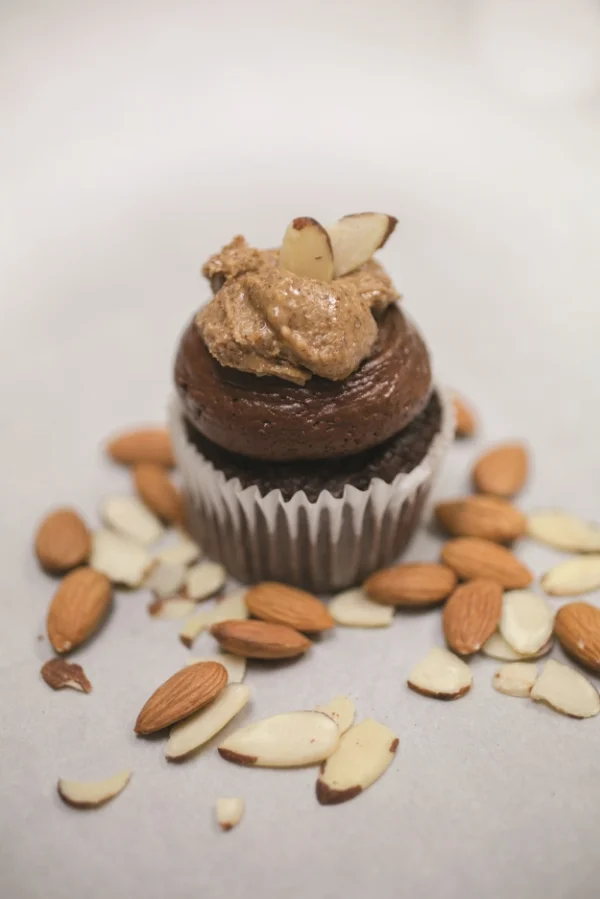
So, there's this cool new book out called Sweet, Savory, and Sometimes Boozy Cupcakes by Alison Riede. And it's full of creative cupcake flavors for a grown-up palate.
This recipe in particular caught my eye, because:
1. Chocolate.
2. Dark chocolate frosting.
3. Almond butter.
Seriously, what else do you need? Here's what the author has to say about this recipe:
I remember the day I got hooked on almond butter. I was training for a half-marathon, and I didn’t have any food in the house for a pre-race snack, so I stopped by a local market and bought a small container of almond butter and a package of English muffins. Not only was it a tasty treat, but I had one of the best runs ever that morning. It wasn’t long after then that I created my almond butter frosting.
What are you waiting for? Get baking. This recipe was reprinted with permission from Sweet, Savory, and Sometimes Boozy Cupcakes.
Sweet, Savory, and Sometimes Boozy Cupcakes
⅓ cup olive oil
¾ cup granulated sugar
½ cup whole milk
½ cup sour cream
1½ teaspoons almond extract
¾ cup all-purpose flour
¼ cup self-rising flour
⅓ cup cocoa powder
1 teaspoon baking soda
½ teaspoon baking powder
½ teaspoon salt
1 cup sliced almonds
Preheat the oven to 350°F. Line a standard cupcake tin with 12 paper liners.
Using a stand or hand mixer, cream together the oil and sugar on medium speed in a large bowl.
Reduce speed to low and add milk, sour cream, and almond extract.
In a separate bowl, combine flours, cocoa powder, baking soda, baking powder, and salt. Slowly add dry ingredients to wet ingredients, and mix on medium speed until smooth, about 2 minutes.
Slowly add sliced almonds and mix on medium speed for 1 minute, or until combined.
Using a large spoon, fill the cupcake liners three-quarters full and bake for 18 to 20 minutes, or until a toothpick inserted in the center comes out clean. Let cool for 20 minutes.
½ cup butter, softened
2½ cups powdered sugar
¼ cup heavy whipping cream
¼ cup cocoa powder
With a hand or stand mixer, beat softened butter on medium speed for 3 minutes.
Slowly add half of the powdered sugar and beat on low for 1 minute.
Add heavy whipping cream and cocoa powder and beat for another minute, until combined.
Slowly add the rest of the powdered sugar and gradually increase the speed to high. Beat for 3 minutes, until fluffy.
¼ cup butter
1 ounce (about 2 tablespoons) cream cheese
1 cup powdered sugar
¼ cup creamy almond butter
¼ cup whole or slivered almonds, for garnish
With a hand or stand mixer, beat softened butter and cream cheese on medium speed for 3 minutes.
Slowly add half of the powdered sugar and beat on low for 1 minute.
Add almond butter and beat for another minute, until combined.
Slowly add the rest of the powdered sugar and gradually increase the speed to high. Beat for 3 minutes, until fluffy.
Gently pipe each cupcake with Dark Chocolate Frosting. On top of that, gently pipe a dollop of Almond Butter Frosting. Garnish with a sprinkle of whole or slivered almonds on each cupcake.
Yay! A new, FREE, coloring book page! For kids and adults!

If you click on the above photo and download the "Large" (1638 x 2048) size, it should come out printer page size!
Let me know if you have problems and I can email you the file. Enjoy!
Can you make jell-o with evaporated milk? Friends, it's possible that you've never wondered about this question. But I did for you, and I can also supply an answer. This happens:
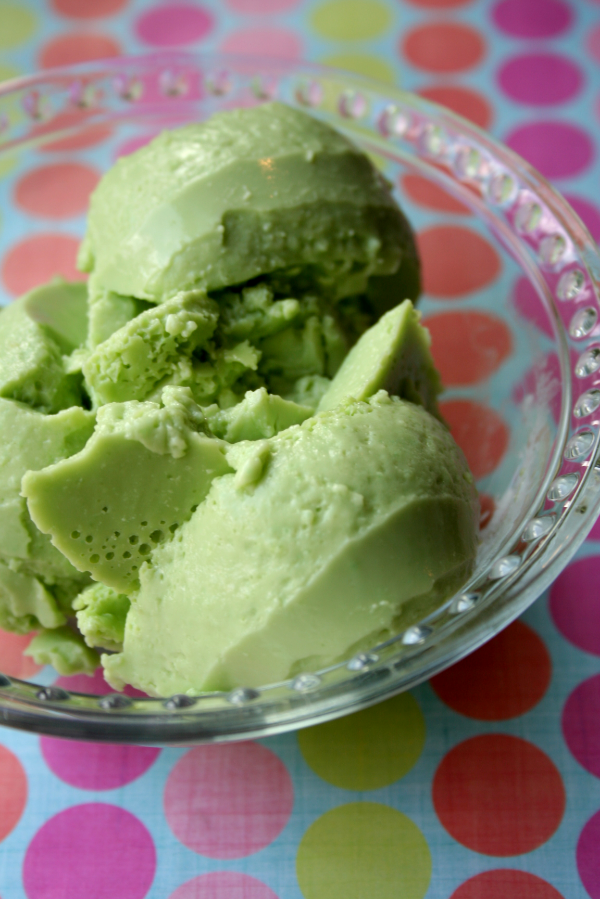
I know! It looks legit, right? When I put a picture of it on Instagram and had people guess what it was, their guesses included avocado ice cream and matcha pudding. I was pleased that they thought so highly of me and the picture, but in truth, the actual ingredients were far more humble:

All I did was pour the jell-o powder in a heatproof bowl, heat the can of evaporated milk until it simmered, then poured the hot milk over the powder.

I stirred it briefly, poured it into a clean plate (I used a pie plate) and then put it in the fridge for several hours to set.

It came out looking like this.

It scooped like this.

And it tasted....well, I will tell you, it tasted way classier than it should, considering the ingredients, one of which was canned, the other boxed, and that was all. It almost tasted like a key lime pie filling. You know, not necessarily a fresh key lime pie, but the type that you might buy in the freezer aisle. Maybe not the freshest and definitely far from farm-to-table, but surprisingly serviceable as a dessert course.

Hey, want to give it a try? Here's how you do it.
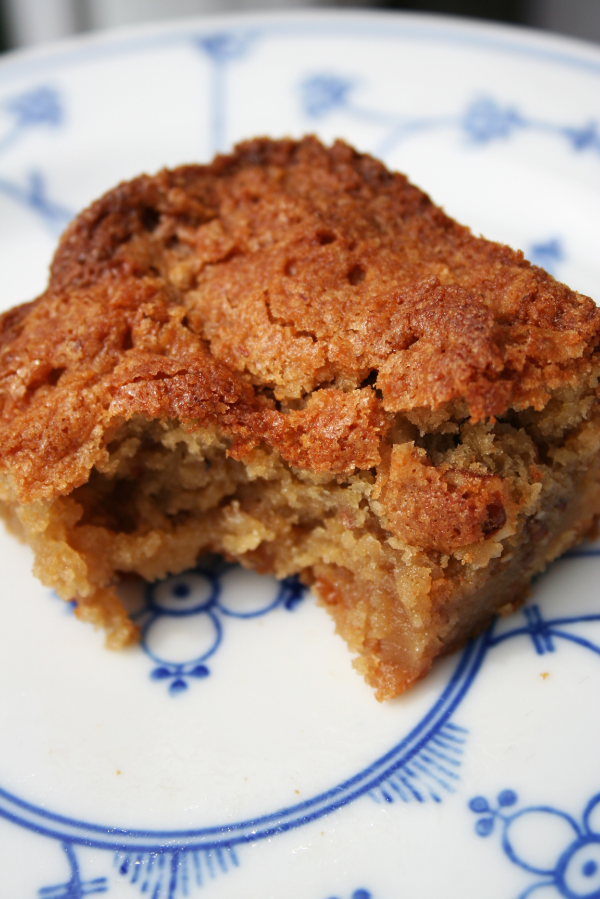
I love brownies...but I love blondies better.
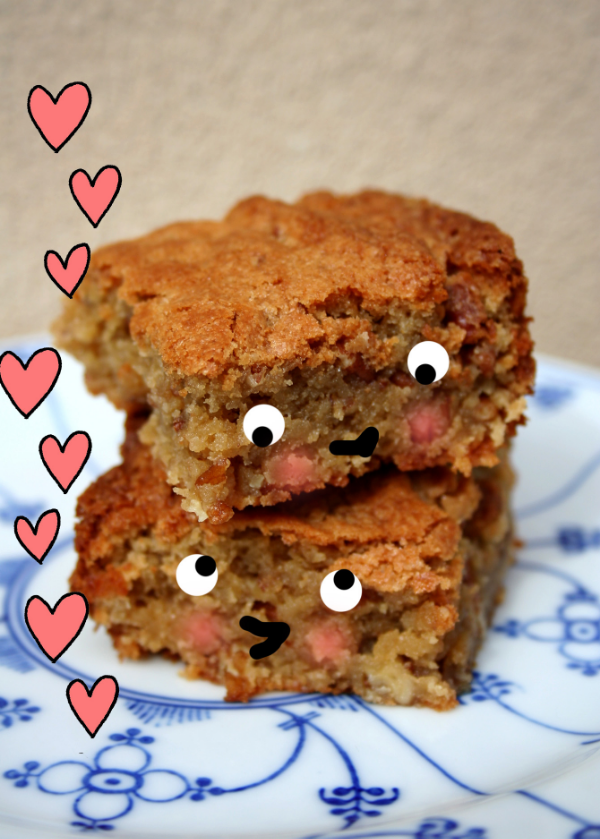
And these ones, with a slightly chewy, moist interior, gently crisped golden top, and rich, caramelly-buttery-brown-sugar-vanilla-y with a touch of salt flavor, are highly craveable.
Don't get me wrong. I don't hate brownies. In fact, quite the opposite. If you hand me a dense, fudge-like brownie, I will be your friend for a good long time. There are some moments when only a brownie will satisfy your needs.
But if I were pressed to make a choice to have one or the other only for the rest of my life...I'd choose blondies over brownies.
Maybe it's the texture: just chewy enough to provide a little resistance when you take a bite, to keep things interesting. Not too cakey, but definitely not a cookie.
Maybe it's the color: blondies do have an awfully alluring toasty, honey-colored hue.
Maybe it's the fact that the milder flavor lets the flavor of nuts really shine, whereas they can get lost under the powerful chocolate flavor of brownies.

Or maybe it's the flavor: each bite with flavor undertones of butterscotch, graham crackers, sweetened condensed milk, caramel, and shortbread, even though blondies contain none of these things. Maybe it's how the subtle flavor fills your mouth with sweet with a touch of salt flavor, and makes you want more and more and more.
Maybe it's all of these things. Probably.
But honestly, while I can get very thoughtful about the whole thing, I'd rather just eat some blondies. This is a particularly nice recipe, adapted from the Whole Foods Market Cookbook.

Makes one 9-inch square pan - printable version here
3/4 cup chopped pecans
1 1/2 cups flour
1/2 teaspoon salt
3/4 cup (1 1/2 sticks) butter, softened
1 1/3 cups packed light brown sugar
2 eggs
1 1/2 teaspoons vanilla extract
Procedure
Preheat the oven to 350°F.
Place the pecan pieces on a baking sheet, and roast them until they are nicely toasted, 4 to 6 minutes. I do this as the oven preheats; if you smell the fragrance of the nuts, they're ready. Once toasted, remove from the oven and set to the side for the moment.
Generously grease a 9-inch square cake pan, and insert a strip of parchment paper (I do this so I have "handles" to lift the bars out later).
In a medium bowl, stir the flour and salt to blend.
In the bowl of a stand mixer, cream the butter and brown sugar until fluffy (2-3 minutes on medium speed). Add the eggs, one at a time, mixing after each addition. Stir in the vanilla extract.

Remove the bowl from the mixer, and stir the flour in by hand. Fold in the toasted and cooled nuts.

Spread the thick mixture in your prepared pan. Bake for 35-40 minutes, or until golden and just set in the center.

Remove from the oven, and let cool for several minutes. If you've added that little handle I told you about, you can pull out the blondies in one solid unit.
Enjoy!
FOOD:
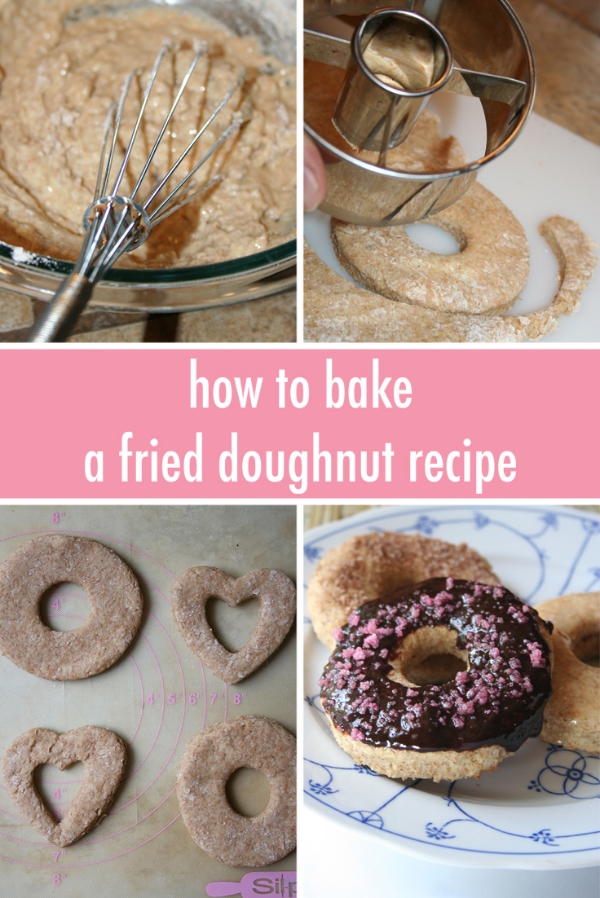
How to bake instead of fry doughnut recipes.
How to make a Dutch Baby. Delicious baby.
How to use up leftover or stale cake. It's not common, but it does happen. Be prepared!
How to make pie pops. So perfect.
Three ingredient flourless cake. Delicious.
Wine-themed cakes. From a while back but still tons of fun.
How to bake, instead of fry, your favorite comfort foods.
Essential tips for beginning bakers. Helpful post!
Clever cookie cakes. You'll love this!
Cake batter pancakes. Yes yes yes.
Easy homemade curry. This recipe will become your new favorite vegetarian entree!
How to make glow in the dark buttercream. From a while back but so worth your time.
DIY Hawaiian bread rolls. So much better than store bought!
ART:
How to draw roses. Five easy ways!
Incorporating metallics into your artwork. Several easy and vibrant ways!
Get doodling! It's good for your heart and soul (really)!
Awesome DIY painted gift ideas.
Free coloring book pages download! This round's theme: summer fun!
Discover bristol board, a mixed media superstar!
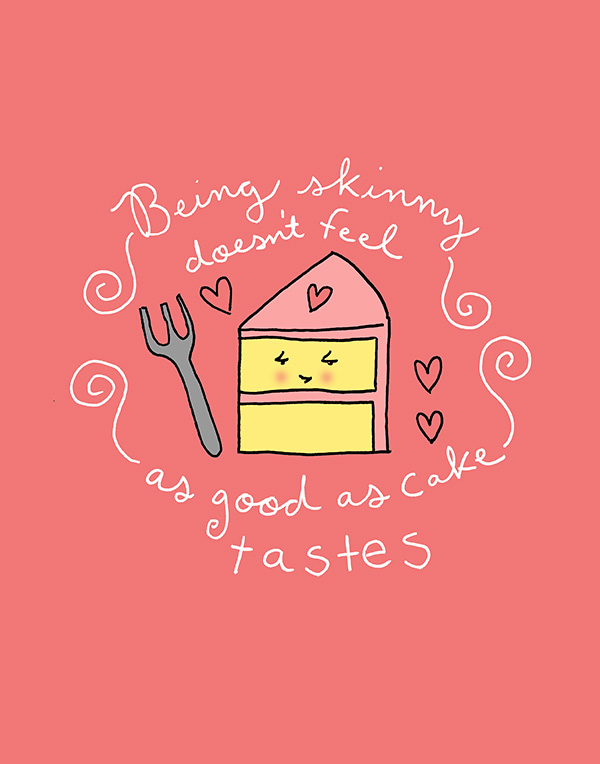
You guys. I don't diet, so I don't need to talk myself into flourless or sugar free desserts actually tasting good. In this case, it's actually true.

This cake only has three ingredients, and none of them are flour or sugar. But hoover-dam it, it tastes fantastic.
How about, for the 4th of July, you do this: eat grilled peanut butter pound cake. It's easy to to, and I can prove it.
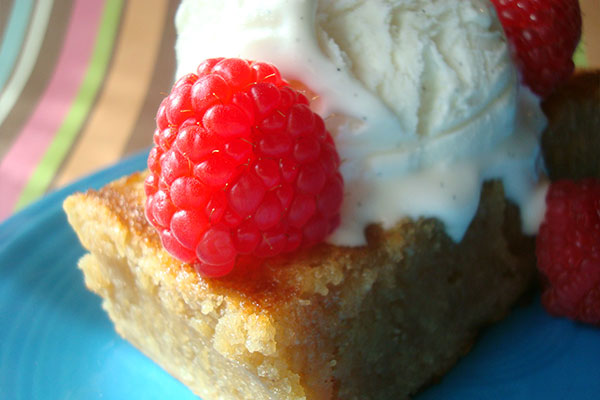
First, you make a peanut butter pound cake. Then, you cut it in slices and grill them.

Then, you top them with ice cream and berries.
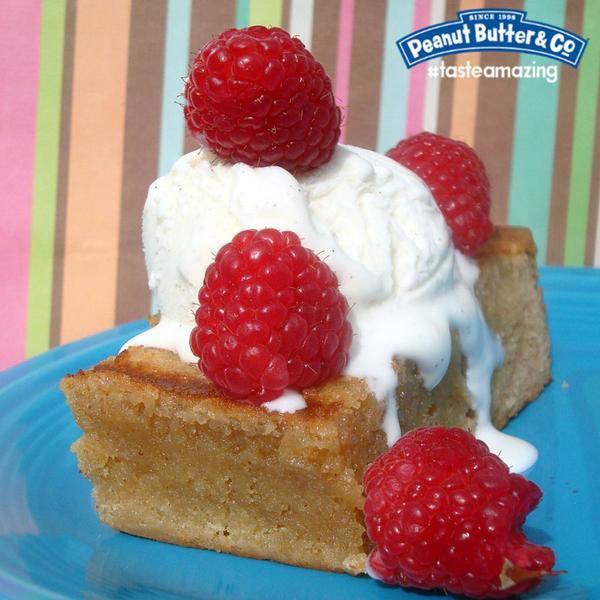
Then, you eat your fill and feel superior to everyone else in the world who isn't eating this ambrosial treat at this instant.
Pop rocks cookies! You need to make these. (CakeSpy archives)
American flag pie. How cute is this? (Sprinkled With Jules)
Tart cherry ice cream with white chocolate and macadamias. Whoa. (Simple Roots Wellness)
How to bake instead of fry a doughnut recipe. (CakeSpy for Craftsy)
Chewy choccy cookies. From a cute new blog! (Miss Charlotte Cake)
S'moreo French silk pie. Yes. (The Spiffy Cookie)
Coo-worthy sweets: how to make pie pops! (CakeSpy for Craftsy)
Salted caramel rice krispie bars. Be still my beating heart. (Life on Food)
The top 50 candies of all time. (USA Today)
Carb-o-licious: homemade Hawaiian rolls. (CakeSpy for Craftsy)
Ricotta gelato (I love saying that) with figs and candied walnuts. Yumsies. (Lorimer Kitchen)
Ever heard of pischinger? You'll like it, I promise. (A Balance of Tastes)
Strawberry cupcakes with strawberry cream cheese frosting. YES! (Chocolate Moosey)
Awesome DIY painted gift ideas. Cool! (CakeSpy for Craftsy)
Syrniki: Russian cheese pancakes. Intriguing. (Babaganosh)
Book of the week: Bakeless Sweets by Faith Durand. During the summer, you're less likely to want to fire up a hot oven, and this book hears you, with sweet recipes that don't require baking. There's a strong emphasis on pudding, including pistachio and butterscotch, but then a bunch of other stuff, including (interesting!) homemade "jell-o", and icebox cakes that will impress. It's a great summer hostess gift, or gift to yourself so that you can make pin-worthy no bake desserts.

I love olive oil. I love what it does to food, of course, but I also love it for baking. It imparts a wonderful, nutty flavor and light-yet substantial texture to cakes; it gives cookies a little je ne sais quoi. But most recently I found myself thinking beyond the oven and in terms of fillings and toppings. What would happen, I wondered, if you made a dish like mousse with olive oil?
Well, as usual, it didn't take me long to go from "what if" to "let's go." In record time I had a batch of mousse going, and some olive oil at the ready to stand in for the butter I would usually add.
I decided on chocolate, because really, isn't that the most classic type of mousse? It is in my heart, and no, I am not open to your comments.
I melted the chocolate with the olive oil. It separated slightly as it cooled, but that was fine, because when I added it back in later to the whipped mixture, it re-incorporated and stayed together. Maybe the eggs helped emulsify? Sorry, I am CakeSpy, not ScienceSpy, so I can't tell you for sure.

A few notes in case you're judging my mousse recipe as slightly non-traditional: the recipe I adapted called for whipping egg yolks, egg whites, and whipping cream all in separate bowls; I streamlined the process by whipping egg whites and cream all at once, and it turned out fine; it was motivated by me not wanting to wash the bowl. I also just added the egg mixture into the chocolate. Once again, came out fine.
I added an assertive amount of salt, which was the bridge that unified the nutty, unique olive oil flavor and the mellow milk chocolate. It made for a salty-sweet-gently complex caramelly flavor that kept you coming back for more. This mousse is absolutely crave-worthy, and I think it is a strong indication that adding olive oil to mousse is not only possible, but an official Good Idea.
Here's how you do it. Printable recipe here.
Note: the egg yolks are folded into a warm chocolate mixture in this recipe, but that doesn’t necessarily “cook” them. If you are concerned about the eggs not cooking enough to destroy bacteria, pasteurize them first. You can find out how to do that in this post.
In a medium saucepan or the top of a double boiler, melt together the chocolate and olive oil over low heat.
Once melted, remove from heat and set to the side. If some slight separation occurs over the next few minutes, that is ok.
In a stand mixer fitted with the whisk attachment, whip the egg whites and heavy cream together on medium-high speed until it forms soft peaks. Slowly add the sugar and continue to whip until the mixture attains firm peaks.
In a small bowl, combine the egg yolks, vanilla, and salt. Mix the egg yolk mixture into the chocolate mixture with a whisk. Mix until combined.
Fold the chocolate mixture into the whipped cream and egg white mixture, gently, until no streaks remain. If desired, transfer to individual serving dishes, or into one large bowl. Let the mousse chill in the refrigerator for at least 2 hours before enjoying. It will "set" more as it chills.
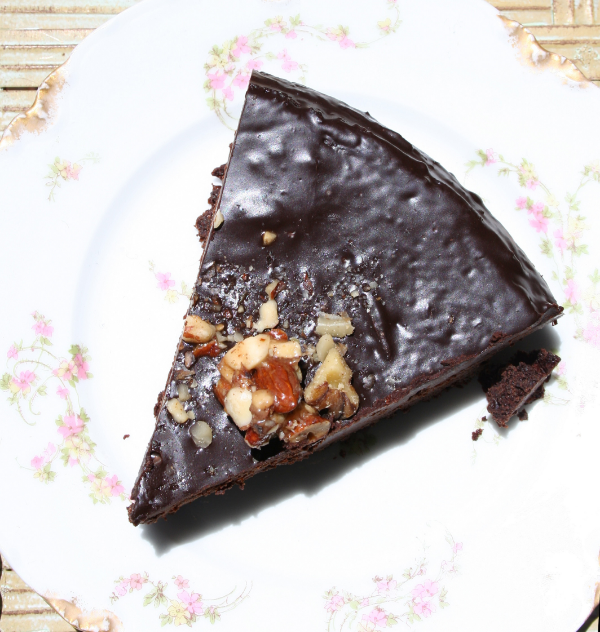
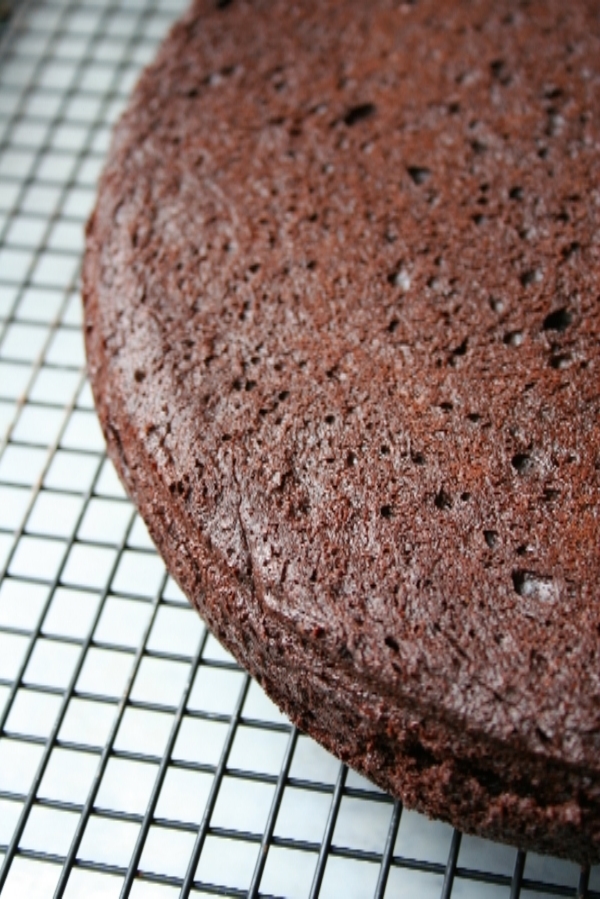
There isn't much I love more than spending $30 on a chocolate cake at Whole Foods.

Oh wait, yes there is: having chocolate cake and not spending $30.
The problem is that the Whole Foods near me makes a really, really tasty chocolate cake.
SOLUTION: use a Whole Foods recipe to make my own flourless chocolate cake! This thing came out beautifully, and since I saved myself a bunch of money, to say thanks, I shelled out (at Whole Foods, natch) some of my savings for the fancier chocolate, thus making my cake even better.
Just look at that hunk of chocolate I used:

To say I'm feeling smug right now would be an understatement.
But the cake backs up all of my overconfidence and more. Taking a bite of this thing is like taking a bite of the very soul of what chocolate is and should be. It's deep, it's dark, it's rich. It sticks to your teeth. Dieters will take one look and run away to the nearest treadmill (good riddance). Yeah, it's that good.

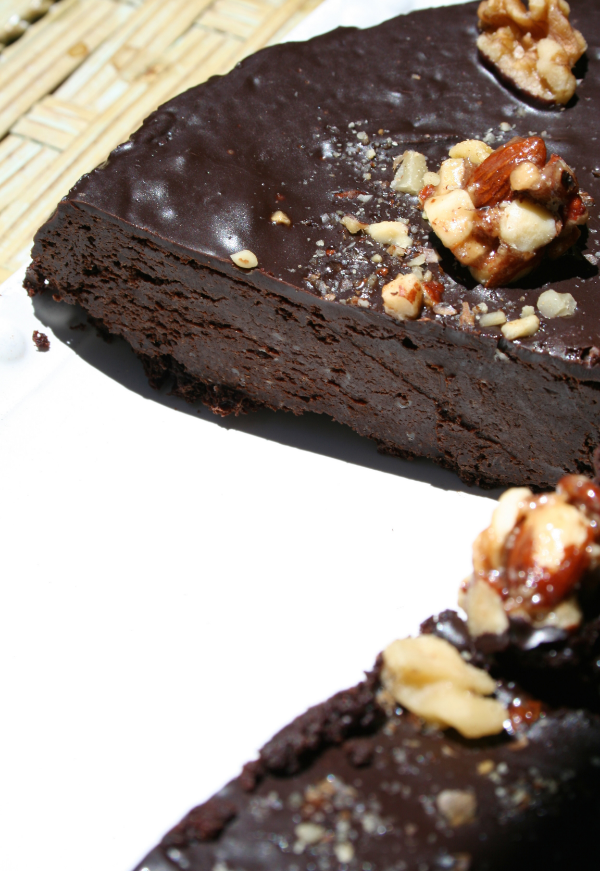
And to cap it all off, it's topped with a sort of honey-chocolate ganache.

I added a bonus to mine by adding candied nuts. Let me tell you, I don't regret doing this one bit.
Please, would you make this cake right now? You will not regret it.
Adapted from Whole Foods - printable version here
Serves 12
Ingredients:
For the glaze
Procedure:
Preheat oven to 375°F. Grease a 9-inch springform pan, then line the bottom with a circle of parchment. Grease the parchment on top. Set pan to the side.
Place the chocolate and 2 sticks of butter in a medium saucepan over medium low heat.

This is your brain on chocolate and butter.
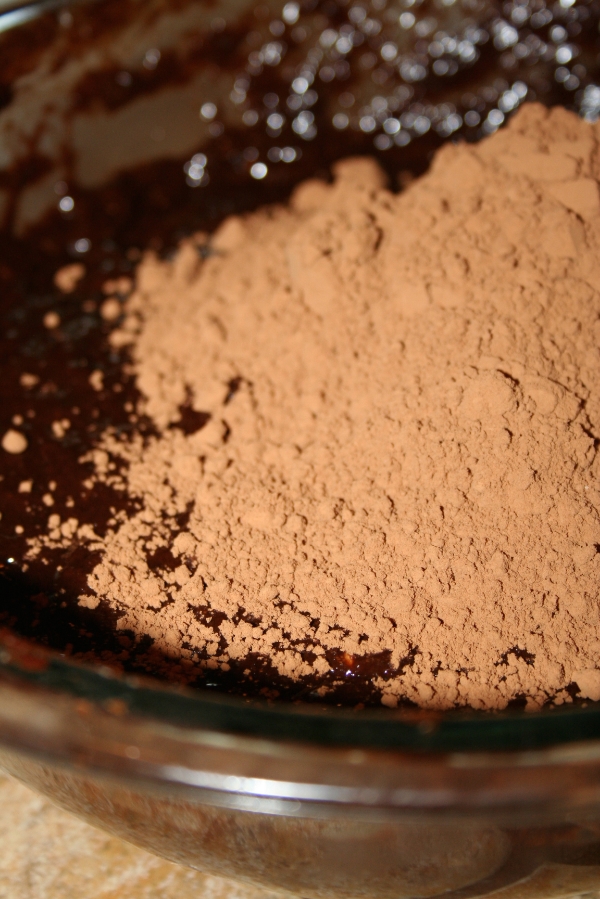
Stir often, until the mixture melts and blends. Stir in the sugar until completely incorporated. Add the eggs, one at a time, whisking until no streaks remain.

Sift the cocoa into bowl and stir just until blended.
Pour batter into prepared pan and bake for 30 to 35 minutes, or until cake has risen and top has formed a thin crust. A little jiggle in the center is OK.

Let the cake cool in the pan for 10-15 minutes, then remove the springform sides and invert on to a wire rack. Remove the parchment circle, and let the cake cool completely.
Meanwhile, make the chocolate glaze. Set the chocolate in a heatproof bowl, and drizzle the honey on top.

In a saucepan, heat the half and half until it comes to a simmer. Once it simmers, remove from heat and pour over the chocolate and honey. Whisk until the mixture becomes smooth and cohesive. Stir in the vanilla, and mix until smooth. Let the mixture set for 15 minutes or until it has achieved a thick, honey-like consistency: you want to pour it over the cake, but not so liquid that it will run over the sides of the cake immediately.
Pour the glaze on top of the cake. Using a spatula, smooth it along the top and sides of the cake.

Regard its beauty.

If you wanna, top it with nuts or something.

Put the cake in the refrigerator for 20-30 minutes so that it can set, and the cake will slice cleaner.
I don't want you to die. BUT. The photos that follow are basically heart attack-inducing cute, so consider yourself warned.

These cakes are part of the new baby cake collection by Philadelphia bakery Whipped Bakeshop. I consider them worth their own post just to showcase their adorableness.
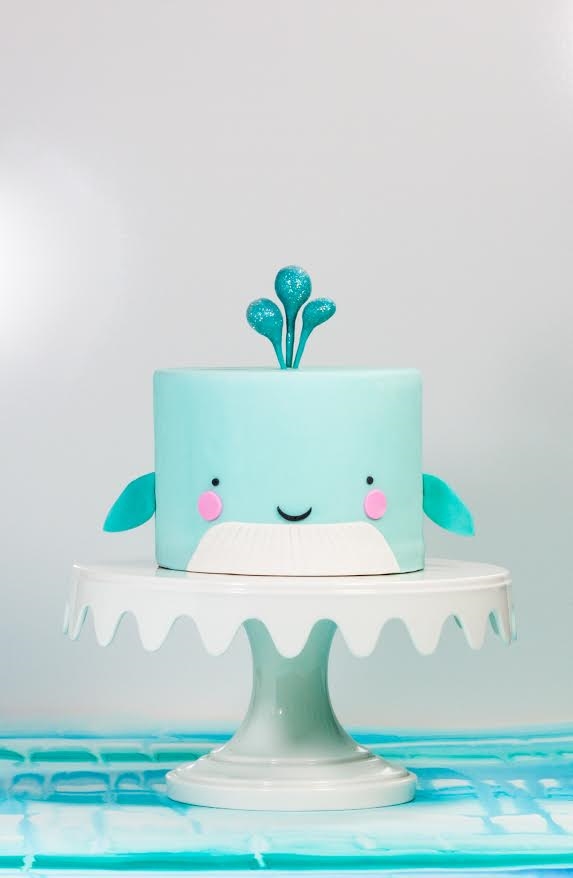
If you're in Philadelphia, you should go buy one, whether there's a baby in your life or not.
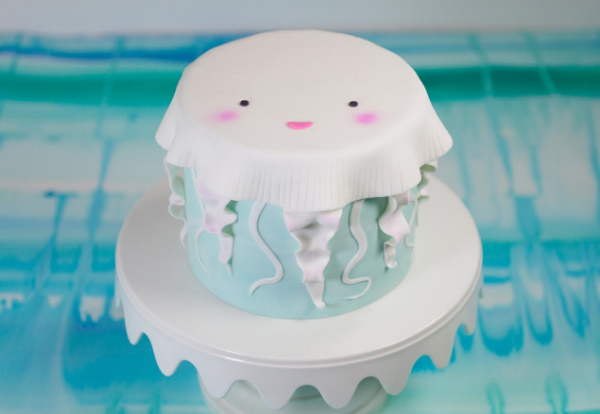
If you're not in Philadelphia, either go there, right now...

or just enjoy and coo at the photos and send a link to someone you know in the Philadelphia area.
Seriously - how freaking cute are these?? And there are more designs coming.

Coloring book pages for grown-ups: summer fun! They're free! (CakeSpy for Craftsy)
Essential tips for beginning bakers. (CakeSpy for Craftsy)
Banana split ice cream sandwich cake. (The Spiffy Cookie)
The best (foodie) pool floats for summer. (Sugar + Cloth)
Three ingredient flourless cake. Genius. (CakeSpy for Craftsy)
The best food podcasts. Hey, my friend Matthew Amster-Burton's podcast is on this list! Woo! (Guardian)
Did you have the gall to miss the most magical cake ever? (CakeSpy)
Dark and stormy sticky toffee pudding. OMG. (Baking a Moment)
Cherry almond dutch baby. Thanks too to this site for linking to my Craftsy post on how to make a Dutch baby! (Shredded Sprout)
What menus can tell us about our cities. (USC News)
Malted milk chocolate cake. (Eva Bakes)
On the same site as the last one...Chocolate acorn squash baked custard. File this one for fall! (Eva Bakes)
Graham cracker crumb cheesecake bars with golden oreos. OMG! (Wallflour Girl)
Peach brown butter sweet rolls with brown sugar cream cheese glaze. Yes. (Cooking for Keeps)
Book of the week: The Cake Therapist by Judith Fertig. Do you love novels that focus on food? I do, and I particularly loved this novel. It features a fictional bakery in a small town, a woman who is getting her life back on track and regaining her sense of taste and intuition, and flashbacks to the past. It is a great story and you might even learn something new about baking!
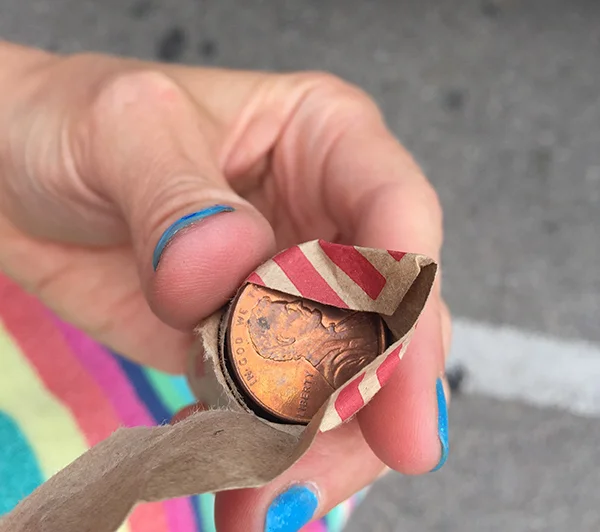
Do you pick up heads-up pennies when you come across them?

I do. It's a small moment that makes me feel lucky, like yes, I am where I am supposed to be at that moment. I put the penny in my pocket and continue walking with a spring in my step. This small surge of happiness makes me more likely to hold the door for the next person I see, or to say hello, or to compliment someone's shoes. I even take it one step further: if I come across a penny that is heads-down, I will not keep it, but I will flip it over so that it is heads up for the next person, so that they might get that little surge.
And who knows where those happiness ripples might go.
They might be small: maybe the person whose shoes I complimented had been feeling awkward that day and it just made them feel a little more at ease. They might be big, in the long run: maybe the person who I held the door for is more likely to be kind to a trainee bank teller, thus giving that teller the confidence to go on, rise up the ranks, and manage the bank one day.

So, I found myself thinking: what if I did a little feel-good project where I placed pennies throughout the city, in order to engineer a slightly better day for people? The math seemed on my side: for a small investment...

I had the potential to make 50 days a little better.
Some might dismiss this project as "throwing away money", but I really don't look at it that way. Think again about that meager investment of 50 cents. For the two hours that this project took me, I had a fantastic walk, and got some great exercise. In terms of exercise, it was far cheaper than a yoga class. I also had some great entertainment. If I had gone to a movie for entertainment, it would have cost way more than 50 cents, and the potential for that experience to brighten anyone else's day would be limited (though yes, I believe in going to movies to brighten my own day, too).
So for a few hours, I walked around downtown Santa Fe and placed pennies here and there. Some highlights:

Placing my last penny, I felt exhausted, and my hands smelled metallic, but I felt exhilarated. The sun was setting and all felt right with the world.

Maybe not everyone would be thrilled to find a penny. Maybe some of them would be knocked over and end up heads down. But maybe, just maybe, some of these placed pennies would present a superpower. Maybe they would brighten someone's day just a little bit. And they would never know it, but that penny had been placed there just for them.

I don't know what will happen to all of the pennies that I left around town. But the project is already a success, because of the potential to delight others, and the definite delight that it gave me to complete.
There is magic and delight everywhere in the world, and it's waiting for you.
