
I know, it's monday and you're already bored at work. I have a solution / distraction: a cake decorator name generator! Here's a preview--to find out your code name, check out the full graphic here.

May 15: National Chocolate Chip Cookie Day
It's National Chocolate Chip Cookie Day. Hooray! Here's what I suggest you do today.

1: Educate yourself on the chocolate chip cookie.
This timeline really breaks it down in a detailed way.
2. Make some morsels.
Fancy up any chocolate chip cookie with DIY chocolate morsels. You can flavor or tint them as you wish! Plus, bragging rights.
3. Make some cookies (duh).
I like this recipe, courtesy of BAKED in Brooklyn, but you choose your own adventure, I won't judge.
Happy National Chocolate Chip Cookie Day!
Baker's Dozen: A Batch of Sweet Links

Right up there? A t-shirt I created. Buy it! (Society 6)
Roasted Strawberry and coconut popsicles. Wow. (Avocado a Day)
What is pastillage? Educate yourself. (Craftsy)
This "Mondrian" cake is the loveliest thing I've seen this week! (La Receta de la Felicidad)
Definitely not sweet, but I am sort of in love with this: Spam Fries. (Fuss Free Flavours)
What's your secret cake decorator name? A fun game. (Craftsy)
How to make brigadeiros! (CakeSpy)
How to mix acrylic paint: hacks, tips, tricks. (Craftsy)
Monster cookie snack mix. I'm into it. (Glorious Treats)
Neapolitan cream cheese bars. I want them. (Betty Crocker)
Neapolitan popsicles! I also want. (Cooking Classy)
Brown butter bourbon walnut chocolate chip cookies. OMG. (Feast+West)
Also, Feast+West interviewed me, and I must say, I sound pretty darned cool. (Feast+West)
Book of the week: The Secret Lives of Baked Goods. Can you believe it's been three years since my brilliant second book came out?
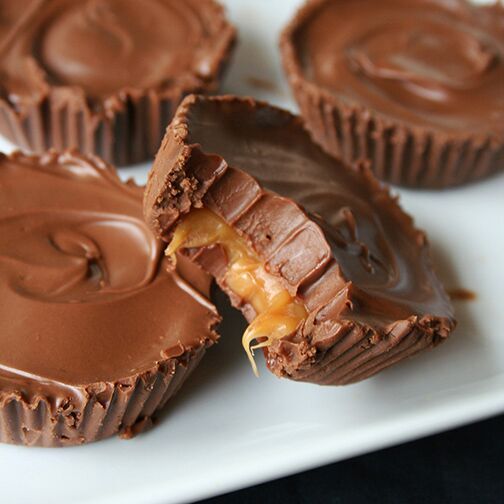
Caramel Filled Shortbread Cookies

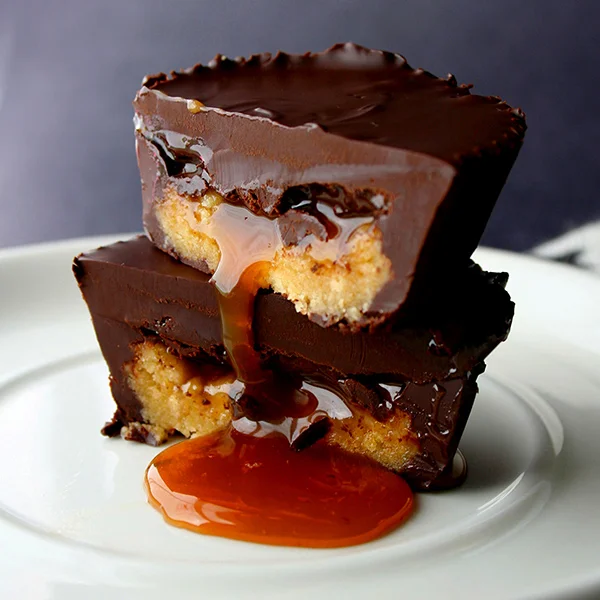
OMGOMGOMGOMGOMGOMGOMGOMGOMGOMG you guys. I have outdone myself this time. I have created a little batch of miracles I like to call Caramel Filled Shortbread Cookies.
I was hired to make a version of these chocolate filled cookies for a client (I love how fancy that makes me sound!) and mid-way through baking the second batch, I thought "hey, why don't I try out some with a different filling, just for me and just for fun?".
Well, I happened to have a bag of caramel candies within easy reach, so I decided to see how it would go if I filled the cookies with those.
As it turns out, caramel candies are the perfect type of filling for a cookie like this: firm enough to handle and wrap the dough around, but pleasingly melty and soft once baked.
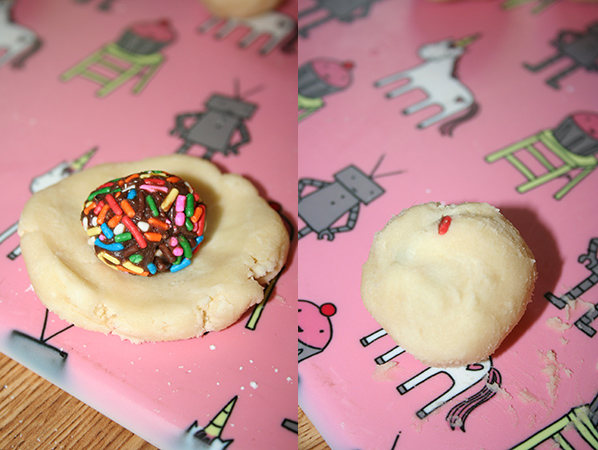
Basically, the key to the magic in this recipe is making sure to cover the candy on all sides with cookie dough. This forms a seal, which keeps the filling from oozing out until you take a bite. This means that when you take a bite of what looks like a normal sugar cookie or shortbread cookie, you find this delightful surprise waiting for you:

Aw yeah.
These cookies taste absolutely brilliant. I mean. Caramel combined with a tender shortbread-y cookie. It's like heaven in your mouth.
As a side note, the term "shortbread" is perhaps a liberty here, because it's not a traditional super crumbly and firm shortbread. It is softer and more tender, but I find these cookies to be closer to the spirit of shortbread than sugar cookies, so I am going with it.
PS! I made one extra special cookie filled with one of the brigadeiros I made last week. I marked it with a single sprinkle on top. The person who got that cookie was so delighted!
Caramel Filled Shortbread Cookies
Makes about 20 - Printable version here
- 1 1/2 cups all purpose flour
- 1/2 cup cornstarch
- 1 teaspoon salt
- 2 sticks unsalted butter, softened
- 1/2 cup sugar
- 1 egg
- 1 teaspoon vanilla extract
- 20 caramel squares
Line a baking sheet or large plate with parchment paper. Preheat oven to 325 degrees F. Line two baking sheets with parchment paper. Unwrap the caramels (that’s important).
Combine the flour, cornstarch, and salt in a medium bowl. Set aside.
In a stand mixer fitted with the paddle attachment, cream the butter on medium-high speed. Then, add the sugar and beat for 3-5 minutes; it will become somewhat fluffy. Add the egg and vanilla extract, mixing until combined. The mixture may look somewhat curdled; that is totally fine. Pause to scrape down the sides of the bowl and mix again to ensure everything is incorporated.
Add the flour mixture in 2-3 increments, mixing at low speed after each addition until combined, and pausing to scrape down the sides of the bowl with each addition. The mixture will come together to form a soft, malleable dough. If the dough is too sticky, put the bowl of dough in the refrigerator for several minutes. It will be soft, but it should be easy to handle with lightly floured hands.
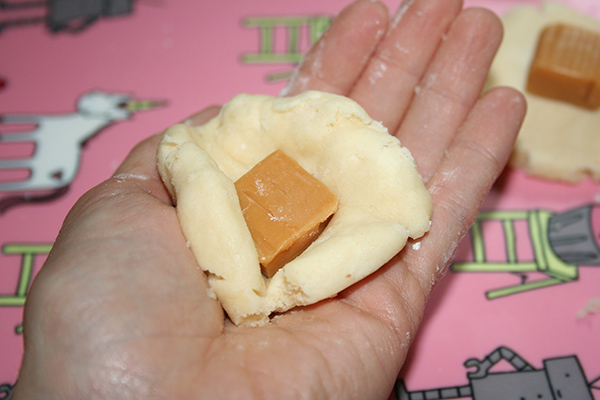
With lightly floured hands, pull a piece of dough, about a heaping tablespoon’s worth, from the bowl. Form a 2-3 inch flat but fairly thick, circle of dough (you can do this one at a time, or make all of your rounds and then proceed).
Place a single caramel in the center of each of the circles of dough. Pull the sides of the dough over the filling to form a soft dome, making sure the dough is covering the caramel on all sides. If you don’t form a complete seal, the filling will drip out as you bake.
Place the cookies on the prepared sheets, 1 1/2 inches apart to accommodate slight spreading. Bake for 14-18 minutes, rotating at the 7 minute mark, or until with a dull finish on top (a golden touch on top is fine, but don’t let them get completely golden or browned). Let them cool on the pans. If desired, dust with confectioners’ sugar. Once they have set for about 10 minutes, you can serve. Keep stored in an airtight container at room temperature for up to 3 days.
Have you ever made filled cookies?
Baci Chocolate Cream Pie
FACT: Chocolate cream pie is a thing of great beauty and deliciousness.
FACT: Even a classic likes to get dressed up from time to time.

This recipe is the equivalent of chocolate cream pie getting all gussied up for a party. But instead of going to the salon for a blowout, it's getting a deluxe Baci treatment.
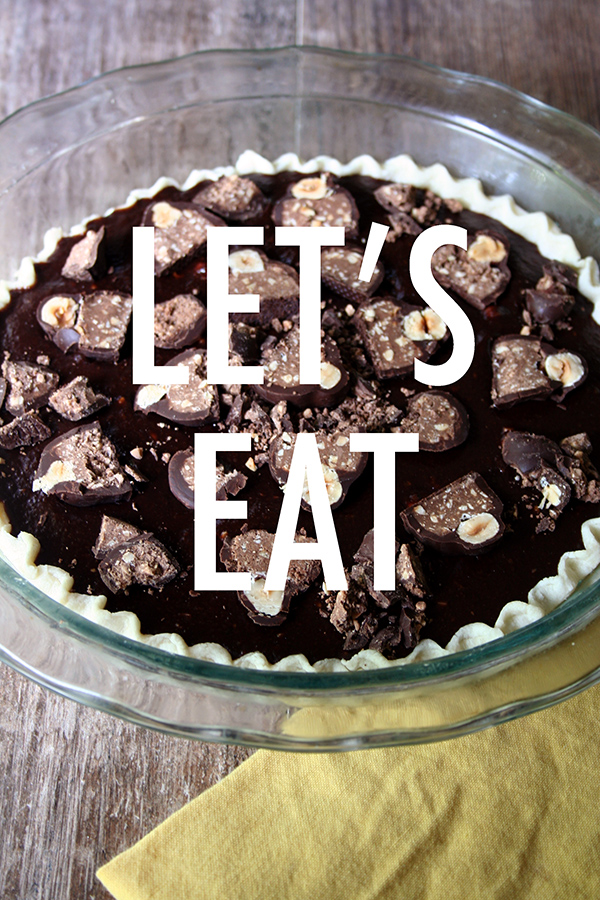
Yep: this chocolate cream pie is made with a bunch of melted Baci candies in the mix, and is almost too delicious to describe!
I mean, imagine a classic, old-fashionedy chocolate cream pie, and give it a chocolate hazelnut makeover. It's awesome.
Listen, I am going to tell you from the get-go that my blind-baked pie crust shrunk a little bit (it's a real thing, and apparently it's more likely to happen when you use a glass plate; I should have read this first!) but don't let that deter you from the recipe. If your pie crust shrinks at all like mine did, it's not a huge deal, it just means that you will have some extra filling. And extra filling is an opportunity for a sweet little snack, like so:

So if you have a regular-sized pie crust, the amount of filling should work perfectly, but if you purposefully or accidentally have a more tart-like stature in your crust, don't despair. It will all work out.
Baci Chocolate Cream Pie
Makes 1 pie - printable version here
- 1 blind-baked pie crust, at room temperature
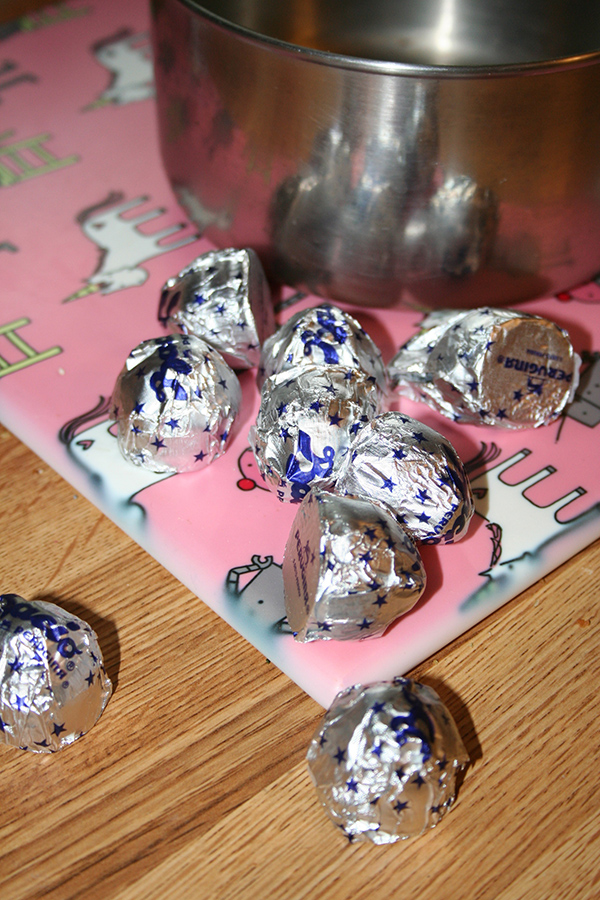
- 10 Baci candies, plus about 6 more, slivered, for garnish
- 1 1/2 cups milk
- 2 tablespoons cocoa powder
- pinch salt
- 1 package pudding mix (I used a 3.4 ounce container of Vanilla instant pudding)
1. Combine the Baci candies, milk, cocoa powder, and salt in a medium saucepan. Heat over medium, stirring frequently, until the baci candies have melted. Remove from heat, and let the mixture cool to room temperature.

2. Stir in the pudding mix, and whisk until combined. It should start to thicken shortly. The mix directions say to use cold milk, but as you can see, I am going rogue here.
3. Pour into the prepared pie shell. Place in the fridge until completely "set" and firm, about 2 hours.
4. Garnish with slivered Baci candies!
Enjoy.
CakeSpy's Recent Craftsy Posts

Food
The best t-shirt designs for cake decorators! So cute. Buy me one of each.
The most popular food posts of all time on the Craftsy blog! A few are by me!
An illustrated guide to the candy making stages. Cute and handy!
Art
Coloring book page: MAY calendar page! Free download.
Baker's Dozen: A Batch of Sweet Links
Olive Oil crumb cake. Believe it! (Colavita)
An illustrated guide to candy making stages. A great and cute reference! (Craftsy)
Cookie Crisp cookies. Yes. (Nerdist)
Sour cream chocolate cake. Looks great! (5 Boys Baker)
Modjeska: a candy with a stalker story. (CakeSpy)
Ever heard of Esterhazy Torte? (Wien.info)
Are you familiar with the different types of cake? (Craftsy)
All hail rainbow pudding pops! (Sandy Toes and Popsicles)
Homemade hemp milk. (What She Ate)
How do we all feel about Cheez-it cookies? (Bite the Biscuit)
I've got to say, these little cupcake undies are awfully cute. (Etsy)
Baci di dama cookies! Yum. Pictured top. (Perugina)
And on the flip side, homemade salted caramel Frappuccino. (Crunchy Creamy Sweet)
Book of the week: The Unicorn Coloring Book! I just had a new batch printed. Have you bought it yet?!?!
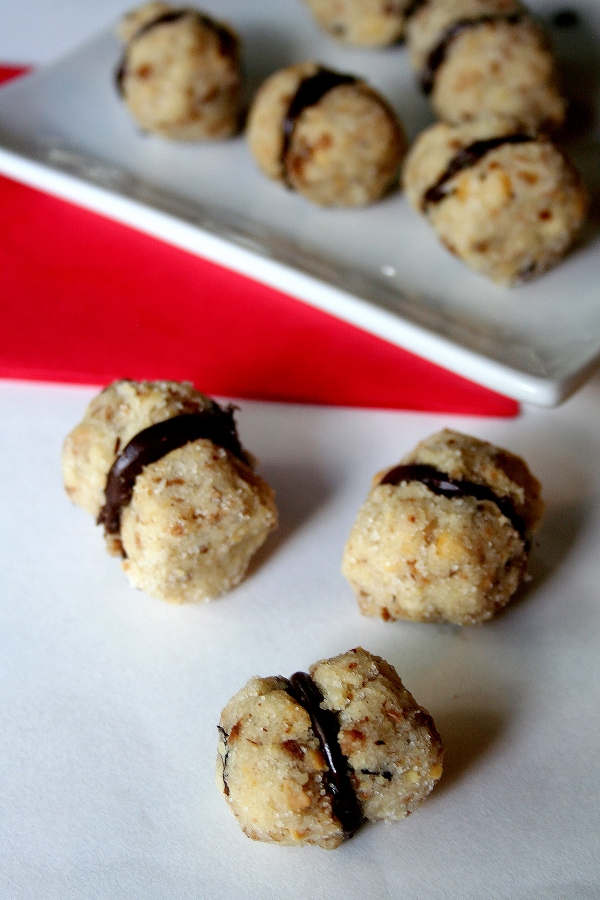
Let's Make Brigadeiros
Hey! Let's munch on balls!

Balls of delicious, caramelly sweetened condensed milk, cocoa powder, and butter, that is! This is the glory that is the brigadeiro, a totally sweet and delicious Brazilian confection.
I first tried brigadeiros when Carla, a woman originally from Brazil who worked at my former yoga studio in Santa Fe, brought a few for me to try. Knowing my deep love of sweets, she figured I would enjoy discovering a treat from her home country. She was right. These balls are about as addictive as crack.

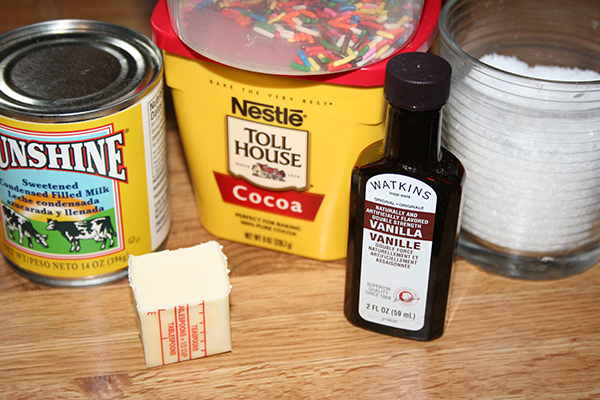
Brigadeiros are extremely simple in construction: sweetened condensed milk, cocoa powder, and a little butter. (I added a little bit of vanilla and a little bit of salt to mine, too). But in their simplicity there is a kind of sweet perfection: the sweetened condensed milk slightly caramelizes during the cooking process, making for a mellow, rich flavor that you don't ever want to leave your mouth. Since the confections are somewhat soft on their own, they are typically rolled in sprinkles, which not only makes them easier to hold on to, but makes them hella cute to behold, too.

The sweet mystery of brigadeiros
Brigadeiros gained popularity in 1940s, but where exactly they came from is the source of some debate. There are two basic theories:
The Ingredient Availability Theory: in the years following World War 2, fresh milk and sugar were in short supply, so recipes including sweetened condensed milk, which was shelf stable when canned, began to gain in popularity. Some brilliant person figured out that adding chocolate would make the sweet, syrupy milk mixture even better, and the rest is history.
The Political Theory: Others say that what made the confection an enduring classic is its connection to a politician, and that the name was inspired by brigadier Eduardo Gomes, a handsome and liberal politician (apparently his running slogan was along the lines of "Vote for the most handsome and single brigadier"). Apparently, some loving fans began selling the confection as a means of fundraising for this hottie.
My thoughts
I wasn't around in the 1940s, but I think that it's likely that a combination of the two theories above resulted in the confection's development and proliferation. It's my guess that the treat was borne of ingenuity with limited ingredients, but that it gained popularity and became widespread as a means for promoting the candidate.

Make them!
Here's the recipe.
Brigadeiros
Printable version here - Adapted from From Brazil to You
- 1 can (14 ounces) sweetened condensed milk
- 1/4 cup unsweetened cocoa powder
- 1/2 teaspoon salt
- 2 tablespoons unsalted butter
- 1 teaspoon vanilla extract
- A bunch of sprinkles
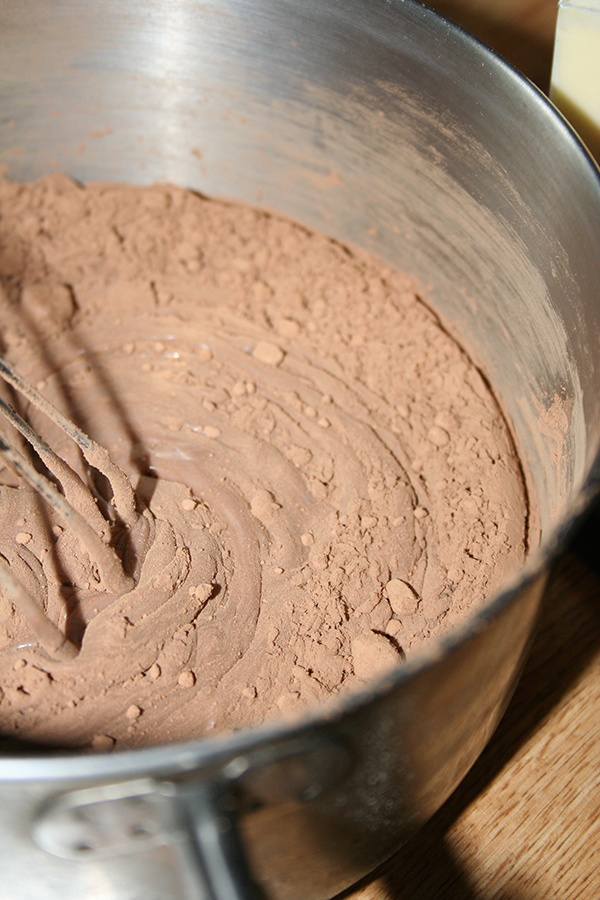
In a large saucepan, combine the sweetened condensed milk, cocoa powder, and salt. Whisk until cohesive. It would be helpful if you sifted the cocoa beforehand, but I really can't be militant here because I did not do so. :-/
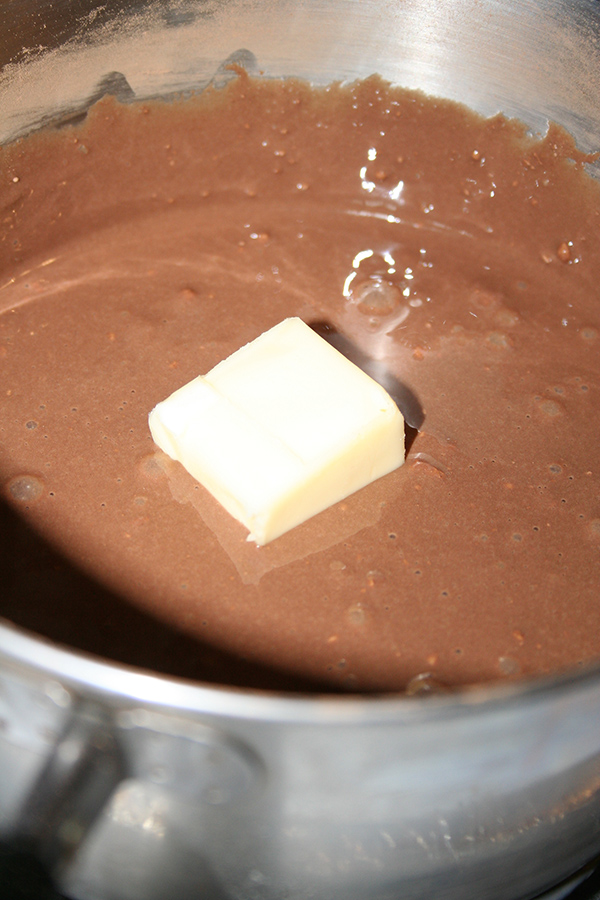
Add the butter, and put the saucepan over medium heat. Stir constantly until the mixture begins to thicken, about 5-8 minutes. What you're looking for here is for the mixture to thicken so that when you scrape a spatula along the bottom of the pan, the mixture is resistant to drip back into place. Keep on stirring well, because you don't want the mixture to scorch the bottom of your pan (you'll ruin your candy and have a huge mess to clean up, so you don't want that).
Remove from heat, and stir in the vanilla until combined.
Let the mixture cool to room temperature, then using buttered or oiled hands, roll the mixture into balls. Roll in sprinkles (I kept mine on a shallow plate). Place on a tray or dish, and store in the fridge for an hour or so to "set". If they flatten out a little bit, roll them back into a circular form after they have chilled for a bit so that they will have the shape you desire. Keep them at either cool room temperature, or in the fridge if it is hot/humid where you are.

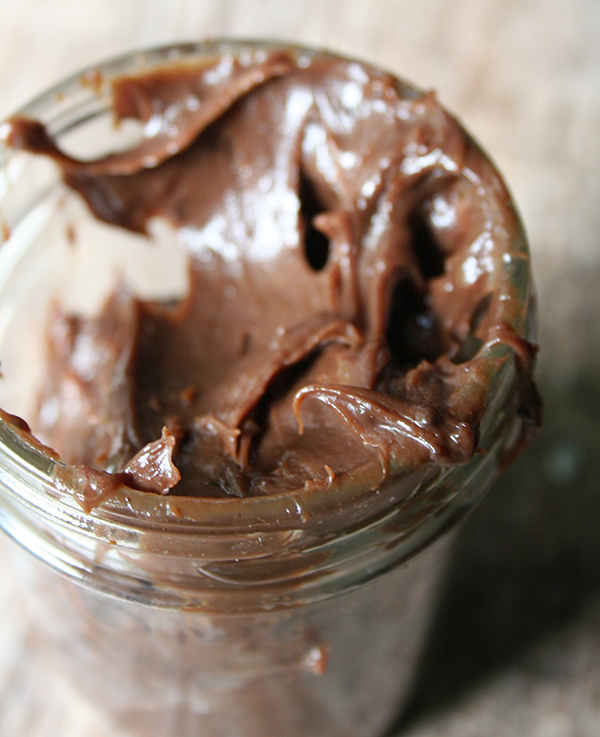
Oh, and P.S., if you get tired of rolling the balls, you can just store the candy mixture in a jar as a sticky-sweet spread for toast or to enjoy by the spoonful.
Enjoy!
Freaking Easy Chocolate Bourbon Truffles
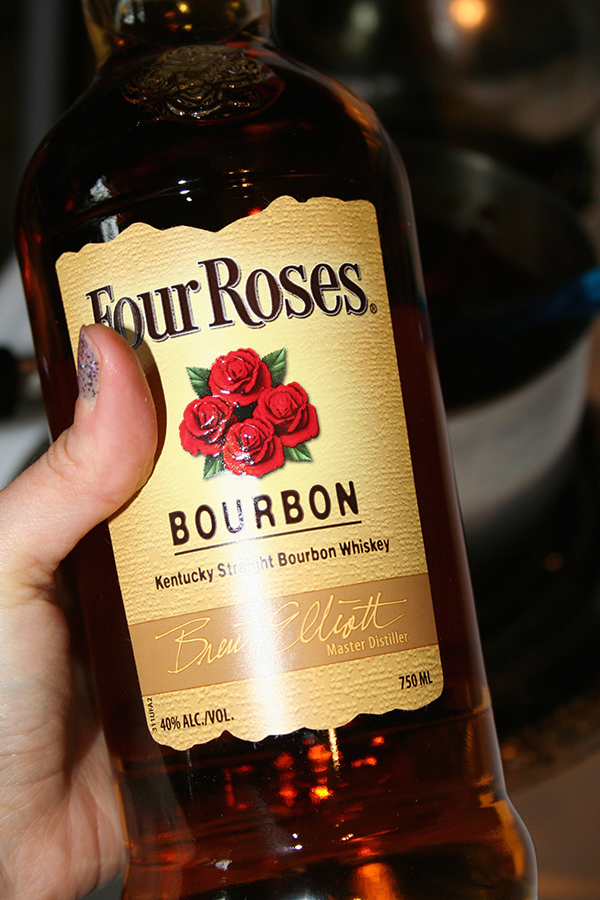
The other day, I received a big ol' bottle of bourbon in the mail. And it was WORK RELATED. It helped me make this happen (please don't judge my messy chocolatey hand):
Thanks, Four Roses!
After a glug or ten of "work", I decided to make some truffles. That last sentence was a joke, fyi. But honestly, these truffles are so easy to make that you could have a shot or two or ten and they would still come out fine. I'm also not a doctor or a qualified health provider, fyi.
Chocolate bourbon truffles. Chocolate combined with butter and salt, and livened up with bourbon. They are surprisingly refined, and pleasingly (but not overwhelmingly) boozy. I used a very dark chocolate (85% cacao!) for a finished result that is for grown-ups and true chocolate lovers ONLY.
Freaking Easy Chocolate Bourbon Truffles
Makes 20-30 depending on size
- 6 ounces Extra dark chocolate, coarsely chopped (I used 85% cacao)
- 1 stick unsalted butter
- pinch of salt
- 2 tablespoons bourbon
- confectioners' sugar or cocoa powder, for coating
In a medium saucepan, melt the butter and chocolate over medium-low heat, stirring frequently to discourage scorching.
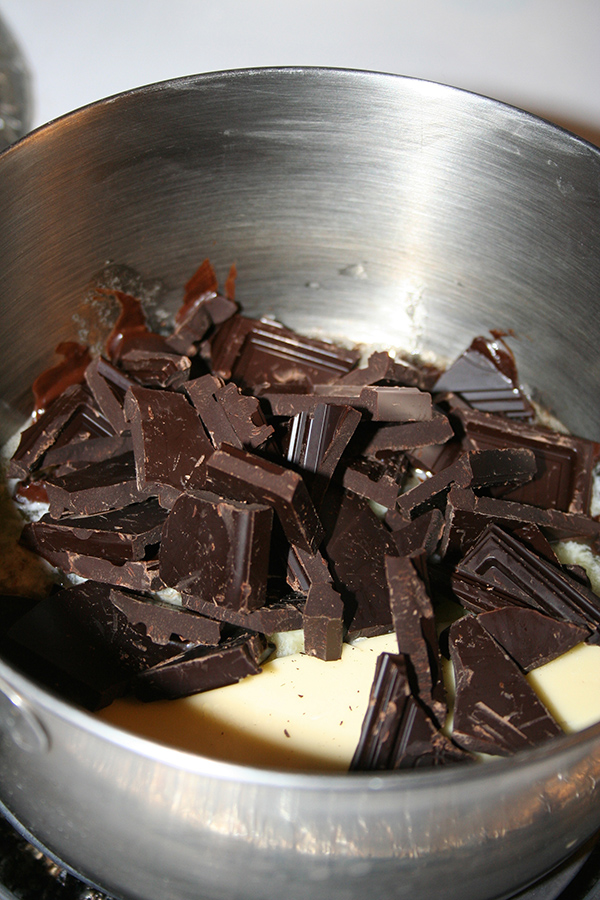
Remove from heat, and stir in the salt and bourbon. Glug glug.
Stir to combine, and then transfer to a heatproof bowl. Let the mixture cool until firm--several hours at cool room temperature or less time in the fridge. I wish this screen had smell-o-vision right now.
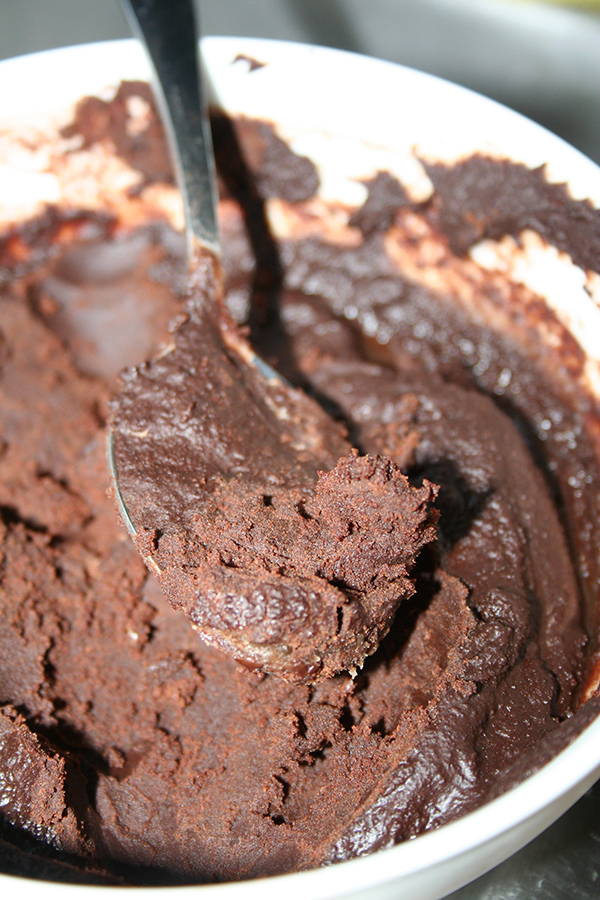
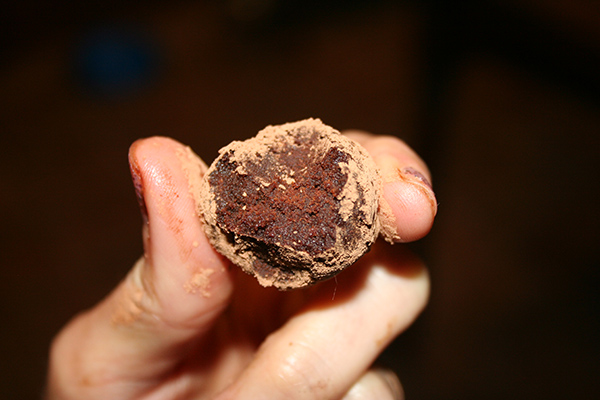
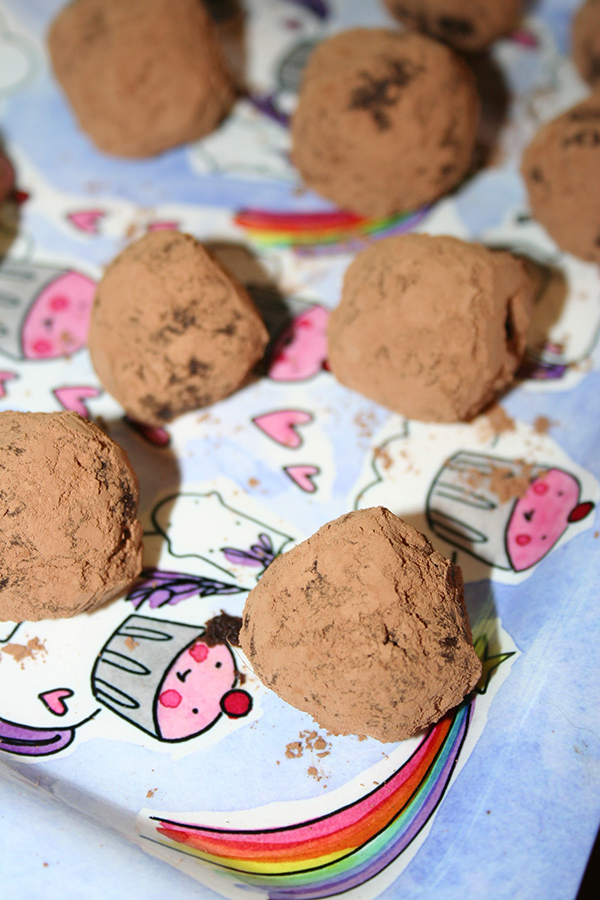
Spoon out the mixture, and roll portions of it into balls, about 1 inch in diameter.

Roll the balls in cocoa powder or confectioners' sugar.

Keep in the fridge or freezer until ready to serve; be sure to tell people that they are gluten-free, because they are (naturally!). Store leftovers in the fridge or freezer.

What recipe will you make for the Kentucky Derby?
Baker's Dozen: A Batch of Sweet Links

Check out the latest calendar coloring book page I designed for Craftsy! (Craftsy)
Texas. Sheet. Cake. (Alwayz Bakin')
Mexican chocolate custard cake with spiked marshmallow whipped cream. Into it. (Host the Toast)
Thanks for recognizing me as the #1 cake blog! (Creativui)
Luxardo cherry trifle. Crave-alert is on high! (Coco Cooks)
Salted butterscotch bars. Definitely need. (Inside BruCrew Life)
The best t-shirts for cake decorators! (Craftsy)
Chocolate chip meringue cookies. (Eva Bakes)
Be a baller. I mean, use your melon baller in different ways. (Tasting Table)
Chocolate peanut butter cheesecake cake. Whoa. (Shugary Sweets)
Easy homemade flavored finishing salts. (Love & Olive Oil)
OMG. Caramel olive oil sticky buns with chocolate glaze. (Perugina)
Almond cheesecake. Need this, yo. (Eat Me Blog)
Book of the week: SPRINKLES! Recipes and Ideas for Rainbowlicious Desserts. 'nuff said, huh?
Can You Make Crumb Cake Without Butter?

If your mind works like mine at all, I know what you're thinking. You're thinking: "BUTTER IS THE KEY AND MOST VITAL INGREDIENT IN CRUMB CAKE AND THERE IS ABSOLUTELY NO REASON TO MAKE IT ANY OTHER WAY."
Well, part of me says you're right. But another part of me says, I am a recipe developer and sometimes I need to test out other options, and people pay me to do so; therefore, I do it.
That's a long way of telling you that I took on the task of making a classic NY-style crumb cake with olive oil instead of butter recently, and the results were interesting enough to tell you about.
My general method
The general method I used make this cake were simple. I took my classic crumb cake recipe (with butter!) and substituted olive oil. Both the crumb and the cake section called for 1 cup of butter each; I substituted 3/4 cup olive oil in both parts. Typically you want to use slightly less olive oil than butter when making that substitution; it's a texture thing.
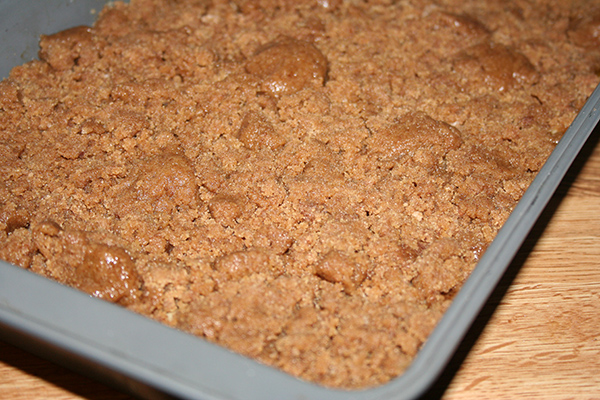
The crumbs
Substituting the olive oil was a snap here, because the original recipe called for melted butter. The ingredients mixed up just fine, and I was able to clump them into nice, fat crumbs.

The cake
I started out by mixing together the olive oil and sugar; they don't really "cream" per se but I mixed them until they formed a wet-sand like mixture. Then, I basically followed the original recipe: adding eggs, adding sour cream and dry ingredients alternately.
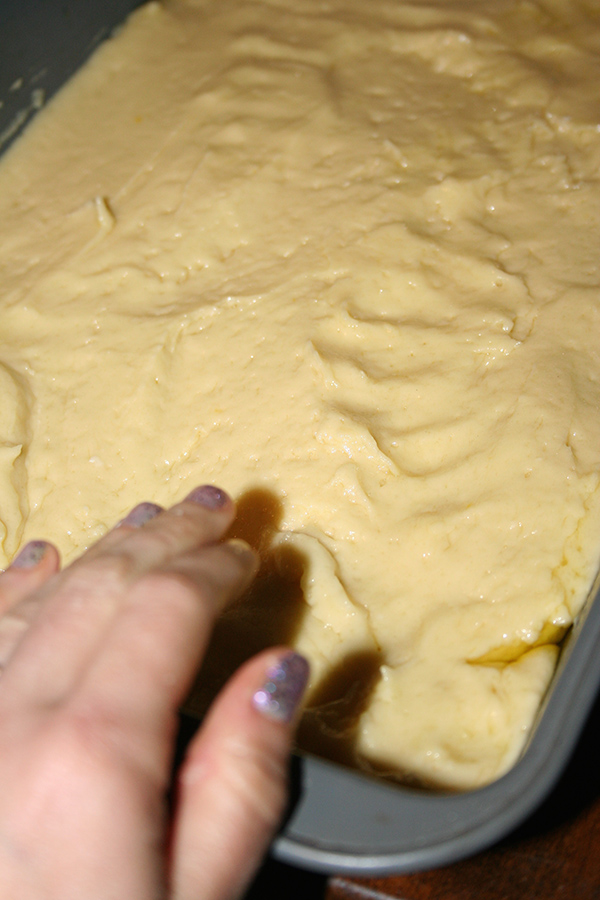
When the batter was spread in the pan, it had a different texture than the traditional cake. It seemed almost pliable, like the batter of a gooey butter cake base, if you've ever made that. I could oil my fingers and pat it down.
Dressing the cake
I have a method for applying crumbs. First, I start by scattering crumbs all over the surface of the cake. Consider this the "base coat". I don't worry about them being big, they're really more streusel-like at this point.
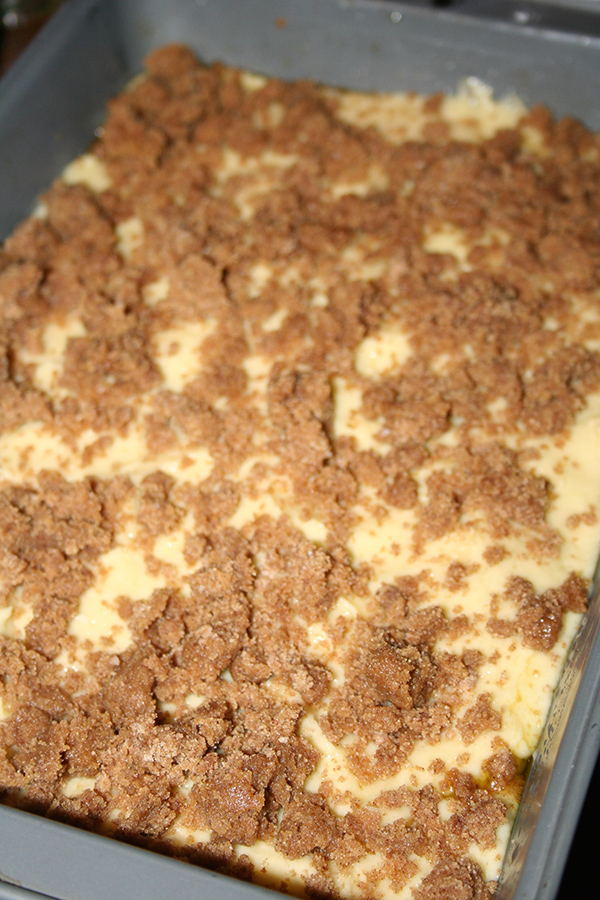
Then, I form many medium and many large crumbs (I like a few REALLY big ones) and then dot the surface with them. I always try to completely coat the surface. There are two reasons: one is deliciousness; the other is that full coverage keeps the cake below from bubbling over.

The olive oil crumbs formed nicely and I had the perfect amount.
Baking the cake
No change in the bake time or consistency. When the cake came out, it looked right.
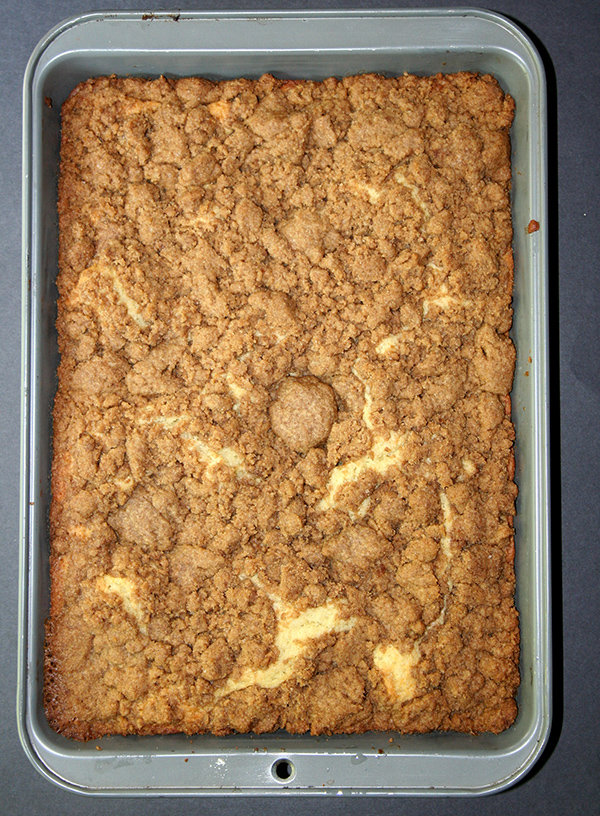
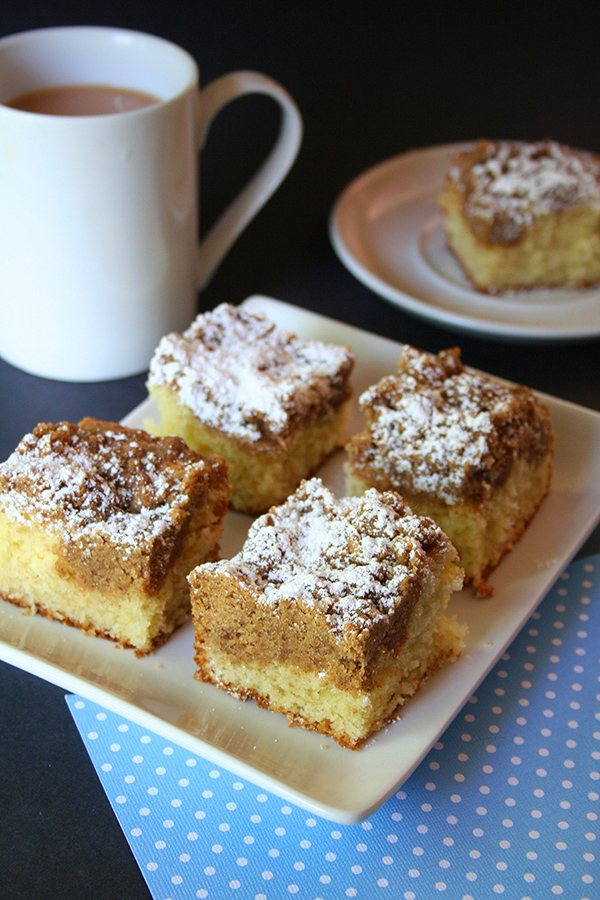
It continued looking right even after being sprinkled with confectioners' sugar and sliced. Reallllll right.
So...how did it taste?
OK, I am going to just tell the truth from the get-go: I still prefer the version made with butter. I mean, I just love butter, that's all there is to it.
But this version was very good. It did not taste like diet food (it really isn't, after all) and it didn't taste like a consolation prize.
The cake was very light, but also very moist. It was almost like a chiffon cake, with that contrast of rich flavor and light texture. You could definitely taste the olive oil, which gave it a kind of unique nutty-fruitlike undertone.
The crumbs were similarly awesome. They lacked that butter flavor, as I mentioned, but the olive oil yielded a very interesting crumb. It was more delicate than a butter crumb topping, but had a full, rich flavor. The cinnamon and sugar were assertive; the olive oil makes the crumb topping almost taste like fruit or fruit juice had been added.
Final thoughts?
Crumb cake without butter, made using olive oil, is a very good thing. It's great if you want a slightly lighter version of crumb cake for whatever reason (I'm not judging), and it's also one step closer to being vegan; if you substituted egg replacer and non-dairy yogurt, you'd have a very nice result.
While I still love crumb cake with butter best of all, this made for an interesting experiment and yielded a beautiful and tasty result.
Want the recipe?
Use this recipe, but substitute 3/4 cup olive oil for the butter in both parts of the recipe.
Have you ever made a butter-rich recipe with another type of fat?
Recipe Redux: Rainbow Cookies Stuffed With Chocolate Chip Cookie Dough
Every now and again, it's good to look back at where we've come from, so that we can proceed mindfully and deliciously into the future. #sodeep
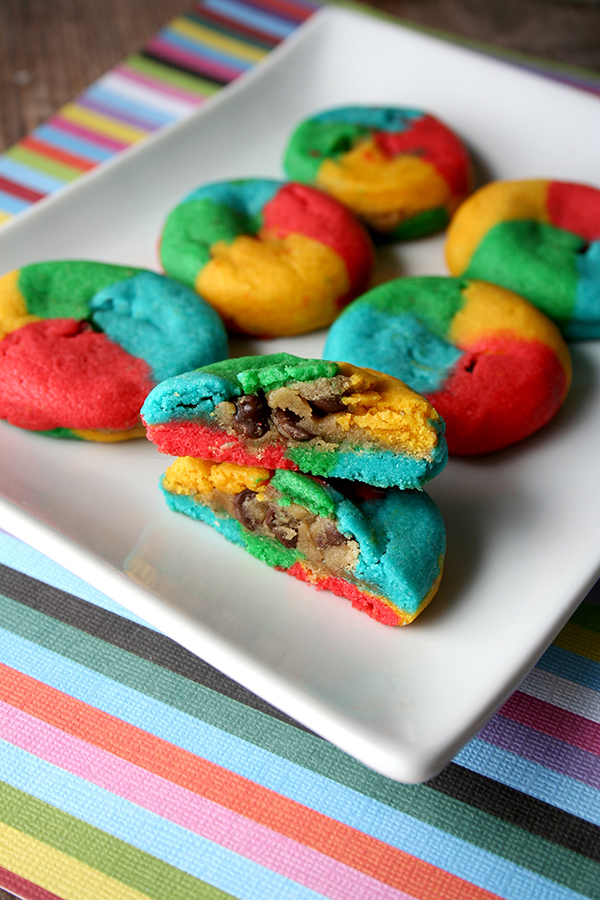
What I mean to say is, I recently revisited an old recipe from my first book and am happy to report that it is still delicious, still magical: rainbow cookies stuffed with chocolate chip cookie dough.
I mean, what could be better than taking a bite of a magical rainbow cookie and then realizing it's stuffed with chocolate chip cookie dough? It's like...your brain will be a confetti cannon, that degree of mind-blowing.
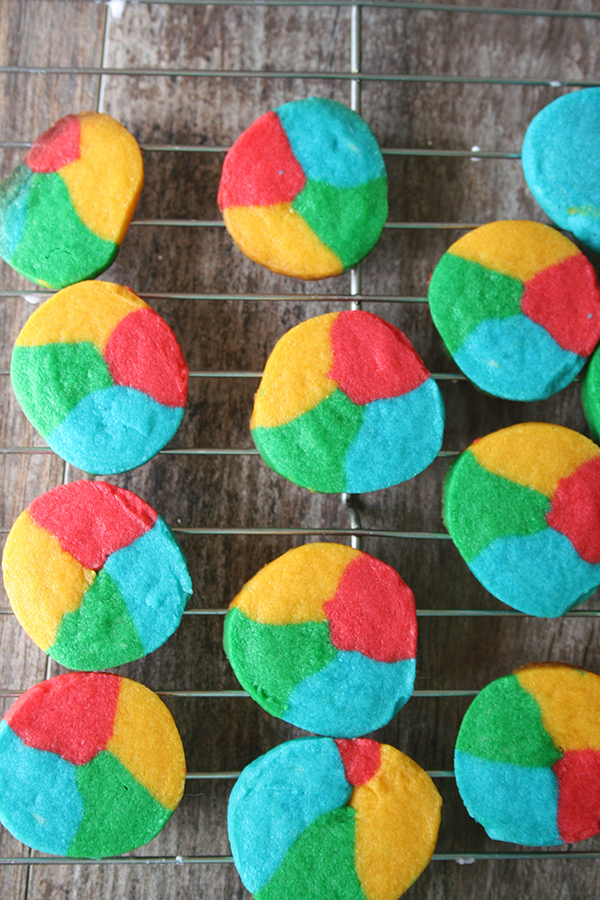
Realizing that my original recipe, which employed a full batch of Kaleidoscope-cooky (yes, cooky) batter was a bit LARGE, this time I tried a half-batch, and it worked splendidly. So when just a half million cookies as opposed to a full million are in order, give this recipe a try!

Rainbow Cookies Stuffed With Chocolate Chip Cookie Dough.
Here's how you do it. Adapted from CakeSpy Presents Sweet Treats for a Sugar-Filled Life
You'll need:
- 1 batch rainbow cookie dough
- 1/2 batch or a little less of chocolate chip cookie dough (bake the rest normally, or use it to stuff cupcakes, you follow your bliss)
- Preheat your oven to 375 degrees. Line two baking sheets with parchment paper.
- So, you've got your rainbow cookie dough all ready to go. Now, slice it into fairly thin coins--like, 1/8 inch thick. Lay them on your prepared baking sheet with about 1 inch in between rounds (they won't spread too much).
- On the center of each round, place a small dollop of chocolate chip cookie dough.Place a second coin of rainbow cookie dough on top. If it cracks between color segments, use your fingers to smooth it back into place. Gently press the sides down so your chocolate chip cookie dough doesn't ooze out.
- Bake for 9-10 minutes, or until rainbow cookies have a dull finish on top.
- Let cool for 5 minutes on the sheet before transferring to a wire rack to cool completely.

Enjoy!
CakeSpy's Recent Craftsy Posts

Food
How to cook shrimp: 4 ways. Plus an extensive education on shrimp.
How to make evaporated milk. This actually tastes good even on its own, and adds a great flavor to baked goods.
The most popular cake decorating posts of all time on the Craftsy blog. I am proud to say I had a hand in several of these!
How to make the perfect meringue. A primer!
Art
Free coloring book page download: a design specifically for cake decorators!
Free coloring book page download: a design specifically for knitters!
Helpful tips for designing your own coloring book pages!
Creative ways to color your coloring book pages. Think beyond colored pencils!
How to draw a zen-tangle in four easy steps! Unicorn art used in the tutorial, thank you very much.
Baker's Dozen: A Batch of Sweet Links
Free coloring book page with a knitting design! (Drawn by me). (Craftsy)
A chocolate subscription service tailored to YOU, wonderful YOU. (Chococurb)
Melty mint sugar cookie cups. Love! (Wishes and Dishes)
How to make chocolate ganache WITHOUT cream. (CakeSpy)
Twinkie ice cream cake. Yes! (Frugal Upstate)
Um...have you bought The Unicorn Coloring Book yet? (Amazon)
Carrot coffee cake. This combines aspects of crumb cake, cheesecake, and carrot cake. That is to say, OMG. (Eazy Peazy Mealz)
Lemon souffle pudding cakes. (Merchant Baker)
No bake chocolate chip cookie pudding pie. Yasss. (Crazy For Crust)
In case you missed it: how to make salted caramel sauce with milk instead of cream. (CakeSpy)
Raw chewy chocolate squares. These look delicious. (La vie quotidienne)
Crunchy bite-sized bacon tots. Not sweet but I love the creativity here. (West via Midwest)
Chocolate espresso pots with Baileys. Whoa. (Vodka and Biscuits)
Challah cinnamon rolls. YUM! (Heather's French Press)
Book of the week: The Hot Chicken Cookbook. No, it's not dessert, but I am really interested in regional food, and this is a great book dedicated to a Nashville specialty that is still relatively little-known outside of the region. This book offers recipe, regional flair, and some interesting history--I say it's a winner!
Can You Make Caramel Sauce With Milk Instead of Cream?
FACT: Caramel sauce is delicious. Caramel sauce is dreamy, and filled with cream. But wait. Can you make creamy caramel sauce when you're all out of cream? The answer is yes: it's possible to make caramel sauce with milk instead of cream, and I want to tell you how.

But before I do that, I feel that I should offer a small education on the unusual process that is making caramel, because it is full of moments when your mixture looks WRONG, and I want to tell you about them and why you're actually doing things right.
These are some hard-earned tidbits I have picked up from experience. These hold true whether you're using cream OR milk.
1: A sturdy, heavy-bottomed saucepan with tall sides is your best bet.
You'll see that I didn't quite follow my own advice in the photo tutorial, but I am pretty accustomed to making this sauce so I have learned how to do it. If you have never made caramel, you'll be happy for the tall sides on a pot, because of the next thing:
2: When you add the milk to the sugar, the reaction can be scary.
The basic process of making caramel sauce is this: you'll melt some sugar, then you'll incorporate milk, then cook until thickened.
But here's the thing: when you add the liquid to the hot sugar, it's going to have a firecracker of a reaction: it's going to bubble, it's going to hiss, it's going to seem like something is very wrong. Guess what? It's totally normal. You just want those high walls on the pot so that when it gets bubbly and scary, it doesn't make a big mess on your stovetop.
3: When you add the milk to the sugar, weird, hardened bits of sugar will form.

In addition to the crazy reaction, bits of sugar will solidify and look like ruined lumps and bumps when you add the liquid. Some of them, as you can see above, are really quite scary and wrong-looking. Guess what? Also this is normal. By continuing to cook the liquid, those bits will dissolve gradually. Even that monster-lump above!
4: It's not hard to make caramel sauce, but it requires your full attention.
Making caramel sauce isn't hard, but please give it your undivided attention. It's worth it in the end, because you'll have a smooth, delicious caramel, and won't have any scorched pans to have to deal with later.
OK, now that you've read these cautions, let me tell you how to make caramel with milk instead of cream!
Note: this is a salted caramel sauce. If you're the single person in the world who does not love salt and caramel, you can omit the salt.
Caramel sauce with milk
Makes about 1 3/4 cups
- 2 cups sugar
- 1 3/4 cups milk (I used whole milk)
- 1 teaspoon vanilla
- 1/2 teaspoon salt
Pour the sugar into your large pot. Shift the pot side to side to distribute the sugar evenly.

Put the pot over medium-low heat. Stay nearby, but don't stir or shift the sugar. This is a slow, gentle heating, and nothing visual will really happen for a few minutes. Concurrently, you can combine the milk and the vanilla in a heatproof measuring cup, and heat the mixture in the microwave for about 1 minute (this will help lessen the reaction when the liquid hits the hot sugar in a bit).
After several minutes (it was about 8 minutes for me), you'll see the sugar beginning to liquefy. At this point, use a heatproof rubber spatula to turn the mixture over on itself, moistening the still-dry portions of sugar.
Continue heating. As the sugar warms, it will begin to darken in color, first to a sort of beige and then to a light caramel tone. When the sugar has reached a rich caramel tone, medium-brown but not dark, remove from heat. Now, be ready for some hissing and bubbling as you pour about 1/3 to 1/2 of the milk mixture into the caramel mixture. It will hiss, it may bubble, hardened bits may form, but it shouldn't bubble over the sides of the pot. Once the bubbling has subsided, add the rest of the milk mixture, and return the pot to the burner, and put it on medium-low heat. Remember: those hardened bits = totally normal.
Stir constantly as the mixture cooks. You'll see that the hardened bits begin to shrink and then dissolve. Once they are mostly dissolved, stir in the salt.

Cook for about 10 minutes for a thinner caramel sauce, 15-20 minutes for a thicker sauce. Remove from heat when the mixture is about 20% short of how thick you'd like it, because it will thicken more as it cools. If it seems at all lumpy, strain it through a fine mesh strainer.
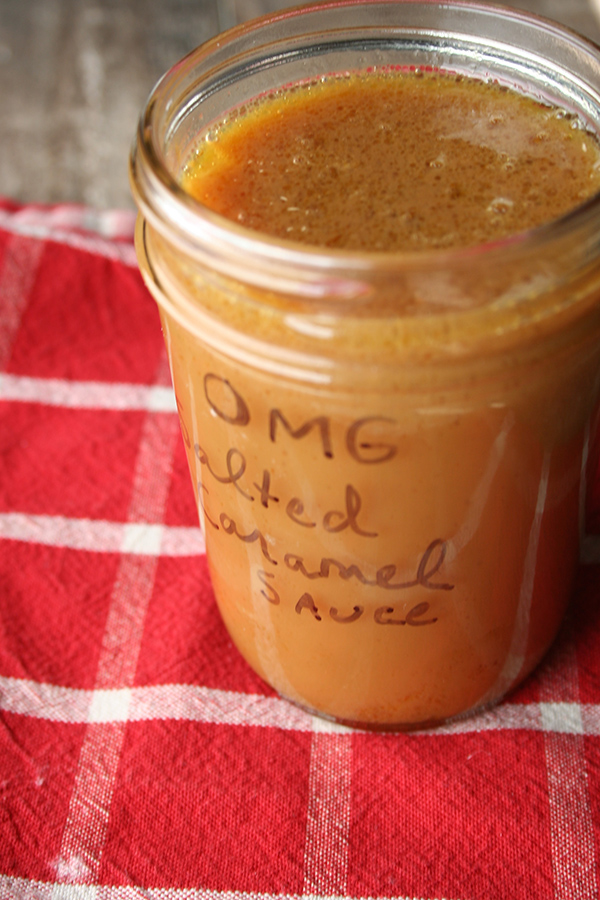
Transfer the mixture to a heatproof container to cool. Store leftovers in the fridge in jars. Enjoy on EVERYTHING.
Do you like caramel sauce?
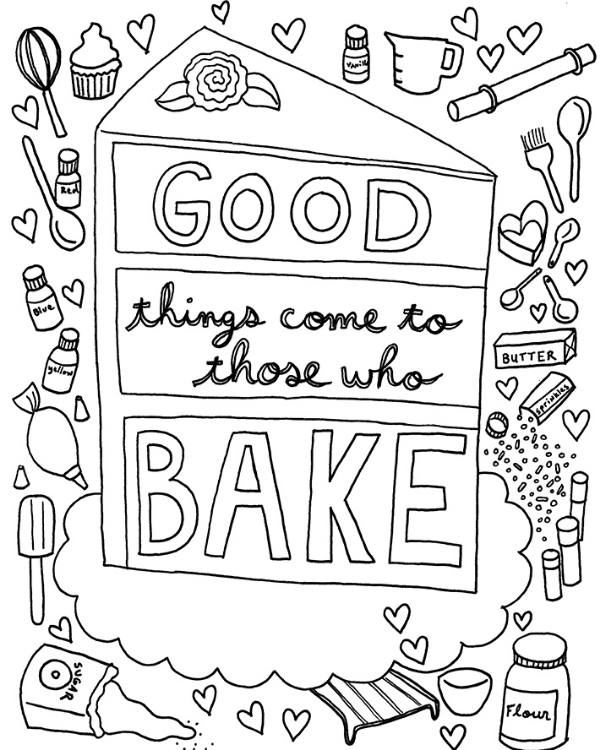
Two FREE Coloring Book Page Downloads!
Heyyyy creative people! I have made two brand new and totally free-to-download coloring book pages for Craftsy.com. The images below are previews; you can click on them to go to the download!
First up is a coloring book page designed for cake decorators...
and then the next design is made for knitters!

To review: get the cake-themed coloring book page HERE; get the knitting-themed coloring book page HERE.
Enjoy!
Baker's Dozen: A Batch of Sweet Links
Chubby hubby-style dessert cups. OMG. Pictured above. (Perugina)
Vegan almond butter and dark chocolate breakfast cookies. Yum. (Warm Vanilla Sugar)
Chocolate chip cookie dough brownies. These look great! (Marsha's Baking Addiction)
How to draw a (unicorn-themed) zentangle! (Craftsy)
Chocolate chip cheesecake bars. Yummmmmm! (Food Fanatic)
Mogador vertical cake. Classy, in the way that only the French can pull off. (Delices d'orient)
This cherry buttercream frosting looks off the hook. (Girl Inspired)
Japanese melon bread. I am intrigued! (Chopstick Chronicles)
Very cool: how to make geode cake pops! (Craftsy)
Chocolate chip snickerdoodles. Happy dance! (Crazy for Crust)
Lemon olive oil cake. Refined! (Beyond Frosting)
Crunchy chocolate milkshake ice cream cake. OMG, people. (Sweetest Menu)
Make your own evaporated milk! (Craftsy)
Book of the week: Artisan Caramels. If you love caramel but are kind of scared to make it, this book is rather handy to have around! First, learn the basics of caramel-making (including some really good troubleshooting), then use your perfect caramel to make candies, and recipes infused with caramel filling/sauce/etc.
Carrot Sugar: It's a Thing. Or at Least it Should Be.
I have done something creative and unusual with carrots. No, it doesn't involve starting my own adult YouTube channel. What I did is this: I made carrot sugar.

CARROT SUGAR!
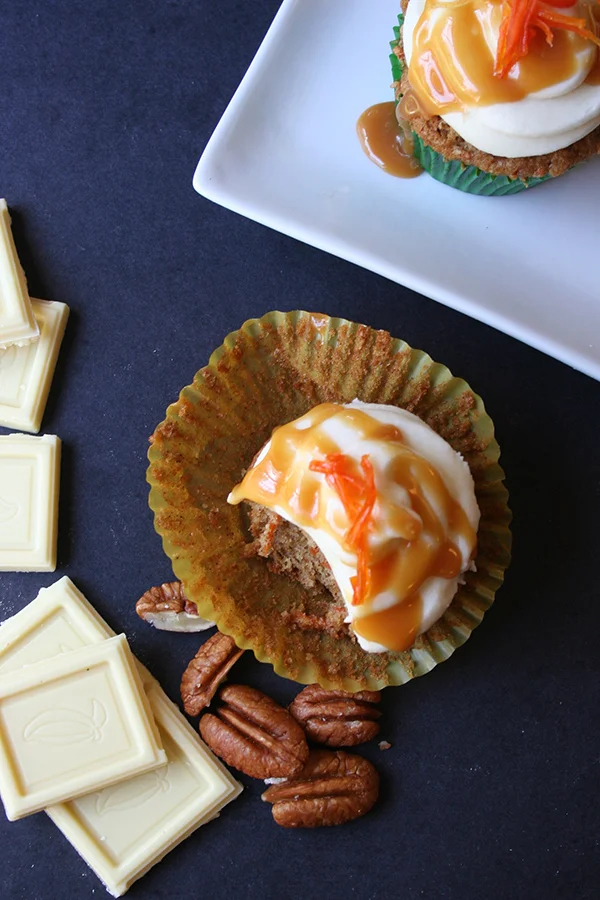
Let me explain how this magical orange dust came into existence. You see, a few weeks ago I was working on developing a recipe for carrot cupcakes. They came out beautifully, and part of their appeal was the homemade candied carrot peel garnish.
Candied carrot peel is made by boiling carrot shavings in a simple syrup, then baking them low and slow until they become firm. It's a fantastic carrot cake garnish.
But once the recipe was done, I had a lot of candied carrot peel. As appetizing as it is as a garnish, it's not quite as appealing as a stand-alone snack. So, I found myself with a good 3/4 cup of candied carrot peel.
I don't know if I'm the only one who thinks like this, but.
When it came to using up this candied carrot peel, I pretty immediately thought "I wonder what would happen if I ground this candied carrot peel back into sugar?"

After it had been around for a few days, it had gotten pretty dry, which I figured would work to my advantage.
So, I put the carrot peel in the blender...
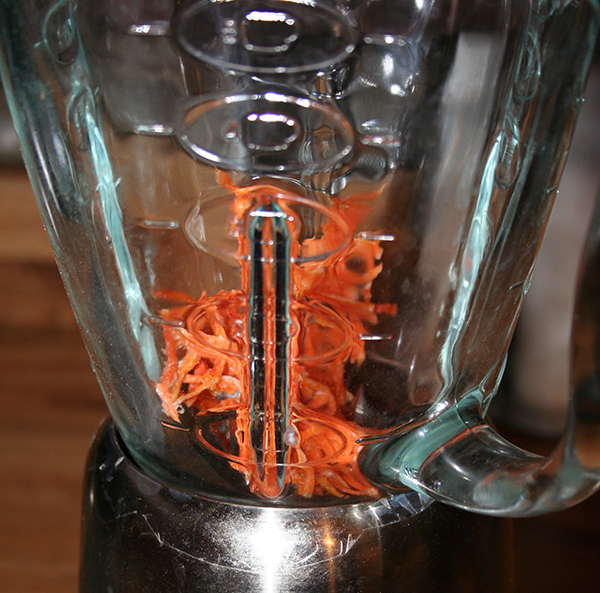
...and blended. At first it was somewhat coarse, so I blended a bit more, until it had a consistency with the smallest granules like confectioners' sugar, and the largest about the consistency of granulated sugar.
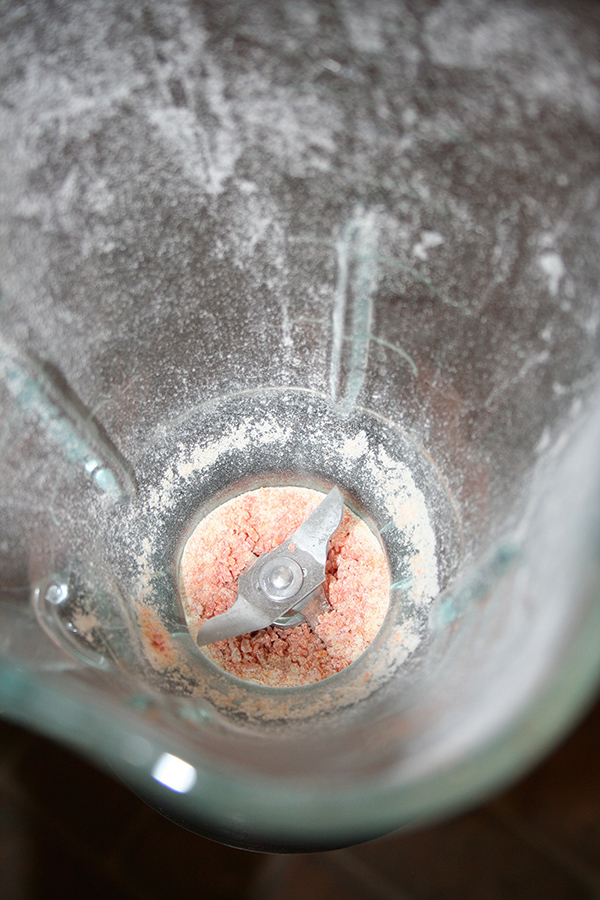
All of those candied carrot bits yielded a rather small amount of sugar (about 3 tablespoons' worth), but look at how pretty.

So how would I use this carrot sugar?
The way that I decided to do it was like so: to use it in a very small-batch buttercream.
I combined about 2 tablespoons of softened unsalted butter with the carrot sugar and a pinch of salt, and mixed with a little spreading knife, acting like it was a palette knife and I was mixing acrylic paint. It made me feel like a particularly artistic bunny.

Then, I piped it on to a cupcake.

I loved how this came out! I have to say that I have the benefit of having gone through the process of creation, so I think that I was tasting with extra curiosity and anticipation. I don't know if you'd be able to tell that this was a carrot buttercream, because interestingly, it didn't SCREAM carrot.
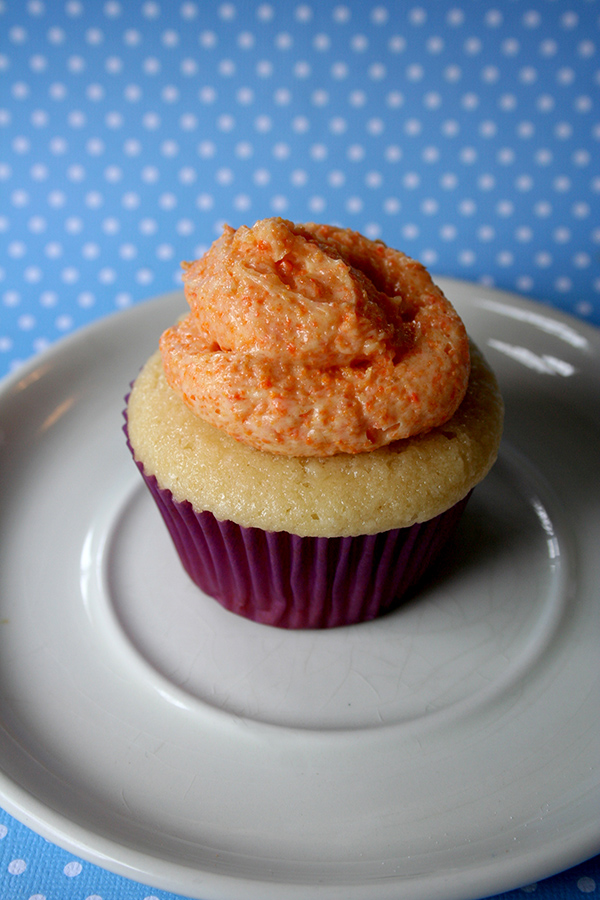
So, the carrot-sugar buttercream was subtle--not super carrot-y, but definitely a little different. The carrot bits gave it a little bit of texture, and a definitely earthy flavor. The sweetness wasn't as tooth-numbing as a typical confectioners' sugar.
To review: how I made this carrot sugar
- I made a batch of candied carrot peel.
- Part of it, I used to garnish carrot cupcakes. But I had about 3/4 cup of candied carrot peel leftover, and no particular use for it.
- I blended the leftover candied carrot peel into a sugar consistency.
- I used it in a small-batch buttercream, but I bet it would be a great way to sweeten a club soda or a cocktail, or to use as a sprinkled garnish on a carrot cake.

Oh, and PS, I also reserved the sugar-water from boiling the candied carrot peel, let it dry, and then ground that, too. It's in the background here. What should I do with that, do you think?
If you give it a try, enjoy!
Rainbow Cookies
If you are what you eat, be a unicorn-approved rainbow cookie.
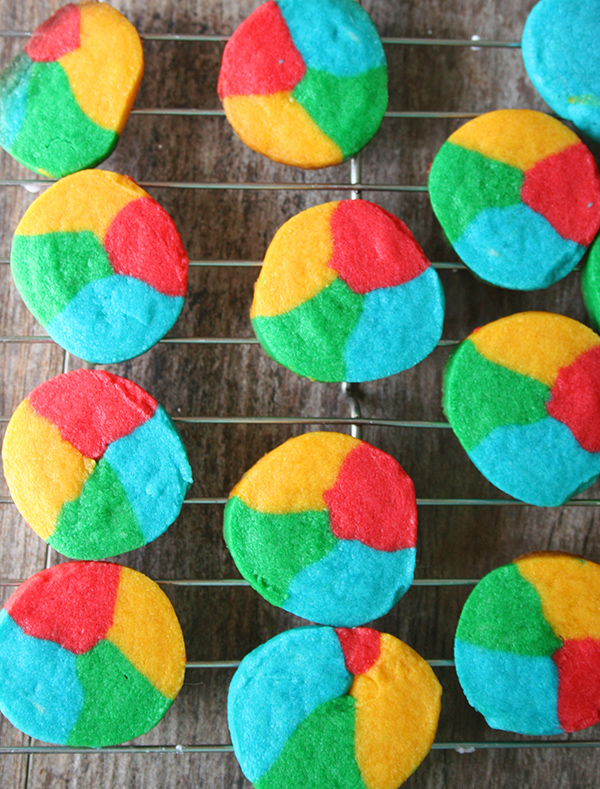
Sometimes, you want to eat a cookie that is beige. Sometimes, you want to eat a cookie that is the color of coffee. But me, I like my cookies the same way I prefer unicorns: full of rainbows and magic.

These cookies are incredibly easy to make, a little old-fashioned (they're based off of the Kaleidoscope Cookies in Betty Crocker's Cooky Book), and totally delicious. They taste more subtle then they look, with a basic, simple, nothin-wrong-so-why-change-it butter cookie flavor. But the look is really what draws you in: a multicolored array of slice and bake cookies that will delight people and have them asking "how'd you do that?".

Well, it's easy. I'll tell you how. Let's make these cookies. Right here, right now.
Easy rainbow cookies
Makes about 40 cookies, maybe more - Printable version here
- 2 1/4 cup flour
- 1/4 teaspoon salt
- 2 sticks unsalted butter, softened
- 1 cup confectioners' sugar
- 1 teaspoon vanilla extract
- food coloring
- Sift together the flour and salt; set to the side.
- In the bowl of a stand mixer fitted with the paddle attachment, cream the butter until nice and creamy. Add the sugar, and continue beating until the sugar has been absorbed (employ rubber spatula as needed). Stir in the vanilla.
- Add the flour mixture in 2-3 additions, mixing on low speed, using the rubber spatula as needed. You're gonna be all "this flour is never all gonna fit in this dough" but trust me, it will.
- Divide the dough into four equal portions (or five, if you're feeling frisky). Tint each one a different color. Go vibrant, because food coloring fades a touch in the oven.
- Divide each tinted portion into two equal parts.
- Grab one portion of each color of dough, and roll each portion into a log about 4 inches long. Press the portions together, firmly, to ensure a seal. Now, roll the multicolored log into one long log, about 12 inches long. Repeat with the remaining dough portions, so you have two logs of dough.
- Wrap each log with plastic wrap and put in the fridge for 2-3 hours or overnight.
- When you're ready to bake, line 2 baking sheets with parchment and preheat the oven to 375 degrees F.
- Remove the dough from the fridge, and let it soften slightly. Slice into "coins", at least 1/4 inch thick, a little thicker if you like fat cookies. If the dough is flaky or the color segments are cracking as you slice, let it soften a few minutes before working with it. (you can also gently smoosh the dough back together).
- Place the coins on the prepared baking sheets--they won't spread much so you can put them fairly close together.
- Bake for 7-9 minutes, rotating the pans at the 4 minute mark.
- Once matte on top (it can be hard to tell if they are lightly browned on the sides because of the vibrant colors) remove from the oven. Let the cookies cool on the pans for a few minutes before transferring to a wire rack to cool completely.

Taste the rainbow!
Baker's Dozen: A Batch of Sweet Links

Happy National Empanada Day, btw!!
Food packaging, and why we're so attached to it. (Irish Times)
Freaking amazing: olive oil cupcakes with white chocolate mascarpone buttercream. (Colavita)
Chocolate babka. Let's do this thing. (Eva Bakes)
Butter tart bars. YES! (The Kitchen Magpie)
Peanut butter marshmallow chocolate rice krispie squares. OMG. (15 Spatulas)
Lumberjack plaid cake. Love! (Boing Boing)
Chocolate curry coconut cake. Very interesting! (My Dish is Bomb)
I want to eat every one of these interesting Japanese desserts. (How I became Texan)
Vegan meringues. Fascinating! (Cooking is Messy)
Healthy....salad....cakes? (News.com)
Lemon Welsh cakes with honey ginger whipped butter. Breakfast, yes. (Giraffes Can Bake)
The "I want chocolate" cake. I want this! (Smells Like Home)
Cornmeal olive oil cookies. (Colavita)
Book of the week: The Unicorn Coloring Book. Wait, wasn't this the book of the week LAST week? Yes, it was. But it's still my favorite book so it's retaining this spot.