Aren't you GLAD that cookies exist? After all, they make the world better in so many ways. From day-to-day treats to holiday extravaganzas, they have the power to make moments even sweeter.
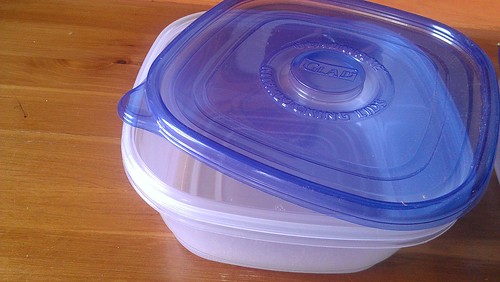
So I was mega-excited to be chosen to host a GLAD "Cookies for Kids' Cancer" cookie exchange. Having been chosen, they provided a stipend for my baking ingredients and sent me a care package of GLAD containers for the giveaway...
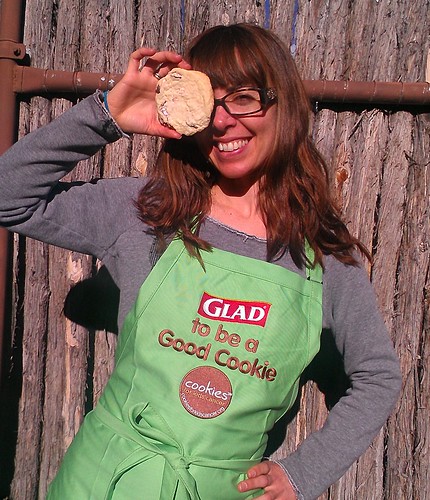
as well as some stickers, promo items, and this snazzy apron:
You can find out more about the program at www.cookiesforkidscancer.org--it's a very sweet way to promote a great cause. You too can get in on the fun by exchanging a virtual cookie with a friend at www.glad.com/Glad-Cookie-Exchange. GLAD will donate up to $1.00 to Cookies for Kids' Cancer for each cookie sold, exchanged or given this November and December 2012 – up to $100,000!
So, in case you haven't gotten it yet--good cause. But having established that...let's move on to the good good better than good COOKIES. OH, the delicious things which were baked! It was a great way to share some sweetness with friends.
Now, because my crew wasn't completely comfortable with the sale method, we did ours as an exchange. There were about 10 types of cookies total. Everyone got a container, and set forth to filling it with each other's cookies--how sweet, right?
Everyone was told to bring 24 of their cookie, and since there were 10 batches, that means that a total of 240 cookies were exchanged (well, some were consumed right away. I will be honest.) I was honored that many of the guests hit me up for recipe suggestions, and was fascinated to see what people decided on.
In looking at the things people brought, which ranged from classic to creative, I wondered if we could define the hows and whys into several ideas for those who may host their own cookie exchanges this year: things that might act as great tips when deciding what to make! I decided to make this the focus of my post, along with some of my favorite recipes shared during the evening!
IDEA #1: GO CLASSIC ALL THE WAY.
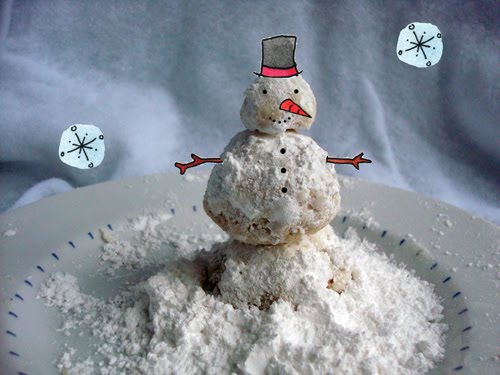
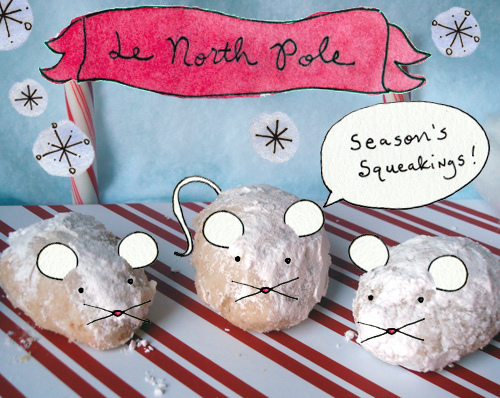
Snowballs. Or Russian Teacakes. Mexican Wedding Cakes. Whatever you want to call them. While their name can vary, what does not is the fact that they are highly tasty and a traditional holiday favorite! This makes them a vital part of any cookie exchange! Of course, I did hear (adorable!) that sometimes these cookies are called Moldy Mice. Which makes this all the more appropriate:
This recipe is just about as simple and as classic as you can get. YUM.
Snowball Recipe
Ingredients
- 2 cups sifted flour
- 1/4 tsp. baking powder
- 1/4 tsp. salt
- 1 cup butter, softened
- 1/2 cup confectioners sugar
- 1-1/2 cups chopped walnuts
- 1-lb. confectioners sugar to roll cookies in
Directions
- Sift flour, baking powder, and salt. Mix butter with sugar until very light and fluffy. Mix in flour mixture. Stir in walnuts. Refrigerate until easy to handle.
- Make balls in the palm of your hand by tablespoons. Place on a lightly greased cookie sheet, and bake in a 350 degree F. oven until golden brown, being careful bottoms do not burn.
- Place confectioners sugar in a large bowl. Take cookies from oven and gently put into bowl. Carefully, they are hot, toss cookies in sugar until they are coated.
IDEA #2: TAKE A CLASSIC, GIVE IT A TWIST
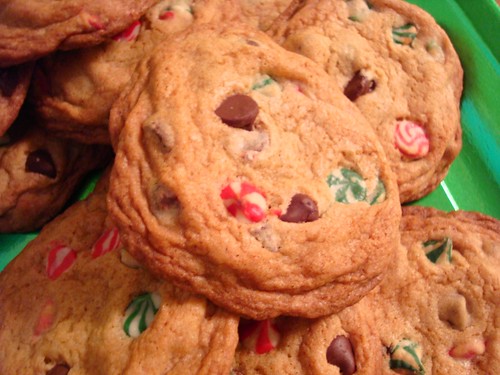
Here's an idea: take a crowd pleaser, such as chocolate chip cookies...but add something unexpected! These cookies have two twists. First, one that is visual: the chips are tricked out! Second, instead of using vanilla extract, my friend Jill had the idea to use peppermint instead! This definitely gave the cookies a highly unexpected flavor. It's funny because on the first bite everyone was like "there's something wrong with these chocolate chip cookies!" but as it turned out it was just unexpected, that minty burst of flavor. But upon bite two, it started to taste pretty good. And then, suddenly, the cookies were gone!
Ingredients:
- 2 cups flour
- 1 teaspoon salt
- 1 teaspoon baking soda
- 1 cup (2 sticks) unsalted butter, softened
- 1 cup packed dark brown sugar
- 1/2 cup granulated sugar
- 2 large eggs
- 2 teaspoons peppermint extract
- 2 cups semisweet chocolate chips or swirled holiday morsels such as these
Directions:
- In a large bowl, whisk the flour, salt, and baking soda together; set aside.
- In the bowl of an electric mixer fitted with the paddle attachment, beat the butter and sugars together until smooth and creamy. Scrape down bowl and add eggs, one at a time, beating until incorporated. Mixture will look light and fluffy. Add peppermint extract and beat for 5 seconds.
- Add the flour mixture, bit by bit, mixing after each addition.
- Using a spatula or wooden spoon, fold in the chocolate chips.
- Cover the bowl tightly and put in the fridge for several hours (Baked suggests 6; I did 2 and they were still delicious).
- Preheat the oven to 375 F degrees.
- If you want big cookies, use an ice cream scoop to scoop out 2-tablespoon sized balls. If you want smaller ones, use two teaspoons (one to scoop the dough and one to release it). Use your hands to shape into perfect balls and erase any imperfections. Place on prepared baking sheets, leaving at least 1 inch between cookies. Bake for 10-12 minutes for smaller cookies, 12-14 minutes for larger cookies. Make sure to rotate pans at the halfway mark to ensure even baking. They're done when the edges are golden and the tops are just starting to lose their shine.
- Remove pan from oven and cool on wire rack. They are great warm, but you could also let them cool, if you're so inclined.
- These babies can be stored in an airtight container for up to 3 days. Doubt they'll last that long though.
IDEA #3: HIT UP MOM FOR IDEAS
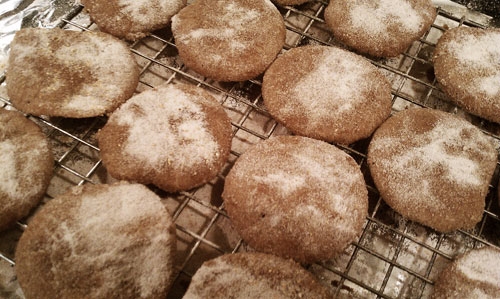
Some of us are lucky enough to have moms that are really good bakers. Such as my mom, SpyMom! It's from her that this recipe was donated. While she couldn't physically make the event, she donated this recipe and I believe they'd probably ship quite well in a GLAD container...
Snowy Snickerdoodles
Ingredients
- 1 cup sugar
- 1/2 cup butter
- 1 large egg
- 1 teaspoon vanilla
- 1 1/2 cups flour
- 1 1/2 teaspoons cinnamon
- 1 teaspoon baking powder
- 1/4 teaspoon salt
- cinnamon sugar
Procedure
- In a mixer bowl, cream together sugar and butter; beat in egg and vanilla
- Combine flour, cinnamon, baking powder and salt
- Add to butter mixture
- Blend well
- Cover and refrigerate 2 hours or till firm enough to roll into balls
- Shape dough into small balls about 3/4-inch in diameter
- Roll in cinnamon sugar to coat
- Set cookies 1-inch apart on lightly greased cookie sheets
- Bake at 350° for 10 minutes or till the edges are lightly browned.
- Cool slightly on pans, then remove to racks to cool completely.
IDEA #4: SEEK THE ADVICE OF AN EXPERT
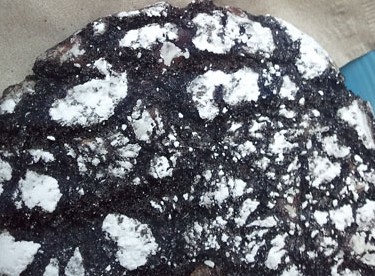
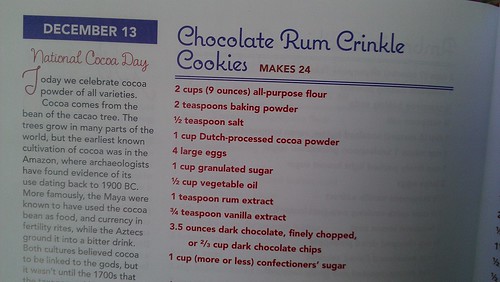
It's never an idea to trust the expertise of a cookie expert. And luckily with Anna Ginsberg of Cookie Madness's new book, The Daily Cookie: 365 Tempting Treats for the Sweetest Year of Your Life, every day is a cookie opportunity. When one of the guests hit me up for ideas for what to bake, I said, why not pick a significant date to you from this book, which has a cookie for every day of the year, with fun facts about why each cookie is appropriate for the day? Well, said friend chose December 13, a date in the future which happens to be her birthday, as well as National Cocoa Day, and baked up some Chocolate Rum Crinkle Cookies from the book. Since she didn't use rum, I guess we'll call them "Chocolate YUM Crinkle Cookies".
Chocolate Yum Crinkle Cookies, adapted from The Daily Cookie: 365 Tempting Treats for the Sweetest Year of Your Life - makes 24 cookies
Ingredients
- 2 cups all purpose flour
- 2 teaspoons baking powder
- 1/2 teaspoon salt
- 1 cup dutch processed cocoa powder
- 4 large eggs
- 1 cup granulated sugar
- 1/2 cup vegetable oil
- 1 teaspoon rum extract (we just used more vanilla instead of this)
- 3/4 teaspoon vanilla extract
- 3.5 ounces dark chocolate, finely chopped
- 1 cup (more or less) confectioners' sugar
Procedure
- Mix the flour, baking powder, salt, and cocoa together in a small bowl; set aside.
- In the bowl of a stand mixer fitted with the paddle attachment, or in a large mixing bowl using a handheld electric mixer, beat the eggs on medium-high speed for about 2 minutes or until light. Reduce speed to medium and gradually add the granulated sugar. Using the lowest speed of the mixer or with a mixing spoon, stir in the oil and extract(s). Add the flour mixture and stir until incorporated. Remove from the stand mixer (if using) and stir in the chocolate. Cover the bowl with plastic wrap and place in the freezer for 40 minutes, or until firm enough to handle.
- Preheat the oven to 350 degrees F, and place a rack in the upper third of the oven. Line two baking sheets with nonstick foil or parchment paper.
- Pour or sift the confectioners' sugar onto a plate. Scoop up heaping tablespoons of cold dough and shape into 1.5 inch balls. Roll the balls in the sugar to coat generously. Arrange the balls 2 1/2 inches apart on the prepared baking sheets. Bake one sheet at a time for 10 minutes or until just until they appear puffy and "set". Immediately transfer to a wire rack to cool completely.
IDEA #5: GO COLORFUL
Why not deck the halls with holly jolly color? After all, people "eat" with their eyes first, and this brightly colored cookie is bound to make people smile.  It was the recipe that I contributed to Go Bold With Butter recently, so I will let you click over there for the recipe, but basically it's an adaptation of this simple butter cookie. Yum. These are guaranteed to draw people's eyes to the cookie plate, and they will keep beautifully in airtight containers!
IDEA #6: CHOOSE HANUKKAH SWEETNESS
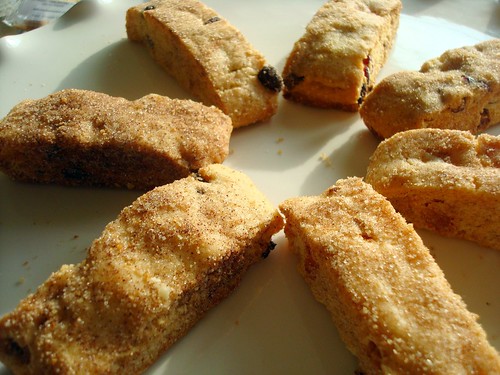
While I do not personally celebrate Hanukkah, through the years and experiencing some of the customs through friends who do, I have truly come to appreciate a lot of the delicious sweets from those "eight crazy nights". Though mandelbrot, which is somewhat like biscotti, is delicious any time of year, Cake Gumshoe Melissa reports that her (not super-traditional) family always enjoys them especially during this time of year. I think you will, too!
Cinnamon sugar Mandelbrot
Makes 30-40; recipe adapted from theshiksa.com
- 3 cups all purpose flour
- 1 teaspoon baking powder
- 1/2 tsp salt
- 1 cup vegetable oil
- 1 cup sugar
- 3 eggs
- 1 tsp pure vanilla extract
- 1 cup semi-sweet chocolate chips (you can sub chopped nuts, candied fruits, etc.)
- Ground cinnamon and granulated sugar for dusting
Procedure
- Sift together the flour, baking powder and salt; set to the side.
- Mix together oil and sugar until combined, then add eggs one at a time. After the eggs are combined, add the vanilla.
- Add the dry ingredients slowly to the sugar/egg mixture.
- Once the dough is smooth and sticky, fold in the chocolate chips.
- Cover the dough with plastic wrap and place it in the refrigerator for at least two hours, or overnight.
- When ready to proceed, oil your hands and form 4 long rows with the dough onto a parchment-lined cookie sheet. Each strip of dough should be 3-4 inches wide. Leave space for spreading as these will spread during baking.
- Bake at 350 for 25 minutes. Meanwhile, in a flat shallow dish, combine ¾ cup of sugar with enough cinnamon to turn the mixture light brown.
- Take the mandel bread out of the oven (they are not finished yet). Reduce oven temperature to 250 degrees F. Slice the mandel bread into slices, like biscotti. Maybe like an inch thick.
- Roll each cookie into the cinnamon sugar mixture. Put the pieces back on the cookie sheet on their sides.
- Bake for another 15 minutes; if you like them softer, you might want to take them out at 12 minutes or so, as the longer they bake, the crispier they will be. Let cool completely on a wire rack; Store in an airtight container.
IDEA #7: POP OUT OF THE MOLD
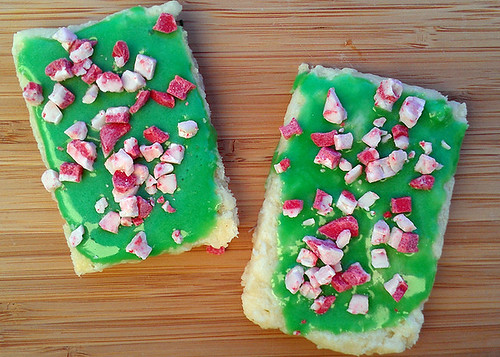
Want to delight and impress your cookie exchange guests? I have three (is a hyphenated word like 2 words or one and a half?) words for you: HOLIDAY POP-TARTS. Yes indeed, these holiday-hued babies are bound to make your offering the most memorable.
Homemade Holiday Pop Tarts
Makes 6-8 tarts, maybe even more, depending on size; adapted from wonderful, wonderfulCulinary Concoctions by Peabody
For the crust
- 1 1/2 cups flour
- 1/2 teaspoon salt
- 1/2 cup (1 stick) butter, softened and cut into cubes
- 3 tablespoons cold water
For the filling
Jam, about 1 heaping teaspoonful per pastry (your choice of flavor; I used blueberry)
For the icing
- 1 cup confectioners' sugar, sifted
- heavy cream, to thin (you could use milk...but I like cream)
- food coloring, if desired
- colored sprinkles or mint chips for garnish
Procedure
- Preheat oven to 450°F. Line a baking sheet with parchment paper; set to the side.
- Combine flour and salt in a large bowl. Add butter and blend with a fork, pastry cutter, or your impeccably clean hands. Blend until the mixture is fairly coarse. Add the water, bit by bit, gently mixing the dough after each addition, until the dough is cohesive enough to form a ball.
- Place dough on a lightly floured surface and roll into a rectangle, about 1/8 inch thick. Cut out rectangles approximately the size of index cards (3x5 inches), or smaller if you prefer a more modest portion (I didn't). Make sure you have an even number of cutouts. I think that mine might have been a little thicker than 1/8 an inch, but I ended up with 12 rectangles (for 6 pastries).
- On half of the rectangles, place a small spoonful of the jam of your choice in the center. You don't want it to be too thick or the top crust will mound on top of it.
- Place the remaining rectangles of dough on top of the ones with jam. Crimp all four edges by hand or with a fork to ensure that your filling won't ooze out. I also poked the top of each with a fork, to vent them.
- Place the tarts on your prepared baking sheet, and bake for 7 to 8 minutes, or until light golden on the edges. Remove from the oven and let them cool completely.
- While the tarts cool, prepare your icing; make sure it is fairly thin but not so thin that it will just drip off. If desired, tint with food coloring. Once the pop tarts are cool, drizzle it on top. Garnish with sprinkles or holiday-hued treats.
IDEA #8: JUST BE HONEST, YOU'RE LAZY
Not a baker? Nobody's going to be fooled if you show up with fancy-looking treats and try to pass them off as your own (well, unless perhaps you use this handy guide). Sure, you *could* get a slice and bake tube cookie, but yeah, that's just too hard. But you know what? Don't sweat it. Just head to the store and pick up SOMETHING so you're not empty handed! Because as much as we love homemade cookies that came from the result of love and hard baking labor, we mostly want to gather together. So go ahead and buy some Little Debbie Christmas Tree Cakes--we won't judge you. Too harshly. Just be sure to give a really big donation to the cause after, please!
Store-Bought Snack Cakes
- Go to the closest grocery store (not a co-op or Whole Foods please, they won't have the kind of treats we're talking about here).
- Go to the snack cake aisle, where you'll find Twinkies and stuff.
- Buy the most holiday-tricked out ones you can find. In the picture, you'll see Little Debbie Christmas Tree Cakes.
- Return home.
- Unwrap, put in a GLAD container. Go to the cookie exchange, and hold your head up high. Give a big donation to the GLAD cause after!
I have partnered with The Glad Products Company through DailyBuzz to help promote their Food Storage products. I have been compensated for my time commitment to work with this product. However, my opinions are entirely my own and I have not been paid to publish positive comments. Thank you GLAD!

