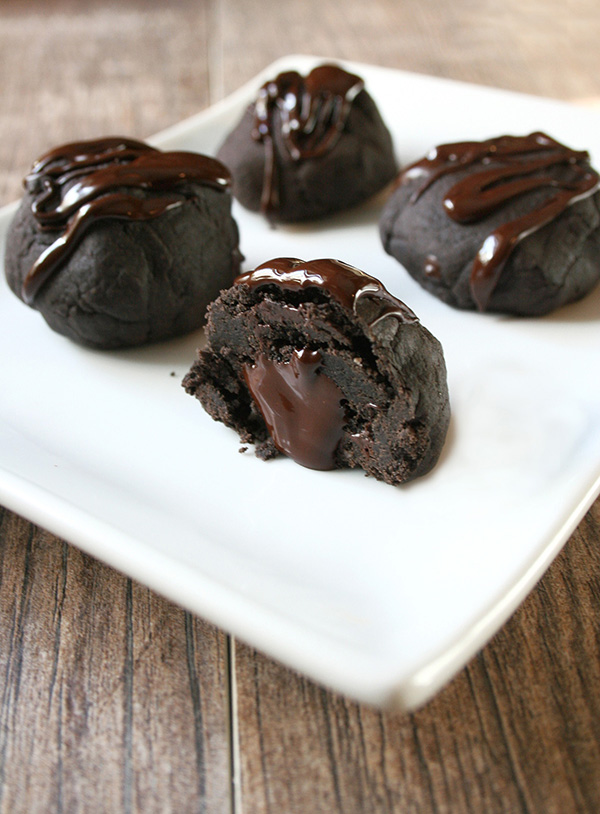
These are like nuggets of pure joy. Why?

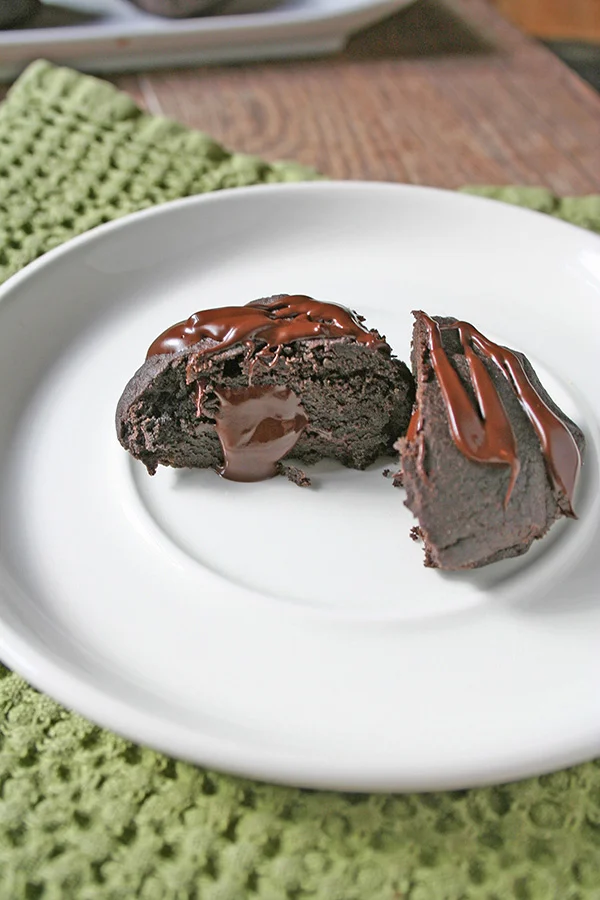
Well, because they are chocolate cookies--already joyful--that once you bite into, you realize are also filled with chocolate. This upgrades them to pure joy territory. That answers that, doesn't it?
This cookie recipe wasn't without some ups and downs. I thought I had the recipe just right, but then I wanted to test it one more time (and bring some cookies to my neighbors and show off my mad skillz). On the second batch, I freaking forgot to add sugar, a sad tale you can read about here. I decided to look at that as an opportunity to grow, so I blogged about it, tossed out the offending cookies, and made a brand new batch.
There was sugar in this batch, you can rest assured.

The batch following the sugar debacle confirmed it: these cookies are winners. With a slightly sandy (in a good way) dough, they have a rich chocolate flavor from the Hersey's Special Dark cocoa I used, a texture with a touch of resistance and a touch of crumble, and a touch of salt for contrast. The chocolate filling gives them moisture and makes them fun and prize-like to bite into. And as for chocolate on the top? Well, why not?
These cookies are a winner, and as long as you remember the sugar, I'm sure they will impress all of your friends. Give 'em a go, yo!
Note: the goo factor is strongest when the cookies are warm. If they have cooled, you can put them in the microwave for 10 seconds before serving to re-activate the ooze of the chocolate.
Chocolate nugget cookies
- Makes 12 large cookies
- Active time: 25 minutes
- Total time: 40 minutes, plus cooling time
Ingredients
- 1 ¼ cups all purpose flour
- ¼ cup dark cocoa powder
- ¼ cup cornstarch
- ¼ teaspoon salt
- 1 cup (2 sticks) unsalted butter, softened
- ½ cup sugar
- 1 egg
- 1 teaspoon vanilla
- 1 bar (3.5 ounces) dark chocolate (this is the typical size of a gourmet chocolate bar that you can buy in the grocery store. The one I used had 10 equal sized portions)
Unwrap your chocolate bar, and separate the bar into 10 equal squares, or as even as you can cut them. Set four of the squares to the side, to be used later on in the recipe.
With the remaining six squares of chocolate, cut each square into fourths. They don’t have to be perfect, but get them as even as you can. Set these 24 small squares to the side until step 8 in the recipe.
Preheat the oven to 325 degrees F. Line a baking sheet with parchment paper or a silicone mat.
In a large bowl, sift together the flour, cocoa powder, cornstarch, and salt. Set to the side.
In the bowl of a stand mixer, cream the butter. Once fluffy (2-3 minutes on moderate speed in your mixer) add the sugar, egg, and vanilla. Let mix for a minute or so on low speed to combine.
Pause mixing for the moment. Add the dry mix to the wet, and resume mixing on low until the mixture comes together into a pliable dough.
Divide the dough into 1 ½ inch balls. Lightly flatten each ball with your hand.
Grab those 24 small squares of chocolate you portioned out in step 2 of the recipe. In the center of each flattened portion of dough, place two of the squares, one on top of the other.
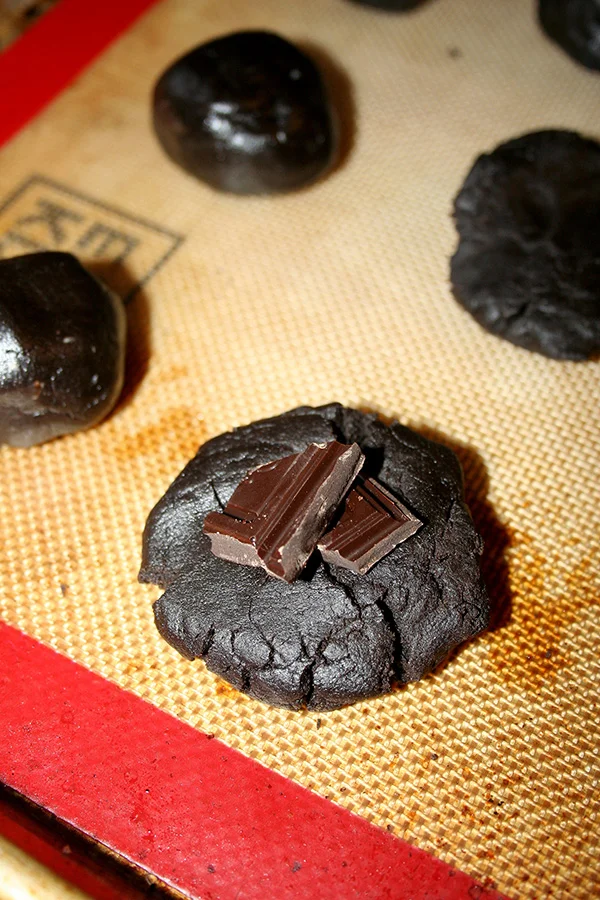
Using your hands, mold each portion of dough into a ball around the chocolate, making sure there are no cracks or holes, and that the dough completely covers the chocolate on all sides.
Space the chocolate-filled balls of dough on your prepared baking sheet, spacing them evenly in three rows of four each.
Bake in the preheated oven for 14 to 18 minutes. It can be hard to detect doneness based on browning as the cookies are dark, so look for a matte appearance on the top of the dough. A gentle touch of the dough with your finger should not leave an imprint.
Remove the cookies from the oven, and let cool on the sheet for about five minutes before transferring to a wire rack to cool completely.
When the cookies have cooled, coarsely chop the four chocolate squares you set to the side in step 1 of the recipe. Melt the chocolate, and use this to drizzle the tops of the finished cookies. Garnish as desired.