Make Everyone Love You With Mini Cherry Pies

I have figured out a sure-fire way to impress people, and it doesn't involve having a degree from Harvard. My method is far more pleasurable and much less expensive: make mini pies.

I'm telling you. If you present a classic pie recipe served in individual, cupcake-sized portions, you are going to win friends and influence people. It's as easy as that.

Personally, one of my favorite parts about mini pies is that there is a high crust to filling ratio. I am a crust (and carb, in general) freak, so I always want more pie crust. In the mini portion, the amount of pie crust compared to filling is upped, which means that crust fiends like me can have some carbs in every bite. EVERY BITE!

I made this batch with cherries, which are currently in season and just fantastic. Dressed up lightly with a kiss of sugar and a little flour to thicken the mixture, the true cherry flavor shines through, and tastes terrific paired with the buttery crust.

It is my strong suggestion that you pair these mini pies with ice cream or whipped cream, but then again, I understand if you go without, because then they are health food. 


Mini Cherry Pies 

Makes about 12 - printable version here

Note: I had enough to make 12 mini pies plus lattice top crusts for each. I had some dough left over, which I never mind because I used it to make roly polies

For the crust:

One batch all-butter pie dough recipe (sufficient for a double crust pie)

For the filling:

  • 1 pound cherries, pitted and diced into small pieces 
  • 1/4 cup granulated sugar
  • 1 1/2 tablespoons flour
  • Pinch of salt

To top:

1 egg, beaten 

Other supplies:

  • A cupcake baking tin
  • 12 cupcake liners

Instructions

Preheat the oven to 400 F. Line the cups of your cupcake tin with liners (I like silicone cupcake liners for this baking project).

In a large bowl, toss the diced cherries, sugar, flour and salt, making sure everything is combined. Set the mixture to the side for the moment. 

Roll out the pie dough, one ball at a time, on a floured surface, until it is about as large as you would roll it to fill a pie plate. The edges don’t have to be perfect. 

Slice off a bit of the crust (maybe a handful-worth) and set to the side, to use for the lattice toppings later. 

Cut circles of dough about an inch wider than the circumference of one of your cupcake liners. Re-roll the scraps to get a few more cutouts. 

Press the circles into the cupcake liners, patting them into shape as you would a pie crust.

Spoon the cherry mixture into the pie shells. Using the leftover dough, make mini lattice tops. 

Brush the tops with your egg wash, and sprinkle with sugar, if desired. 

Bake for 20 to 30 minutes or until the tops and sides of the crust are browned. Remove, let cool in the cupcake tin, and then serve. 

Psst! You could also use the same ingredients to make pie pops!

Have you ever made mini pies?

Dessert Sauce of the Gods: Olive Oil Ganache

Olive oil ganache, you guys. Believe it. Live it. Love it. Let me explain.

OK. Now that I have your attention, let me tell you how this ambrosial treat came to reside on top of my brownie. 

First, I was working on a roundup of creative ganache varieties for Craftsy (it came out great, by the way). 

Then, I received a big box in the mail from Bertolli olive oil. In it, they had gifted me a big ol' bottle of their 150th anniversary edition olive oil. Well gee whiz, thanks!

They also sent me a gift card for ingredients and an invitation to enter their #vivabertolli contest by entering a creative recipe made with their products plus any other ingredients which I was to purchase with the card.

Well, I knew right away what I had to explore with that olive oil, and its name was ganache. 

So I bought some chocolate and then with the rest of the gift card bought myself new shoes. (TRUTHSIES) 

But even though the ingredients don't cost $50, this recipe tastes like a million bucks. It has all the chocolatey goodness of ganache, but a smooth, silky, nutty flavor from the olive oil. It tastes very fancy, like a dessert you'd pay $15 for at a posh eatery. Of course, theirs would be delivered with a random swipe of coulis on the plate. I prefer the less delicate approach of using the ganache to drown my brownie.

Oh, I should tell you, this ganache will eventually set firm, just like regular cream ganache. While it's still warm you can use it as a delightful dessert sauce or filling, or you can wait til it cools a bit and use it to top a cake or to combine with buttercream for a unique treat. 

Oh, and while I didn't give her any, Olive the pug approved.

Olive oil ganache

Printable version here

  • 6 ounces chocolate, coarsely chopped
  • 3 ounces extra virgin olive oil (I used the Bertolli 150th anniversary stuff)

Melt the chocolate in a heatproof bowl set atop a bowl if simmering water (DIY double boiler).

Once melted, remove from heat and let it chill out for maybe 5 minutes, so it's not piping hot.

Pour in the olive oil and mix. Use a whisk, or use a spatula (not sure why I did but I did)

Once mixed, let the mixture sit at room temperature until it has firmed to the amount needed for your project. Give it a stir every 5 minutes or so to discourage separation. 

Enjoy!

Have you ever made ganache with butter or olive oil?

What Happens When You Make Ganache with Fruit Instead of Cream?

File under mind-blowing: you can make ganache with puréed fruit instead of cream (the chocolate, of course, remains constant).

I first learned this when I was exploring cream-free ganache varieties for a Craftsy post.

I came across the idea of making ganache with fruit butter, and I thought, gee whiz, in spite of sounding kind of like health food, this additionally seems like a tasty and interesting idea.

And then came the question: what would happen if I made ganache with mashed bananas instead of cream? 

So, I mashed up a very ripe banana...

Then I melted some chocolate in a double boiler. 

Then I combined them until they were completely mixed. 

Since I hadn't actually puréed the banana, I had more just mashed it, there were some textural bits of banana in the mix. I didn't mind at all, though. It was kind of nice in this instance. 

The texture was like a thick mousse or frosting. You could probably use/serve it as either; it will eventually set firm.

This ambrosial mixture could be a dessert as-is, could be used as a frosting, as a filling, or as a swirl-in for ice cream.

What happens when you make ganache with fruit instead of cream? Good things.

Here's how to make it happen in your house. 


Fruit ganache

Printable version here

Note: this makes close to 1 cup. If you want a larger amount, simply double/triple/quadruple the quantities. 

Also, you could substitute any pureed fruit you'd like in the place of banana. Let me know how it turns out if you do!

  • 3 ounces banana, mashed (about 1 large) 
  • 4 to 4.5 ounces chocolate, coarsely chopped
  1. Mash the banana, or puree it in a blender if you want a really smooth finished result.
  2. Melt the chocolate in the top of a double boiler. I did a DIY double boiler, placing a heatproof bowl above a pot of simmering water. This also made it easy to add the banana right to the chocolate once it was melted.
  3. Combine the banana and chocolate and stir until completely combined. 
  4. There you go! Banana ganache. You can let it set until it's firm enough for whatever you want to use it for. 

PS. Here's how the ganache looks like after it has "set" - it firms into a set, frosting-like consistency.

Have you ever made a fruit ganache? 

The Best Part About Making Pie? Not the Pie.

The best part about making pie is not the finished pie. It's the treasures that can be created with the pie dough scraps. I'm telling you, people: it's all about the roly poly. 


You might call them something other than "roly polies". I've heard "snails". I've heard "doodandles". But in my house, they were called roly polies. So that's what you're getting here.

The most traditional version I grew up making is detailed in this post. The classic little roll-ups include butter, cinnamon, and sugar rolled up into pie crust strips. They're an undeniable classic.

But every now and again, I like to take a little riff on the original.

On a recent pie-baking adventure, I decided to make some roly polies using olive oil, brown sugar, and walnuts, and they came out SO freaking good that I really wanted to remember it in the future.

It's reliable that I will remember it if I put it on my site--I'll be honest, I am constantly googling my own recipes! I figure if I write it down, I'll have it on the web so I can remember it, and you might benefit, too. See how I think of you at all times, dear readers? 


Brown sugar walnut olive oil roly polies

Note: I am not including specific measurements here because everyone ends up with different quantities of pie crust scraps. Use your best judgment!

Printable version here

  • Pie dough scraps, cut into long strips (the pie dough you see here has part whole wheat flour)
  • Olive oil
  • Brown sugar
  • Salt
  • Coarsely chopped toasted walnuts 

Since you're already baking pie, your oven is probably set to 400 or so degrees F. If for some reason it's not, set it at 400 and let it preheat.

Brush the pie dough scraps with olive oil. Sprinkle with brown sugar and a pinch of salt. Gently place some walnuts on top.

Roll the little strips of pie dough, snail-style, as if they were the most precious little dollhouse cinnamon rolls ever. Try not to let any walnuts fall out, because they are DELICIOUS once baked. 

Place the roly polies on a baking sheet and put them in the preheated oven.

Let them cook until browned and toasty. This can vary between 5 and 10 minutes depending on the size. 

Remove from the oven, let cool slightly, and enjoy warm. 

Have you ever made treats like this? If so, what do you call them?

Easy Chocolate Pound Cake Recipe

The thing I'd like to talk about today is this: CHOCOLATE POUND CAKE. This is a fine specimen of the stuff:

Basically, the story behind it is this: I wanted to make a dessert that would please my beloved, who loves chocolate. But I felt like I might have to stab myself in the eye if I made one more flourless chocolate cake (bet you've never read that before). So I took a moment to observe that this was, indeed, a champagne problem--and then I began to look for another simple chocolate cake recipe that would yield a dense, buttery result. 

I quickly settled on a cake that if not glamorous, felt reliable: chocolate pound cake.

In particular, this chocolate pound cake from Chow.com. They had some fantastic photos and the recipe looked simple enough, so I gave it a try. 

I actually made a mistake with the recipe: I didn't add enough water (I missed the extra 2 tablespoons in the recipe below) to the cocoa mixture, and it didn't turn into a full-out paste before I added it to the batter. This means that in my finished cake, it was specked with a few tiny cocoa lumps. Far from a problem, these mini lumps were actually DELICIOUS. They were sort of like chocolate chips. I am not going to say I did a great thing by being laissez-faire with the recipe, but I am going to say it worked out OK, if you start feeling less than Martha Stewart at any point during the recipe. 

The resulting cake is nothing that you haven't tasted before, but every element is so good. It's chocolatey, buttery, definitely cake but far denser than, say, a birthday cake.

This is an assertively hefty, not-afraid-to-take-up-space-and-weight-in-the-world cake. 

I didn't feel like making the chocolate glaze featured in the recipe, instead opting to go creative with my slices. So far I've tried one with ice cream, one with a sprinkling of sea salt, and this version--my favorite--features a spoonful of almond butter...

Then a fat dollop of half and half, foamed with a milk frother.

THEN--finally--I added some cocoa nibs. Good stuff. 

Find some room in your life for this cake. You won't regret it. 

Chocolate pound cake 

1 hr 30 mins, plus cooling time - adapted from CHOW.com - printable version here

Ingredients

For the cake:

  • 1 1/4 cups all-purpose flour
  • 1/2 teaspoon salt (I used coarse sea salt)
  • 3/4 cup good quality unsweetened cocoa powder
  • 1/2 cup plus 2 tablespoons boiling water
  • 2 sticks unsalted butter, at room temperature, plus more for coating the pan
  • 1 1/3 cups granulated sugar
  • 1 1/2 teaspoons vanilla extract
  • 4 large eggs, room temperature

Heat the oven to 350°F. Grease a 9-by-5-inch loaf pan generously with butter; set aside.
In a medium bowl, combine the flour and salt, and give it a whisk. Set aside for a sec.

Place the cocoa in a medium heatproof bowl. While whisking constantly, slowly pour in the boiling water and whisk until smooth and paste-like. 

Place the butter and sugar in the bowl of a stand mixer fitted with the paddle attachment. Mix on medium for 5 minutes--it should be pretty darned fluffy at this point. Add the eggs, one at a time, scraping the bowl after each addition. Stir in the vanilla.

Add the cocoa mixture, mixing on low speed until combined (I told you, mine didn't totally incorporate). 

Add the flour mixture last, mixing only until combined on low speed.

Spread the thick batter in the prepared pan, and smooth it on top as much as you can. Bake until a cake tester inserted in the center comes out clean--this was 40 minutes for me but I am at high altitude so it might take longer for you. 

Remove the cake from the oven; immediately run a knife along the edges to loosen. Let the cake cool on a wire rack for about an hour before transferring to pretty paper for blog photos.

Cut into slices and serve however the heck you want. 

Storage? It won't last long enough to go stale, but keep it covered at room temp for up to 3 days or freeze slices and bring them back to room temp before serving. 

What would you put on top of a slice of this cake?

Pie Pops!

NEWS FLASH: your pie could be cuter. Here's how: make pie pops. 

If you have a baked pie (versus one that you fill with a custard or filling that you chill) recipe, you can convert it into adorable pie pops.

I posted a cherry pie recipe on Craftsy.com, but you can use the method with your favorite pie recipe or type!

Read more here. 

What Happens When you Put Whipped Cream in an Ice Cream Maker?

I've decided to start a new hashtag. My own hashtag. It is this: #whathappenswednesday . Because it seems that every Wednesday lately, I've been posting some sort of experimental recipe that began with the question "what happens..."

The most recent mystery that popped up in my mind was this: "what happens when you put whipped cream in an ice cream maker?". I'm not talking about whipping cream. I'm talking about whipped cream, as in, ready to use to top a sundae or piece of pie.

What happens when you put whipped cream in the ice cream maker and churn it?

I didn't know the answer, but I wanted to.

So in the name of education, I hastened to the grocery store to buy some heavy whipping cream.

And I whipped it, with normal whipped cream makings: some sugar, a touch of vanilla, and a pinch of salt. 

And then I transferred it all into the chilled drum of my ice cream maker, and let it churn.

When it finished churning, it looked something like this, and removed from the ice cream maker in a single unit. 

It had the consistency of soft ice cream, and was able to be spooned with an ice cream scoop. So I put it into a cup, added some rainbow sprinkles (NECESSARY)...

and took a big bite.

Well, no surprise here: sugar and cream and vanilla, all chilly and served with sprinkles, it was an instant classic, according to my mouth. It was thick but also somewhat light. It was like ice cream, but it wasn't. It was like whipped cream, but it wasn't that either. It had a consistency somewhat like mousse that you've left in a slightly too-cold fridge. I say this as a good thing.

Gosh it was good. 

I put a portion of the whipped cream-ice cream in the freezer, and a portion in the fridge. I also used a rubber spatula to scrape out the bits on the sides of the ice cream drum into their own cup and put these in the freezer. Look, you can see my reflection in the spoon as I was scooping here. Yes, my dress matched the sprinkles! Unintentionally, but this fact does not displease me.

After a few hours, the version in the fridge was sort of like wilted whipped cream--it still held a shape, but it was droopy. Not the same as regular whipped cream.

The version in the freezer had maintained its shape but had become very hard. When left to thaw for a few minutes, it came back slightly more rigid, but still just as delicious, flavor-wise. 

Interestingly, the little crumbles I scraped from the sides of the ice cream maker drum had remained flaky, and I thought, gosh, they reminded me of something. Then it hit me: they reminded me of butter that had been left in the freezer and how it flakes when you cut it. 


And then I had a big whammo moment: basically, what I had done here by churning the whipped cream was basically make a sort of frozen sweet churned butter.

Since I hadn't removed the solids from the whey like you would making butter, it remained lighter than butter, but still, it had sort of the same consistency. 

Frozen compound butter, whipped cream ice cream, frozen whipped cream, I don't care what you want to call it. It's suitable as a rich little dessert all by itself, or you could use it an alternative topping to regular whipped cream or ice cream. 

I am calling this experiment a success in sweet excess. 

Here's how you do it.

Ice cream-churned whipped cream

Makes 2 to 4 servings depending on how hungry you are - printable version here.

  • 1 cup heavy whipping cream
  • 2 tablespoons confectioners' sugar (or more, to taste)
  • 1 teaspoon vanilla extract
  • 1/4 teaspoon salt 
  • Rainbow sprinkles, for serving

Whip the cream until soft peaks have formed. Add the sugar, vanilla, and salt. Continue whipping until you've attained firm peaks.

Transfer the whipped cream to the drum of your ice cream maker. Churn according to the manufacturer suggestion (I did about 15 minutes in my Kitchen Aid ice cream maker)

Remove from the ice cream maker, and serve immediately. Top with rainbow sprinkles (not optional).

wcreamice3.jpg

Note: I suggest storing leftovers in the freezer in individual portions and letting them thaw slightly before eating. 

Hey, if you enjoyed reading about this ice cream maker experiment, you might like these experiments too:

What happens when you make Jell-o with evaporated milk?

What happens when you put Jell-o in an ice cream maker? 

Would you use this churned whipped cream as a dessert by itself, or as a topping? 

Batter Chatter: Judith Fertig, author of The Cake Therapist + Giveaway!

Are you one of those jerks who just wants to enter the giveaway and doesn't want to read the awesome interview? Shame on you...scroll down to the bottom of the post for the giveaway.

OMG. Dudes. Dudettes. I am so excited to say that I got to interview Judith Fertig about her new book The Cake Therapist.

My first contact with Judith's work was in the cookbook All-American Desserts: 400 Star Spangled, Razzle-Dazzle Recipes for America's Best-Loved Desserts. Published by Houghton Mifflin Harcourt, it was one of those comprehensive books that has all sorts of recipes spanning all sorts of styles, from humble puddings to fancier fare like layer cakes and a killer brownie recipe. Every recipe I tried was absolutely solid, but it wasn't recipes that made the book a treasure to me. It was the headnotes. 

Somehow, even in a huge book like this, the headnotes each included interesting anecdotes, historical tidbits, and informative recipe notes. I realized, in reading them, that I liked the author, just from her writing. It was almost like receiving a huge file of recipes from a friend with handwritten, witty notes to accompany each one. 

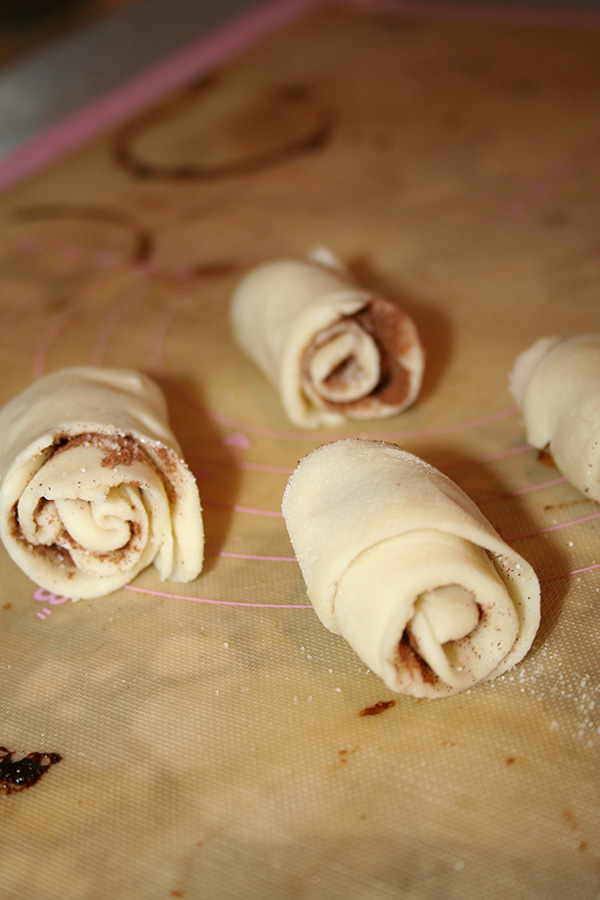
Since coming across that first book, I've followed Judith's recipe books, which are impressively wide-ranging: she's written about everything, from BBQ to plank cooking to even, yes, an entire book about cinnamon rolls. 

And now, she's branched out into foodie fiction. The Cake Therapist is an absolutely engaging story about a woman starting over in her hometown after a stint as a fancy pastry chef in NYC. But what unfolds as she opens a bakery in a sleepy Ohio town goes much deeper than just a fresh start. It's a story that spans generations, includes plenty of delicious food descriptions, and will leave you feeling as comforted as if you just ate a huge slice of your favorite layer cake.

OK, so DO buy the book. But before that, enjoy this interview: 


You are well known as a cookbook writer...was it an odd leap in any way to dive into fiction after writing so many non-fiction cookbooks? I was an English major before I got into the culinary arts, so it was like writing a headnote for a recipe that turned out to be 62,00 words! Sort of. . . .

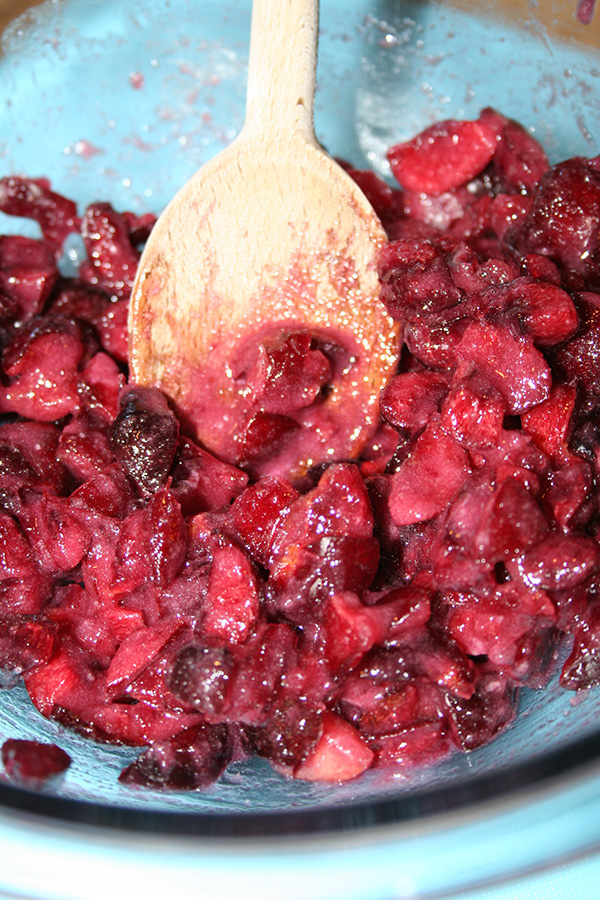
I felt like I learned so many cool baking tips from the book. What did you learn while writing this book?  That the strawberry cake in The Cake Therapist (and on the cover of Bake Happy) really does take me back to my childhood. Something about the combination of strawberry and rosewater. My mother never made strawberrycake, but this one has the simple, summery flavor that just makes me want to go play outside. I learned that flavor--especially in desserts--really can resonate with us just like a favorite song or the smell of suntan lotion or the feel of cool sheets on a hot night.

The lead character, Claire (Neely) O'neill, says that she makes sense of the world by flavor and taste. Is this something that you identify with? Can you expand on that? I think we've all had times in our lives when we're hungry for something, but don't know what. So we sample this, sample that, until we hit on just the right thing. It's emotional eating. What we're craving is the feeling that that flavor or texture will hopefully induce--like all is well, we're safe, we're loved, we're gonna be all right. Food and flavor can be the vehicles to self-enlightenment. We finally taste the right thing and voila, "So that's what's going on with me!"

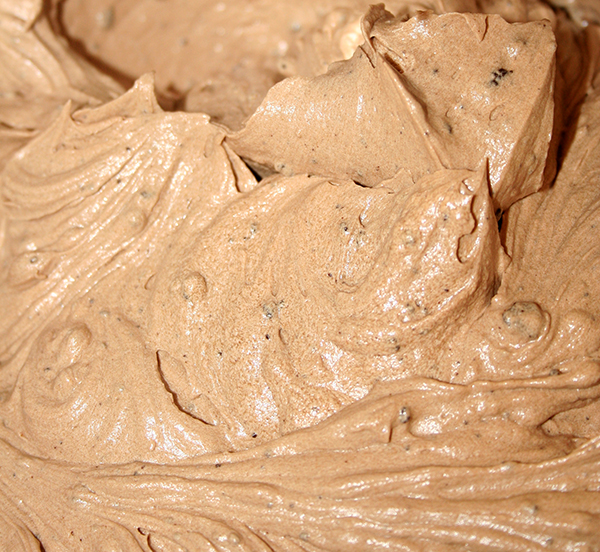
I love the fact that the lead character is an unofficial "cake therapist". What therapeutic benefits do you believe cake and baking can offer people? Unlike cooking, which can be spur-of-the-moment, baking is more methodical, more meditative, more repetitive. It give us a chance to just chill out, be in the moment. Baking is also transformative. You take butter, sugar, flour, and eggs, put them together in the right way, and end up with cake! Small-batch baking, like Neely does in her bakery, has the true flavor of homemade, of honest ingredients. Flavor is telling, sort of like a test to determine if you have a diamond or cubic zirconia. 

What kind of research went into the historical parts of the novel? When writers say they can get carried away by research, I can relate. You Google something and all of a sudden, you're down the rabbit hole and find out so many more things that are related. And then other things just turn up. Ethel Parsons Paullin really did visit Stearns & Foster in Lakeland Ohio, with Ben Nash. She went on to paint religious art as well as commercial. Ireene Wicker, the Singing Lady, also had a long career. I just happened on a little cereal box with a Singing Lady story on the back at an antique mall.

Tell me more about your inspiration for Rainbow Cake bakery. My first job in high school was at a mom-and-pop bakery that made all of our family's celebration cakes for birthdays, graduations, and so on. I remember walking in and smelling that wonderful bakery scent. I also saved a story from the late, great Country Home Magazine with an inspiration bakery that I put up on a vision board I made for The Cake Therapist. I also visit bakeries or macaron shops when I'm in a new city--or an old one, like Paris.

Writerly question: where, and when, do you prefer to write? What is your working style? I write when I have big blocks of time, any time of the day. When I think I just don't have "it" that day, I do other things like order books from the library or research or bake.

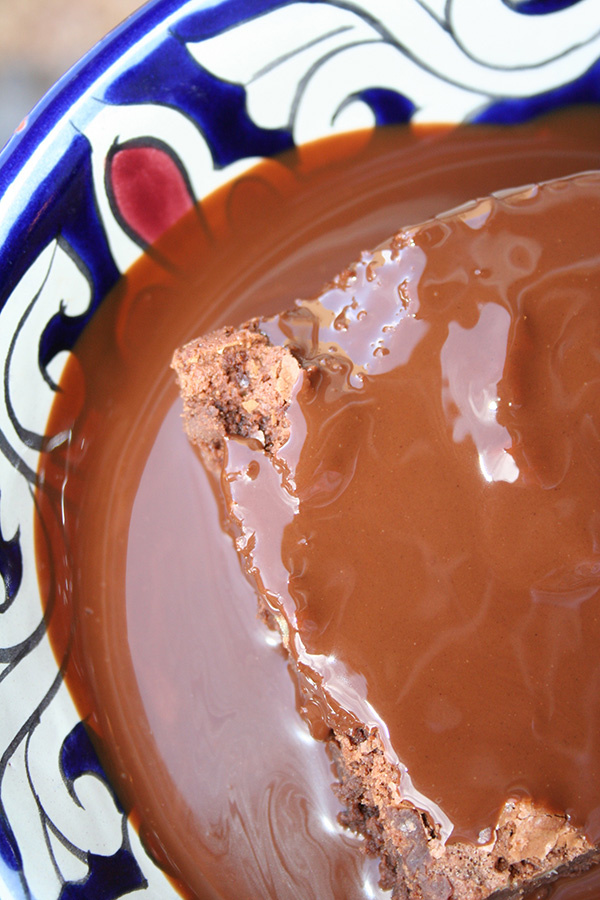
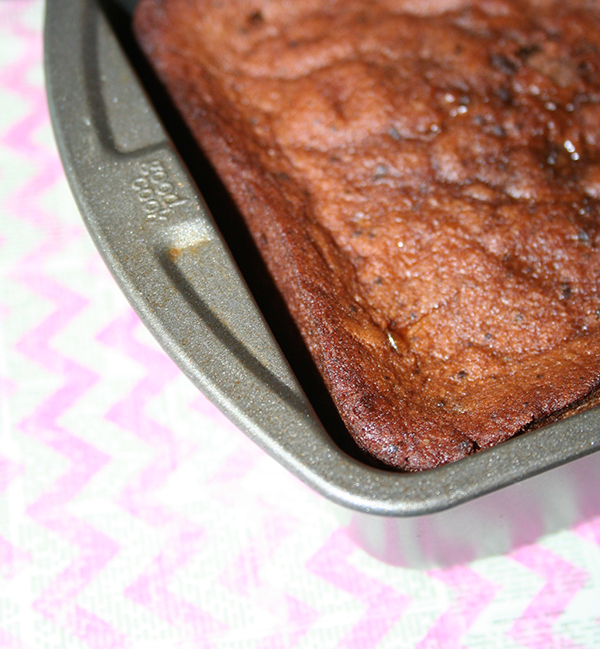
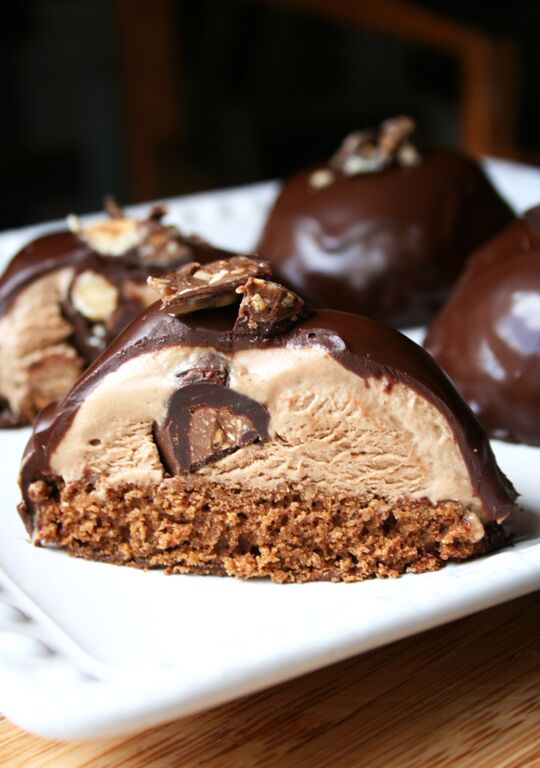
What is your favorite type of cake or dessert? I love a tender yellow cake with a secret filling and a fluffy coconut frosting; I'm also a sucker for a really moist, fudgy chocolate cake.

I'm intrigued by the idea of different flavors having different significance. Is that fictional, based on fact, or anecdotal? Like there can be a language of flowers (a 19th century conceit written about by Vanessa Diffenbaugh in her novel The Language of Flowers), I think there's also a language of flavor. Some of that language is in the scent, taste, and mouthfeel of a flavor. Sometimes it's the chemical properties in the spice or the fruit. A rich, luscious, homemade caramel says "luxury" better than a designer handbag. Cinnamon actually contains properties that help lower blood sugar, so it does sort of hold your hand as you get started in the morning or want to calm down when your flight is delayed at the airport--the power of cinnamon rolls! 

In the book, it is mentioned that people who crave salty desserts have secrets. Um, if I like to sprinkle salt on top of my dessert, does that mean I have secrets?? Yes, you have secrets. That makes you very interesting!

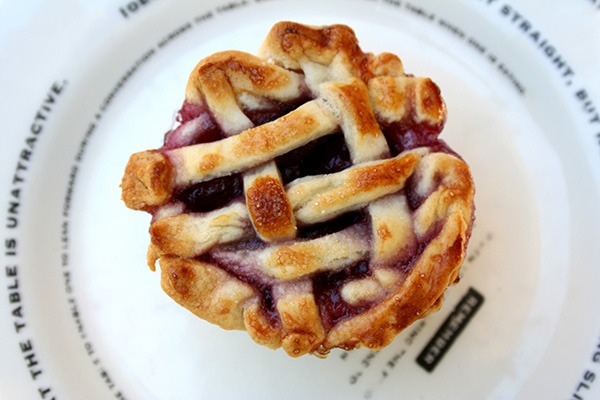
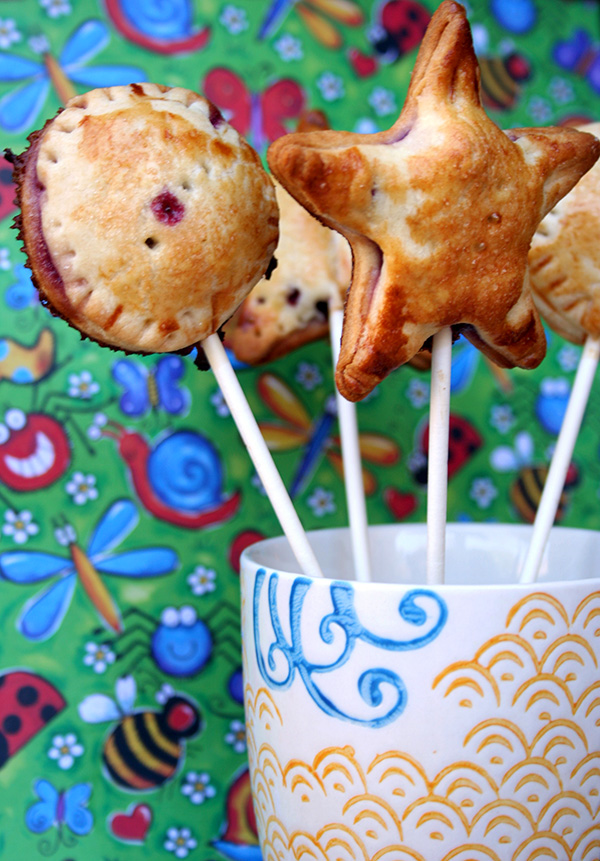
What's next for you? I'm finishing the second novel in the series, The Memory of Lemon. It starts out with a "hillbilly" bride who wants pie, not cake and clashes with her high society mother, Neely's growing relationship with Ben, and her homeless father's struggle with PTSD. Two flavors--citrus and spice--and the stories that emanate from them turn out to have a surprising connection to Neely. Maybe families have signature flavors, too.


About the Author:
Cookbook author Judith Fertig grew up in the Midwest, went to La Varenne Ecole de Cuisine in Paris and The Iowa Writers' Workshop, and now lives in Kansas City. Described by Saveur Magazine as a "heartland cookbook icon," Fertig writes cookbooks that reflect her love of bread, baking, barbecue, and the fabulous foods of the Heartland. Fertig's food and lifestyle writing has appeared in more than a dozen publications, including Bon Appetit, Saveur and The New York Times. The Cake Therapist (June 2, 2015; Berkley), is her fiction debut.

Connect with Judith Fertig online:
Website: http://www.judithfertig.com/
Facebook: https://www.facebook.com/JudithFertigAuthor
Twitter: https://twitter.com/judithfertig
Pinterest: https://www.pinterest.com/judithfertig/

BUY THE BOOK: The Cake Therapist

GIVEAWAY:

To enter to win a copy of both The Cake Therapist and Bake Happy, all you have to do is this. Leave a comment on this post answering this question:

How is baking therapeutic to you? 
 

I'll choose a winner one week from today (July 28) at 5pm MST. Due to high shipping costs, I am going to limit this giveaway to US entrants only this time - thank you for understanding!

How to Make Delicious Ganache with Water

Why on earth would you ever, ever, ever want to water down chocolate? I realize that this might be what you're thinking as you read the title of this post. But stay with me, because I promise, water ganache is worth your time.

So, I became acquainted with the idea of water ganache like so. I made ganache with beer, which I thought was terribly clever and inventive, and then someone was all, "Have you ever made water ganache?".

Well, I discounted the idea instantly: why would I ever want to water down chocolate?

But then I started to look into it, and I got curious. Apparently, cream-free ganache varieties of ganache have gained some momentum in the pastry chef world in the past few years. Chef Damian Allsop is considered a pioneer of the water ganache, using spring water and flavor infused waters to create unique ganache varieties.

According to the article linked just above, his "goal with his water ganache is to simply deliver flavor in the best possible way, enabling the consumer to taste the true character of the chocolate to respect what he states is “the amazing chocolates with complex flavors” being produced by the small, artisan chocolate makers who have come onto the scene in recent years." 

Basically, if you use water to make your ganache, there is no masking of the chocolate flavor--it shines through completely. This can be a beautiful thing if you're using excellent chocolate. But water ganaches made using substandard chocolate? Not so much.

Without cream to put a warm blanket of tastiness over everything, mediocre chocolate will make a mediocre water ganache. 

So the deal here is that if you're making water ganache, you have to use good quality chocolate. And if you do, you will be so, so, so very rewarded. The water doesn't dilute the chocolate flavor: if anything, it clarifies it, simply altering the texture so that the pure essence of chocolate can be tasted in a different structure.

It's almost like your glaze, filling, or icing is a textural version of the taste experience of eating a perfect square of dark chocolate. 

Plus, once you've tried out a water ganache, you can mess with it in any number of ways. Instead of plain water, you could use a flavored water: say, one infused with lemon slices (which are drained before you make the ganache) or water with a teaspoon of liqueur or flavoring extract mixed in. You could even start going nuts and use steeped tea or try out different beverages, like my beer ganache recipe. 

I'm not saying that water ganache should totally eclipse traditional cream ganache in your recipe repertoire. But I am saying that there's a time and a place for it, and it is good stuff.

Here's how you do it.

Note: the important thing here is that you use equal quantities of water and chocolate, by weight. You can adjust the recipe based on the amount you need.

Water ganache

Printable version here

  • 6 ounces very good quality chocolate
  • 6 ounces water

Chop the chocolate coarsely and put it in a heatproof bowl. Set to the side.

In a saucepan, heat the water until it comes to a low boil. 

Remove from heat and pour over the chocolate. It will look muddy at first but will start to combine rather quickly.

mixwtrandchoccan.jpg

Mix with a whisk until the chocolate melts entirely, and you have a hot chocolate-like substance.

Let the mixture cool, stirring every 10 minutes or so until it is of a consistency just right for whatever you want to do with it. I used it as a glaze on mini custard pies, as seen in the photos in the post. 

Out of curiosity, I also poured some of the water ganache into silicone cupcake liners and then put it in the freezer. It came to a solid consistency that would make for a perfect frozen treat. 


Have you ever tried a non-cream ganache?