King Arthur Flour Giveaway Winner

Totally sweet! Thanks to random.org, I have chosen a winner for the awesome King Arthur Flour giveaway.

The lucky winner, in case you forgot, is going to receive a super-awesome prize pack care of King Arthur Flour: Hooray! King Arthur Flour has offered to reward one lucky reader with one of their mega cool dough scrapers, a cookbook, AND some of their highly patented and extremely delicious boiled apple cider (perfect for flavoring apple pie and using as a slightly fancy pancake syrup).

From over 500 entrants, the winner is Susanne Bell! Here's her comment about her favorite type of pie:

Totally sweet! Congratulations to the winner, and stay tuned for the next awesome giveaway! Til then, enjoy the pie crust technique which King Arthur taught me on their Bake For Good tour!

Of Eating Disorders and Food Blogs


ED Blog post illustrations

Today, I'd like to discuss eating disorders. Yup, you heard me. True, this is a topic which is not often discussed on food blogs, it's a subject about which I am extremely passionate.

It's not a secret that I have suffered from various eating disorders in the past. I'm not alone.

According to the National Eating Disorder Association, in the United States, 30 million women and men have suffered from a clinically significant eating disorder at some time in their life. That's reported cases: it's estimated that only 1 in 10 eating disorders is ever reported or treated. 

And this doesn't include eating struggles that don't technically classify as eating disorders. The National Institute of Mental Health reports that in the US, as many as one in every five women struggle with eating or have a clinical eating disorder. 

ED Blog post illustrations

But I am CakeSpy. 

My case is interesting and unlikely in that today, I happen to run, and be best-known for, a blog dedicated to dessert. A history of disordered eating may seem at distinct odds with the fact that I write about, draw, and pretty much live dessert and sweet treats. 

But with a little more explanation, it might not seem all that crazy.

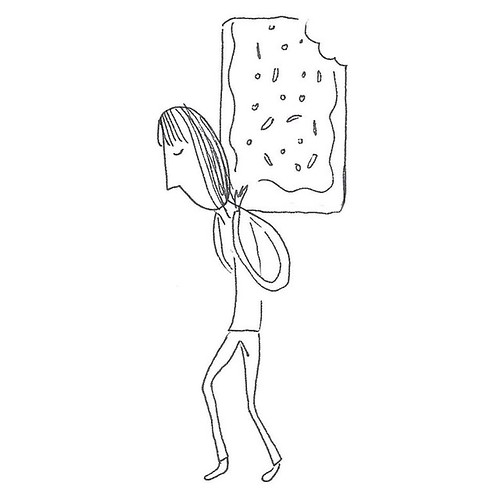
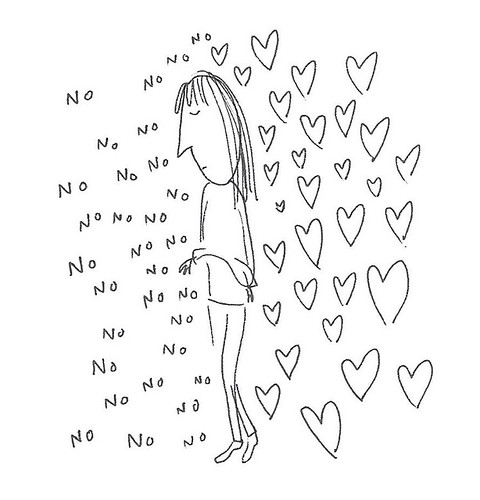
We all deserve dessert.

Whenever I am part of Q+A sessions, at book readings or panels, the most frequently asked question does not involve my work much at all. It is this:

"How do you stay so thin?". Oh, there are variations: they may say "how are you not 300 pounds?" or "you can't eat MUCH of what you bake..." et cetera. 

At moments like this, part of me cringes, thinking of how my website and writing present an all dessert all the time image. With a history of disordered eating, does this mean I've been living a lie? 

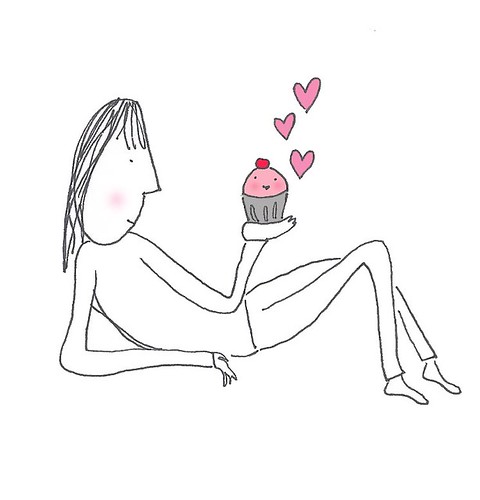
Nope. I do enjoy sweets. I adore sweets. I eat something sweet every single day. Sometimes it is something small like a chocolate truffle, sometimes it is something big and fat, like a slice of behemoth crumb cake (one of my all time favorite recipes).

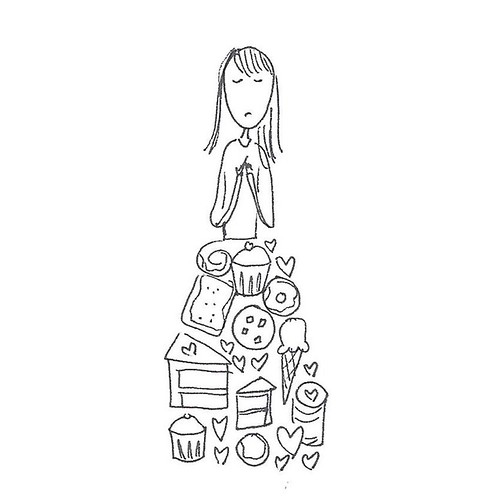
The difference between me and a non disordered person is that after I eat a fat slice of cake, there is a voice that wants to tell me IN ITS OUTDOOR VOICE that I am absolutely not permitted eat for the rest of the day, and maybe tomorrow too, just to be safe. An eating disorder tries to tell me that I don't "deserve" things that other people do.

Following years of personal work and therapy, I have learned to make a concerted effort to supercede these voices with a healthier one that tells me that I am OK, that I deserve to enjoy delicious things.

I strongly believe that the perceived "negative" or "unhealthy" aspect of desserts is far outweighed (pardon the pun) by the benefits they offer to your very soul.

As a result, it has also become part of my goal to ensure readers that they are ok, too. I suffered a lot with eating disorders; I want to do whatever I can to ensure that others do not.

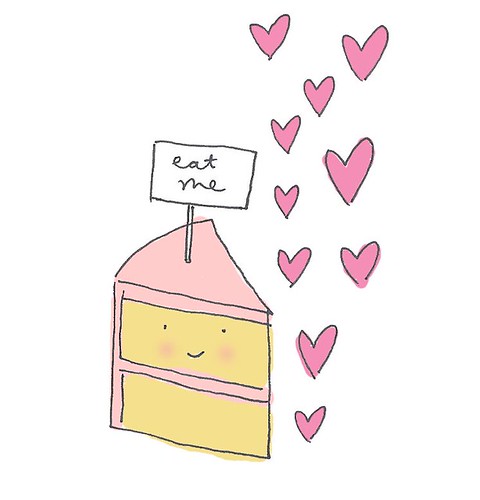
So when I say that you deserve to eat a nice, creamy slice of cake or fat wedge of pie, I mean it--for you and me both. We deserve to enjoy things purely because they are delicious and make us happy. Let me put it like this: you could live without cake. But what kind of joyless life is that?

So when people ask me how I "stay so thin", I am honest. I tell them that I eat a balanced diet, that I do yoga every day and walk almost everywhere (nobody likes these answers, btw, hoping instead that I will tell them I have a medical condition or at least gave up gluten). But I also tell them that I refuse to deny myself sweets. Believe it or not, giving yourself permission to enjoy sweets makes it far less likely that you'll over or under-indulge. Pretty revolutionary, huh?

So when you've made a dessert like cadbury creme eggs benedict or cookie cake pie, it is in no way a good idea to eat the entire thing. But will a small serving kill you? No. In fact, it might just make your day a little sweeter.

ED Blog post illustrations

Why speak up about eating disorders now?

Disordered eating has been on my mind a lot recently, for a few reasons.

One: I have been working on writing what I hope one day could be a memoir of my story--from eating disorder to dessert queen. I'd buy the book, but then I'm biased, am I not?

Two: Recently, I shared on my personal Facebook page that I had done a phone interview about my eating disordered past. This was the update.

The reaction to it stunned me. Not only in terms of "likes" and comments, but also with the behind-the-scenes reactions. I have been contacted by numerous women and men privately, who have shared their own tales, and sympathized with me.

Very importantly: more than one of these private responders was somehow connected to the food industry.

This fact was equal parts heartening ("I'm not the only one!") and horrifying ("we've all been alone together!").

All of the aforementioned things have made me realize that now more than ever, it is important to be open about my story. Why? Eating disorders have a huge shame factor. If I can shed some light on the subject, perhaps it can help erase some of the stigma so that others can begin to emerge from the darkness. 

ED Blog post illustrations

My story, Readers' Digest form.

Some say that people with eating disorders are like loaded guns: they have all of the genes in place to pre-dispose them to disordered eating, but some event needs to "pull the trigger."

For many, including me, this thing is dieting. I started my first diet at age 12, following a comment before my 8th grade dance that I had "thick ankles". Here I am on the day of that dance:

Mardi gras magic

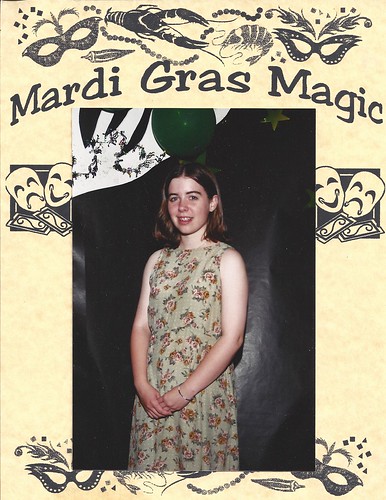
(Thankfully, the offensively thick ankles are out of the shot)

What I heard, of course, was not that my ankles were thick but that my ankles were fat, which quickly grew in my mind to "you are fat".

I can see now that I was a normal girl, not thin and not chubby--just kind of average build. But even an offhand comment during this sensitive time can set off a girl with a predisposition to disordered eating.

ED Blog post illustrations

From fat ankles to eating disorder in five easy steps

  • I began exercising, ostensibly to slim down those fat ankles, and decided to speed things along by dieting. I received many compliments about my new and improved physique.
  • Surprise: I was hungry all the time. I couldn't keep it up. One day I gave in to my hunger and ate more than I ever thought I could in one sitting. 
  • Frightened by how I felt mentally and physically after what I now know was an eating binge, I went on an even stricter diet to compensate for what I was sure was a stand-alone incident.
  • Surprise, again: that started a cycle that graduated to an unhealthy cycle of starving followed by an inevitable binge. I began to make myself vomit, too, a terrible habit which stayed with me for more than ten years.
  • Gradually, I was able to cease the bingeing and purging, but took it too far, into anorexic territory. My weight plummeted, but I still only saw myself as chubby. 

ED Blog post

And then came CakeSpy

When I started CakeSpy, I fell into the category of "sub clinical" or what many adorably call "almost anorexic". This means that I didn't classify clinically, but I still harbored a lot of the disordered thoughts. 

Even before I started the blog, I baked; there's a joke that "nobody bakes like an anorexic". In my experience, this is true. Anorexics love to see others indulge in what they feel they cannot. But I never lost a love of dessert. Even at my lowest weight, I always reserved a few of the calories I did allot myself for sweets. 

One day, finding myself yearning for a life beyond my refrigerator magnet company job, I had a sit-down with myself that went something like this: "well, in an ideal world what would you want to do?". 

There was no hesitation. In my ideal life, I would do something that involved writing, illustration, and baked goods. 

After further self consultation to figure out the perfect name, CakeSpy was born. Since I didn't know exactly how to get something rolling that would include writing, illustration, and baked goods, I decided to start a blog while I figured it all out.

On the day I started my blog, I weighed about the same as your average 11 year old girl. Little did I know, this blog would actually save my life. 

ED Blog post

Healing, with cake

Someone wiser than me once said "keep your friends close, but your enemies closer". I never thought of my blog in that way, but it really was.

At first in my blogging days, I would get scared frequently. Trays of brownies had the potential to panic me, I felt I had to revolve an entire day's meal plan around indulging in a slice of cake. In the beginning, it was only on a very strong day that I was able to eat and enjoy one of my own baked goods without giving myself a major guilt trip afterward. But I kept on doing it.

The more I worked with food, the less scary it became. It would take time to trust food; in the beginning, I was content to at least fear it less.

Food is both the enemy and the savior with an eating disorder. Often, your dealings with it are furtive, secretive.

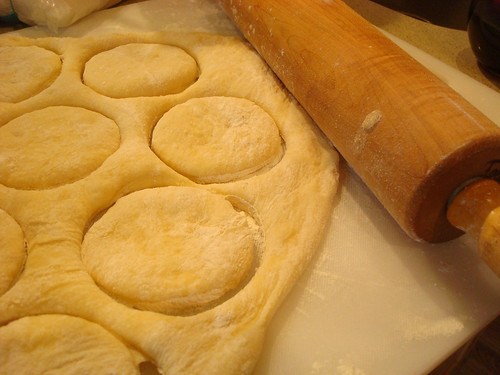
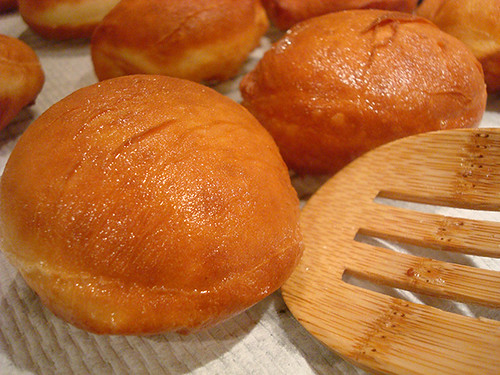
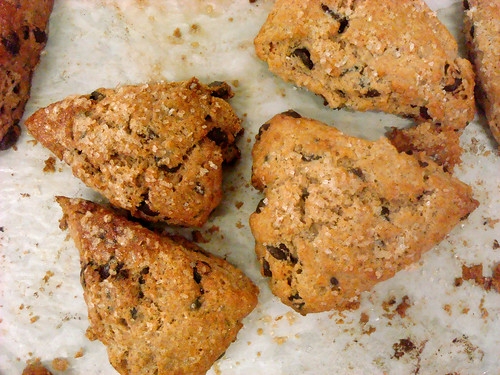
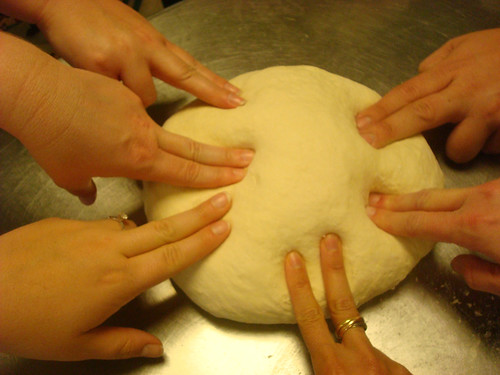
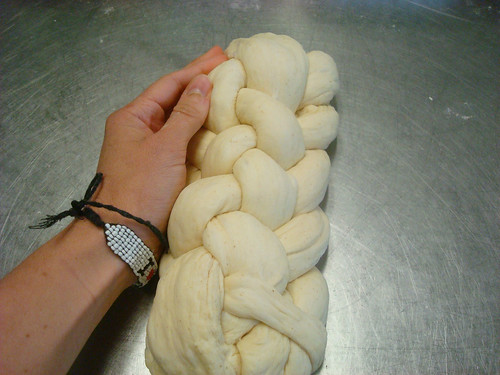
For me, it it was cathartic to work with food so openly, intimately, and in such a tactile way: to touch it, smell it, be in its presence. To inhale the aroma of butter creaming with sugar. To see cakes rise in the oven. To roll pie dough. To knead bread. Understanding the process of how things were made gave me an appreciation, and little by little, trust grew. 

Of course, it didn't hurt that I was also receiving a lot of professional therapy, too.

I began to experiment with food beyond simply baking at home. I would challenge myself to take part in experiences baking or eating with other people. Sometimes I would feel panicked, but more often than not I would be rewarded by the experience. I found myself capable of doing things like judging baking contests (even if I took the most minute bites you could possibly imagine) and not only sampling, but allowing myself to enjoy, my own baked goods. I found myself capable of doing it with abandon. If other people could do it, I figured, I could too.  

I have gained weight since I started CakeSpy. Not just because I've eaten more sweets (which I have) but because I've learned that I actually need food, not only to live but so that I can be good to the people I love and do the things I want to do: write, do crazy yoga poses, walk for miles while talking with friends, travel, experience, love, and create. 

Speaking of creating, that is the other way in which CakeSpy has helped me heal. It may sound funny to say this, but one of the ways in which the blog helped heal my eating disorder had nothing to do with the food: it had to do with my sense of purpose and accomplishment. It is something I have built by myself, featuring my art: my writing, my illustrations, my creations. I cannot understate the positive effect it has had on my life to know that my work has had an impact on others.

Yes, an eating disorder has to do with food. But for me, recovery isn't merely about trusting food: it's about trusting yourself, and life. 


ED Blog post

Am I cured?

Let me say this: I do believe in full recovery for eating disorders. But for me, recovery remains a moving target. Why so?

Because at one point, when I was bulimic, I would have said "cured" was no longer bingeing and purging. Well, I reached that goal, but then I plummeted to an alarmingly low weight and suffered a slew of related health consequences. So, no, that was not really cured. 

At this point, I have not shown clinical signs of eating disordered behavior in years. I can eat a slice of cake like nobody's business. However, I am hesitant to say without a doubt "I am cured!".

Because I still have weak moments. I can still feel panic when someone shoves a cookie in my face and says "try this!" or berate myself for eating too much. I don't always like eating in front of others. I can observe that in times of crisis (real or perceived), I turn to food obsession as a way to set structure in what seems like a crazy, out of control world. 

So with that in mind, instead of stating absolutes such as "cured" or "diseased", I will designate myself as a "work in progress".

ED Blog post


THE MORAL:

CakeSpy has helped me in recovering from disordered eating, as backwards as it may seem. It has helped me pave my own way in the world, to believe in myself and my ablities, and to keep growing in a postive way. If I had to share a big takeaway, it would be this:

Your story does not need to be open and shut, black or white. It doesn't have to follow the same story arc as a movie.

Basically, it boils down to this: you have the power to change your story, and I chose to make mine delicious.

If you or someone you know has an eating disorder, or you suspect that eating may have become a problem in your life, I urge you to seek help. Both professional and from your family and friends. Do not make disordered eating your own private island. 

Comments? Questions? I welcome them. Leave a comment here (moderation is enabled, so if it doesn't pop up right away please forgive me), or email me: jessieoleson@gmail.com
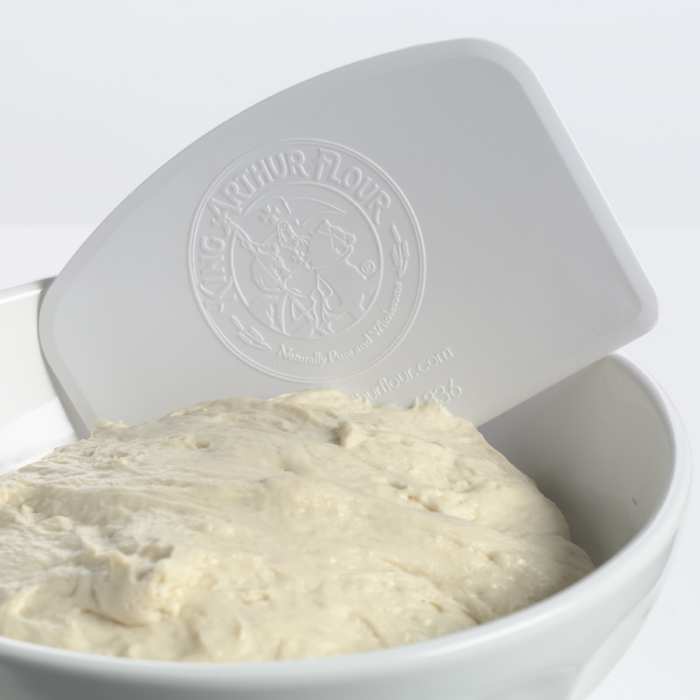
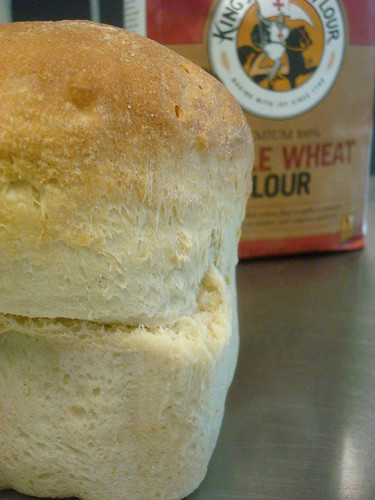
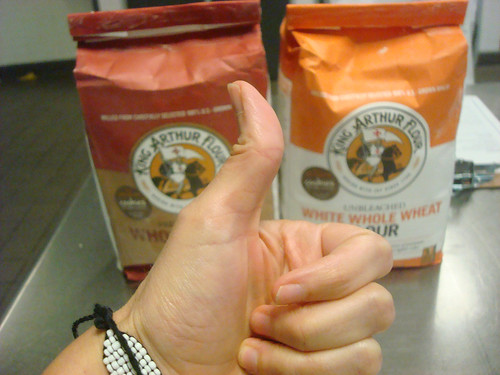
Baker's Dozen: A Batch of Sweet Links!

Seriously. Cannoli doughnuts! Image and recipe via Pillsbury.

Delicious any time of day: pizzelles!

Choco-mallow: I want it in my mouth.

Do you know the different types of sprinkles?

What makes a great theme cake? A horse of course! Here's a fantastic roundup.

Stuffed with fun: Funfetti Ooey Gooey Bars.

Quit pretending you're working: take this "what kind of unicorn are you?" quiz!

I'm very interested in the "Test Bakery" model Panera has unveiled.

Neapolitan rice krispies cake!

Ebinger's blackout cake: a brief history and warnings for baking.

Peppermint Nanaimo bars are great even in warm weather.

Sweet video: check out this video from the Bake For Good event sponsored by King Arthur Flour!

Book of the week: Foods of the Americas: Native Recipes and Traditions. A fascinating look at how Native American traditions and foods have affected the way that we eat in the USA. Includes a fantastic dessert chapter which says that "of all the cross-cultural preparations that we now enjoy, desserts have benefitted the most from diversity."

The Secret to Perfect Pie Crust? It's in Your Hands (Plus a Giveaway)

Pie crust technique

Note: this post includes a giveaway at the bottom! Lucky you.

You're always taught the same basic rules with pie crust. Cut small pieces of cold butter into a mixture of flour and salt; blend until the pieces are like peas. Add cold water, a little at a time, until the dough will come together in a clump. Gather, flatten into a disc, chill, and proceed. 

But recently, I learned a method that basically rocked my everloving, pie-eating world. Because it involves using your fingers to attain the perfect consistency.

This was very exciting to me because I actually kind of despise most kitchen tools. Especially the pastry cutter, because it is such a pain to wash. In general, the more functions I can get out of one tool, the more I like it. Wooden spoons and wire whisks? Awesome. Garlic press? Not so much. 

But enough about me--back to the pie. You're probably wondering some things. Let me try to answer:

Where the method came from

I learned this method at the Bake For Good event in Los Angeles, part of the Bake For Good Tour, where baker Robyn told us it was a method she'd learned from famed foodie Marion Cunningham.

By the way, if you want to know more about the event, check out this video.

Cherry cream walnut pie

How it works

Basically, the method includes working in larger than usual hunks of butter, and instead of mashing them with a pastry cutter, you squeeze the butter pieces with your fingers to flatten them.

    Cherry cream walnut pie

Why you should immediately adopt this practice

Those pieces of flat butter will make for the coveted "VB" (visible butter) in your rolled crust, and the taste is flaky and fantastic on your resulting pie.

Pie crust technique

I have co-opted and adapted it for my own use at home with a sort of mashup between traditional and by hand methods. Best of both worlds, and still, minimal stuff to clean.

And here, I will share it with you. Aren't you lucky?

Making Pie Crust with Your Hands

adapted from King Arthur Flour, who adapted it from Marion Cunningham

enough for a double crust pie

  • 2 1/2 cups flour
  • 1 1/4 teaspoons salt
  • 1 cup (2 sticks) cold unsalted butter
  • 1/4 to 1/2 cup very cold water

Procedure

  1. Sift together the flour and salt in a large bowl. Set to the side.
  2. Size your butter. One stick cut into small pieces, the other cut into fairly large pieces (double the size you'd usually cut for a pie crust.
  3. Cherry cream walnut pie
  4. Work in the stick of smaller butter with a plastic dough scraper (my new favorite tool and very easy to clean). It's not going to have the same impact that double the butter would in terms of working in, but go for the regular pea sized consistency.
  5. Now, add the bigger hunks of butter. Gently coat them with flour in the mixture, so they won't stick to you when you squeeze them. 
  6. Cherry cream walnut pie
  7. Now, one by one, squeeze all of those pieces of butter until they're flat like pancakes. Cherry cream walnut pie You don't have to be too precious about it. Grab, squeeze, then move on to the next one.
  8. Got 'em all? OK. Give the mixture another stir with your pastry scraper. Now, start adding the water. Switch back to your dough scraper.
  9. Keep on adding it bit by bit until the dough forms a shaggy consistency, still floury but you can clump it together.
  10. Pie crust method
  11. Gather, form into a ball, and place on top of a sheet of plastic wrap. Wrap the plastic on top of it, not too snugly, and then flatten it into a disc with your hand. Doing it this way, I learned, helps the dough spread out into the plastic and is just less messy.
  12. Pie crust method

Proceed with your recipe as usual. 

GIVEAWAY!

Hooray! King Arthur Flour has offered to reward one lucky reader with one of their mega cool dough scrapers, a cookbook, AND some of their highly patented and extremely delicious boiled apple cider (perfect for flavoring apple pie and using as a slightly fancy pancake syrup). Want to win? All you have to do is leave a comment (don't panic if it doesn't pop up right away; comment moderation is enabled) answering the following question:

What's your favorite type of pie to eat, and how do you like it served?

Apple pie with cheese for breakfast? French silk pie à la mode for dessert? It's all game here. I'll choose a winner by EOD Pacific time one week from today!

Homemade Vanilla Kreme Style Donuts

Homemade vanilla kreme donuts

There are some pleasures in life that can only be described as guilty. You know they aren't great, in a technical sense, and yet, they are still so good. Among them, in my life: Beautician and the Beast, vanilla tootsie rolls, birthday cake from the grocery store bakery, Gossip Girl, and Vanilla Kreme Donuts from Dunkin' Donuts.

These super-sweet treats are a beautiful thing: rich in butter "kreme" filling, weighing about as much as a brick, and garnished with pretty rainbow sprinkles which sometimes changed colors during holiday seasons. They were my favorite as a child, and they are my favorite today. This is a sweet love which is perhaps not so guilty: it has been immortalized in love letter form, and I will proudly declare my love to anyone who asks.

And yet (proof that I am a complex person) I very much enjoy and appreciate a homespun treat, made with ingredients that I can pronounce. So I was particularly proud to have created a homemade version of the vanilla kreme donut. 

It's inspired by the Dunkin' creation, but made with "eat local" sensibilities: I made my own confectioners' sugar, used local butter and eggs; I used good quality flour and sugar and fried the doughnuts myself. 

Homemade vanilla kreme donuts

The resulting rounds of dough were truly a treat: a lightly crisp exterior and ethereally light interior, which I anchored right back to earth by piping a healthy amount of rich vanilla buttercream inside each donut. Finished by dusting the works with confectioners' sugar, piping a "puff" of buttercream outside of the hole and garnishing it with rainbow sprinkles, these donuts certainly fulfill the nostalgia part of the equation, with a more nuanced, "adult" flavor which will satisfy childhood Dunkin' Donuts lovers who have grown up into foodies. 

Donut stop buying the real thing (I know I won't) but please, do enjoy this tip of the hat to a favorite "fast-food" treat in homemade form.

Homemade vanilla kreme donuts

Homemade vanilla kreme donuts

makes about 18 (printable version here!)

  • 2 cups (about 8 1/2 ounces) all purpose flour, plus more for work surface
  • 1 packet active dry yeast
  • 1 teaspoon salt
  • 1/3 cup (about 1.58 ounces) granulated sugar
  • 2 large eggs
  • 3/4 cup (6 ounces) whole milk
  • 2 tablespoons unsalted butter
  • enough vegetable oil to fill a pan at least 3 inches deep
  • confectioners' sugar, for dusting
  • 3 cups vanilla buttercream
  • rainbow sprinkles

Procedure

  1. Place the flour, yeast, and salt in the bowl of a stand mixer. Set aside.
  2. Homemade vanilla kreme donuts
  3. In a medium saucepan, warm the milk, sugar, and butter until the butter has melted, or the mixture reaches about 105°F. Remove from heat and whisk in the eggs.
  4. Add the wet mixture to the dry, and using the paddle attachment, mix on low speed until the dough comes together. Homemade vanilla kreme donutsIncrease the speed to medium-high, and continue mixing until the dough is smooth and pulls away from the sides of the bowl, five to seven minutes. It will still be somewhat sticky. Form the dough into a ball and place in an oiled bowl. Cover with a towel and let it rise in a warm place for about an hour, or until doubled in size.
  5. Near the end of the rising period, prepare your work area. Dust a work surface with flour, and place the dough on top. Using a floured rolling pin, roll the dough to about 1/4 inch thick. Using a 2- or 3-inch round cutter (or even a floured drinking glass rim, or the top of a wide mouth mason jar top, as I did), cut out as many circles as you can and place on a lightly floured baking sheet. Homemade vanilla kreme donuts Re-roll the scraps and continue cutting out circles until you've used all the dough. Cover the rounds with plastic wrap and again let them rise, this time for about 30 minutes.
  6. Homemade vanilla kreme donuts
  7. Place paper towels under a wire rack. Have it near your frying surface. This is where you'll put the doughnuts to cool off.
  8. It's time to get frying. Heat your oil in a large deep skillet or deep pan until it has reached 350°F. 7. Transfer the rounds a couple at a time (you don't want them crowded) and fry until browned—about 1 to 2 minutes. Flip, and remember the second side takes less time to fry. Using a slotted spoon, transfer to the wire rack. Continue frying until you've finished them all.
  9. Homemade vanilla kreme donuts
  10. By the time you're done frying, the first of the fried doughnuts should be cool enough to handle. Using a chopstick, make a hole and slightly "shimmy" it without enlarging the hole too much, to make more space in the doughnut for the filling.
  11. Homemade vanilla kreme donuts
  12. Load up a piping bag with your buttercream, and pipe as much as will possibly fit in each doughnut. Homemade vanilla kreme donuts (You can also spoon it in if you prefer, slicing the doughnut in half and putting a layer of frosting inside, then sandwiching it. Pipe the sides to make it look pretty.) Dust with confectioners' sugar. Finish a pretty puff of buttercream with a star tip outside of the hole in which you piped, and garnish with rainbow sprinkles.

What's your favorite commercial donut?

Baker's Dozen: A Batch of Sweet Links!

Good idea: make a fudge cake.You know, I would totally eat a waffogato.

Important skill: how to make doughnuts using biscuits from a tube.

Devil's food cake: an exploration.

Remember when I had the experience of doing an early morning bake at a commercial bakery?

Well, the friend I did that with has a pie company in Providence now! Check 'em out.

Ice cream filled glazed doughnuts.

Win something: there's a giveaway every friday on the CakeSpy facebook page!

Do you know the different types of kitchen whisks?

I'm rather curious about these pomegranate jellies.

Making your own chocolate morsels. I want to do this with flavored candy melts!

Glow in the dark buttercream. Fun and amazing!

How to make a chocolate bubble bath. There you go, someone made a tutorial. Thanks, internet.

I was just given a banneton, which led to the question "what is a banneton?". here's how I plan on using it.

Book of the week: An oldie but goodie, Baked: New Frontiers in Baking. Released in the early days of the CakeSpy blog, this has become a trusted volume in my kitchen, with fantastically amazing and delicious recipes for brownies, cookies, and many more American classics which are front and center at Matt and Renato's Brooklyn location of BAKED (also a stop on my first book tour!). If you don't already have this book, buy it. If you do have it, buy it for someone you love.

Mother's Day Flower Pot Cupcakes Tutorial

Hey, I know you probably already bought your mom the best Mother's Day present ever. But just in case you've slacked...

here's a fantastic and exclusive tutorial just for CakeSpy readers, by Paul Bradford Sugarcraft School!

You may remember how they previously shared a tutorial on making a magical unicorn cupcake. Well, this one is just as sweet! 

For easy reference, here's a review of what you'll need to make these sweet cakes:

Tools

  • 6 silicon flowerpot cases
  • Medium calyx cutter
  • Medium daisy cutter
  • Sieve
  • PME cone tool
  • Small rolling pin
  • Piping bag
  • Sponge former
  • Tweezers
  • Large lily cutter

Ingredients

  • Basic Victoria sponge (or vanilla cake) recipe to fill 6 muffin/ plant pots
  • 400g/ 14oz Ganache
  • 50g/ 1.7oz white flower /gum paste
  • 50g/ 1.7oz green flower/gum paste
  • 12x 20g white wires
  • Green florist tape
  • 6 pose pics
  • PME pearl spray

Enjoy, and happy Mother's Day in advance!

Sponsored Post: Amex Offers Makes Life Sweet

CakeSpy Note: This is a sponsored post via American Express and BlogHer. While yes, it helps me pay my rent (which helps me write posts for you to enjoy), Amex Offers is a program I considered relevant because I have made use of it with the card I use to buy ingredients and sweets, and have enjoyed the rewards myself. Plus, there's a chance to win a $100 Amex gift card! Scroll the post to learn more.

Nougat from Sugar & Spice, Taiwan

Sometimes credit card companies seem less like lenders and more like Evil Empires.

Make that necessary evils. After all, credit cards are the thing that enables you to buy not only ingredients and delicious pastries, but also enables you to live a cool lifestyle and buy the stuff that makes life totally sweet. This includes anything from nougat in Taiwan when you have no local currency to a rare type of Tahitian vanilla for baking the perfect cake. American Express has proven again and again that credit card companies need not be evil. In fact it is quite the opposite. I can tell you this because I’ve enjoyed their services and cards in my life as not only a business owner but as a person who enjoys awesome things. Amex, along with Amex Offers, is there to help.

I can tell you that when some dude or dudette poaches your credit card to buy plane tickets to Russia or spends an incongruous amount online shopping for booty shorts, Amex notices. They will call you, work with you, and help you figure it out. They’ve saved my hide before, and I’ll bet they’d save yours, too.

On a more day-to-day level, they understand that you get what you give, and so in return for their customers’ loyalty, they give good stuff. I like the idea that after months and months of buying ingredients to make cakes, cookies, and pies to feature on this site with my Amex card, using it exclusively to pay for my travel and rental cars as I travel for the latest sweet discoveries, I am going to be noticed and rewarded.

Not only does the Amex rewards program listen, but it rewards with things that you’d actually want and use in your everyday life. I can tailor the rewards to the things I love, like cute jackets at Brooklyn Industries, puppy chow and cute outfits for my pug, Porkchop (business expense, right? investing in ambience?) from Petco, or coffeebean.com.

So instead of the points going toward things I don’t want, care about, or need (I’m talking about you, monogrammed tote bag or branded digital camera circa 2006), I’m making an investment in myself--in more ways than one.

I realize that it is a millennial thing to say, but the fact that they are also all over social media making their program known is helpful to me. I can keep up with current offers and see what’s going on with my friends. I adore Amex for helping make my life more awesome while I do and spend money on the things I need to run my business and my life. I’m delighted to share this program with you, sweeties!

Here's the nitty gritty:

OFFERS ARE RELEVANT & CURATED: Amex Offers are curated for me by American Express based on where I’ve shopped in the past and my current location. It’s great that no matter where I am, Amex gives me highly relevant and interesting offers from brands I love that are actually useful and that I will use immediately to save money.

HOW IT WORKS: American Express makes it super easy to get savings every time I shop. I can either use my American Express online account ID to log in at www.amexoffers.com and get offers right in my account dashboard – all I have to do is click on ‘Save’ to add the offer to my Card. Or, I can easily and securely connect my Amex Card to social networks like Facebook, Foursquare, Twitter and TripAdvisor to add offers to my Card right in those places. Then, I just have to spend with my Card like I normally would and the merchant and I see the savings add up as statements on my bill.

EASY & SEAMLESS: With Amex Offers, I love not having to clip coupons or remember codes – it’s so easy.

TONS OF OFFERS AVAILABLE: It’s crazy – right now Amex has more than $15 Million in savings available for Card Members… go get your piece of the pie!

That's enough about me. It's time to talk about you, and to reward what YOU do with the possibility of winning a $100.00 AmericanExpress® GiftCard. Yes, you heard me! All you have to do to enter is leave a comment on this post answering the following question: What is your favorite part about Amex Offers?


Sweepstakes Rules:
No duplicate comments.
You may receive (2) total entries by selecting from the following entry methods:

  1. Leave a comment in response to the sweepstakes prompt on this post
  2. Tweet (public message) about this promotion; including exactly the following unique term in your tweet message: “#AmexOffers” and “#SweepstakesEntry”; and leave the URL to that tweet in a comment on this post
  3. Blog about this promotion, including a disclosure that you are receiving a sweepstakes entry in exchange for writing the blog post, and leave the URL to that post in a comment on this post
  4. For those with no Twitter or blog, read the official rules to learn about an alternate form of entry.

This giveaway is open to US Residents age 18 or older. Winners will be selected via random draw, and will be notified by e-mail. The notification email will come directly from BlogHer via the sweeps@blogher email address. You will have 72 hours to respond; otherwise a new winner will be selected.

The Official Rules are available here.

This sweepstakes runs from 5/5-5/31

Be sure to visit the Amex Offers brand page on BlogHer.com where you can read other bloggers’ posts!


Baker's Dozen: A Batch of Sweet Links!

I love this cake stand series. No, that pony is not a unicorn, but close. PS: the seller, Culinary Surfer, was so pleased with my share that they gave me (and my readers, you!) a discount code: CS1 for 10 percent off. 

Chocolate cookies made with...mustard??

Woot! Thank you to Parade Magazine for featuring my brilliant ideas for leftover Easter candy.

My favorite facebook page, possibly ever.

Not literally sweet, but definitely totally sweet: my tips for making perfect quiche.

Croissant french toast with strawberry syrup. Outta sight!

I think I'd like to try this chocolate tres leches cake recipe.

How to make gummi candies at home.

Adorable "keep off the grass" cake. Striking and whimsical--I like it!

Cotton candy cupcakes: still a fave.

Yoga cookie cutters: so cute!

Banana chocolate chip crumb cake

Still (as always) perfect and delicious: chocolate chip cookies from Baked: New Frontiers in Baking.

Book of the week: A Cake Lover's Recipe Notebook. A fun new spin on the expected cake book, this is part guide book, part recipe book, and notebook. It's separated into tabbed sections ("posh cakes", "little cakes", etc) and is wire bound with sections for notes, and this also makes the pages lie flat, which I love. Plus, the photos are beautifully styled, so it's fun to look at even while you're not baking. 

Pure Sin: Butter Ice Cream Recipe

Butter ice cream

Don't be fooled. As sweet as the scoops above might look, the fact is that they are stuffed with sin. You see, dear readers, I have a confession to make. I have done something so, so, SO naughty.

I've made butter ice cream.

BUTTER ICE CREAM! 

You may be wondering, "is this for real?". Well, the answer, my friends...

Butter ice cream

While you absorb the gravity and general amazing-ness of this statement, let me explain. Don't start panicking, because there is a homemade butter ice cream recipe at the end of the story.

I was writing about how to make ice cream without an ice cream maker for an upcoming post on Craftsy, when it hit me: what if I used butter instead of cream to make the ice cream? After all, isn't butter the condensed best part of cream, anyway? The more I thought about it, the better an idea I decided it was.

So using the same method I used for the Craftsy writeup, I whipped up a batch of vanilla ice cream. But instead of heavy cream, I substituted an equal amount of butter. From there, I basically followed the same steps.

So, now that you've had some time to digest the words "butter ice cream", you're probably wondering "was it gross? Or was it awesome?". Because let's be honest, when somebody says something like "butter ice cream" it's probably going to be one or the other: awful of awesome. Something like butter ice cream is never just "well, it was ok". 

Butter ice cream

Listen. I need to tell you that there is a reason why this kind of ice cream is not sold in stores. It is absolutely made of sin. It tastes like the unholy love child of a rich buttercream frosting and frozen custard, which is to say, it tastes amazing. 

Now, there were some differences between the butter ice cream and regular ice cream. For one, it was flakier in the pan once frozen; I had to let it sit at room temperature for about 2 minutes before it would scoop properly. It doesn't have the same exact texture as ice cream. Oddly, the texture is more like a coconut milk or vegan ice creams I've tried in the past. But the taste is nothing like those varieties. 

Butter ice cream

Listen, I am not going to advocate eating buckets of the stuff, because quite frankly, you'd probably have a heart attack. But I am going to say that as a garnish for a treat, a thinly spread filling in an ice cream sandwich, or enjoyed in a single sinful scoop, this is a treat which ends up tasting way better than it has any right to. 

OK. Maybe you're sold, maybe not. But if you are curious, here's the recipe. 

Butter ice cream

BUTTER ice cream

Makes about 12 cookie scoop sized servings

  • 1 egg, beaten
  • 1/2 cup sugar
  • 1/4 teaspoon salt
  • 3 sticks of unsalted butter
  • 1 cup half and half
  • 1 1/2 teaspoons pure vanilla extract

Procedure

  1. Cut the butter into small pieces. Place the first five ingredients (everything but the vanilla) in a heavy bottomed saucepan. Stir CONSTANTLY. I found that if I didn't, burned bits of butter would form very quickly.  If they do, don't stop: we'll strain the mixture in a little bit.
  2. Butter ice cream
  3. Continue to cook until the temperature has reached 145 F (a few degrees over is fine). Keep a close eye on this as the smoke point for butter is 150 degrees F. Remove from heat, and if needed, strain the mixture into a different bowl through a sieve to strain out burned bits. Stir in the vanilla and place the bowl or pan in an ice bath.
  4. Butter ice cream
  5. While the mixture is cooling in the ice bath, place a stainless steel bowl (fairly shallow) or baking pan in the freezer to chill.
  6. Once the mixture has cooled, gently pour it into the cold pan. Take care that no drops of water from the bottom of the pan get in the mixture.
  7. Place the pan in the freezer for about 20 minutes. Remove the pan. Chances are, it feels a bit gluey. It's OK. Stir it as vigorously as you can, using a combo of rubber spatula (to loosen the mixture from the sides and bottom) and a whisk (to mix). Stir vigorously (but not so hard as to make the mixture go flying) for 1 minute or so. Return the mixture to the freezer.
  8. Homemade vanilla ice cream
  9. Repeat this process every 20 minutes or so for 6 cycles. The mixture will be slightly thicker every time. If at any point it is too thick, place the mixture in the refrigerator to soften slightly before stirring, then do the step and return to the freezer.  Once the ice cream has completely frozen, your ice cream is ready. 
  10. Butter ice cream

Enjoy in moderation and good health. 

Butter ice cream

Bali Diary: Dosha Balancing Drink Inspired by Bali Buda

Bali

In case you've been living under a rock and didn't know I spent an extended time in Bali, well, let me tell you.

Bali was great. It was magical. I eat pray LOVED every minute of it. 

One thing that was especially eye opening to me was the fact that Health Food Can Be Delicious. For instance, one day I am at a cafe called Bali Buda (yes, that's how it's spelled). They have something on the menu called a "Dosha Balancing Drink". I had no idea what a dosha was, but I know that the items that were in it according to the menu, which included banana, dates, and almonds, all sounded quite to my liking.

Bali

I took one sip and said to my companion, "I have no idea what a doshi is but mine feel so balanced right now!". You see, I'd already forgotten what this beverage was balancing. But what I still don't forget is the taste. It was perfect. Very mellow and subtle, but so calming. Even though it was a chilled drink, it tasted like a comfort food, with the sweetness of the banana and dates working in sweet harmony with the almonds. You could not be in a bad mood while drinking this thing. 

I blinked out of my reverie as my companion spoke up.

"Dosha," she gently chided, and I received the reader's digest version of the dosha story. Basically, doshas (is it doshi, plural?), according to Ayurvedic medicine, are "each of three energies believed to circulate in the body and covern physiological activity."

Anyway, if you want to know more about the doshas in your particular life, there's a quiz on the Deepak Chopra site. I can't believe I just linked to Deepak Chopra on CakeSpy. 

Unicorn eating a banana

Anyhow, once you forgive me for linking to the Chops, do give this recipe a try. Even though it's health food, it's awfully good food. The sweetness of the bananas and dates work beautifully with the richness of the almonds; even though it has no dairy, it's amazingly creamy. I'm never going to tell you it could stand in for dessert, but it's very acceptable as a snack or breakfast. 

Dosha Balancing Drink (AKA banana date almond smoothie)

Inspired by Bali Budha; adapted from Deliciously Ella

Makes 2 delicate servings, or one very large one

  • 1/4 cup almonds
  • 2 large ripe bananas
  • 1 1/2 cups very cold almond milk
  • 8 medjool dates, pits removed
  • 2 teaspoons of cinnamon

Procedure

  1. If your blender is not incredibly strong, go ahead and coarsely chop the almonds to start. I don't really care if they have skins on or not.
  2. Undress the bananas and remove the pits from your dates.
  3. Now, combine all of the ingredients in your blender. Blend for, I don't know, 1 minute or so, until it has reached your desired consistency. I like mine a little chunky, so I can use a spoon toward the end to snack on the lumps of almond and date bits. 

Enjoy in good health and highly balanced doshas. 

Baker's Dozen: A Batch of Sweet Links!

New Card!

I'm selling ALL of my old card styles! Buy them while they still last! I will have one more sale when I clean out my storage unit in July, but I can't guarantee how many cards I will have then. 

Curious about baking with spelt? Here's a very informative article.

Key lime cheesecake cookies? The lime makes it healthy.

How to make your own brown sugar!

I'm obsessed with the Whole Foods chocolate mousse recipe.

Tips for freezing whipped cream.

Helpful if you're a heathen at the table: dessert etiquette.

I would like to get to know Salzburger Nockerl better.

A historical look at Angel Food Cake.

Pear and honey custard tart. Yumsies.

Bittersweet to hear of DailyCandy closing their doors. They were the first company to hire me as a freelance writer. I consider my time writing for them very formative.

A review: La Boulange pastries at Starbucks.

Sweet memories: Velveeta Fudge!

A primer on gluten-free flours for baking.

It made me so happy to read that this "desserts in moderation" article tells you to run like hell from fat free stuff (I am paraphrasing, of course).

Book of the week: 

Repast: Dining Out at the Dawn of the New American Century, 1900-1910. I can't put down this book about dining out in the early 1900s. It's fascinating to read about the foodies from the age before Julia Child, Craig Claiborne, and Ruth Reichl. Of particular interest is reading about how restaurants prided themselves on being innovators, both with recipes and with technology. If you're interested in the history of food, this is a must-read.

Bake For Good: A Sweet Adventure with King Arthur Flour

King Arthur Flour Bake For Good

So.

A few months ago I get an email from King Arthur Flour asking if I'll join their "Bake For Good" event in Seattle. Now, without even knowing what that was, my initial impulse was to say "yes! YES!". You see, I am a big fan of King Arthur Flour. One of the benefits of being a blogger is that you're allowed to be a groupie for things like flour companies. 

Only there were two problems. One was that I don't live in Seattle any longer, and they weren't paying for airfare. Second (bigger issue) was that I would be in Bali on the days of the event. So with a heavy heart I had to say no. I realize that you probably feel terrible for me that I had to turn something down because I would be in Bali.

Happily, there was a solution which made everyone happy: an event a couple of weeks later, in LA. I said yes, bought a plane ticket, and proceeded to not look up anything about the event I was attending. 

A few days before, I acquinted myself with the event, and was very impressed with what I found. 

King Arthur Flour Bake For Good

What is Bake For Good? 

According to the King Arthur blog, "Bake for Good is the umbrella name we give to everything we do here at King Arthur Flour to make the world a better place – through baking."

Loved it already. Don't you?

So, as part of their do-gooding outreach, King Arthur Flour decided to do several events, tour-style in the midwest and on the west coast, where they are not as well known. This had a double benefit--people in these areas could learn about their fantastic products, and they could do some good while they were out and about. 

On this particular tour, they would meet up with bloggers for two days in each city. The first day they taught us how to make bread and pies, and then we immediately put our newfound knowledge to work and baked up a storm. 

The next day, we took our baked goods to a shelter, and rounded it out with a full dinner. Let me tell you, this was a fantastic treat for them as well as for us. There was nobody who didn't win in this equation. 

Now that I have given you the basics, I will tell you about my adventure. 

Day 1: Meet, greet, bake. 

Day 1 started out bright and early, at 7.30 AM. As I approached the group, one lady said "Hello, Jessie!". I returned the greeting, cautiously. How did she know my name? Turns out, Susan Reid, one of the King Arthur Flour bakers and editor of The Baking Sheet newsletter, had done her homework. She not only knew everyone's name and face, but details about us (that I was from NJ, for instance). This was very impressive and just a little creepy--but in an awesome, how can I be more like that? kind of way. 

King Arthur Flour Bake For Good

The group was composed of seven talented food writers and bloggers including myself. I was lucky enough to meet Julianne of Beyond Frosting, Nicole of Pinch My Salt, Jennie and Corelyn of Garlic My Soul, Farley of Over Over Under and LA Weekly, and Jessica of Beer and Baking. I already had a good opinion of these people going into the event, but it only became a better opinion once I got to know them better. Good people!

They warmed us up by letting us taste the still-warm chocolate chip scones you see above. Good. Good. Good.

We started out our baking with a bread tutorial from Robyn, another of the King Arthur Bakers. This woman was like a baking encyclopedia. She knew everything. She showed us the proper way to mix bread dough, knead, and shape it. Really, it was a great bonding experience. 

King Arthur Flour Bake For Good

In spite of knowing everything, she was very inclusive of people who knew less. One thing I've always felt a deep shame about is my lack of proper training--I can get it done, baking-wise, but I don't always follow the proper procedure. When I asked things like "Is it OK that at this point I would normally just use my hands to mix the dough?" which were clearly NOT THE RIGHT ANSWER, she lovingly would assure me that I was doing fine without turning into a crazy pastry chef who yells "sacre bleu, you are doing eet all wrong!". 

BTW, I made copious notes. 

Under Robyn's tutelage, we quickly found ourselves making rolls...and then a braided loaf...and then a mega-braided (6 strands, baby!) loaf. Say what?

King Arthur Flour Bake For Good

Yup. We did good.

King Arthur Flour Bake For Good

After a break, we were back to the dough and it was time for pie.

Pie Time


Now, unless you've been living under a rock, you probably know that People Are Scared Of Pie Crust. I don't see why--I'm not. But at the same time, while it's turned out fine, I've never been properly trained.

King Arthur Flour Bake For Good

Robyn showed us not one right way but two, and explained that there isn't one way. Before we knew it we were rolling and patting our crust into the pan with delightfully visible butter in the crust. 

But the coolest parts, to me, were these.

1. Robyn showed us how to peel an apple with high speed. First, peel the top, and don't lift the peeler. Drag it down and peel around the bottom. Now, bring the peeler in strokes along the sides, letting it lift between strokes. Seriously. So fast. 

King Arthur Flour Bake For Good

2. She showed us how to flute the crust. I never knew how to do this pointy style.

King Arthur Flour Bake For Good

3. Susan stepped in and showed us how to do a lattice crust. She told us that the way I have always done it--right on the pie--is not necessarily incorrect, but that to keep things from getting messy, it's easier to do it on an upside down pie plate. How right she was! Plus, this has an amazing "voila" moment when you transfer it. It's exhilarating and fun.

King Arthur Flour Bake For Good

We baked up our treats and felt very satisfied. We packed them up for day two, and retired to dinner.

King Arthur Flour Bake For Good

We all went to a place called Little Beast for dinner. It was adorable - the amount of mason jars present in this restaurant was up through the stratosphere. Pinterest would love this place. But more importantly, it was freaking delicious. I had a really amazing chocolate mousse for dessert. It was served in a mason jar, natch.

I wore a sequined unicorn dress, if that matters.

There was a moment of stress when someone suggested the table share desserts. "I cannot tell a lie," I bravely confessed, "I do not share dessert." so I had this baby all to myself. I'm pretty sure everyone else was jealous. 

Photo via Beer and BakingDay 2: Sharing and caring

The next day was a bevy of doing good and meeting others who do good.

We started by visiting Homeboy Industries. Seriously, if you have never heard of this place, you need to. They do fantastic and inspiring things.

In a nutshell, Homeboy "serves high-risk, formerly gang-involved men and women with a continuum of free services and programs, and operates seven social enterprises that serve as job-training sites."

Former gang members--some previously jailed--are given a second chance by working at this world class bakery, working their way to recovery. As they gain experience and skill, they also gain entry back into the "real" world. We got to speak to several of the bakers and they were all amazingly inspiring, having come from the bottom to where they are today. Without a doubt every single person was a hard worker, and thankful for the opportunity. 

King arthur flour trip

And equally as important as their message...the cookies are great! 

After leaving Homeboy, we headed over to PATH to cook a dinner for the residents. We created a number of Susan's recipes, including mac n cheese, Spanish rice, lime-scented chicken, and veggies. We worked together in the tiny kitchen and made it happen, serving our wares along with the bread and the pies we'd made the day before. Talk about a good feeling, especially when we saw the smiles on the residents' faces. The shelter residents, I learned, rarely see food of this caliber, much less homemade desserts.

IMPORTANT: We all felt good at the end of the day. 

Photo via Beer and Baking

- - - - - -

RECIPES

King Arthur Flour Bake For Good

You didn't think I'd leave you hanging, did you? Here are the tasty recipes we made. Both are courtesy of King Arthur Flour.

BREAD:

Yield: 1 large loaf, about 18 servings.

  • 1 1/3 to 1 1/2 cups lukewarm water*
  • 1 heaping tablespoon honey
  • 2 1/4 teaspoons instant yeast
  • 1 3/4 teaspoons salt
  • 2 tablespoons soft butter
  • 4 cups King Arthur Unbleached All-Purpose Flour
  • 1/3 cup Baker's Special Dry Milk or 1/2 cup nonfat dry milk granules

*Use the lesser amount in summer or humid climates; the greater amount in winter or drier climates.

  1. Mix all of the ingredients in the order listed, and mix and knead — by hand, or using a stand mixer — to make a smooth dough. It won't be particularly soft nor stiff; it should be smooth and feel bouncy and elastic under your hands.
  2. Place the dough in a lightly greased bowl or other container. Cover it, and let it rise at room temperature until it's very puffy, 1 to 2 hours.
  3. Gently deflate the dough, and shape it into a fat 9" log. Place it in a lightly greased 9" x 5" loaf pan.
  4. Cover the pan, and let the dough rise for 60 to 90 minutes, till it's crowned 1" to 1 1/2" over the rim of the pan. Towards the end of the rising time, preheat the oven to 350°F.
  5. Bake the bread for 20 minutes. Tent it lightly with aluminum foil, and bake for an additional 15 to 20 minutes, till it's golden brown. An instant-read thermometer inserted into the center will read 195°F to 200°F.
  6. Remove the bread from the oven, and turn it out onto a rack to cool. When completely cool, wrap in plastic, and store at room temperature.

King Arthur Flour Bake For Good

PIE:

For the crust

  • 2 1/2 cups Perfect Pastry Blend or King Arthur Unbleached All-Purpose Flour
  • 3/4 teaspoon salt
  • 1/3 cup vegetable shortening
  • 1/2 cup (1 stick) cold unsalted butter
  • 7 to 10 tablespoons ice water

filling

  • 8 cups sliced apples
  • 2 tablespoons lemon juice
  • 3/4 cup sugar
  • 2 tablespoons King Arthur Unbleached All-Purpose Flour
  • 2 tablespoons cornstarch
  • 1/4 teaspoon salt
  • 1 teaspoon cinnamon
  • 1/4 teaspoon nutmeg
  • 1/4 teaspoon allspice
  • 1/4 cup boiled cider or undiluted apple juice concentrate
  • 2 tablespoons butter, diced in small pieces

Procedure

  1. In a medium bowl, whisk together the flour and salt.
  2. Cut in the shortening until it's in lumps the size of small peas.
  3. Dice the butter into 1/2" pieces, and cut into the mixture until you have flakes of butter the size of your fingernail.
  4. Add the water, two tablespoons at a time, mixing with a fork as you sprinkle the water into the dough
  5. When the dough is moist enough to hold together when you squeeze it, transfer it to a piece of wax or parchment paper. It's OK if there are some dry spots in the pile. Use a spray bottle of water to lightly spritz these places; that way you'll add just enough water to bring the dough together without creating a wet spot.
  6. Fold the dough over on itself three or four times to bring it together, then divide it in half and pat it into two disks 3/4" thick.  
  7. Roll the disk on its edge, like a wheel, to smooth out the edges. This step will ensure your dough will roll out evenly, without a lot of cracks and splits at the edges later. Wrap in plastic and refrigerate for 30 minutes before rolling.  
  8. Lightly grease a 9-inch pie pan that's at least 2 inches deep. This will make serving the pie easier after it's baked. 
  9. Combine the sliced apples and lemon juice in a large mixing bowl.  
  10. In a small bowl, whisk together the sugar, flour, cornstarch, salt, and spices. Sprinkle the mixture over the apples, and stir to coat them. Stir in the boiled cider or apple juice concentrate.
  11. Roll out half of the pastry to a 13" circle. Transfer it to the prepared pan, and trim the edges so they overlap the rim of the pan by an inch all the way around.
  12. Spoon the apple filling into the pan. Dot the top with the diced butter.
  13. Roll out the remaining pastry to an 11" circle. Cut decorative vent holes, if desired. Carefully place the pastry over the apples.
  14. Time to preheat the oven to 425°F.
  15. Roll the overhanging bottom crust up and over the top crust, pinching to seal the two.
  16. Flute the edges of the pie, then place it in the refrigerator for 10 minutes to firm up the crust while the oven finishes heating.
  17. Place the pie on a parchment-lined baking sheet. Bake the pie for 20 minutes at 425°F, then reduce the oven temperature to 375°F and bake for 40 minutes more, until you see the filling bubbling inside the pie. Check the pie after half an hour of baking time, and cover the edges with foil or a pie shield to keep them from browning too quickly.
  18. When the pie is done, remove it from the oven and cool it completely before slicing.

To learn more about Homeboy Industries and PATH, click on the respective hyperlinks. 

To learn more about the Bake for Good program, visit the King Arthur site.