Sweet Treats for the Holidays Blog Tour: Hot Cocoa Marshmallow Cookies

Guess what? I'm part of the blog tour for a fantastic new book by my friend Norene Cox.

The book is entitled Sweet Treats for the Holidays: Edible Creations for Halloween, Thanksgiving, Christmas, and More, and I need to tell you: it is adorable.

In its pages, you'll find tutorials for such crafty holiday-themed sweets as these:

and these.

And I'll share the recipe from the top of the post--how cute is that??

Be sure to check out the other stops for the blog tour as seen below:

November 28: The Purple Pug
November 29: Fizzy Party
November 30: Log House Foods
December 1: My Cake School
December 2: Party Wagon
December 3: Catch My Party
December 4: Kitchen Fun With My 3 Sons
December 5: Bird’s Party
December 6: Momstart
December 7: The Things I Love Most
December 8: Cakespy
December 9: Simple Fare, Fairly Simple • Readalot • Author’s Hideaway
December 10: The Marshmallow Studio • Babs Book Bistro
December 11: Creative Juice

Ingredients

  • 1/4 cup white candy coating
  • 4 mini candy canes
  • 4 jumbo marshmallows
  • 1 (16-ounce) can chocolate frosting
  • 12 jet-puffed mallow bits
  • 1 7-ounce pouch stor bought white cookie icing
  • 4 store bought tea cookies 
  • 40 small tree sprinkles
  • 4 large tree sprinkles

Procedure

  1. Melt the candy coating in a small microwave-safe bowl according to the package instructions. 
  2. Cut a candy cane at the curve. Dip the ends into the melted candy coating and push them into the side of the marshmallow. Hold it in place until it hardens and is secure.
  3. Using a small knife, spread a small amount of chocolate frosting on top of a marshmallow, leaving a small rim. Top with 3 mallow bits.
  4. Frost a cookie with white icing. Place the marshmallow in the middle of the cookie.
  5. Place 10 small tree sprinkles around the perimeter of the cookie.
  6. Attache a large tree sprinkle to the front of the marshmallow using the candy coating.

I Love H: Award-Winning H-Bars Recipe

I love love.

I also love cookies.

And furthermore, I adore a good story.

Naturally, I gravitated toward this recipe, since it combines all of the above in one tasty form. Adding to its intrigue was the fact that is was an award-winner: these bars are featured in the new book Holiday Cookies: Prize-Winning Family Recipes from the Chicago Tribune for Cookies, Bars, Brownies and More


These so-called "H-Bars" have a mysterious story: 

Victoria Weisenberg won first place in 2012 for this recip and her tale of using them to woo "a very special man". Weisenberg created the recipe as a Hanukkah give for her former beau and said the "H" stands for the first letter of his first name, though she opted to leave that name a mystery.

This story is what intrigued me about the bars, which I might have otherwise passed over owing to the fact that they are made with a raisin filling. This t-shirt design sums up my thoughts on raisins in cookies:

Luckily (great timing!) I just received a package from the California Dried Plum Board (no, really). It didn't take me long to decide to swap the prunes for the raisins. I'm glad I did: they add a wonderful moisture and mellow flavor to the bars. 

Yes, really.

The only other thing I did differently is I baked the bars in a loaf pan rather than the size specified in the recipe. Doing such, I had to increase the bake time by about 5 minutes. I have left the instructions intact though; if you want to make them look like mine, use a loaf pan, increase the bake time, and slice into fingers instead of bars. 

Award-winning H-Bars

  • Yield: 20 bars
  • Prep time: 30 minutes
  • Bake time: 37 to 40 minutes per batch

Shortbread base:

  • 1 stick (½ cup) unsalted butter, softened
  • 1 cup flour
  • ¼ cup granulated sugar

Middle layer

  • ⅓ cup flour
  • ¾ teaspoon cinnamon
  • ¼ teaspoon salt
  • 1 cup brown sugar
  • 2 eggs, lightly beaten
  • ½ teaspoon vanilla
  • 4 ounces chopped dried plums (original recipe calls for ⅔ cup golden raisins)

Topping:

  • ½ cup flour
  • 1/3 cup granulated sugar
  • ½ stick (¼ cup) unsalted
  • butter, softened
  • 1 teaspoon cinnamon

Icing (I omitted this)

  • ½ cup confectioners’ sugar
  • 1½–2 tablespoons milk
  • ¼ teaspoon vanilla

Procedure

  1. Grease or coat with cooking spray a 7½-by-11-inch baking pan. Heat oven to 325 degrees.

  2. For the shortbread, combine butter, flour and granulated sugar in a medium bowl until crumbly. Pack into the prepared pan; bake, 15 minutes.

  3. For raisin layer, stir together flour with the baking powder, cinnamon and salt in a small bowl. In another bowl, beat brown sugar, eggs and vanilla together until blended. Stir in dry ingredients and dried plum bits. Pour over the baked shortbread layer.

  4. For the topping, combine ingredients in a bowl until mixture is crumbly. Sprinkle evenly over the middle layer. Bake, 22 to 25 minutes. Cool.

  5. For the icing, combine confectioners’ sugar, 1½ tablespoons milk and vanilla in a small bowl. Add more milk, if needed, until you get a smooth, easy-to drizzle mixture. Drizzle over the top. Cut into 20 bars.

Food processor method: You do not have to wash the bowl of the processor between steps. Combine ingredients for the bottom layer with a few pulses until crumbly. Pack in pan. Bake as above. Prepare topping in the processor in the same way. Place in a bowl and set aside. Then, place brown sugar, eggs and vanilla in processor bowl and process until blended. Add dry ingredients and pulse a few times. Stir in raisins. Continue as above.

Do you like raisins in baked goods?

Cake Mix Bonbon Cookies

You'd never guess cake mix is the key ingredient of these pleasant little cookies. Vaguely shortbread-y, I made mine with peppermint extract for the holidays, but I'm putting vanilla for more everday use. 

I made these because I had a spare box of cake mix lying around (you know, food blogger problems) but was pleasantly surprised. I even included them on a few cookie samplers.

Enjoy!

Cake Mix Bonbon Cookies

Makes 30-40 cookies depending on size

  • 1 box cake mix (I used Immaculate Baking Yellow Cake Mix)
  • 1/4 cup sugar
  • 1/3 cup vegetable oil
  • 2 eggs
  • 1 teaspoon vanilla (or peppermint around the holidays)
  • 3-4 ounces of dark or milk chocolate (3 ounces = delicate drizzle; 4 ounces = more generous icing like pictured)

Procedure

  1. Heat oven to 350°F (325°F for dark or nonstick pans). In large bowl, mix cake mix, sugar, oil, vanilla and eggs with spoon until dough forms. It will be a somewhat crumbly dough.
  2. Shape dough into 1-inch balls. On ungreased cookie sheets, Place balls 2 inches apart.
  3. Bake 9 to 11 minutes or until set. Cool 1 minute; remove from cookie sheets to cooling racks. 
  4. Make the chocolate topping. Melt 3-4 ounces of chocolate, and drizzle on top of each cookie. 

Baker's Dozen: A Batch of Sweet Links

Learn how to make a DIY paint by numbers painting! I made one of a cupcake to illustrate the easy and fun technique. (CakeSpy for Craftsy)

Which recipe won the million dollar prize at the Pillsbury Bake-Off? (Find out here)

Easy acorn doughnut holes. TOO CUTE! (A Taste of Madness)

Paris-Brest. No, I am not catcalling you. (Lavender and Lime)

Homemade brownie mix in a jar. Gift idea alert! (The Perfect Brownie)

What is cornstarch and what does it do in baking? (CakeSpy)

Is pure vanilla worth the price? (The Kitchn)

Gingerbread pancakes. Frosting tree. You've gotta see it! (Brooklyn Farm Girl)

Buttermilk chess pie! (Love and Olive Oil)

What's the best type of chocolate for baking? Here's a guide. (CakeSpy for Craftsy)

Carb-o-licious: homemade apple cinnamon bagels. (Heather's French Press)

Desserts that are ORANGE. (CakeSpy Shop)

I wish I had thought of this first: speculoos and pumpkin spice oreo "lasagne" (Spiffy Cookie)

IN LOVE: Baking in Miniature. Thanks Pam for the lead! (Baking in Miniature)

Painted holiday cookies. (Jelly Toast Blog)

Ever heard of "Buddha's Hand"? (Food on Fifth)

Book of the week: The Cookie Dough Lover's Cookbook: Cookies, Cakes, Candies, and More. Because...well, COOKIE DOUGH. Recipes to enjoy it in more ways than you'd ever dreamed!

Red Velvet Cake with Chocolate Ganache Filling

Have you ever found yourself eating red velvet cake and thinking "hmm, isn't this cake supposed to have some chocolate in it?". I certainly have. While the cake does in fact contain cocoa, it's delicate, and can easily be overshadowed by the rich cream cheese frosting which typically covers the cake.

This red velvet cake brings chocolate back with a sweet surprise: in addition to the rich cream cheese frosting used to cover it on the top and sides, it has a deliciously decadent chocolate ganache filling, too. The ganache brings out the cocoa-scented flavor of the cake, and it works in sweet harmony with the cream cheese. It's a beautiful way to unify the flavors of red velvet. 

No, it's not traditional; no, I'm not sorry. Because this cake tastes great. 

Red Velvet Cake with Ganache Filling


Makes 1 9-inch cake

For the cake

  • 2 heaping tablespoons unsweetened cocoa (not dutch-process), sifted
  • 1 teaspoon concentrated gel food coloring
  • 1 1/2 tablespoons water
  • 2 ¼ cups cake flour, sifted
  • 1 teaspoon salt
  • 1 stick unsalted butter, softened
  • 1 ¼ cups sugar
  • 2 large eggs
  • 1 teaspoon vanilla extract
  • 1 cup plus 2 tablespoons buttermilk
  • 1 teaspoon baking soda
  • 1 teaspoon white vinegar

Note: this recipe has been adjusted for high altitude by reducing the sugar by ¼ cup and by increasing the buttermilk by 2 tablespoons. 

Ganache filling 

  • 1/2 pound good quality bittersweet chocolate, finely chopped
  • 1/2 cup heavy whipping cream
  • pinch salt 

Cream cheese frosting 

  • 1/2 cup unsalted butter, softened
  • 8 ounces (1 cup) cream cheese, softened (do not use low-fat)
  • 1 teaspoon vanilla extract
  • 4 cups confectioners' sugar

 Procedure

  1. Preheat the oven to 350 degrees F. Grease, flour, and line with parchment 2 8-inch round cake pans.
  2. In a small bowl, combine the sifted cocoa, food coloring, and water. Mix together until it forms a thick but lump-free paste. Set to the side.
  3. In a medium bowl, combine the cake flour and salt. Give them a stir to combine; set to the side.
  4. In the bowl of a stand mixer fitted with the paddle attachment, combine the butter and sugar. Mix on medium-high speed for 3 minutes; the mixture should be fluffy.
  5. Add the eggs, one at a time, pausing to scrape down the sides of the bowl with each addition. Stir in the vanilla. Stir in the coloring mix.
  6. Add the flour alternately with the buttermilk, mixing on low speed and scraping the bowl after each addition.
  7. Now, gear yourself up to move quickly for a few minutes. Don’t be tempted to pick up the phone or take a bathroom break.
  8. In a ½ cup size bowl or larger, combine the baking soda and vinegar (it will bubble up--don’t panic, that’s why you used the size cup you did to mix) and add it immediately to the batter. Mix until combined.
  9. Divide the batter evenly between the two cake pans, and put in the oven.
  10. Bake for 25 minutes or until a cake tester or toothpick inserted in the center comes out clean.
  11. Let the cakes cool in the pans for about 10 minutes. Run a sharp knife along the edges of the pan to loosen the edges, and turn the cakes out on a wire rack to cool completely before frosting. If the cakes have formed domes, level using a serrated knife.
  12. Make the ganache. In a saucepan, heat the cream on medium-low heat, stirring occasionally to discourage scorching on the bottom of the pan. Bring it just barely to a boil. Once it comes to a boil, remove from heat immediately. Pour on top of the chocolate. Using a wire whisk, mix the chocolate and cream together until they have become smooth, and the chocolate has melted into the cream. It will be the consistency of a thick hot fudge sauce. Stir in the salt, mixing until smooth. Wait until it has come to room temperature (it will solidify more) before using to fill the cake. 
  13. Make the frosting. In the bowl of a stand mixer fitted with the paddle attachment, cream the cream cheese and butter until very smooth. Stir in the vanilla. Add the confectioners' sugar one cup at a time, mixing well after each addition and pausing to scrape the sides of the bowl with a rubber spatula as needed, until the frosting is smooth and spreadable. You may not add all of the confectioners' sugar.
  14. Assemble the cake. Place one of the layers with the flattest side up on a serving platter. Coat it generously with a thick layer of ganache. You might not use all of the ganache, but if you have extra I don't think this is a bad thing for your life and snacking for the next day or two. Place the second layer on top, flattest side up again. Now, cover all over with that tasty cream cheese frosting. You might want to apply a crumb coat, but it is not necessary. Do, however, cover the cake very generously.
  15. Store in the refrigerator, but serve at room temperature. 

 Do you like Red Velvet cake?

Chocolate Cherry Cookies

Are you ever haunted by the memory of Christmas cookies past? 

I am. Let me tell you about it.

When I was young, there were two cookies in particular which I treasured above the others. They were chocolate chip pistachio cookies (recipe here) and chocolate cherry cookies.

While my mom was happy to hand over the pistachio recipe, she claims a cloudy memory about the chocolate cherry variety. What? They were the best!

I'll tell you about them, and maybe you know of something similar: a chewy yet slightly crumbly chocolate cookie with a cherry pressed inside, and a chocolate ganache type topping, baked right into the top of the cookie. 

I loved those cookies so hard.

This recipe, while not the same as those cookies in my memory, came out awfully good. They have the same flavor combination, and I made them with some Montmorency cherries from Stoneridge Orchards which were recently sent to me in the mail. They have a perfect, shortbread-meets sugar cookie texture base, and the cherry inside works very nicely with the chocolate, giving it an almost almond-y flavor. The chocolate topping bakes up fudge-like, and is extremely pleasant and if not gooey, then it adds a moist element to the cookie.

The candies are mainly for show, but I learned pretty quickly to not display two of them side by side, because, well, boobs. Well, OK, do it--it might make you laugh.

Chocolate cherry cookies

Makes 24

Very loosely based on this recipe 

  • 1/4 cup light brown sugar, packed
  • 1/4 cup granulated sugar
  • 1 cup butter or margarine, softened
  • 1 teaspoon vanilla
  • 1 egg yolk
  • 1-1/2cups all purpose flour
  • pinch salt
  • 1/4cup unsweetened baking cocoa
  • 24 dried cherries

For the topping

  • 1/4 cup butter
  • 1/4 cup chocoalte morsels
  • 1 cup confectioners' sugar
  • 24 cinnamon candies, for garnish

Procedure

  1. Heat oven to 350 degrees F.
  2. In large bowl, beat the sugars, 1 cup butter and the vanilla with electric mixer on medium speed until fluffy. Beat in egg yolk until smooth. Beat in flour, salt, and cocoa.
  3. Shape dough by rounded teaspoonfuls into 1-inch balls. Press a cherry on top of each cookie, and ease the dough around to cover it.
  4. On ungreased cookie sheet, place balls 1 inch apart. With index finger or thumb, make indentation in center of each ball. It might feel a little awkward because of the cherry inside, but I promise, you'll be OK.
  5. Make the topping. Combine the chocolate chips and butter in a microwave-safe bowl and heat in 20-second increments until melty. It will look ugly. Stir in the confectioners' sugar; as it mixes it will become less ugly.
  6. Top each cookie with a dollop of the chocolate mixture, and place a cinnamon candy on top of each.
  7. Bake 7 to 10 minutes or until set. Immediately remove from cookie sheet to wire rack. Cool completely, about 30 minutes.

What's your favorite holiday cookie?

Dear Postal Service: Will You Crush My Cookies for Me?

With the holidays hurtling toward us at an alarming rate, I'm all about any kitchen shortcut which will streamline my baking. 

And I have come to the conclusion that crushing cookies for a pie crust takes up way too much time and energy. 

But following my ice cream cone shipping experiment, I began to wonder: could I ship cookies to myself in the mail, and rely on the postal service to crush them for me? I mean, let's be honest: they're not necessarily known for their gentle handling of packages. 

I'm aware that this might sound ridiculous to you.

I realize that you might be tempted to point out a fatal flaw in my thinking here: doesn't packing and sending cookies to yourself take just as long as crushing the darned things? And yes, you are correct. But my thought process was this: if this experiment worked, I could move into shipping large amounts of cookies through the USPS. If I were shipping five cookie crusts' worth at a time, paying a nominal fee for the USPS to crush them just by doing what they do...it seems like a small price to pay. 

I realize too that you might be tempted to say something like "dudette, just get a food processor." Well, I will have you know that I own a food processor. It's just that this way seemed so much more like an adventure. You're not going to deny me a life filled with adventure and joy, are you? 

So, moving past any nay-saying, let me tell you exactly how I went about my experiment.

Here's what I did.

  1. I grabbed a bag of Walkers mini scottie shortbread cookies. Walkers shortbread is one of my favorite cookies to use for a cookie crust. (Note: while I have been paid to do recipes for Walkers in the past, they didn't pay me to say that. It's the truth!).
  2. I poured the entire bag, which is usually a good amount for a pie crust, into a plastic freezer bag and forced out any extra air.
  3. Then I packed it in an envelope WITHOUT padding, so it could be pummeled and crushed by any and every element that came its way.
  4. To bring home the point that this was not a parcel to be handled gently, I helpfully labeled it (pictured below) and then popped it in the mailbox. 

It arrived back to me two days later, and I was disheartened to see that the envelope still held a somewhat lumpy, dimensional shape.

When I opened the parcel, I saw that the cookies were slightly crumbly around the edges, but really not all that different from how I mailed them.

I was tempted to curse the post office for its ginger handling of the parcel. But I held myself back. RESTRAINT.

Oh well, I thought. That answers that: having the USPS crush my cookies for me is not going to be a viable option for streamlining my holiday baking.

But, I do feel like I got some important takeaways from the experiment:

  • It made me laugh while I did it, and that's not for nothing.
  • It did give me a head start with my cookie crushing, though it didn't finish the deed as I'd hoped.
  • It made me realize that perhaps there is an aspect of reverse psychology at hand here. By labeling the parcel in such a way that implied I wanted it to be pummeled, injured, and generally not handled with care, I seem to have ensured that they did just the opposite: I imagine the postal employees cradling the parcel like a delicate flower.

So maybe, when you're shipping something fragile in the future, you should just label it "NOT FRAGILE IN THE LEAST" and it will arrive totally fine.

Hey, I can't say that for certain. But it's definitely food for thought.

What's your favored method of crushing cookies for a cookie crumb pie crust?  

What is Cornstarch and What Does it Do?

I'll just get right into it: what is cornstarch and what does it do?

This question came up when I was chatting with a gluten-free friend who said she'd recently made a GF brownie mix that called for 1/2 cup of added cornstarch in the event of high altitude baking. Well, that's odd, I thought. I wonder why? That seemed like a lot of cornstarch to me. Maybe there are some things I don't know about cornstarch?

And so I figured, for my reference and yours, I'd come up with a roundup of what cornstarch is, what it does, and how to use it in your baking. Ready? Set? Let's go.

Cornstarch: what is it? 

The short version? Cornstarch is derived from the endosperm (tee hee) of corn kernels, which is ground into a find powder. It's used primarily as a thickener and binder both in savory and sweet cooking and baking.

Cornstarch: how is it made?

The long version? It's sort of confusing, but here's what I gleaned from the International Starch (really) page. First, corn is steeped in hot water for up to 48 hours. The germ is then separated from the endosperm, and still steeping, they are both, respectively, ground. Starch is separated from the steeping liquid, the remaining cereal germ, and corn gluten--mainly in centrifuges and hydrocyclones (a cyclone-shaped device). The starch is then modified by applying different reaction conditions - temperature, pH, additives. This process creates the corn starch with unique and reliable properties we use for our culinary projects. 

Key roles cornstarch plays in baking
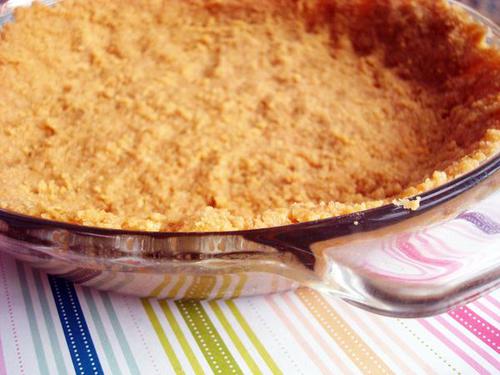
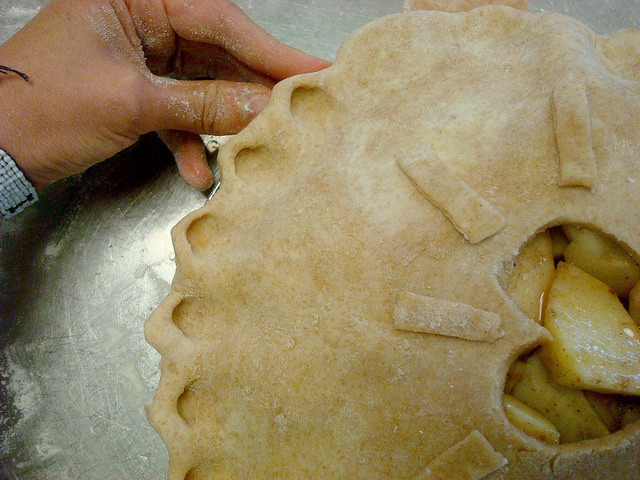
Lemon meringue pie

Cornstarch as a thickening agent

Cornstarch can be added as a thickener to a variety of mixtures, from gravy to pie fillings to custards or cake fillings. It has more power, ounce for ounce, than flour, which is also used for this purpose; increasingly, the fact that it is also gluten-free is attractive to bakers, enabling them to make gluten-free pie fillings and custards. 

Here's what happens when cornstarch is added to the mix: heat causes the starch to bind with molecules of water, and the starch begins to swell as it absorb the liquid. When the mixture comes to 203 degrees F, the starch will have expanded to about 10 times its size while still in powder form. However, this expanding is finite. You can bring cornstarch-enriched sauces or mixtures close to a boil, but don't let them fully boil and don't stir too vigorously. The starch will start to deflate, erasing the entire purpose of adding it to your mixture. 

The cornstarch will not only become thicker in heat, but as it cools, it will set, so it's a great way to further solidify desserts tending toward gooey such as the filling of Lemon meringue pie, without the cloudy color that flour might impart.

There are considerations for using cornstarch as a thickener. According to this website,

  • If you add cornstarch directly to a liquid, it can get clumpy, especially if added to a hot mixture. First, make a slurry of equal parts cornstarch and a cold liquid. Add this liquid paste to the mixture you want to thicken for better results. 
  • Cornstarch doesn't react well with acidic ingredients. Tapioca starch or arrowroot will work better for thickening acidic mixtures.
  • Cornstarch imparts a glossy, translucent sheen to the mixtures it thickens, so it tends to be used more in sweets rather than savory sauces. 

Cornstarch in cookies and cakes

Peanut Butter Alfajores

Cornstarch not only thicken sauces and mixtures, but it can be used in baked goods such as cookies or cakes, too. It is said that cornstarch used in combination with flour can "soften" the harsh proteins of flour, making a more tender baked good. Anecdotally, I can tell you this is true. A recipe such as shortbread which employs part flour and part cornstarch yields a cookie with the perfect crumb: crumbly, but not fall-apart. Tender and delicate, but in a way that the cookie still holds its shape.

As I learned on a King Arthur Flour forum, it is also one of the secrets of cake flour.

Cake flour has been treated with chlorine gas which acts not only as a whitening agent, but also has a maturing effect on the flour. It damages the proteins that form gluten so that these will not form the long stiff chains and networks that make good bread, but also breaks down starches so that these will absorb more water. These hydrated starches then "gel" during baking to provide an alternate structure (alternate to gluten formation) which is desirable for cakes; tight, even crumb, moist, very tender.

You can make your own cake flour substitute, by the way. All you have to do is add two tablespoons of cornstarch per cup of all-purpose flour for a recipe. While it won't yield exactly the same results, it will certainly yield a more delicate baked good than all purpose flour alone. 

Cornstarch as an anti-caking agent

The difference between confectioners' sugar and granulated sugar? Primarily texture--confectioners' sugar has been finely ground (and you can make your own, at home, btw!)--but it's also the fact that confectioners' sugar is mixed with a small amount of cornstarch. The starch acts as an anti-caking agent by keeping moisture and condensation from forming the sugar granules into lumps.

Cornstarch isn't just used to discourage moisture from ruining your sugar. If you buy shredded cheese in the supermarket, chances are it has cornstarch in the mix--this keeps the moisture and condensation from making your cheese slimy. However, with cheese, there is a caution involved. The starch can turn brown quicker than the cheese in heat, so it can give a false indication of doneness. 

Frequently asked questions

Still curious about cornstarch? Here are some answers to commonly asked questions.

Why is cornstarch used so often in gluten-free baking?

Probably first and foremost because it's naturally gluten-free. Both cornstarch and flour are considered "cereal starches"--but the main difference is the aforementioned gluten. Flour has it; cornstarch does not.  But, you know, it also adds structure to baked goods, and this can be helpful when they lack the "glue" of gluten. 

Is it possible I know this stuff by a different name?

I've seen it as "corn starch" and "cornstarch"--I prefer the one-word variation. You'll see it referred to as such in US and Canada; in other countries, it may be called "cornflour"--not to be confused with cornmeal. 

My cornstarch got all clumpy in my pie filling. What's up? 

Nobody likes clumps and lumps in what should be a smooth pie filling. To avoid lumps, make a slurry (equal parts cold liquid and cornstarch) before incorporating the starch into the pie filling mixture. 

I'm sure I did everything right, but the starch didn't thicken my mixture.

Check the expiration date. Cornstarch does not last forever, and an advanced age can very much affect its thickening abilities.

Other possible causes: the mixture got too hot and the starch broke down; you overstirred and the starch broke down.

Help! My pie filling began "weeping". Is the cornstarch to blame?

Cornstarch can thin as it stands. The technical term is "syneresis", and it is characterized by a liquid "weeping" from the filling. It tends to happen more with mixtures including eggs or a lot of sugar. One of the culprits can be overstirring--this can break up the starch and make it thin out. Be sure to follow the instructions on your recipe to ensure that you are following the specified guidelines for how to treat the cornstarch mixture.

Don't have cornstarch?

Here is a list of some substitutes you can use in baking.  

Can I use cornstarch instead of flour?

Go ahead and give it a try. Cornstarch has twice the "thickening" power of flour, so you won't need as much. This helpful table will assist in substitution amounts. 

Recipes with cornstarch

Marquesote

What's your favorite recipe containing cornstarch?

CakeSpy's Recent Craftsy Posts

Absolutely pie-fect: how to attain pretty pie crust edges.

How to draw cartoon hands! It makes what can be an intimidating part of illustration easier. 

The ultimate gift guide for cake decorators! Plus a chance to win Craftsy courses.

The best comfort food recipes

Now that the weather's getting cooler, I'm all about soup. You? Here's a recipe for an amazingly delicious French Onion soup made from scratch.

How to draw food. Now there's something I know how to do!

Concept art. What is it, and how do you break into that industry?

Savory whipped cream. Really! 

How to paint a perfect sunset! 

Tapioca Pudding with Coffee Syrup and Caramelized Tapioca

Lucky you, dear readers! What we've got here is a guest recipe and excerpt from the fantastic new book Brazilian Food by Thiago Castanho and Luciana Bianchi

This is a really lovely book, with photos as vibrant as what I imagine Brazil to be (having never been, it's all imagination for me!). The recipes are accessible, flavorful, and interesting--and exotic. It's a cookbook to dream on, and I think it would make a nice holiday gift!

And, well. Even if none of that intrigued you, the fact is this: the cover features rainbows.

 Note: the photo and recipe in this post are used with permission from Brazilian Food by Thiago Castanho & Luciana Bianchi, Firefly Books 2014, $39.95 hardcover.

‘Bolo podre’ com calda de café e tapioca caramelizada 

Tapioca pudding with coffee syrup and caramelized tapioca 

This is a traditional pudding of the Amazon region. It does not contain wheat but granulated tapioca flakes, usually moistened with coconut milk. We eat it in the morning or late afternoon, but it is always accompanied by a cup of freshly brewed coffee. 

Serves 10 

* 2 vanilla beans   

1/2 cup (50 g) unsweetened, finely shredded dried coconut 

* 2 cups (500 ml) whole milk  

* scant 1 cup (200 ml) sweetened condensed milk  

* scant 1/2 cup (100 ml) unsweetened coconut milk 

* 1 cup (120 g) farinha de tapioca (granulated tapioca) or Farinha de Tapioca substitute (see page 82)  

* oil, for greasing  

Coffee syrup   

* 2 ¾  oz (80 g) rapadura or unleveled . cup (80 g) dark brown sugar 

* 1 cup (250 ml) hot espresso coffee 

Caramelized tapioca 

* unleveled . ¾ cup (100 g) farinha de tapioca (granulated tapioca) or Farinha de Tapioca substitute (see page 82) 

* unleveled . ¼ cup (60 g) superfine sugar 

1. Cut the vanilla beans in half lengthwise, and scrape out the seeds with the tip of a knife. Put the seeds, bean pods, shredded coconut, and all the milks in a saucepan. Place over medium heat, and cook, stirring constantly, until the mixture reaches scalding point. Discard the vanilla bean pods. 

2. Put the farinha de tapioca in a large bowl, and add the hot milk mixture. Stir well. Pour the pudding batter into a generously oiled 12 x 4.-inch (30 x 11 cm) loaf pan, and refrigerate it for 3 hours, or until it is firm. 

3. To make the coffee syrup, combine the rapadura and . cup (60 ml) of water in a saucepan. Heat for 2 minutes, stirring until the rapadura has dissolved. Add the coffee and remove from the heat. 

4. For the caramelized tapioca, combine the farinha de tapioca and sugar in a saucepan, and heat gently, stirring constantly, to melt the sugar. Cook until the caramel is a light golden brown. Pour the mixture into a nonstick baking pan and let cool. Store in an airtight container. 

5. Transfer the chilled cake to a serving board, and sprinkle with the caramelized tapioca. Serve in slices, accompanied by a drizzle of coffee syrup. 

Tips from Thiago: When pouring the pudding batter into the pan, press it down gently to pack it together and prevent it from falling apart when it is removed from the pan. 

Baker's Dozen: A Batch of Sweet Links

Red.

Today's links are brought to you by the color RED. 

Need a good way to use up all that leftover pie? Pumpkin pie shakes for all! (CakeSpy)

One of my favorite Christmas cookies: pistachio cookies. (CakeSpy)

Another fave: Stained Glass Cookies. Get ready for compliments if you make these! (CakeSpy for Craftsy)

Very intrigued: 7-up biscuits! (Bake.Frost.Repeat)

Cardamom rolls: so spicy and delicious-looking! (Fresh April Flours)

A helpful primer on cake knives. (Bakery Boy Blog)

No-bake peppermint cheesecake. This one's a showstopper. (Beyond Frosting)

Cappuccino eggnog donuts. So into these. (The First Year

Mini gingerbread house mug kits by my friend Not Martha. (Not Martha)

Savory whipped cream! Really?? Really. (CakeSpy for Craftsy)

DIY horchata. Or, add rum and make it "rumchata". (CakeSpy)

French Toast Swirl Sticks. I'd go there. (Pepperidge Farm)

Interesting: a historian chases down the history of baby food. (Saratogian)

Brown sugar chess pie. YES. (Grandbaby Cakes)

Cherry buttercream. It's a winner. (CakeSpy

Book of the week: CakeSpy Presents Sweet Treats for a Sugar-Filled Life. Yes, MY book! Because it's a great holiday gift.

Best-Ever: Pumpkin Pie with Sweetened Condensed Milk

If pumpkin pie made with evaporated milk simply stopped existing today, I wouldn't really care. Because even though that's the "back of the box" classic version, I prefer mine with sweetened condensed milk.

Adding sweetened condensed milk not only saves you the trouble of measuring out sugar, as it provides all the sweetness your pie will need, but it also imparts a creamy, rich flavor. It's perfectly accented with a little salt, which takes the pie from earthy to ethereal, and completely crave-worthy. 

It's also almost sinful how easy this pie is to make, so instead of using pumpkin pie spice I used all the spices separately. It made the recipe seem more impressive, I think. 

I consider this the best way to eat pumpkin pie, and I hope you will, too. 

Pumpkin pie made with sweetened condensed milk

Makes one 9-inch pie (8 servings)

  • One 9-inch pie crust, unbaked (I prefer the King Arthur method)
  • 1 teaspoon ground cinnamon
  • 1/2 teaspoon ground ginger
  • 1/4 teaspoon ground cloves
  • 1 teaspoon salt (note: I like my pie fairly salty. If you don't, use 1/4 to 1/2 teaspoon)
  • 2 large eggs
  • One (15 ounce) can plain pumpkin puree
  • One (14 ounce) can sweetened condensed milk

Procedure

  1. Position a rack in the center of the oven; preheat the oven to 425 degrees F (212 degrees C).
  2. Roll the pie dough to a circle about 12 inches in diameter; place it into the pie pan and crimp the edges. Keep the dough refrigerated while you prepare the filling.
  3. In a small bowl, stir together the cinnamon, ginger, cloves and salt. Set aside.
  4. In a large bowl, beat the eggs; stir in the pumpkin and the sugar-and-spice mixture. Once well incorporated, stir in the sweetened condensed milk (it may incorporate better if you add the milk in three additions, ensuring that each addition is fully mixed in before adding the next). Pour the filling into the prepared pie shell.
  5. Bake for 15 minutes, then lower the oven temperature to 350 degrees F. Bake for an additional 40 to 45 minutes, or until a knife inserted into the center comes out clean. Cool on a wire rack to room temperature. Serve at room temperature, or refrigerate the pie and let it sit at room temperature for 30 minutes before serving. If desired, serve topped with whipped cream.

PS: Pumpkin pie not for you? Here are some other pies and ideas for Thanksgiving from around the web that I suggest.

Happy Thanksgiving, sweet ones!

Best of New Mexico: Homemade Blue Corn Pinon Bread

This one's dedicated to my Santa Fe friends.

If you've ever been to Santa Fe, New Mexico, you know that it is a special place indeed. The food reflect's the city's "tri-cultural" background: Native American, Mexican, and Spanish. With, of course, a touch of modern hippie and crystal-chaser in the mix. It makes for an interesting food scene, to say the least. (for my ultimate review of New Mexico sweets, check out this post!)

Two ingredients which are in frequent rotation in both baked goods and savories alike are blue corn and piñon nuts (pine nuts), respectively. One beautiful example of a delicious fusion of these ingredients was found in the beyond-locally famous atole-piñon pancakes served at Tecolote Cafe, a funky little breakfast place on Cerillos Road that is famous for their "no toast" policy. 

Tecolote Cafe, Santa Fe

Well, me and everyone in Santa Fe was saddened when Tecolote shuttered their doors earlier this year due to a lease matter. I mourned those pancakes. 

Well, I am happy to say that Tecolote has found a new home and will be re-opening soon. In the meantime, I will "toast" them with a food that is inspired by them but that will never-ever appear on their menu: blue corn piñon bread.

Made with part blue corn flour and plenty of buttery piñon both in the bread and on top, this is a beautiful loaf with a novel, slightly blue-purple tint when looked at from the right angle. Taste-wise, it's lightly nutty; the blue corn gives it an intriguing, earthy taste. With mellow little lumps of rich piñon punctuating every bite, it's an absolute delight served with butter and a little salt.

Since it's made with whole wheat flour, too, it has a firm enough structure so that it is also appropriate for any type of dish you'd make with sandwich bread. 

Blue Corn Pinon Bread

Adapted from King Arthur Flour

Yield: 1 large loaf 

  • 2 cups lukewarm water
  • 2 1/4 teaspoons instant yeast (1 packet)
  • 1 tablespoon honey
  • 2 teaspoons salt
  • 3 tablespoons soft butter
  • 3 cups whole wheat flour, sifted
  • 1 cup blue corn flour, sifted
  • 1/4 to 1/2 cup piñon, to taste

 Procedure

  1. Combine the water and yeast. Once the yeast begins to bubble lightly, proceed.
  2. Mix all of the remaining ingredients with the yeast mixture in the order listed, reserving 1/4 of the piñon to top the bread later.
  3. Knead, either by hand with a dough scraper or with a stand mixer, until it has progressed past a shaggy texture to a solid, slightly sticky mass. This can take up to 5 minutes by hand; less when using a mixer. It will never quite take on the smooth elasticity of wheat flour-only bread, but the extra moisture is necessary as the whole grains will absorb it. Place the dough into a lightly greased bowl, cover it, and let it rise at room temperature until it’s quite puffy and doubled in size, 1 to 2 hours.
  4. Gently deflate the dough with your hand (a gentle pressing, not a knockout punch), and shape it into a fat 9″ log (it may still be slightly sticky; I used lightly oiled hands). Place it in a lightly greased 9″ x 5″ loaf pan. Sprinkle remaining piñon on top.
  5. Cover the pan, and let the dough rise for 2 hours or even overnight, or until it has formed a crown which extends 1 inch or slightly more over the rim of the pan. Toward the end of the rising time, preheat the oven to 350°F. 
  6. Bake the bread uncovered for 20 minutes. Tent it lightly with aluminum foil, and bake for an additional 15 to 20 minutes, or until it is golden brown on top, and when knocked lightly, yields a slightly hollow sound.
  7. Remove the bread from the oven, and turn it out onto a rack to cool. When completely cool, wrap in plastic, and store at room temperature. 

Have you ever baked with blue corn flour before?

Easy Recipe: Horchata

Have you ever heard of horchata? No, I am not insulting you. Horchata is a delicious, milky beverage which is actually not always made with milk, but often rice or nuts ground into a "milk". It's nearly always spiced with cinnamon, and is often sweetened. It's common in Mexico, and common enough in New Mexico that I have become quite intimately knowledgable of the stuff.

Photo via flickr member sstrieu

Now that you're intrigued...how about making some horchata?

It's so easy and tasty that there's no reason for you to say no. And I'd bet that it's pretty likely you have a lot of the ingredients on hand already!

There's nothing to lose. Make it now. This version does have milk, which I think makes it extra-nice. You don't have to add it if you don't wanna. And oh, if you wanna get really naughty, add some rum!

Easy Horchata

Makes 2 servings

  • 1/2 cup long grain white rice, UNCOOKED
  • 1 1/2 cups water
  • 1/4 cup whole milk* (see note above)
  • 1 teaspoon vanilla extract
  • 2 teaspoons cinnamon
  • 1/4 cup sugar
  1. In a blender, combine the rice and water. Mix on high for about 1 minute.
  2. Add the rest of the ingredients right to the blender, and let it steep for 3 hours at room temperature. This is letting the flavors come together in a very pleasant way.
  3. Strain the mixture, and pour it into a pitcher. Serve chilled (I prefer to chill it in the fridge rather than serving with ice, as I feel that it dilutes the mix).

Enjoy!

Great for Holiday Baking: Plush Puffs Marshmallows

Commercially made marshmallows aren't a go-to confection for me, because so many are inferior in quality and flavor. However, a homemade marshmallow is a different thing entirely: pillowy, sweet, and just begging to be popped on top of a rich cup of hot chocolate.

I was happy to discover a company that creates marshmallows that really do approximate that unique homemade flavor and texture: Plush Puffs. They sent me a package of samples, and I was very impressed with the quality (note: the samples were free to me; I am not being paid to write this post).

They sent me their holiday flavors, which included Gingerbread spice, pumpkin pie, and peppermint marshmallows. Each of the flavors tasted season-appropriate, and had a wonderful, pillowy yet holds-its-shape texture. In looking at their website, I was delighted to see that they offer a huge selection of flavors, from vanilla bean to caramel swirl to lemon meringue to even a tantalizing-looking chocolate chip cookie inspired flavor. Oh, and they pride themselves on not using high fructose corn syrup.

While my experience to this moment has been eating the marshmallows out of hand, I can definitely see them playing a role in holiday baking, be it gingerbread s'mores, minty cocoa, or maybe a homemade holiday s'mores pop-tart? Hmmm....

What do you think I should bake with these seasonal marshmallows?

If you're intrigued, shop for your own marshmallows on the Plush Puffs website.

Baker's Dozen: A Batch of Sweet Links

Need cards? Click here.Cake decorators: Win 8 Craftsy courses! (Craftsy)

I need to tell you: Oreo Peanut Butter Dip. (Dinners, Dishes, and Desserts)

Maple walnut fudge. I like it. (Eagle Brand)

I know, linking to a link post. But this is a collection of food blogs beloved by someone in eating disorder recovery. Now that's sweet! (Recovery Warriors)

Is Walkers the best shortbread in Britain? (Telegraph UK)

Intriguing: salted caramel pita chip clusters. (Naptime Chef)

Pie-fect: how to make pretty pie crust edges. (CakeSpy for Craftsy)

Pecan pie baklava. A naturally delicious progression for both desserts. (Crazy for Crust)

In case you've ever wondered how to make a carved dinosaur cake. (My Sweet and Saucy)

50 Cake batter desserts. YES! (Chef in Training

Spumoni trifle. FREAKING LOVE THIS! (Confessions of a Cookbook Queen)

Palette knives: no longer just for paint. For cake, too! (CakeSpy for Craftsy)

Pear, blue cheese, and walnut rugelach. Wow! (Baking a Moment)

Ramen Donuts. Would you ever?? (Culinary Brodown)

Edible Thanksgiving place cards. (Hungry Happenings)

In case you missed it: my awesome roundup of the Pillsbury Bake-Off (CakeSpy)

Homemade carmelitas. I wouldn't lie about this. (Shauna Sever)

Book of the week: 

Holiday Cookies: Prize-Winning Family Recipes from the Chicago Tribune for Cookies, Bars, Brownies and More. This book spans three decades of prize-winning cookies from the Chicago Tribune's annual holiday cookie contest. They are amazing. I will be featuring the winner from 2012 in a few days on the site, but til then, I do suggest you buy this book!

Tastes Like Joy: Creme de Noisettes Recipe

Hazelnut chocolate creme

See that thing? Up there in the jar? That creamy, chocolatey looking stuff? Well, guess what--you now officially have the recipe. 

Not to break you out of the reverie, but I suppose I should tell you what it is, exactly. That little mason jar is filled with a chocolate-hazelnut slurry known as (doesn't it always sound better in French?) crème de noisettes. I never tried this when I was in France, but stateside, I've tried a little something called Nutella which brings it to mind. Ever heard of it?

This lovely recipe is excerpted from French Bistro: Restaurant-Quality Recipes for Appetizers, Entrées, Desserts, and Drinks.

PS: want to read more about my overseas adventures? Here's a roundup of my last trip to Paris.

French Bistro Maria Zihammou

*crème de noisettes*

Hazelnut and chocolate crème

Hazelnut and chocolate is an unbeatable combination that I downright love. My kids do too! Here, I’ve blended the two flavors into a rich and dangerously delicious crème, which my kids love to eat on baguette dipped in hot chocolate. I prefer it on a croissant, dipped in café au lait.

Makes 1 Jar 

  • ½ cup (100 ml) Nutella
  • 7 oz (200 g) dark chocolate, 70% cacao
  • 3½ tbsp (50 g) butter
  • ¼ cup (50 ml) cream
  • 2 tbsp molasses
  • 1 tbsp water
  • 3½ oz (100 g) hazelnuts

Procedure 

  • Place the Nutella in a saucepan. Coarsely chop up the chocolate and place it in the pan. Cut the butter into small pieces and add it too, along with the cream, molasses, and water. Warm over low heat to make a smooth sauce. Move the saucepan off to one side.

  • Roast the nuts in a dry pan for 3–4 minutes. Mix them well and blend them into the sauce. Pour the crème into a jar with a tight lid. If stored in the fridge, it should keep for at least one week.

Enjoy!