What Happens When You Put Jell-O in an Ice Cream Maker?

Today's question is this: what happens when you put Jell-o in an ice cream maker?

I woke up with this question in my mind, and it was such a powerful and burning question that it didn't take too long for me to have a batch of Jell-O in the works so I could test it out.

Now, let me pause to answer some questions that you might have. Namely...why? Why did I want to see what would happen when I put Jell-O in an ice cream maker?

Well, let me answer your question with three simple words:

  1. Summer

  2. Fun

  3.  Because. 

​​Luckily, I had my ice cream maker drum in the freezer (you know, in case inspiration might strike) so I didn't have to wait the interminable chilling period. All I had to do was make some Jell-O, wait for it to set (a much more manageable chilling period), then pop it in the ice cream maker to see what would happen.

I set to work. I grabbed some orange Jell-o that I had in the cabinet, and made it per the instructions. Nothing special or fancy in my methodology. 

I let it chill. While the Jell-O chilled, I dreamed of slushy jell-o flavored delights that awaited me at the end of this experiment. 

Finally, when the Jell-O was cooled and set, I plopped it into the ice cream maker. I say "plopped" because it really did come out of the bowl in one unit, and made such a sound when it landed in the ice cream maker's drum.

Then I set the ice cream maker for 18 minutes.

At first, the Jell-O began to form lighter, slushy-looking bits.

But as the churning progressed, it began to lighten in color all over.

When the churning was done, all of the Jell-O came out of the ice cream maker in one impressive unit.

I transferred the mixture to a bowl and gave it a stir, and here's what it looked like.

And then I gave it a taste.

So what does Jell-O made in an ice cream maker taste like?

It tastes like a Jell-O Slushie. I say this as a good thing. It's almost like Jell-o met and had a baby with Italian ice: a thick, viscous, sweet, slushy baby. 

What makes the Jell-O Slush special is not necessarily the flavor, which is pretty much standard Jell-O...but it's more the texture. It is like a thicker version of Italian ice or sorbet. It's a great summertime treat texture.

So, my vote is this: if you're into Jell-O and want to give it a hot weather makeover, serve it as slush. All you need is an ice cream maker.

I think that this Jell-O Slush would also taste great combined with vanilla ice cream, or served with whipped cream. I haven't done it yet so I can't report, but I feel pretty confident that both of those variations would be Good Things. 

There you go! If you put Jell-O in an ice cream maker, you will get smooth, wonderful, sorbet-like Jell-O Slush. And you'll be happy you did.

Here's the recipe. You can also find a simple printable version here

Jell-O Slush

  • I box Jell-O (your flavor choice)
  • An ice cream maker
  1. Chill the ice cream maker drum, if applicable. 
  2. Prepare the Jell-O per the package instructions. Let it chill in the refrigerator until set and cold.
  3. Place all of the Jell-O in the drum of your ice cream maker.
  4. Set to churn (I set my ice cream maker to churn for 18 minutes).
  5. Once you're satisfied with the texture, transfer to a bowl.
  6. Enjoy immediately, place in the fridge if you will enjoy the Jell-O Slush within the next hour or two, or store in the freezer for longer term storage. It will lose some of its softness in the freezer.

Have you ever put Jell-O in your ice cream maker? 

Baker's Dozen: A Batch of Sweet Links

Secret Lives Illustrations

DIY Baking hacks. An awesome post by ME! (CakeSpy for Craftsy)

How to make homemade coconut butter. Yumz. (Vegan Family Recipes)

DIY pudding mix. Impress EVERYONE. (CakeSpy for Craftsy)

Menus from LA restaurants of yesteryear. Love this project. (NPR

Learn how to draw an adorable duckling. A tutorial by my awesome, sort of big deal famous illustrator mom, Margie Moore! (Margie Moore Illustration)

Reese's Brookies. (Brookie = brownie + cookie). I know. Yum. (Savor the Baking)

Chocolate peanut butter banana bread. I know it sounds good, but just LOOK at the pictures. (Pancake Warriors)

Ever heard of Rose Marie Cake? I'm intrigued by this treat from Singapore. (Yahoo

I'm almost absurdly proud of this infographic detailing all sorts of cookie variations you can make from one base recipe. (CakeSpy for Craftsy)

Strawberry. Ricotta. Nutella. Dessert Pizza. OMG. (Sun Diego Eats)

Whole wheat sesame tahini cookies. Aw yeah. (East of Eden Cooking)

Ever heard of Faluda? Hint: It's a beverage. (Giramuk's Kitchen)

Amazing fruit and vegetable art. This made me smile. (Dump a day)

Someone please take me to Thessaloniki, Greece's confectionery capitol. (Telegraph UK)

Free download: coloring book pages for adults! (CakeSpy for Craftsy)

Book of the week: Tiki Drinks: Tropical Cocktails for the Modern Bar. Because everyone loves the idea of mai tais and tropical drinks, but few people know what they actually are, much less how to make them. This book, written by Nicole of Baking Bites and her amazing partner, is absolutely delightful. It imparts tons of knowledge about the art of mixology, but given the subject matter, it's appropriately witty with clever / fanciful photos and tips on how to make cool cocktail garnishes!

Great for Showing Off: Hidden Passion Mini-Cakes

I don't know about you, but I'm a sucker for a showoff cake.

Surprise cakes excerpt

By "showoff cake", I mean a cake which will make people jealous of your amazing kitchen prowess.

This cake, my friends, is an official showoff cake. It's from the cool new book Surprise Cakes by Marsha Janine Phipps. 

In the book's overview, it says this:

"The impact of your cake--traditionally lost upon cutting - will go on to surprise your guests with hidden designs baked baked directly into the sponge, or through clever use of frostings or jam. With recipes, baking tips, and frostings, you'll be guided through the easy, step-by-step process from the very start of your project to the finish."

See? Exactly like I said. Cakes for showing off. Here's one of my favorite ones from the book, with permission from the publisher.


Hidden Passion Minicakes

This is the perfect treat for a romantic dinner date. Red love hearts attached to the outer layer hint at what’s inside, and once cut, your loved one won’t be able to fathom how you achieved the vertical stripes! The pretty hearts are an addition inspired by my friend Davina.

Preparation Time: 45 minutes plus baking and chilling | Servings: 4

  • 1 ¾ oz (50 g) red gumpaste
  • Confectioner’s sugar, to dust
  • ½ cup (4. oz/125 g) unsalted butter, softened
  • ¾ cup (5. oz/150 g) superfine sugar
  • 1 extra-large egg, at room temperature
  • 1 ¼ cups (5 oz/140 g) allpurpose flour
  • 1 tbsp unsweetened cocoa powder
  • ½ tsp baking soda
  • Pinch of salt
  • ½ cup (4. fl oz/125 ml) buttermilk
  • 1 tsp vanilla extract
  • 1 tsp white wine vinegar
  • 2 tsp red gel food coloring
  • 2 tbsp water
  • ½ x batch Classic Buttercream (see below)
  • 1 lb 10 oz (750 g) white ready to use fondant
Surprise cakes excerpt


Procedures

  1. Preheat oven to 350.F (180.C). Line a jellyroll pan that’s roughly 14 x 9 inches (35 Å~ 23 cm) with parchment paper.

  2. Roll out the red gumpaste on a work surface dusted with confectioner’s sugar. Use a heart-shaped cutter that’s roughly ½ inch (1 cm) tall and wide to cut out 20–25 hearts. Set aside.

  3. Fit the paddle attachment to a stand mixer. Set the mixer to a medium speed, then blend together butter and superfine sugar until the mixture is pale. Add the egg and mix it in thoroughly. Stop the mixer and scrape down the sides of the bowl.

  4.  In a medium-sized bowl, sift together the flour, cocoa powder, baking soda, and salt.

  5. In a small jug, mix together the buttermilk, vanilla extract, and white wine vinegar.

  6. Add half of the dry ingredients to the butter, sugar, and egg mixture in the bowl of the stand mixer and blend on a low speed. Once incorporated, add half of the buttermilk mixture. Once incorporated, scrape down the sides of the bowl and repeat, adding the rest of your dry and liquid ingredients to the bowl in the same way.

  7. In a small jug, stir the red gel food coloring into the water, ensuring the gel is completely dissolved and that there are no lumps. Pour this into your mixture and blend in the color on a slow speed until it is evenly distributed throughout.

  8. Spoon the colored mixture into the prepared pan, ensuring it reaches the corners. Bake for 20 minutes, until the center of the sponge bounces back when touched.

  9. Dampen a dish towel with cold water and place it on top of the cake. Flip over the pan (use a dry dish towel to handle the jellyroll pan as this will be hot). Gently and slowly peel away the parchment paper. Tightly roll up the cake up, starting the roll along one of the longest edges, in the damp dish towel, then leave for at least 30 minutes to allow it to cool completely.

  10. Carefully unroll the cake—it will be very moist so do this slowly, to avoid tearing the sponge, but don’t worry if it does tear, as the cake will still roll back into shape. Spread the buttercream across the top, starting from the middle and spreading outward until it reaches . inch (1 cm) from the edges. The cream should be approximately (5 mm) thick, which is roughly the same thickness as that of your cake. Now carefully reroll your cake.

  11. Slice your swiss roll into 4 equal pieces. Sit these upright on a plate and refrigerate for 30 minutes. Using an angled metal spatula, apply a thin crumb coat (see page 20) to your cake and refrigerate for 30 minutes.

  12. Roll out the white fondant to a thickness of . inch (5 mm) on a work surface dusted with confectioner’s sugar. Make sure the surface area is large enough to cut out 3 large circles with which to cover your cakes. Cut out 1 circle, then remove 1 cake from the refrigerator and cover it with the fondant. Now set the cake in position on your presentation plate. Repeat with the remaining cakes.

  13. Apply your hearts around the base of the cakes, using a dampened paintbrust to stick them in place. When serving, slice down the center of the cake for the best visual impact.

Surprise cakes excerpt


Classic Buttercream
Quick and simple and absolutely delicious, this buttercream continues to be a favorite frosting with bakers around the world. It is rich, sweet and firm, so it forms a nice base for fondant decoration, and is perfect for decorating cupcakes. This recipe can be easily adapted by choosing different flavors of extract, or cocoa powder for chocolate buttercream.

Preparation time: 10 minutes

Portion: Enough to fill and cover an 8-inch (20-cm) cake with 3 layers or top at least 12 cupcakes

  • 3 ½ cups (1 lb 2 oz/500 g) confectioner’s sugar

  • 1 cup (9 oz/250 g) unsalted butter, softened and cubed

  • 1 tbsp milk

  • 1 tsp vanilla extract

  • Gel food color (optional)

1. Pour the confectioner’s sugar into the bowl of a stand mixer fitted with a paddle attachment and set to medium speed. One by one, add the cubes of butter and allow them to be slowly mixed into the sugar. It may take a minute or two for the buttercream to begin to form, so be patient.

2. Once all the butter is incorporated, add the milk and continue to mix on a medium speed. Once the milk is incorporated, leave the mixer to continue blending the mixture on a high speed for about

5 minutes until the frosting is light and fluffy.

3. Add the vanilla extract (or another flavoring of your choice). If you are coloring the frosting, use gel food color. Reduce the stand mixer’s speed setting to slow and add small amounts at a time using a toothpick (allowing the stand mixer to blend the color for you) until you have the desired shade.

Who would you make this cake for?

The Story of Baked Alaska (Recipe Too!)

Baked Alaska

CakeSpy Note: I thought it was about time to share this excerpt from my awesome book, The Secret Lives of Baked Goods. If you find the witty repartee engaging and the dessert tantalizing, well then, maybe you should buy the book.

The Story of Baked Alaska

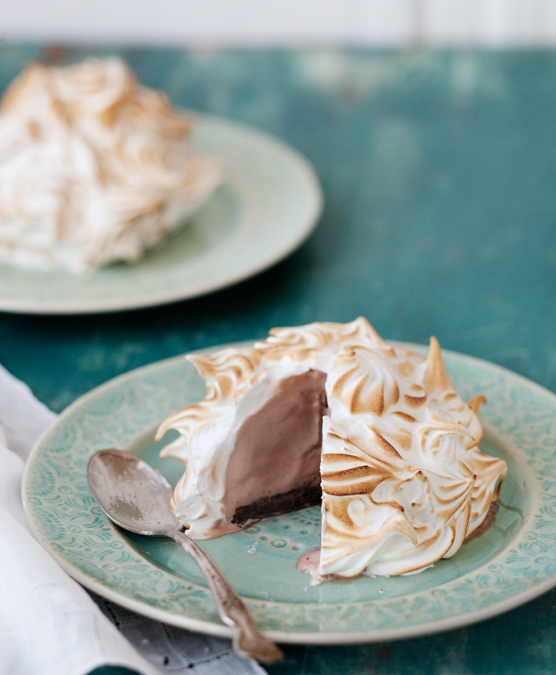
It wouldn’t be so crazy to assume that this dramatic dessert, characterized by a chilly core of ice cream with a thick coating of snowdrift-like meringue, hails from Alaska. But, alas, you’d be wrong. Baked Alaska may take its name from the Last Frontier, but it was born many miles away and many years prior to the state’s annexation.

The idea of cooking a cold dessert encased with pastry is documented as early as the 1700s in China. At that time, the desserts would have borne little resemblance to what we call Baked Alaska today—they would have been more like frozen ices or creams coated in breadcrumbs. However, when Chinese delegates introduced such treats to the French, the concept excited pastry chefs, who adapted it in a most delightful sugar-, cream-, and egg-filled way. America’s first famous Francophile, Thomas Jefferson, may have served something along these lines as early as 1802.

But it’s an eccentric genius named Count Rumford (born Benjamin Thompson) to whom we owe a big, sweet thanks when it comes to further developing this showy dessert—he’s the one credited with introducing the meringue coating in the 1800s. Rumford was an interesting fellow—he was an American physicist living in Europe (and a former spy, to boot). Apparently in his free time he tinkered with food science—and while experimenting with dessert techniques, he realized that while pastry would conduct a lot of the heat and protect a cold core, a layer of meringue would do so to an even greater degree. He created a dessert that he called “omelette surprise,” which was also dubbed omelette à la norvégienne or “Norwegian omelette,” in reference to its snowy appearance.

The dessert’s popularity caught on during the Victorian era, and these elaborate confections, often called bombes, were made in various fancy shapes.

In 1876, the dessert made a stateside splash at Delmonico’s Restaurant in New York City, where Charles Ranhofer prepared it to celebrate the newly acquired Alaska Territory. Originally dubbed the “Alaska-Florida” (inspired by the cold-hot duality of the dessert), the name was eventually shortened to Baked Alaska. It became known as a dessert for
the privileged, and was popularized in well-heeled destinations as far away as Monte Carlo.

After the blown-out bluster of the Victorian era and the dull austerity of the Depression and war years, the dessert enjoyed a renaissance in the 1950s, when Alaska was granted statehood. It was quite the popular hostess dessert and piece de resistance throughout the ’60s. One flamboyant variation called Bombe Alaska calls for dark rum to be splashed over the Baked Alaska. Lights are then turned down and the whole dessert is flambéed while being served! Exercise caution if you decide to try this at home.

Baked Alaska

Makes one 9-inch dome (12 servings)

  • 10 cups (5 pint-size contain- ers) ice cream, slightly softened (all one flavor, or several flavors)
  • Brownie Base (recipe follows)
  • 6 cups Meringue Coating (recipe follows) 

Procedure
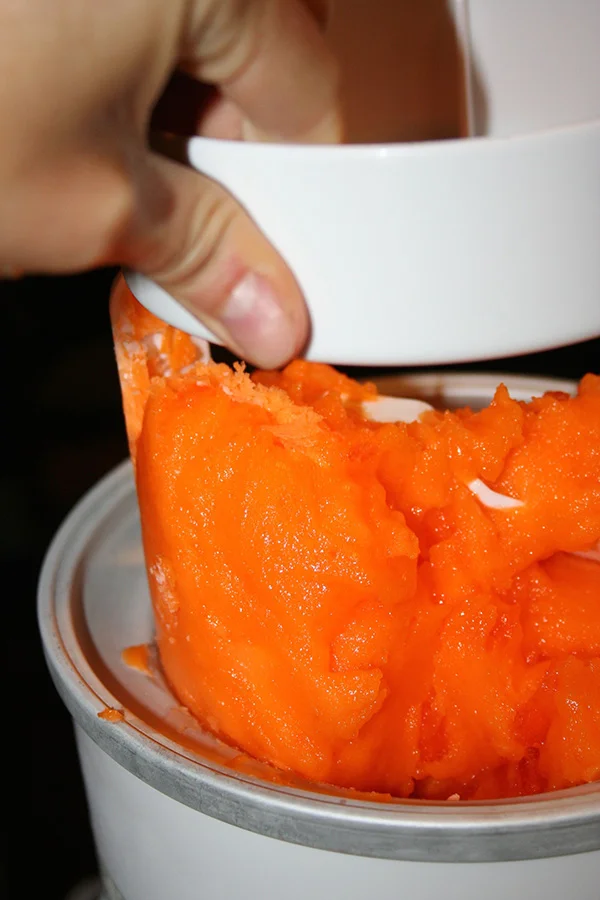
To make the ice cream dome, place a 3-quart mixing bowl (with a diameter of about 9 inches) in the freezer to chill. Line it with plastic wrap. Fill the bowl with ice cream; smooth and level the top surface. Cover the surface with plastic wrap and freeze until the ice cream is very hard, at least 4 hours, or up to 24 hours. Note: To make miniature Baked Alaskas, you can split the ice cream between multiple small domed bowls (with diameters of about 3 inches).

Set the brownie layer out on a large, flat, ovenproof plate. Unmold the ice cream dome on top of the brownie layer, but leave the plastic wrap on top. Trim any bottom edges of the brownie layer to make it flush with the ice cream. Place this big, cold blob into the freezer.

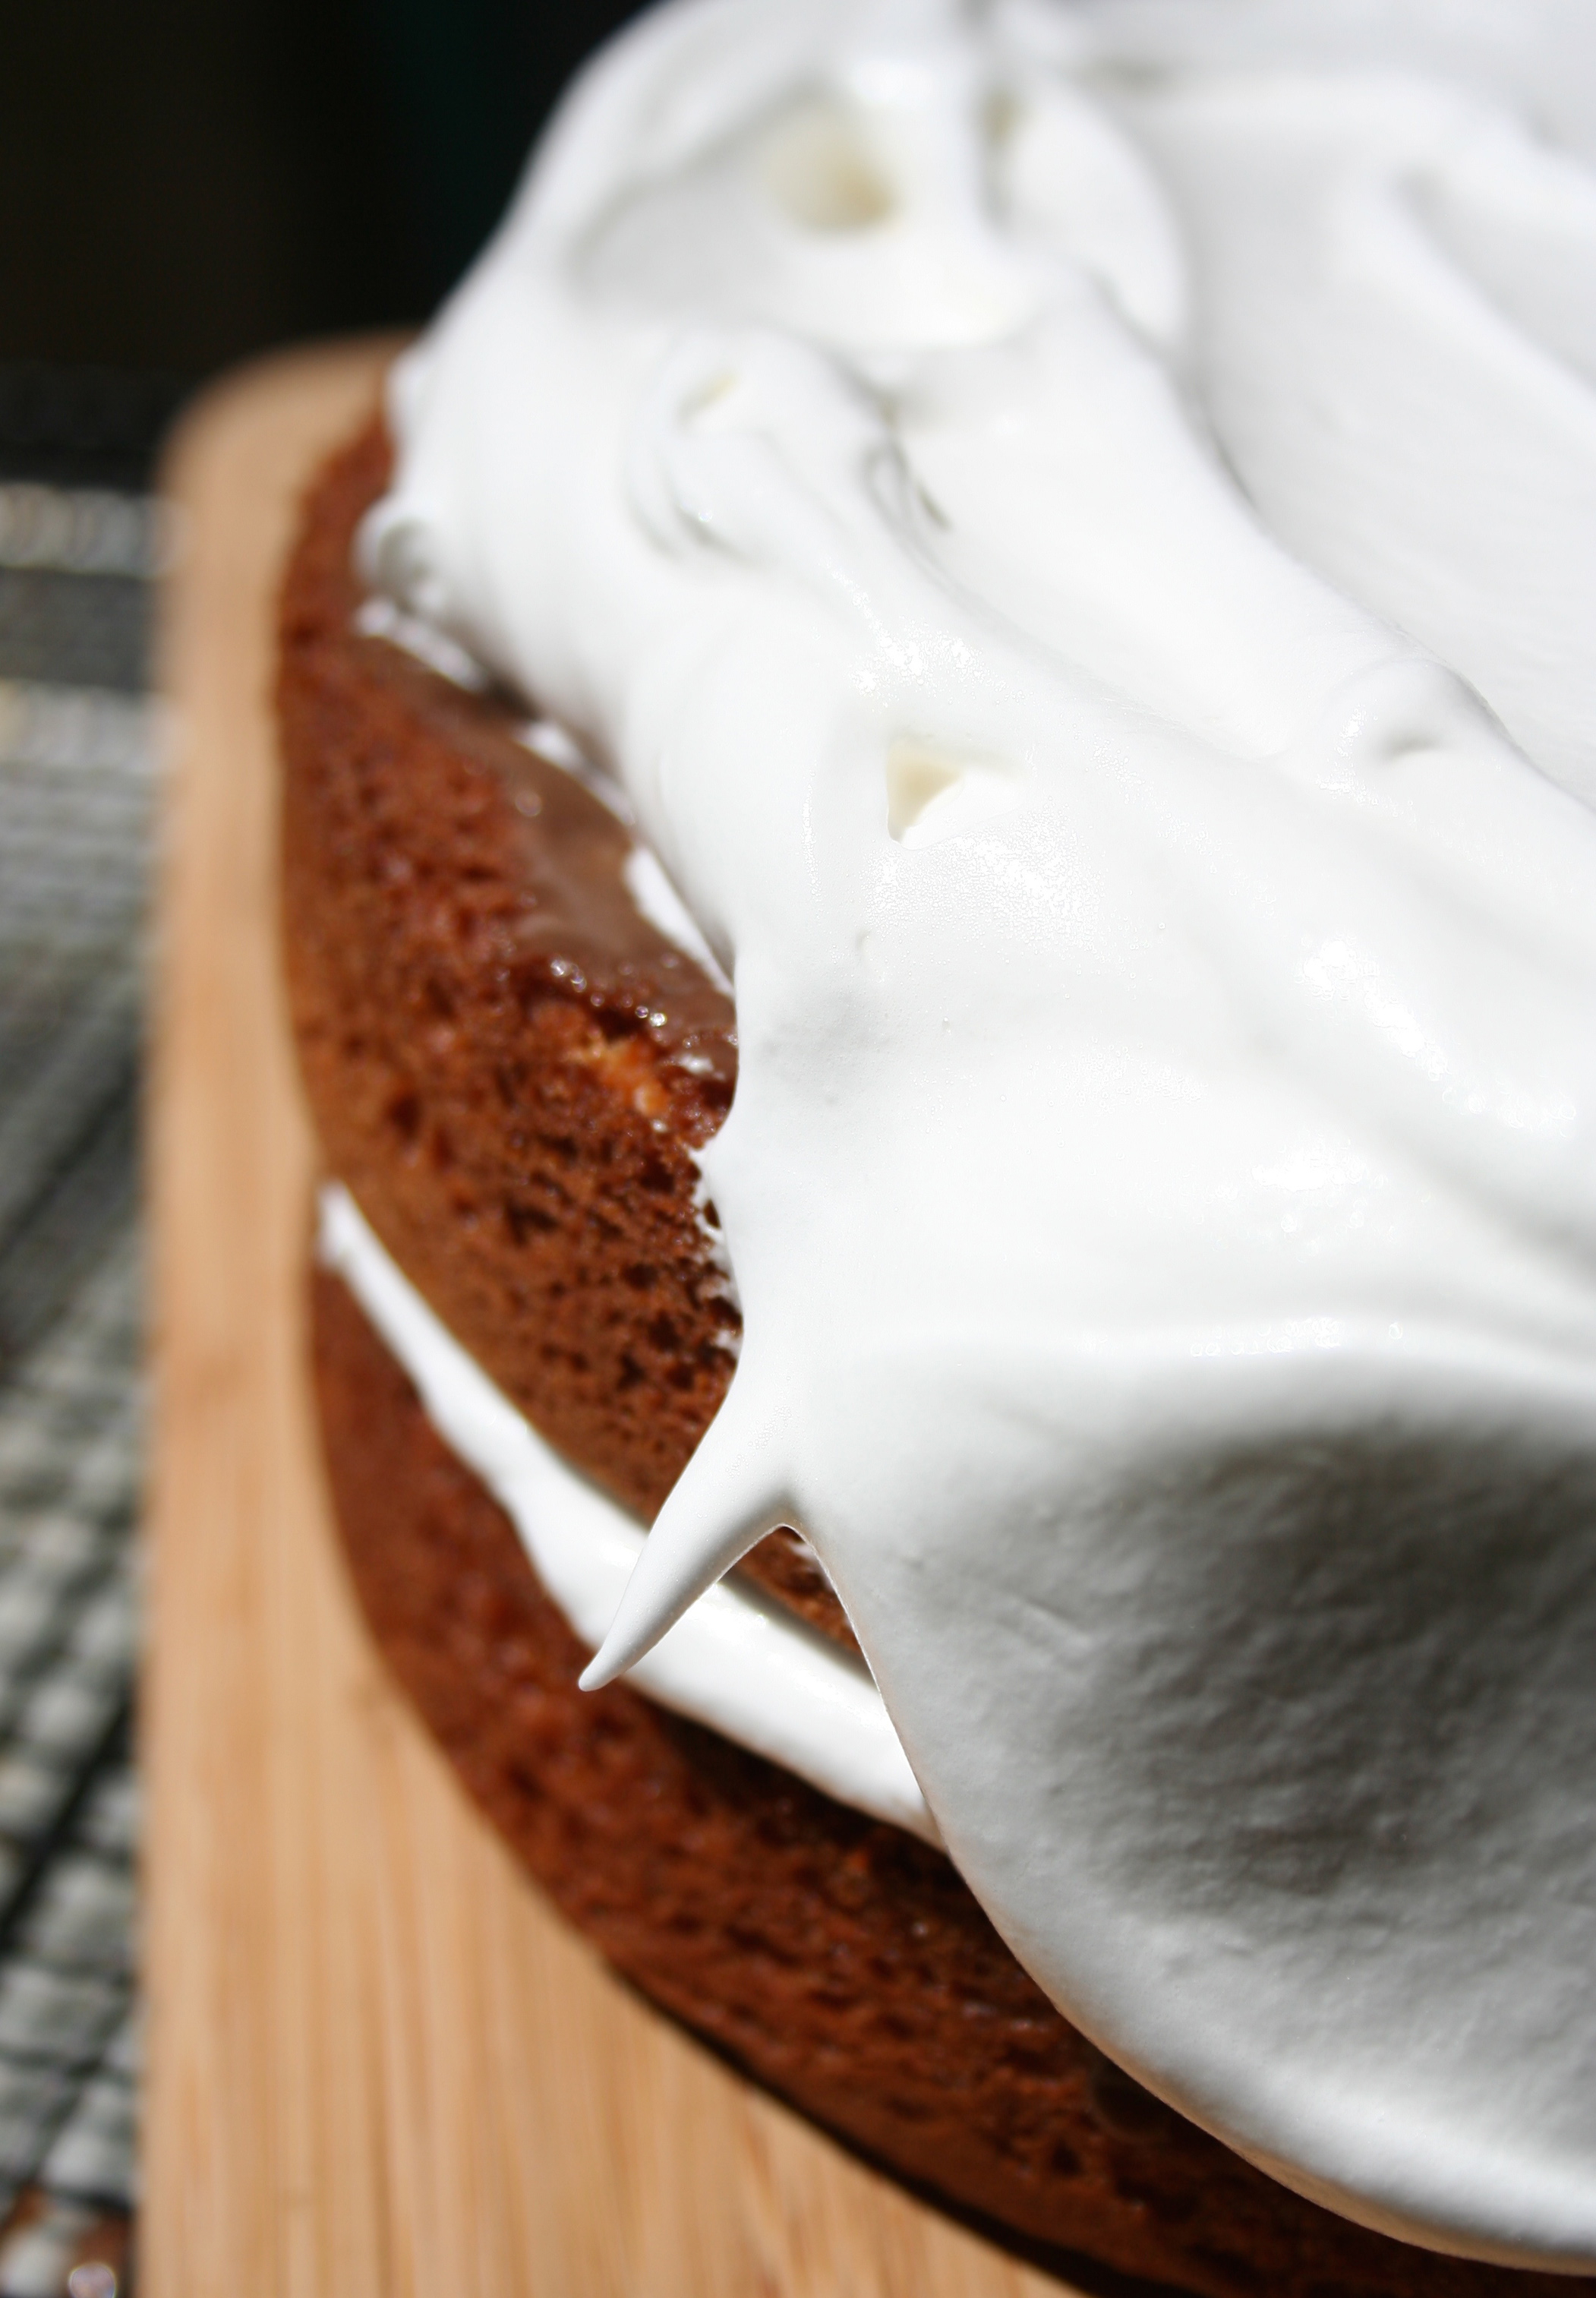
Make the meringue cover, then take the ice cream dome from the freezer and remove the plastic wrap. Spread the meringue onto the ice cream dome, covering it completely. Use the back of a spoon to flick and pull little peaks up from the surface (for a nubbly texture when it bakes). Freeze for at least 3 hours, or overnight.

Near the time you’d like to serve your Baked Alaska, heat the oven to 500 degrees F, making sure there’s enough clearance to fit the dessert. When the oven is at temperature, remove the assembled bombe from the freezer, set it on a parchment-lined baking sheet, and put it into the oven. Bake for 3 to 5 minutes, rotating the dome once or twice, until the peaks turn a golden brown color. Let the cake stand at room temperature for about 15 minutes before serving (this will ensure that you’ll be able to slice through it without the crust getting all gooey and oozey). Slice and serve; freeze any leftovers for up to 5 days.

Brownie base

(note: you can use whatever brownie recipe you like, baked in a 9-inch cake pan)

  • 1 cup (2 sticks) unsalted butter
  • 8 ounces bittersweet chocolate, chopped (about 1 cup)
  • 1 cup all-purpose flour
  • 1⁄2 teaspoon baking powder
  • 1⁄2 teaspoon salt
  • 4 large eggs
  • 2 cups sugar
  • 2 teaspoons vanilla extract
  1. Heat the oven to 350 degrees F. Grease and flour the bottom and sides of a 9-inch round cake pan; line the bottom of the pan with parchment paper.
     
  2. Heat the butter and chocolate over low heat, using either a small, heavy-bottomed saucepan or a double boiler. Stir occasionally until melted. Set aside to cool.
  3. In a medium bowl, whisk the flour, baking powder, and salt until combined. Set aside.
  4. In a large bowl, whisk the eggs, sugar, and vanilla until well combined. Add the slightly warm chocolate mixture to the eggs and whisk to combine. Add the flour mixture and stir with a wooden spoon until just combined. Spoon the batter into the prepared cake pan; use an offset or rubber spatula to smooth and level the batter.
  5. Bake for 45 to 55 minutes, or until a toothpick inserted into the center comes out mostly clean. Set the pan on a wire rack until the brownie layer is completely cool. 

Meringue coating

  • 8 egg whites, at room temperature

  • 1⁄4 teaspoon cream of tartar 1⁄8 teaspoon salt

  • 3⁄4 cup sugar 

Using a stand mixer with a clean, dry bowl and fitted with the whisk attachment, whip the egg whites, cream of tartar, and salt on medium-high speed until the whites form soft peaks. Increase the speed to high and add the sugar in a slow stream, continuing to whip until stiff, shiny peaks form.

Have you ever tried Baked Alaska?

Yogacorns Present: The Drishtis

Even if you don't know or care what a drishti is, you might have fun with this helpful yoga guide as presented by Yogacorns. 


A drishti is the direction of the gaze in a yoga pose, intended to help boost concentration. Of course, if you don't care much for yoga, you can enjoy the cute unicorns and then fix your own drishti on the next delicious dessert!