What Happens When You Boil Cake Batter?

Can you boil cake batter to cook it? #whathappens wednesday, yo! Let's find out!

On the one hand, the answer to this question is obvious, right? Cakes have to be baked, so boiling is impossible, wrong, and gross. Obviously...?

But think about it.

There's more than one way to make a cake. There's the classic way--baked--of course. But if you think about it, it's also possible to fry cake (cake batter pancakes? Funnel cake? Helloooo). And it's also possible to steam one--aren't baked puddings basically steamed cakes? 

So why not at least try boiling cake batter before dismissing it? That's what I did.


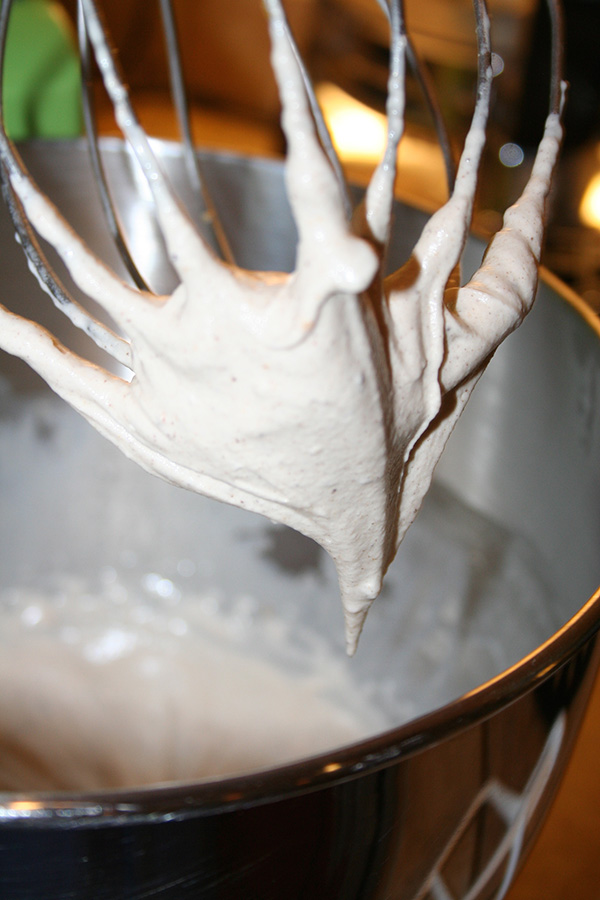
I was baking up a batch of homemade Hostess-style cupcakes and I had a little batter left; I decided it was the right time for my experiment. So I set up a pot of water and brought it to a rolling boil...

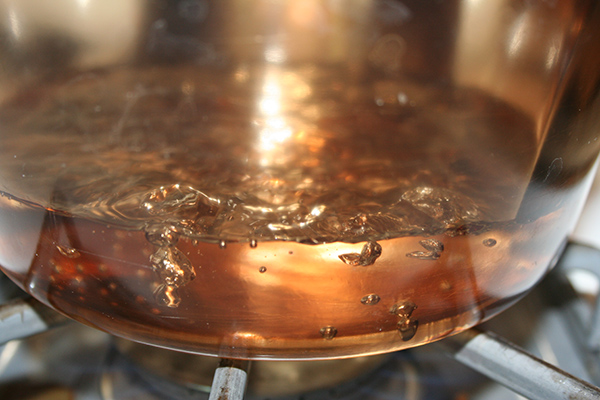
and then I dripped a spoonful of batter into the boiling water.

At first, the batter stuck together and began to float a little, like homemade pasta would.

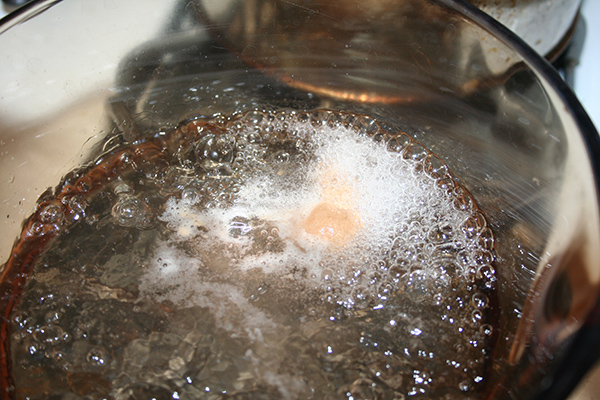
I began to feel hope. I began to have fantasies of little gnocchi-like pillows of cake that I could snack on. This might be the next big thing! I spent several moments dreaming of how to combine "cake" and "gnocchi" into a clever word like Cronut. 

But then, things began to change quickly. The cake batter started to spread a little bit. It began to look like little amoeba in the water.

I let the batter boil for about 1 minute total, then I used a spoon to remove it. I did this with four separate portions of batter.

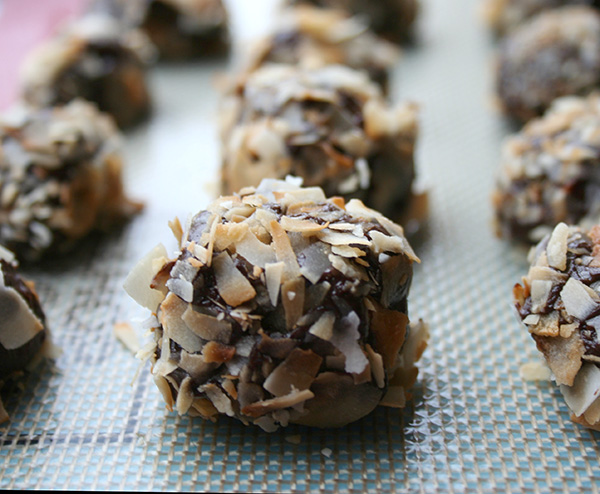
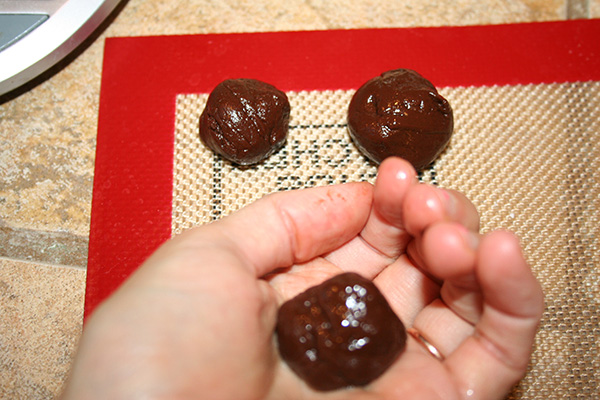
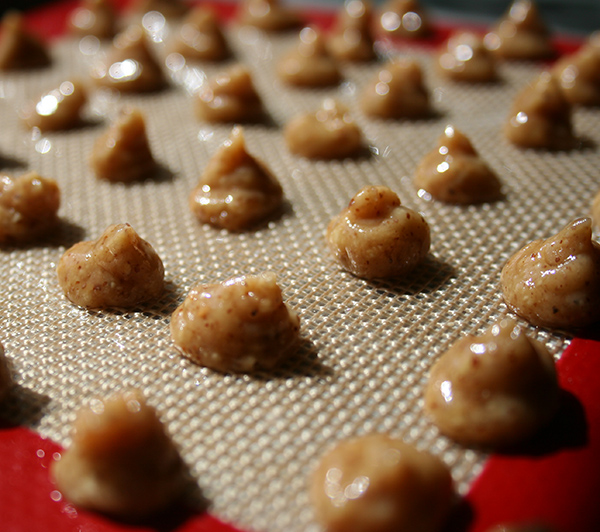
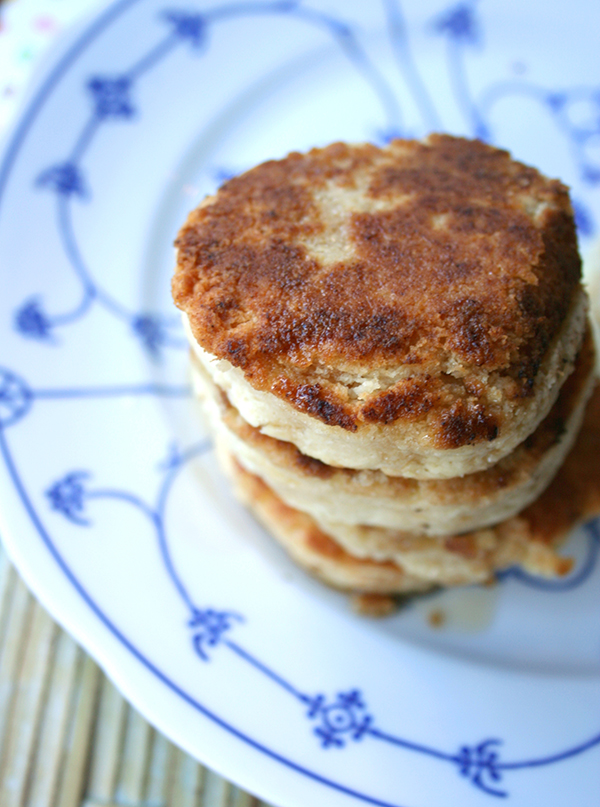
ut of the four spoonfuls I dropped in the pot, only two remained cohesive. They were gooey and delicate. Here's what they looked like.

 the other two had pretty much evaporated into the  water, giving a very not right look. 

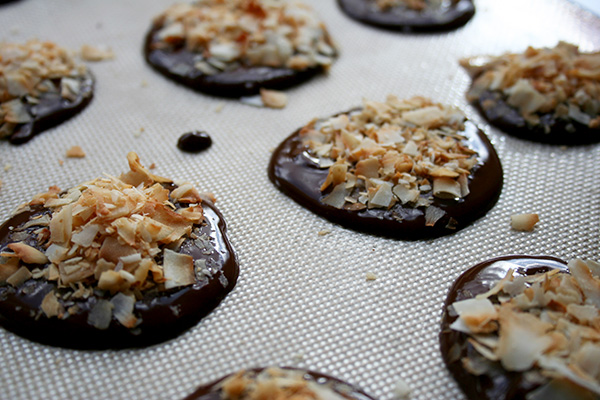
Now, I won't lie...those little blobs of boiled cake didn't look too excellent.

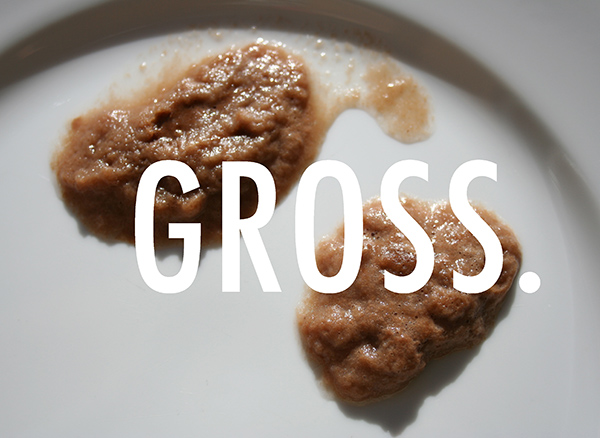
And while they did "set" slightly, they remained too soft to handle and gooey. 

Unfortunately, I can't give you a happy ending on this story, either: they were snot-like in texture, and tasted (surprise!) like watered down and waterlogged cake. It was not the finest moment in baking. 

What this experiment was, however, was interesting and informative. I feel like I now have an idea of why cakes are steamed instead of boiled: because the indirect contact to the moisture allows them to more slowly "set" as they cook. In boiling water, the batter was too thin to set up sufficiently before it began to disintegrate. 

And furthermore, I feel very secure in that baking really is a superior way to prepare a cake. It's good to challenge things that we have always just accepted, though, right?

And yes, flavor-wise, I suggest we both stick to a classic baked version of chocolate cake next time. 

Have you ever prepared cake in an unexpected way?


I Will Actually Eat Homemade Frozen Yogurt

I freaking despise frozen yogurt. In general.

Part of it dates back to my disordered eating days, when I felt that frozen yogurt was what I "should" eat instead of ice cream. I think that since entering recovery, I've had a huge sense of wariness about anything perceived as "virtuous" or "low fat".

Since ditching my eating disorder, I also ditched anything that is manufactured to be low fat (naturally low fat foods are fine by me). I don't want a "lower fat" alternate to ice cream. Give me the full fat stuff. I want to LIVE, and I want ICE CREAM.

And as my final word on the matter--I am fine with fruit being healthy. I am fine with salad being healthy. But stop trying to make dessert healthy. When I want dessert, I want DESSERT, not health food. To put it simply:

froyono.jpg


But I will tell you this: when frozen yogurt is homemade, I don't despise it quite as much. In fact, I don't despise it at all.

Maybe it's because I can employ a really good quality (FULL FAT) yogurt. Maybe it's because I can flavor it how I want. Or maybe the sense of achievement is just intoxicating and makes me want to like the flavor, and therefore I do.

This homemade froyo is awesome. I used the fancy $8 thing of Greek yogurt from the health food store, which is just full of fat (I made sure before proceeding). The fat gives it FLAVOR.

Added flavor comes from the mix of honey and lavender. The lavender in this recipe isn't such a great quantity that it gets perfumey (I don't like that) but it works to make the honey more interesting. The tanginess of the yogurt helps tame the lavender, too, so it acts as a nice scent but not an overpowering floral flavor.

This is an adaptation of a recipe I developed for New Mexico magazine. I used local lavender and honey, and I think that also added to the "story" of this yogurt - as in, everything tastes better with a story, right?

So here's a recipe for frozen yogurt that doesn't suck. It's perfect for these last few warm days of summer. 

HONEY-LAVENDER FROZEN YOGURT

Lightly adapted from the version seen in New Mexico Magazine
makes 6 servings

1/3 cup honey 
1⁄2 cup granulated sugar 
2 tablespoons dried lavender 
1⁄4 teaspoon salt 
2 tablespoons water 
1 quart plain regular or Greek yogurt

Combine the honey, sugar, lavender, salt, and water in a saucepan.

Heat on medium until it begins to bubble at the edges and the sugar has dissolved. Remove the pan  from heat; pour through a fine mesh strainer. Discard the lavender; it will get gummy and chewy if you leave it. Let the mixture cool to room temperature before proceeding.

In a medium bowl, combine the yogurt and the cooled honey mixture. Stir just to combine.

Chill in the refrigerator, or using an ice bath, until the mixture registers 45° F or slightly lower.

Transfer the mixture to your ice cream maker; churn according to the manufacturer’s instructions. To make it without an ice cream maker, follow the steps in this post (even though it's not ice cream, the method is the same).

Transfer to a freezer-safe container before storing.

Enjoy!

Not Sweet, But Totally Sweet: Sweet Potato Noodle Bun

OMG. I love this idea. So much that I am featuring something savory rather than sweet on this site (it has happened, but you know it's not frequent!). Buns made from spiralized sweet potatoes!

SweetPotatoNoodleBunSpiralizer.jpg

I feel fairly certain that any and every sandwich would be better served this way. I have fantasies of eggs Benedict served atop a couple of these, too!

It's not my primary concern, but these do happen to be (naturally) gluten-free, meaning they are a fun alternative to bread if that is something you're avoiding. 

Sweet Potato Noodle Bun

These handy‐dandy little gems are a surprising way to eliminate a traditional bun. They are crunchy, tasty and gluten‐free. You will find yourself making these buns and their variations for all of your sandwiches, burgers and breakfast‐sandwiches.

Recipe courtesy of 150 Best Spiralizer Recipes by Marilyn Haugen & Jennifer Williams © 2015 www.robertrose.ca Reprinted with publisher permission. Available where books are sold.

MAKES 2 BUN HALVES

Two 3/4‐cup (175 mL) ramekins, sprayed with nonstick cooking spray

  • 1 medium to large sweet potato, peeled and ends cut flat
  • 2 teaspoons olive oil, divided
  • 1 large egg
  • pinch of kosher salt
  • pinch of freshly ground black pepper
  1. Using a spiralizer, cut the sweet potato into thin strands.
  2. In a large skillet, heat 1/2 teaspoon oil over medium heat. Add sweet potato and cook, stirring, for 5 to 7 minutes or until softened. Let cool to room temperature, about 15 minutes.
  3. In a medium bowl, whisk egg. Stir in sweet potato, salt and pepper. Divide between prepared ramekins, filling each about halfway and pressing the sweet potato down into the ramekins. Cover with plastic wrap and place a heavy can or jar on top of the wrap to weigh down the sweet potato. Refrigerate for 30 minutes.
  4. Lightly coat a skillet with the remaining oil and heat over medium‐high heat. Remove plastic wrap and invert ramekins to slide noodle buns onto skillet. Cook, turning once, for 3 to 5 minutes per side or until golden brown on both sides and hot in the center.

Tip

Store cooked noodle buns, wrapped individually in plastic wrap, in the refrigerator for up to 2 days. Or prepare through step 3, then refrigerate for up to 24 hours before cooking.

Variation

Instead of the sweet potatoes, you can use russet potatoes, rutabagas or kohlrabi. Cook each of these for 5 to 7 minutes or until softened. 

Courtesy of 150 Best Spiralizer Recipes by Marilyn Haugen & Jennifer Williams © 2015 www.robertrose.ca Reprinted with publisher permission. Available where books are sold.

What Happens When You Whip Ice Cream?

Can you whip ice cream like whipping cream? That's the question on tap for today's #whathappenswednesday. 

If you were to ask me what happened when you whip ice cream in the manner you would whipped cream, I'd probably guess that it would whip just fine. I mean, it's creamy, it's thick, it's already halfway there, right? 

Plus, ice cream usually has stabilizers so I figured this would just make it a really nice, thick whipped substance.

But as you probably know, guessing about this type of thing isn't my style. I like to get my hands dirty and to keep my sweets interesting. I wanted to see for myself what would happen. So basically, I was already on the way to the store five minutes after the question had occurred to me, and I bought some ice cream. To keep it interesting, I bought a peanut butter cup ice cream.

I let the ice cream soften, until it was not totally liquid but close to it. Then I loaded it into a stand mixer fitted with the whisk attachment.

And I whisked away, just like I would if it was heavy cream.


And I whisked. And I whisked. It progressed from definitely ice cream to much more liquid-y.

After a while, I began to have visual cues of whipped creaminess. The mixture thickened and increased in volume, and the cream began to create those little spatters on the side of the bowl that happen when the cream transformation into whipped cream begins to happen. I got excited. 

When I stopped the mixer, the ice cream even stuck to the whisk attachment the way whipped cream would when it has formed soft peaks. So I mixed just a little longer.

While the mixture retained soft peaks, they never progressed to stiff. And even the soft peaks became sort of drippy after just five minutes.

All the same, the whipped ice cream had a fascinating quality. It had the texture of a Wendy's Frostee, but the flavor of ice cream. 

See how it becomes a different thing entirely when whipped? 

So, to answer the question...what happens when you whip ice cream?

Well, you don't get some sort of superpower ice cream flavored whipped cream. But you do get a smooth, frosty treat with a texture somewhere between soft serve and a thick milk shake. 

So while you won't get a whipped cream-like substance, you will be rewarded with something tasty.

Were you surprised by the results?


Coconut Cream Ganache Confections: Two Ways

Um, so recently I found myself with a quarter cup of coconut cream and about half a cup of toasted coconut flakes left over from making a most fantastic coconut cream pie. What the heck to do with this stuff?

Um, make fancy-looking coconut cream ganache confections, of course! 

I tried them two ways: as little truffles, and as little discs.

The truffles are easier to handle if you have a bit more time to devote to the project...

but the discs are really quite serviceable as long as you can handle the fact that they're a little softer than the mendiats they resemble. 

Here's how you do it, either way. Coconut cream ganache truffles: a fine way to use leftover coconut cream. 

Note: this recipe is for coconut CREAM confections - not to be confused with coconut milk. I haven't tried it with coconut milk, so if you want to try that, proceed with caution, and let me know how it all turns out. 

This recipe can be doubled. 

Coconut cream ganache confections

Makes 12 - Printable version here

  • 1/2 cup unsweetened coconut flakes, toasted.
  • 4 ounces chopped chocolate
  • 1/4 cup coconut cream
  • 1/4 teaspoon sea salt

Just in case your coconut isn't pre-toasted, here's how you do it. Disregard if it's already toasted. Preheat the oven to 300 degrees F. Scatter the coconut on a baking sheet, and bake until fragrant and golden and toasty, 5-8 minutes. Remove tray from oven and let the flakes cool. 

Meantime, place the chopped chocolate in a heatproof bowl. Set to the side.

In a saucepan, heat the coconut cream and salt until it comes to a simmer. Remove from heat, and pour over the chocolate. Stir until combined and totally mixed.

Transfer the mixture to the refrigerator until it has thickened a bit. If you're not keen on waiting, wait less time, until the mixture is thick enough to dribble into the discs; if you want truffles, you'll have to wait a bit longer, maybe 30 minutes. Keep an eye on it, though, as the temperature in your house can affect this. It's less about how long it takes, more about attaining the right texture.

While the mixture cools, it being that the coconut should be cool now, go ahead and crush it a little to break it into smaller pieces, if you've used the larger flakes like I did. If you used thread coconut, it's probably fine at the size it is.

OK, so depending on how long you let the mixture rest, you'll follow one or the other option.


Option 1: discs

Drip the chocolate mixture on to a parchment or silicone-lined baking sheet, so that it forms individual discs (you'll get 12 or so). Sprinkle the coconut mixture on top. Place the discs in the fridge or freezer until firm enough to handle. Remove with a spatula. They'll be too soft to remain out at room temperature, so leave them in the fridge or freezer until ready to eat or to use as dessert garnish. 

Option 2: truffles


Roll the mixture into approximately 1-inch balls. It should be soft but malleable enough to roll--if not let it chill a bit longer. Roll them in the coconut shreds. Place on a sheet and store in the fridge or freezer until quite firm. These fare better at room temperature than the discs, but shouldn't be stored at room temperature, so keep them in the freezer or fridge until they're going to be served. 

Enjoy!

How to Slow-Roast Cherry Tomatoes

I know, this isn't sweet. But it's a useful tutorial that I want to remember, and I think you may benefit from, too: how to slow-roast cherry tomatoes.

To cut or not to cut? If the cherry tomatoes are tiny, I don't cut them. If they are larger, I cut them either in half or in quarters. You use your own judgment here.

Why slow-roast cherry tomatoes? Um, because it makes them delicious. As they slow roast, you reduce some of the moisture and basically boil down the flavor into a concentrated form. It makes the tomatoes less watery and more...interesting. The olive oil, salt, and pepper act like supporting actors to the oscar winning performance of the tomato flavor. 

Ok. So here's how you do it. 

How to slow-roast cherry tomatoes

Printable version here.

Preheat the oven to 300 degrees F.

You can line your baking sheet with parchment or not. I like to because it keeps cleanup easier.

Scatter the tomatoes or slices evenly on the sheet. Generously drizzle with olive oil, then generously season with salt and pepper.

Put the sheet in the oven. I used a spatula to move them around every 20 minutes to even out the baking. What you're going for is not completely dehydrated, but wilted, a bit soft, and a little toasty. For me this took about an hour, maybe a bit more.

I enjoyed mine on top of these cute little appetizers, but really, they can be used as a condiment, and they make everything from sandwiches to salads taste better. 


Enjoy!

Slow Cooker Plum Pudding

Forget figgy pudding til December, why don't you. At this time of year, it's all about plum pudding. And this version is spectacular, because your slow cooker will do all the heavy lifting for you. 

It's true. Usually, steamed puddings are all day affairs, but this version comes together quite easily, and then can cook for several hours in your slow cooker while you attend to other things. Sounds like a winner to me!

This recipe is excerpted from the new book 175 Essential Slow Cooker Recipes by Judith Finlayson © 2015 www.robertrose.ca; the recipe is reprinted with publisher permission.

Plum Pudding

8 to 12 servings

Here’s a lightened up version of a traditional holiday favorite. Allow a week for the mixed pudding to soak in the refrigerator. I like to serve this warm with a simple lemon sauce or store­bought lemon curd, but if you’re a traditionalist, hard sauce works well, too. Don’t worry about leftovers. It reheats well and with a steaming cup of tea will take the chill off even the most blustery winter day.

• Large (minimum 5 quart) oval slow cooker
• 6­cup (1.5 L) lightly greased pudding basin, baking or soufflé dish

  • 1 cup seedless raisins
  • 1/2 cup finely chopped mixed candied fruit
  • 2 tablespoons chopped candied orange peel
  • 2 tablespoons chopped candied ginger
  • finely grated zest of one orange
  • finely grated zest of one lemon
  • 1/2 cup brandy or dark rum
  • 3/4 cup all purpose flour
  • 3/4 cup fine dry white bread crumbs
  • 2 tablespoons ground toasted blanched almonds 
  • 1 teaspoon ground cinnamon
  • 3/4 teaspoon baking powder
  • 1/4 teaspoon freshly grated nutmeg
  • 1/4 teaspoon salt
  • 3/4 cup brown sugar, packed
  • 1/2 cup unsalted butter, softened
  • 2 eggs
  • 2 tablespoons molasses 

1. In a bowl, combine raisins, candied fruit, orange peel, candied ginger and orange and lemon zests. Add brandy and stir well. Set aside for 1 hour.

2. In a separate bowl, mix together flour, bread crumbs, ground almonds, cinnamon, baking powder, nutmeg and salt. Set aside.

3. In a clean bowl, beat brown sugar and butter until creamy. Add eggs and molasses and beat until incorporated. Stir in soaked fruit mixture. Add flour mixture and mix just until blended. Spoon batter into prepared dish. Cover tightly with plastic wrap and let sit in refrigerator for a week, spooning additional brandy or rum over the top two or three times in 1 tbsp (15 mL) increments. 

4. Remove plastic wrap. Cover with foil and secure with a string. Place dish in slow cooker stoneware and pour in enough boiling water to come 1 inch (2.5 cm) up the sides of the dish. Cover and cook on High for 4 hours, until a toothpick inserted in the center of the pudding comes out clean. Serve hot. 

Courtesy of 175 Essential Slow Cooker Recipes by Judith Finlayson © 2015 www.robertrose.ca Reprinted with publisher permission. Available where books are sold.

DIY Almond Butter Chips

You know all about peanut butter chips. I mean, they're delicious. But have you ever even dreamed about almond butter chips? 

Well, I have, and I want to tell you how to make them happen in your very own home.

Inspired by Heather's French Press, the other day I set out to make some PB chips. But my sweetheart, who doesn't care for peanut butter (WHAT!? I know), lamented, "If only you could do that with almond butter."

Well...why the heck not?

So I made up a batch. Of DIY Almond Butter Chips. Or Almond Butter Morsels. Whatever you want to call them.

The almond butter mixture was a little hard to pipe since I had a "Natural" almond butter that was somewhat chunky, but other than taking a little time to pipe the morsels, the recipe is a breeze. 

And OMG, these things are so simple, but SO FREAKING GOOD. Like, "I can't make myself stop eating these" good. 

They make a fantastic dessert topping, a tasty snack by the handful, and they can be used for baking. They don't hold their shape quite as well as store-bought peanut butter or chocolate morsels, but as long as they are frozen before being added to a cookie dough, they will hold their shape. To illustrate, here is an example of a cookie that I baked with some of the morsels on top. See how they get melty, but don't melt entirely? 


DIY Almond Chips 

Makes 100+ morsels - printable version here

  • 1/3 cup almond butter
  • 1 tablespoon softened unsalted butter
  • 1/3 cup confectioners' sugar
  • 1-2 tablespoons milk 
  • pinch sea salt

In a large bowl (or in a stand mixer) cream the almond butter, butter, and confectioners' sugar until everything comes together. Chances are it's a somewhat mealy mixture.

Now, pause your mixing and add the milk, a touch at a time, until niiiiice and creamy and as smooth as it can be considering the texture of the almond butter. It should be thick, but have a consistency where you feel like you can pipe it. I say 1-2 tablespoons of almond butter because you may not need it all.

Oh, and stir in that salt. It makes the morsels extra-royale tasty. 

Go ahead and load the mixture into a piping bag or a ziploc bag with a corner cut off (as you see here I have not yet cut off the corner). 

Pipe onto a parchment-lined or silicone sheet. Place the finished morsels in the freezer until completely set; store in an airtight container in the freezer until ready to use. 


Have you ever made DIY morsels?

Buy the Book, Make the Cake: 7-Up Cake via Grandbaby Cakes

Anyhow, my friend Jocelyn (she's kind of famous, you probably know her website, Grandbaby Cakes) wrote a book. It's called Grandbaby Cakes: Modern Recipes, Vintage Charm, Soulful Memories. And I think you should buy it. 

I could tell you about how funny and cool Jocelyn is, and how we clicked instantly when we met last year at the Pillsbury Bake-Off. I could tell you how we instantly decided that Oprah owed us both a check (for what, other than being awesome, I'm not 100 percent sure). 

But I'm sure that as fascinating as our mutual funniness and complete cuteness is to you, you're in it for the cake. So here, I present an excerpt from the new book, a fantastic recipe for 7-Up Pound cake. Enjoy!


Mama’s 7-UP Pound Cake

SERVES 12–16

This is a vintage recipe that has been in my family for decades. It was actually the very first cake I ever learned to bake, which I suspect is not only because it is my mother’s absolute favorite cake but also because it was an unintimidating induction into the baking world, with results that even a nine­year­old girl could master. If you are a beginner baker, this is an excellent recipe to start your journey with. You may even get bitten by the baking bug like I did. Mama’s 7-UP Pound Cake is a classic and decadent treat complemented by the subtle flavor of citrus soda. The juxtaposition of the crunchy crust to the moist inner texture makes this cake simply irresistible. It melts as soon as you taste it.

GRANDBABY NOTES

This recipe doesn’t have a leavening agent, but it doesn’t need one. A significantly longer creaming process adds more air to the batter, giving it the lift it needs. Don’t skip this step. The results are a golden­brown, perfectly filled-­out cake, no leavening necessary. My mother has always been adamant about using the original 7-UP and nothing else. She says you can really taste the difference. While I have used other lemon­lime soda brands ranging from Sprite to Sierra Mist, I try my best to follow my mother’s advice.

INGREDIENTS

CAKE

  • 1 1⁄2 cups (3 sticks) unsalted butter, room temperature 3 cups granulated sugar
  • 1 teaspoon salt
  • 5 large eggs, room temperature
  • 3 cups sifted cake flour
  • 1⁄2 cup 7UP soda, room temperature
  • 1 tablespoon lemon extract

GLAZE

  • 1 cup confectioners’ sugar
  • 3 tablespoons 7-UP soda
  • 1⁄2 teaspoon lemon extract

FOR THE CAKE

Preheat your oven to 315°F. Prepare a 10­-cup Bundt pan with the nonstick method of your choice.

In the bowl of your stand mixer fitted with the whisk attachment, beat the butter for 2 minutes on high speed. Slowly add the sugar and salt. Cream together for an additional 7 minutes, until very pale yellow and fluffy. Add the eggs 1 at a time, combining well after each addition and scraping down the sides and bottom of the bowl as needed.

Turn your mixer down to its lowest speed and slowly add the flour in 2 batches. Be careful not to

overbeat. Pour in the 7UP and lemon extract. Scrape down the sides and bottom of the bowl and mix the batter until just combined. Be careful not to overmix.

Pour the batter into the prepared pan and bake for 75 to 85 minutes, or until a toothpick inserted into the center of the cake comes out clean.

Let the cake cool in the pan on a wire rack for 10 minutes, then invert onto a serving plate. Let cool to room temperature. Lightly cover the cake with foil or plastic wrap so it does not dry out.

FOR THE GLAZE

In a small bowl, whisk together all the ingredients until the mixture is pourable. When the cake is completely cool, spoon the glaze over the cake and allow it to harden. Serve at room temperature.

Reprinted with permission from Grandbaby Cakes by Jocelyn Delk Adams, Agate Surrey, 2015. 

Raspberry Crumble Bars

I'm so into these raspberry crumble bars.

I personally have a long history with the fruit and oat bar: a few years ago, finding out the history of the Mazurka bar (and it's an interesting one) became my Big Project. While I always loved the flavor of fruit and oat bars, delving into how they became so firmly planted in Seattle culture was fascinating to me. 

But I've learned something since leaving Seattle: fruit and oat bars taste good everywhere. And this version, from the new book The Yellow Table, is stellar: simple, and perfectly flavored with brown sugar to complement the oats and nuts in the crust/topping. I hope you'll enjoy as much as I did!


RASPBERRY CRUMBLE BARS

Makes 16 bars

Come summer, these raspberry crumble bars are on regular rotation at our house. To keep things simple, the shortbread dough that’s used for the base doubles as a crunchy topping.

  • 1 cup all‐purpose flour
  • 1/2 cup packed light brown sugar
  • 1/2 teaspoon fine sea salt
  • 1/2 cup (1 stick), plus 2 tablespoons cold unsalted butter, cut into cubes 3/4 cup old‐fashioned rolled oats (not quick‐cooking)
  • 1/4 cup finely chopped pecans
  • 1/3 cup raspberry jam
  • 1 cup fresh raspberries

Preheat the oven to 375°F. Butter an 8 x 8‐inch baking pan, or spray with non‐stick cooking spray.
In a food processor, pulse together the flour, brown sugar, and salt. Add the butter and pulse until the mixture comes together to form a dough. Turn the dough out into a bowl and use your hands to gently knead in the oats and pecans.

Set aside 1/2 cup of the dough and press the rest into the bottom of the prepared pan. Spread the raspberry jam evenly over the dough, leaving a 1/4‐inch‐thick border. Arrange the raspberries over the jam, then sprinkle with clumps of the reserved 1/2 cup of dough.

Bake until the edges are golden brown, about 30 minutes. It will be a bit gooey in the center when you take it out of the oven, but it firms up as it cools. Set the pan on a rack to cool for at least 30 minutes before cutting.
Run a knife around the edges of the pan to loosen the bars. Make one cut down the center, rotate the pan and make a second cut down the center to create four large bars. Using a large spatula, lift the bars out onto a big cutting board and cut them into smaller squares.

These are best when served the day they are baked, but you can store any remaining bars, in an airtight container, layered with parchment, at room temperature, up to 1 day. 

Reprinted with permission from The Yellow Table published in 2015 by Sterling Epicure, an imprint of Sterling Publishing Co., Inc. © Anna Watson Carl. Photography by Signe Birck

What Happens When You Cook Biscuits Like Pancakes?

I know, I'm jumping the gun because it's Sunday and this is definite #whathappenswednesday territory. But it simply couldn't wait, because this question could revolutionize brunch: what happens when you cook biscuits like pancakes?

A few weeks ago, King Arthur Flour sent me a bunch of biscuit making supplies for their "Build a Better Biscuit" promotion. There are some very cool bloggers who have created biscuit recipes--some of my faves are linked at the bottom of the post.

Basically, the idea is that King Arthur Flour wanted we the bloggers to help promote awesome biscuit making and pass on tips and wisdom. Well, I am not sure if I am passing on wisdom, but I am certainly passing on a cool idea. If you want wisdom, though, you're in luck: you can call the King Arthur Baking Hotline 855-371-2253 for carb support and biscuit making and baking tips. 

In the parcel from KA Flour, there were some basic biscuit recipes to get the inspiration going. As I was looking through the biscuit recipes they sent, all of them looked really good--I mean, I love biscuits. But part of my mind couldn't help but wander out of the coloring lines and into experimental territory. And I found myself wondering: "what would happen if I made biscuit dough but then cooked it up pancake style?"

Well, let me tell you, it didn't take me long to get rolling in the dough so as to make this experiment happen.

I made the King Arthur cream biscuit recipe, pretty much to the letter. But then I divided the batch in half. Half of it, I baked per the instructions (425 degree oven for 12-16 minutes). I reserved about 6 of the biscuit cutouts, and then fired up a skillet with a nice knob of butter.

I started the skillet on high heat, but the moment I added the biscuit dough, I lowered it to medium, because I knew that the thickness of the biscuits would require a slower, longer cook time than most typical pancakes (I know this because of my super puffy pancake experiment). 

The biscuit-cakes cooked for 2-3 minutes on each side, and came out like this.

I loved how they retained the side view of a biscuit with the little craggy-textured sides, but also looked like pancakes on the top.

Just to do a comparison, here are the pancake-style biscuits versus the traditionally baked ones. 

So how did they taste? 


Interestingly, even though they were the same exact dough as the baked biscuits, the flavor experience was quite different. The pancakes were denser, and felt heartier, even though the amount of butter they were cooked in was about the same as the amount used to brush on top of the baked biscuits. 

They were crispy on the edges, but soft in the center. It was an unexpected, but interesting texture contrast to the biscuit flavor. I wasn't sure how I felt at first, but after a few bites, I was like "yeah, this is a good thing."

I'm not going to say that everyone should stop baking biscuits and start pan frying them from now until forever, but I am saying that this is a delicious and exciting new brunch or breakfast opportunity.

Cream biscuits

traditional version and pancake option

Printable version here - adapted from King Arthur Flour

This recipe yielded about 12 biscuits for me.

2 cups King Arthur Unbleached Self-Rising Flour
2 tablespoons sugar
1 teaspoon vanilla extract
1 cup heavy cream
1 to 2 tablespoons milk
1 to 2 tablespoons (1/2 to 1 ounce) melted butter, optional, for brushing on top

Directions

1) Preheat the oven to 425°F; move a rack to the top third of the oven.
2) Whisk together the flour and the sugar.
3) In a separate bowl, whisk the vanilla into the cream.
4) Make a well in the flour/sugar mixture, pour the vanilla and cream into the well, and stir until everything comes together. If there's dry flour around the sides and bottom of the bowl, stir in additional cream or milk until all the flour is moistened.
5) Turn the dough onto a well-floured work surface, sprinkle flour on top of the dough, and fold it over several times.
6) Pat the dough into a 7" circle about 1/2" thick.
7) Use a sharp biscuit cutter (2 1/4" is a good size) to cut rounds. Place them on an ungreased or parchment-lined baking sheet.
8) Brush the tops of the biscuits with melted butter and sprinkle with coarse sparkling sugar or cinnamon-sugar, if desired. This is a nice touch if you're going to use the biscuits for shortcake.
9) Bake the biscuits for 12 to 16 minutes, until they're golden brown.
10) Remove the biscuits from the oven, and cool them right on the pan, or on a rack.
11) To make shortcake: Split the biscuits in half horizontally. Top each bottom half with berries or sliced fruit (and whipped cream, if desired). Add the top halves, and top with whipped cream.

Biscuit pancake variation:

follow the recipe up until step 8, omitting the oven preheating. Then, instead of baking, heat up a skillet with a knob of butter. Set the heat to medium-high, and place as many biscuit rounds as comfortably fit. Immediately reduce the heat to medium or even medium low. Cook until golden and browned, flip, and then repeat on the second side. For me, this was about 5 minutes total. 

Serve warm, with butter and syrup or whatever pancake makings you like. 

As promised, some of the other cool biscuit varieties bloggers have come up with:

Easy cherry self-rising biscuits via Culinary Concoctions by Peabody

Pimento cheese biscuits via The Kitchen Prep Blog

Buttermilk bacon sage biscuits via Broma Bakery

Easy buttermilk biscuits with honey cayenne butter via Baked Bree

Apple pie biscuit shortcakes via Beyond Frosting

Roasted beet feta biscuits via Take a Mega Bite

Cheddar rosemary biscuits via Will Bake for Books

What is your favorite type of biscuit?

Birthday Cake Biscuits

If you've ever found yourself feeling like there was something missing from your life, I have the answer. Birthday cake biscuits. That is what has been missing. 

Birthday cake biscuits. Isn't that just the most delightful string of words you've heard all day? 

The idea came to me simply: I had some leftover pink buttercream because my BIRTHDAY was the other day, and I was making biscuits for an upcoming King Arthur Flour "Build a Better Biscuit" baking experiment.

I thought to myself "what if I made a shortcake, but instead of strawberries and whipped cream like the rest of the jerks in the world, I used frosting and sprinkles?".

Well, I knew a good idea when it hit me and I hastened to make it happen. 

To everyone who thinks that shortcake with strawberries is the end-all biscuit dessert, please open your eyes already. I AM OFFERING YOU CARBS AND FROSTING HERE. 

Every bite was better than the last. The creamy buttercream was perfect for keeping the biscuits moist, and imparted a sweet flavor complement that was something like the experience of eating a well-made scone with an awesome glaze, but much better. 

Do yourself a favor and make some birthday cake biscuits.

Birthday cake biscuits

Makes 5 cakes

Grab a biscuit, and spread buttercream on the top.

Roll the sides in sprinkles. Add a second biscuit on top. 

Oh heck, let's add more buttercream.

And more sprinkles on top. Repeat with the remaining biscuits. Put a candle on top and wish yourself a happy early or late birthday. Smile.