Giveaway: Win a Fancy Verizon Cell Phone!

Giveaway

If there's something that you need to enjoy CakeSpy, it's TECHNOLOGY.

That's why, as part of the Verizon Wireless Savvy Gourmets group, I'm happy to have been given (by Verizon) a totally sweet item to give away on my site: the brand new DROID RAZR HD!  I hope you'll be as excited as I am about this one. The phone – the latest RAZR from Motorola – launched as the most compact 4.7-inch smartphone with a full-screen and edge-to-edge display and has a ton of great features, including:

·      An 8-megapixel camera and HD display that makes movies, photos, magazines and websites appear with vibrant clarity.

·      Circles Widget makes it easy to view battery life, text notifications, missed calls or weather updates, right on the home screen.

·      Near-field communications-enabled, so customers can use Android Beam to share contacts, documents and maps directly to compatible phones. 

·      A battery that allows for up to 32 hours of normal use and double the internal storage (of older RAZR phones) to 32 GB.

·      Runs over 4G LTE, combined with Chrome for Android, meaning customers can enjoy blazing fast speeds that make downloading documents or surfing the Web a breeze.

·      Device is Global Ready, so calling home or sending emails is possible from more than 205 countries around the world.

No cell phones!

OK. Here's the nitty gritty of the contest. 

a.  HOW TO ENTER: Leave a comment that answers the question “What DROID RAZR feature are you most excited for?” (don't panic if it doesn't show up right away - comment moderation is enabled!)

b.  PRETTY PLEASE: Since there are other bloggers offering the same giveaway, I must request that if you win on another giveaway, you only accept one prize. Why not share? 

c. DEADLINE: This giveaway will close on December 14, so enter NOW!

d. DISCLOSURE: I am participating in the Verizon Wireless Midwest Savvy Gourmets program and have been provided with a wireless device and six months of service in exchange for my honest opinions about the product.

Cake Mix Biscotti Recipe

Biscotti

I have a strange fascination with "doctored" cake mix creations. I love the idea that you can break the rules, so to speak, by using the mix in a way different than its simple intended purpose. In particular I love the recipes that have a finished product that is not cake at all, but cookies or pancakes or bars--it feels like the sweetest sort of kitchen science. So when I was leafing through a book called Complete Cake Mix Magic: 300 Easy Desserts Good as Homemade, I gravitated right toward the cake mix biscotti recipe. 

While the recipe in the book is for a hazelnut biscotti, I decided to go all holiday on this business and bake up some peppermint chip cake mix biscotti instead. Of course, this decision was also fueled by the fact that I had a bag of Andes brand Peppermint Crunch Baking Chips (I haven't seen them in many stores so there's the amazon link) which I thought would be festive and cute to use. 

Let's do this thing.

I also used a smaller box of cake mix than suggested in the recipe, so I scaled the rest of the ingredients down. The resulting biscotti weren't completely beautifully shaped, but gosh, were they tasty. Nice and buttery, like a condensed yellow cake with a crunchy crust, the smattering of mint chips gave the cookies a very nice, rich yet refreshing creamy mint finish on the tongue. Not such a bad thing.

Biscotti Biscotti

Cake Mix Biscotti

Makes about 18

  • 1 package (9 ounces) Jiffy yellow cake mix
  • 1/2 cup all purpose flour
  • 1 egg
  • 1/2 stick butter, melted
  • 1/2 to 3/4 cup Andes peppermint chips

Procedure

  1. Preheat oven to 350 degrees F. Line two baking sheets with parchment paper.
  2. In a large mixing bowl, combine the cake mix, flour, egg, and butter. Beat on low speed for 1 minute or until well blended. Fold in the peppermint chips until incorporated. Divide the dough in half.
  3. On a prepared baking sheet, shape the dough into a 10 by 3 inch rectangle that is 1/2 inch deep. Or you can make two shorter logs of dough, but make sure they have plenty of space as they will spread. Bake for 15 minutes. Remove from the oven and let cool for 10 minutes.
  4. Using a sharp knife, cut each rectangle into 1/2 inch slices. Place slices on their side on baking sheets. Bake, one tray at a time, for 10 minutes. Turk slices over and bake for 5 to 10 minutes longer or until crisp and golden. Cool for 1 minute on baking sheets, then remove to wire racks and cool completely.

Holiday-hued Homemade Pop-Tarts

Holiday Pop-tarts

If you really want a holiday treat that will make people smile, you've got to incorporate a little pop culture.

And by "pop" I mean "pop-tart"--of course. As in, homemade holiday Pop-tarts!

This is a holiday-hued adaptation of a recipe I made a few years back for homemade tarts. No, there's not much different other than the coloring and minty flavoring, but this holiday dress-up of a familiar treat is nonetheless quite a bit of fun.

This is also my entry for my sweet friend Molly's "virtual" holiday treat party. What's that, you ask? Well, I urge you to find more holiday treats, as well as a giveaway, at www.cakefyi.com.

But in the meantime--here's the recipe for those tarts.

Homemade Holiday Pop Tarts

Makes 6-8 tarts, maybe even more, depending on size; adapted from wonderful, wonderfulCulinary Concoctions by Peabody

For the crust
  • 1 1/2 cups flour
  • 1/2 teaspoon salt
  • 1/2 cup (1 stick) butter, softened and cut into cubes
  • 3 tablespoons cold water

For the filling

Jam, about 1 heaping teaspoonful per pastry (your choice of flavor; I used blueberry)

For the icing

  • 1 cup confectioners' sugar, sifted
  • heavy cream, to thin (you could use milk...but I like cream)
  • food coloring, if desired
  • colored sprinkles or mint chips for garnish

Procedure

  1. Preheat oven to 450°F. Line a baking sheet with parchment paper; set to the side.
  2. Combine flour and salt in a large bowl. Add butter and blend with a fork, pastry cutter, or your impeccably clean hands. Blend until the mixture is fairly coarse. Add the water, bit by bit, gently mixing the dough after each addition, until the dough is cohesive enough to form a ball.
  3. Place dough on a lightly floured surface and roll into a rectangle, about 1/8 inch thick. Cut out rectangles approximately the size of index cards (3x5 inches), or smaller if you prefer a more modest portion (I didn't). Make sure you have an even number of cutouts. I think that mine might have been a little thicker than 1/8 an inch, but I ended up with 12 rectangles (for 6 pastries).
  4. On half of the rectangles, place a small spoonful of the jam of your choice in the center. You don't want it to be too thick or the top crust will mound on top of it.
  5. Place the remaining rectangles of dough on top of the ones with jam. Crimp all four edges by hand or with a fork to ensure that your filling won't ooze out. I also poked the top of each with a fork, to vent them.
  6. Place the tarts on your prepared baking sheet, and bake for 7 to 8 minutes, or until light golden on the edges. Remove from the oven and let them cool completely.
  7. While the tarts cool, prepare your icing; make sure it is fairly thin but not so thin that it will just drip off. If desired, tint with food coloring. Once the pop tarts are cool, drizzle it on top. Garnish with sprinkles or holiday-hued treats.

Sweet Birthday Wishes to Margaret

Bead Bedlam

One of my favorite things about running CakeSpy is meeting all sorts of wonderful people who I might not have met otherwise.

Take for instance Margaret, a class act and Very Cool Lady (you  can view her in cupcake form, at the top of this post) who I met, oh, probably about 5 years ago, shortly after I started the website. Margaret was, at the time, a college student in New York, who contacted me to do some custom artwork for her.

Custom order, Milk DJ at a Cupcake Dance Party

And after I did one custom piece, I did another. And another. 

Throughout the years, we got a nice banter going on, and when her family came to Seattle for a visit, I finally got to meet her in person when I had a store!

Custom order - CakeSpy Shop!

And when her family came back the next year, we visited again.

I don't know exactly when it happened, but somewhere along the way, we became more than website writer and reader, artist and consumer--we became, well, real-life friends!

Custom order, Jam-making

It's amazing to see what kinds of relationships can start and grow through a sweet little corner of the internet such as CakeSpy. 

I've got to be honest, though, there is another purpose in my writing this: yesterday was Margaret's birthday and it slipped my mind to say Happy Birthday! I promise, though, I thought it.

Custom order - Alice in CakeLand

So, I'm just taking a few moments to share some of the artwork I've created at Margaret's request over the years...and to say thank you Margaret for making my life sweeter, and very importantly--a happy belated birthday to you!

custom painting

Thank you also to every reader / customer who has made my life sweeter!

How to Soften Hardened Brown Sugar

Brown Sugar 1

Recently, I found myself with a dense, hard brick that used to be brown sugar. The idea of shelling out more money for soft brown sugar kind of killed me a little inside, because I hadn't gotten my money's worth out of this sugar. But could it be brought back to life? 

Recalling a tip I'd read about adding an apple slice to the sugar to soften it, I decided to give it a try. I put in half an apple that was bruised and I didn't want to eat out of hand, and in a few days, sure enough, the brown sugar was soft, moistened, and use-able. But how and why did this occur?

I hit the internet to find out. 

According to the Domino Sugar website, "Brown sugar becomes hard when moisture in the sugar evaporates. Therefore, the various methods used for softening brown sugar are intended to return moisture to the sugar."

It makes sense that an apple slice would help in this regard...but why not, say, a slice of pear? It is interesting to note that in the various tips I found online, the two objects suggested to re-moisten the sugar were a slice of white bread, or an apple. 

Brown sugar 2

Unfortunately, I wasn't able to find conclusive evidence of why these two items are most commonly suggested, but I am going to make an educated guess: in the case of the white bread, the bland flavor will not affect the flavor of the sugar; in the case of the apple, any flavor imparted to the sugar would be fairly mild and harmonious. 

Of course, if you don't have a few days to soften your sugar, according to the Domino Sugar website, there are other tried-and-true methods for re-moistening your hardened sugar:

Quick softening method: If you need to use hard brown sugar immediately, remove it from the package into an oven-safe container and heat it at 250-degrees. Watch it carefully. As soon as it’s soft, measure the amount you need right away because it will again harden as it cools. Please use caution. Oven heated sugar is very hot!

Microwave softening method: Place about 1/2 lb. of hardened brown sugar in microwave safe bowl. Cover sugar with two pieces of wet (but not dripping) white paper towels. Tightly cover bowl with plastic wrap. Heat in microwave at HIGH for 1 1/2 - 2 minutes. Divide sugar with fork (sugar will be hot); stir. Again, microwave-softened sugar hardens as it cools so microwave only the amount of sugar you need. Use immediately and use caution as it will be hot. Microwave ovens vary in power; cooking time may need adjustment.

Brown sugar

Time-permitting softening method: Place hardened brown sugar in a tight sealing container.  Cover sugar with two pieces of dampened – not dripping, wet paper towels placed over a small piece of plastic wrap or foil on top of the sugar. Or you can also use a slice of bread to add the bowl of sugar.  Place lid on container and seal tightly. Remove the paper towel or bread after the sugar absorbs the moisture and softens (about two days) and tightly reseal the container. Divide sugar with fork; stir. Sugar should remain soft.

Got another tip? Leave a comment!

Glad Cookie Exchange and Baking Ideas

Glad event

Aren't you GLAD that cookies exist? After all, they make the world better in so many ways. From day-to-day treats to holiday extravaganzas, they have the power to make moments even sweeter.

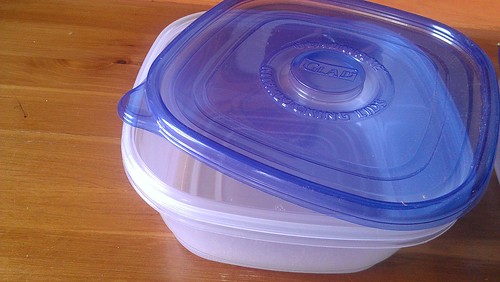
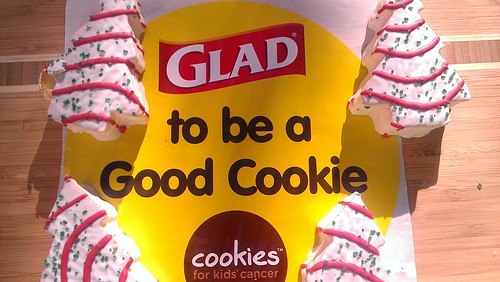
So I was mega-excited to be chosen to host a GLAD "Cookies for Kids' Cancer" cookie exchange. Having been chosen, they provided a stipend for my baking ingredients and sent me a care package of GLAD containers for the giveaway...

Gladness

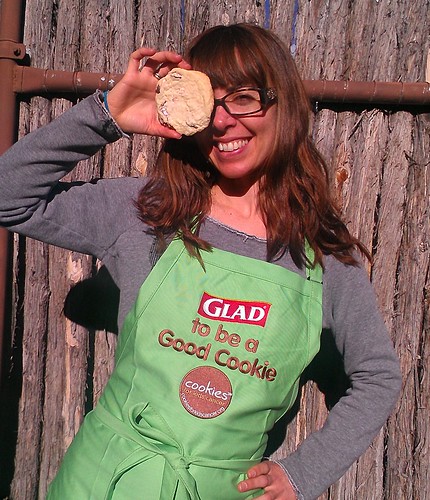
as well as some stickers, promo items, and this snazzy apron:

Cookie

You can find out more about the program at www.cookiesforkidscancer.org--it's a very sweet way to promote a great cause. You too can get in on the fun by exchanging a virtual cookie with a friend at www.glad.com/Glad-Cookie-Exchange. GLAD will donate up to $1.00 to Cookies for Kids' Cancer for each cookie sold, exchanged or given this November and December 2012 – up to $100,000!

So, in case you haven't gotten it yet--good cause. But having established that...let's move on to the good good better than good COOKIES. OH, the delicious things which were baked! It was a great way to share some sweetness with friends.

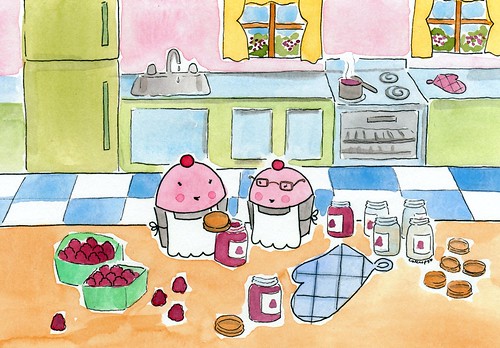
Now, because my crew wasn't completely comfortable with the sale method, we did ours as an exchange. There were about 10 types of cookies total. Everyone got a container, and set forth to filling it with each other's cookies--how sweet, right?

Everyone was told to bring 24 of their cookie, and since there were 10 batches, that means that a total of 240 cookies were exchanged (well, some were consumed right away. I will be honest.) I was honored that many of the guests hit me up for recipe suggestions, and was fascinated to see what people decided on.

In looking at the things people brought, which ranged from classic to creative, I wondered if we could define the hows and whys into several ideas for those who may host their own cookie exchanges this year: things that might act as great tips when deciding what to make! I decided to make this the focus of my post, along with some of my favorite recipes shared during the evening! 

IDEA #1: GO CLASSIC ALL THE WAY. 

Cookie!

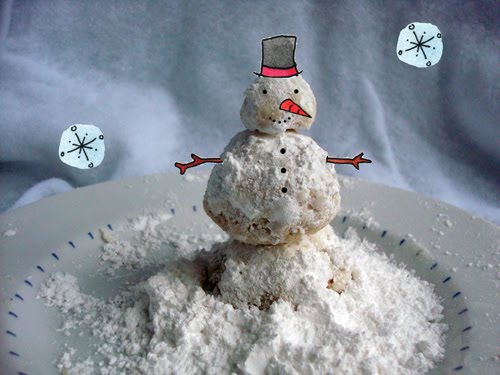
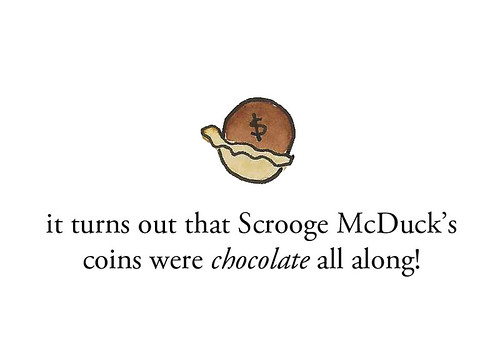
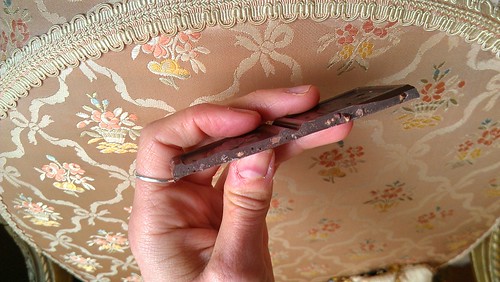
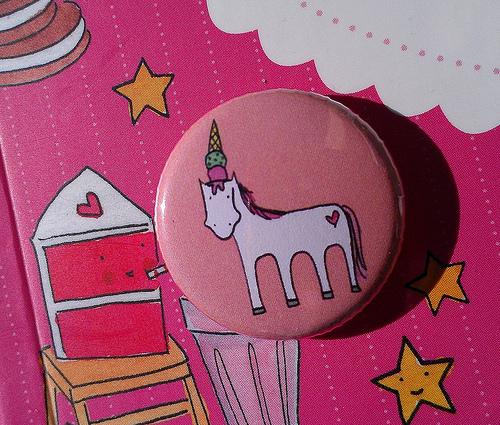
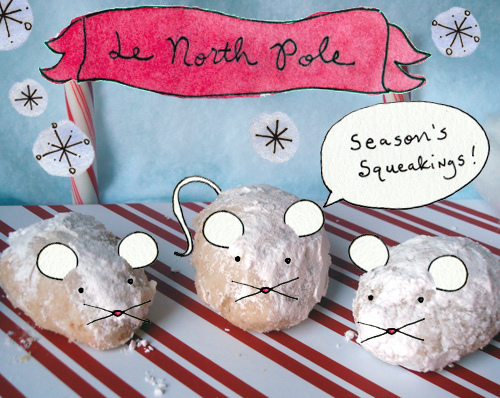
Snowballs. Or Russian Teacakes. Mexican Wedding Cakes. Whatever you want to call them. While their name can vary, what does not is the fact that they are highly tasty and a traditional holiday favorite! This makes them a vital part of any cookie exchange! Of course, I did hear (adorable!) that sometimes these cookies are called Moldy Mice. Which makes this all the more appropriate:

Cookie!

This recipe is just about as simple and as classic as you can get. YUM.

Snowball Recipe

Ingredients

  • 2 cups sifted flour
  • 1/4 tsp. baking powder
  • 1/4 tsp. salt
  • 1 cup butter, softened
  • 1/2 cup confectioners sugar
  • 1-1/2 cups chopped walnuts
  • 1-lb. confectioners sugar to roll cookies in

Directions

  1. Sift flour, baking powder, and salt. Mix butter with sugar until very light and fluffy. Mix in flour mixture. Stir in walnuts. Refrigerate until easy to handle.
  2. Make balls in the palm of your hand by tablespoons. Place on a lightly greased cookie sheet, and bake in a 350 degree F. oven until golden brown, being careful bottoms do not burn.
  3. Place confectioners sugar in a large bowl. Take cookies from oven and gently put into bowl. Carefully, they are hot, toss cookies in sugar until they are coated.

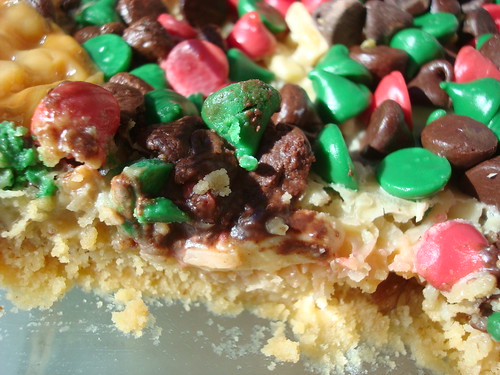
IDEA #2: TAKE A CLASSIC, GIVE IT A TWIST

Christmas Cookies

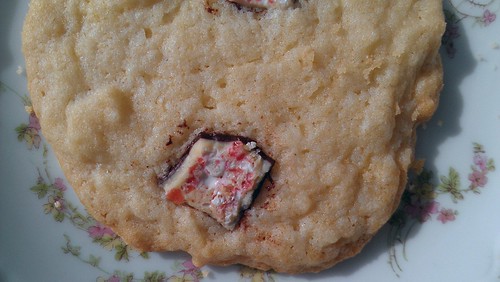
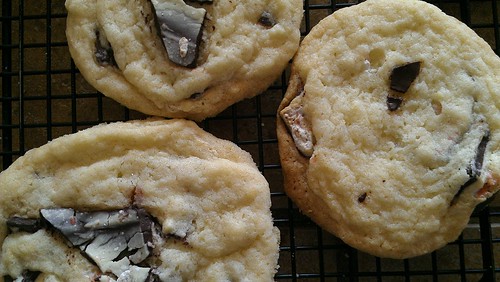
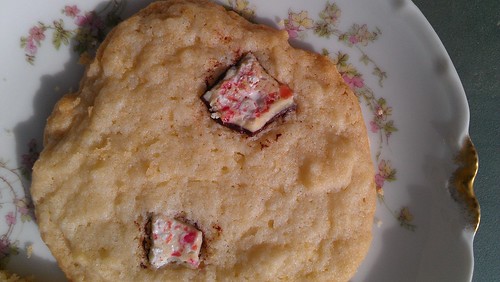
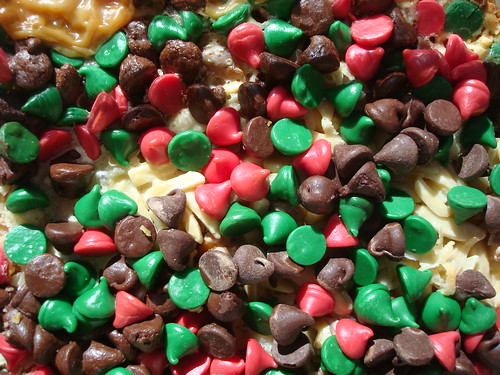
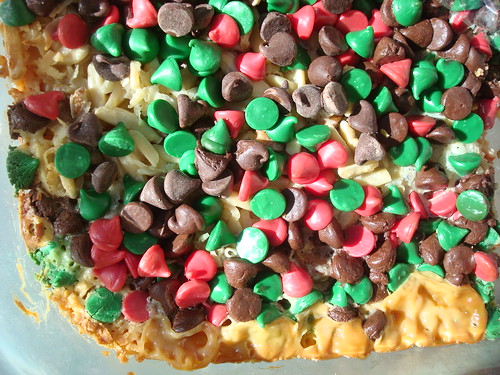
Here's an idea: take a crowd pleaser, such as chocolate chip cookies...but add something unexpected! These cookies have two twists. First, one that is visual: the chips are tricked out! Second, instead of using vanilla extract, my friend Jill had the idea to use peppermint instead! This definitely gave the cookies a highly unexpected flavor. It's funny because on the first bite everyone was like "there's something wrong with these chocolate chip cookies!" but as it turned out it was just unexpected, that minty burst of flavor. But upon bite two, it started to taste pretty good. And then, suddenly, the cookies were gone!

Chocolate Chip Cookies, Ever so slightly adapted from the recipe in Baked: New Frontiers in Baking

Ingredients:
  • 2 cups flour
  • 1 teaspoon salt
  • 1 teaspoon baking soda
  • 1 cup (2 sticks) unsalted butter, softened
  • 1 cup packed dark brown sugar
  • 1/2 cup granulated sugar
  • 2 large eggs
  • 2 teaspoons peppermint extract
  • 2 cups semisweet chocolate chips or swirled holiday morsels such as these

Directions:
  1. In a large bowl, whisk the flour, salt, and baking soda together; set aside.
  2. In the bowl of an electric mixer fitted with the paddle attachment, beat the butter and sugars together until smooth and creamy. Scrape down bowl and add eggs, one at a time, beating until incorporated. Mixture will look light and fluffy. Add peppermint extract and beat for 5 seconds.
  3. Add the flour mixture, bit by bit, mixing after each addition.
  4. Using a spatula or wooden spoon, fold in the chocolate chips.
  5. Cover the bowl tightly and put in the fridge for several hours (Baked suggests 6; I did 2 and they were still delicious).
  6. Preheat the oven to 375 F degrees.
  7. If you want big cookies, use an ice cream scoop to scoop out 2-tablespoon sized balls. If you want smaller ones, use two teaspoons (one to scoop the dough and one to release it). Use your hands to shape into perfect balls and erase any imperfections. Place on prepared baking sheets, leaving at least 1 inch between cookies. Bake for 10-12 minutes for smaller cookies, 12-14 minutes for larger cookies. Make sure to rotate pans at the halfway mark to ensure even baking. They're done when the edges are golden and the tops are just starting to lose their shine.
  8. Remove pan from oven and cool on wire rack. They are great warm, but you could also let them cool, if you're so inclined.
  9. These babies can be stored in an airtight container for up to 3 days. Doubt they'll last that long though.

IDEA #3: HIT UP MOM FOR IDEAS

Snowy Snickerdoodles

Some of us are lucky enough to have moms that are really good bakers. Such as my mom, SpyMom! It's from her that this recipe was donated. While she couldn't physically make the event, she donated this recipe and I believe they'd probably ship quite well in a GLAD container...

Snowy Snickerdoodles

Ingredients

  • 1 cup sugar
  • 1/2 cup butter
  • 1 large egg
  • 1 teaspoon vanilla
  • 1 1/2 cups flour
  • 1 1/2 teaspoons cinnamon
  • 1 teaspoon baking powder
  • 1/4 teaspoon salt
  • cinnamon sugar

Procedure

  1. In a mixer bowl, cream together sugar and butter; beat in egg and vanilla
  2. Combine flour, cinnamon, baking powder and salt
  3. Add to butter mixture
  4. Blend well
  5. Cover and refrigerate 2 hours or till firm enough to roll into balls
  6. Shape dough into small balls about 3/4-inch in diameter
  7. Roll in cinnamon sugar to coat
  8. Set cookies 1-inch apart on lightly greased cookie sheets
  9. Bake at 350° for 10 minutes or till the edges are lightly browned.
  10. Cool slightly on pans, then remove to racks to cool completely.

IDEA #4: SEEK THE ADVICE OF AN EXPERT

Crinkle cookie from Cookie Madness book

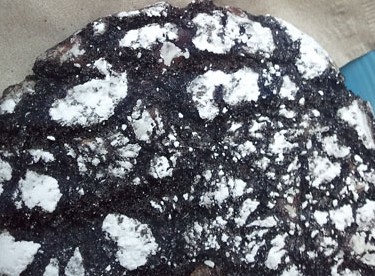
It's never an idea to trust the expertise of a cookie expert. And luckily with Anna Ginsberg of Cookie Madness's new book, The Daily Cookie: 365 Tempting Treats for the Sweetest Year of Your Life, every day is a cookie opportunity. When one of the guests hit me up for ideas for what to bake, I said, why not pick a significant date to you from this book, which has a cookie for every day of the year, with fun facts about why each cookie is appropriate for the day? Well, said friend chose December 13, a date in the future which happens to be her birthday, as well as National Cocoa Day, and baked up some Chocolate Rum Crinkle Cookies from the book. Since she didn't use rum, I guess we'll call them "Chocolate YUM Crinkle Cookies".

Cookies

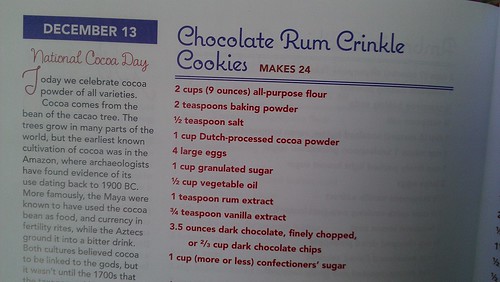
Chocolate Yum Crinkle Cookies, adapted from The Daily Cookie: 365 Tempting Treats for the Sweetest Year of Your Life - makes 24 cookies

Ingredients

  • 2 cups all purpose flour
  • 2 teaspoons baking powder
  • 1/2 teaspoon salt
  • 1 cup dutch processed cocoa powder
  • 4 large eggs
  • 1 cup granulated sugar
  • 1/2 cup vegetable oil
  • 1 teaspoon rum extract (we just used more vanilla instead of this)
  • 3/4 teaspoon vanilla extract
  • 3.5 ounces dark chocolate, finely chopped
  • 1 cup (more or less) confectioners' sugar

Procedure

  1. Mix the flour, baking powder, salt, and cocoa together in a small bowl; set aside.
  2. In the bowl of a stand mixer fitted with the paddle attachment, or in a large mixing bowl using a handheld electric mixer, beat the eggs on medium-high speed for about 2 minutes or until light. Reduce speed to medium and gradually add the granulated sugar. Using the lowest speed of the mixer or with a mixing spoon, stir in the oil and extract(s). Add the flour mixture and stir until incorporated. Remove from the stand mixer (if using) and stir in the chocolate. Cover the bowl with plastic wrap and place in the freezer for 40 minutes, or until firm enough to handle.
  3. Preheat the oven to 350 degrees F, and place a rack in the upper third of the oven. Line two baking sheets with nonstick foil or parchment paper.
  4. Pour or sift the confectioners' sugar onto a plate. Scoop up heaping tablespoons of cold dough and shape into 1.5 inch balls. Roll the balls in the sugar to coat generously. Arrange the balls 2 1/2 inches apart on the prepared baking sheets. Bake one sheet at a time for 10 minutes or until just until they appear puffy and "set". Immediately transfer to a wire rack to cool completely.

IDEA #5: GO COLORFUL

Christmas cookies

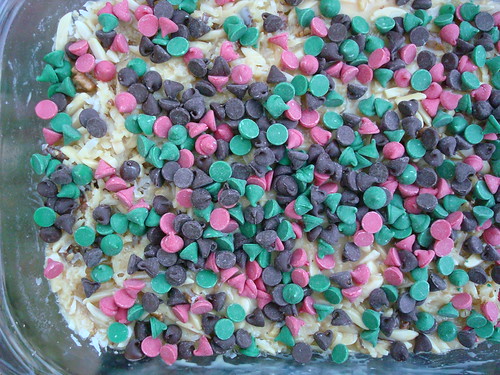
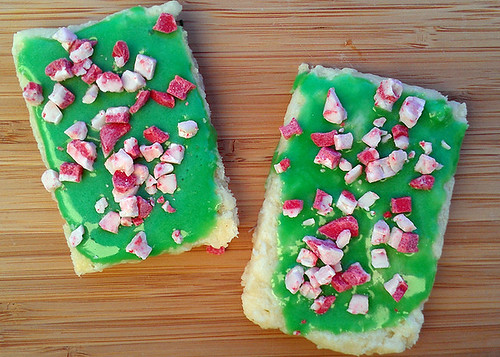
Why not deck the halls with holly jolly color? After all, people "eat" with their eyes first, and this brightly colored cookie is bound to make people smile. Christmas cookiesIt was the recipe that I contributed to Go Bold With Butter recently, so I will let you click over there for the recipe, but basically it's an adaptation of this simple butter cookie. Yum. These are guaranteed to draw people's eyes to the cookie plate, and they will keep beautifully in airtight containers!

Christmas cookies

Click here for the recipe.

IDEA #6: CHOOSE HANUKKAH SWEETNESS

Mandelbrot

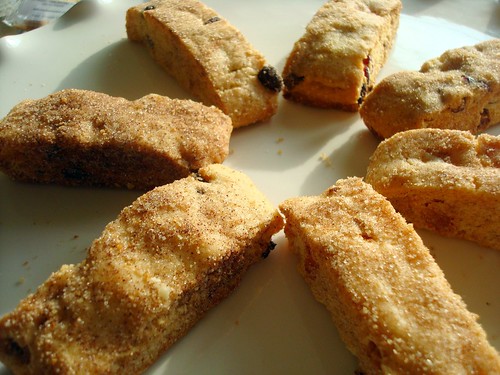
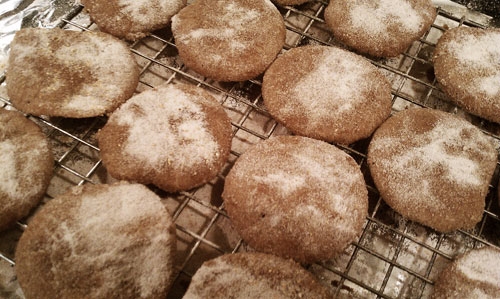
While I do not personally celebrate Hanukkah, through the years and experiencing some of the customs through friends who do, I have truly come to appreciate a lot of the delicious sweets from those "eight crazy nights". Though mandelbrot, which is somewhat like biscotti, is delicious any time of year, Cake Gumshoe Melissa reports that her (not super-traditional) family always enjoys them especially during this time of year. I think you will, too!

Cinnamon sugar Mandelbrot

Makes 30-40; recipe adapted from theshiksa.com

  • 3 cups all purpose flour
  • 1 teaspoon baking powder
  • 1/2 tsp salt
  • 1 cup vegetable oil
  • 1 cup sugar
  • 3 eggs
  • 1 tsp pure vanilla extract
  • 1 cup semi-sweet chocolate chips (you can sub chopped nuts, candied fruits, etc.)
  • Ground cinnamon and granulated sugar for dusting

Procedure

  1. Sift together the flour, baking powder and salt; set to the side.
  2. Mix together oil and sugar until combined, then add eggs one at a time. After the eggs are combined, add the vanilla.
  3. Add the dry ingredients slowly to the sugar/egg mixture.
  4. Once the dough is smooth and sticky, fold in the chocolate chips.
  5. Cover the dough with plastic wrap and place it in the refrigerator for at least two hours, or overnight.
  6. When ready to proceed, oil your hands and form 4 long rows with the dough onto a parchment-lined cookie sheet. Each strip of dough should be 3-4 inches wide. Leave space for spreading as these will spread during baking.
  7. Bake at 350 for 25 minutes. Meanwhile, in a flat shallow dish, combine ¾ cup of sugar with enough cinnamon to turn the mixture light brown. 
  8. Take the mandel bread out of the oven (they are not finished yet). Reduce oven temperature to 250 degrees F. Slice the mandel bread into slices, like biscotti. Maybe like an inch thick.
  9. Roll each cookie into the cinnamon sugar mixture. Put the pieces back on the cookie sheet on their sides.
  10. Bake for another 15 minutes; if you like them softer, you might want to take them out at 12 minutes or so, as the longer they bake, the crispier they will be. Let cool completely on a wire rack; Store in an airtight container.

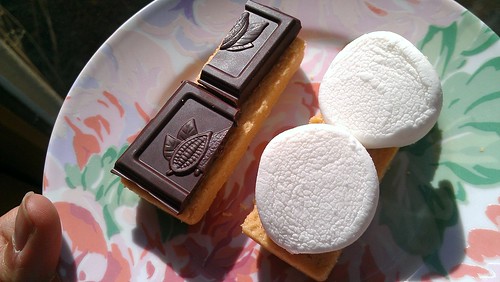
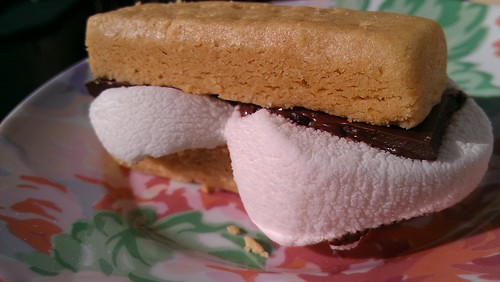
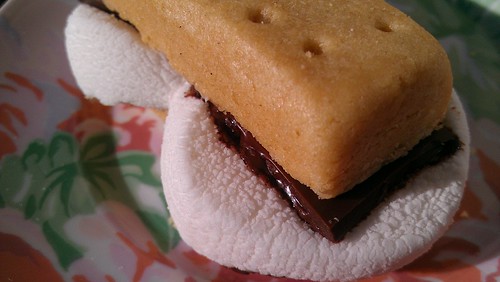
IDEA #7: POP OUT OF THE MOLD

Holiday Pop-tarts

Want to delight and impress your cookie exchange guests? I have three (is a hyphenated word like 2 words or one and a half?) words for you: HOLIDAY POP-TARTS. Yes indeed, these holiday-hued babies are bound to make your offering the most memorable. 

Homemade Holiday Pop Tarts

Makes 6-8 tarts, maybe even more, depending on size; adapted from wonderful, wonderfulCulinary Concoctions by Peabody

For the crust
  • 1 1/2 cups flour
  • 1/2 teaspoon salt
  • 1/2 cup (1 stick) butter, softened and cut into cubes
  • 3 tablespoons cold water

For the filling

Jam, about 1 heaping teaspoonful per pastry (your choice of flavor; I used blueberry)

For the icing

  • 1 cup confectioners' sugar, sifted
  • heavy cream, to thin (you could use milk...but I like cream)
  • food coloring, if desired
  • colored sprinkles or mint chips for garnish

Procedure

  1. Preheat oven to 450°F. Line a baking sheet with parchment paper; set to the side.
  2. Combine flour and salt in a large bowl. Add butter and blend with a fork, pastry cutter, or your impeccably clean hands. Blend until the mixture is fairly coarse. Add the water, bit by bit, gently mixing the dough after each addition, until the dough is cohesive enough to form a ball.
  3. Place dough on a lightly floured surface and roll into a rectangle, about 1/8 inch thick. Cut out rectangles approximately the size of index cards (3x5 inches), or smaller if you prefer a more modest portion (I didn't). Make sure you have an even number of cutouts. I think that mine might have been a little thicker than 1/8 an inch, but I ended up with 12 rectangles (for 6 pastries).
  4. On half of the rectangles, place a small spoonful of the jam of your choice in the center. You don't want it to be too thick or the top crust will mound on top of it.
  5. Place the remaining rectangles of dough on top of the ones with jam. Crimp all four edges by hand or with a fork to ensure that your filling won't ooze out. I also poked the top of each with a fork, to vent them.
  6. Place the tarts on your prepared baking sheet, and bake for 7 to 8 minutes, or until light golden on the edges. Remove from the oven and let them cool completely.
  7. While the tarts cool, prepare your icing; make sure it is fairly thin but not so thin that it will just drip off. If desired, tint with food coloring. Once the pop tarts are cool, drizzle it on top. Garnish with sprinkles or holiday-hued treats.

IDEA #8: JUST BE HONEST, YOU'RE LAZY

So GLAD

Not a baker? Nobody's going to be fooled if you show up with fancy-looking treats and try to pass them off as your own (well, unless perhaps you use this handy guide). Sure, you *could* get a slice and bake tube cookie, but yeah, that's just too hard. But you know what? Don't sweat it. Just head to the store and pick up SOMETHING so you're not empty handed! Because as much as we love homemade cookies that came from the result of love and hard baking labor, we mostly want to gather together. So go ahead and buy some Little Debbie Christmas Tree Cakes--we won't judge you. Too harshly. Just be sure to give a really big donation to the cause after, please!

Cakes

Store-Bought Snack Cakes

  1. Go to the closest grocery store (not a co-op or Whole Foods please, they won't have the kind of treats we're talking about here).
  2. Go to the snack cake aisle, where you'll find Twinkies and stuff.
  3. Buy the most holiday-tricked out ones you can find. In the picture, you'll see Little Debbie Christmas Tree Cakes.
  4. Return home.
  5. Unwrap, put in a GLAD container. Go to the cookie exchange, and hold your head up high. Give a big donation to the GLAD cause after!

I have partnered with The Glad Products Company through DailyBuzz to help promote their Food Storage products. I have been compensated for my time commitment to work with this product. However, my opinions are entirely my own and I have not been paid to publish positive comments. Thank you GLAD!

Baker's Dozen: A Batch of Sweet Links!

Billionaire's Shortbread Recipe for Peanut Butter and Company

Billionaire's shortbread

Millionaire’s shortbread pretty much rules. I mean, it’s shortbread, already buttery bliss all by itself, rendered awesomer by topping it with caramel and chocolate for what amounts to a triple-threat of delicious. It makes for a treat so rich you can kind of see where it gets its name. Billionaire's shortbread

But of course, with inflation being what it is, why stop at a million when you can have a billion? And so I present Peanut Butter Billionaire’s Shortbread, wherein two types of peanut butter is added to it and its awesome quotient is upped exponentially.

This is my latest delicious creation for Peanut Butter and Company, too--I promise, you will enjoy eating this stuff.

Ingredients for billionaire's shortbread

You can find the recipe and more photos here!

The World is Magical and Sweet

Fork

This is not a fork in the road.

It is an arrow, pointing you toward wonderful things. Because (and perhaps you know this already)...the world is:

Made of magic

And in this world, if you look closely, you might just look past the ordinary...

Basement

and see the extraordinary.

Basement

Or you might turn your point of view around...

Cone

and see things are really quite sweet.

Cone

You might look at something you see every day... Theatre

in a new way. 

Theatre

Or you might think... "I never thought of it that way!" Whoa

Or you just might find yourself where you least expect it!

CakeSpy

Every day is an opportunity to find sweetness...both figuratively and literally!

Magic

Just a reminder to have a magical and sweet day.

Love, CakeSpy

Do This: Sugar Cookies with Peppermint Bark

Peppermint Bark Cookies

There really is no reason to improve sugar cookies, because they're already perfect.

But...sometimes even a perfect food likes to get festive for the holidays.

So recently, when I was baking some sugar cookies (because, you know, I was hungry), I thought: why not add a heaping handful of this peppermint bark that Willamette Valley Confectionery sent me? 

Willamette Valley Confectionery

While of course the bark and the cookies were both good on their own, I figured it might taste good to try them together.

Peppermint Bark Cookies

And so, I did.

And when the cookies baked up, they were a wonderful thing to behold. They were awfully pretty, with chocolatey peppermint hued thingies poking through the creamy coloring of the cookies.

But they were even better to put in your mouth.

You know how sugar cookies are awesomely buttery all over, soft on the inside, and lightly crunchy on the outside? Well, add an essence of peppermint to the whole thing, but a nice one, not a toothpasty one. A refreshing minty hint paired with all that buttery flavor? Oh my, were they ever a joy to munch and crunch upon.

So really, this is a long and poetic way of giving you a good cookie tip. Coarsely chop about 2 cups' worth of peppermint bark and fold it into your favorite sugar cookie batter before baking. I'm pretty sure you'll thank me.

Peppermint Bark Cookies

Here's the recipe I used.  

Sugar Cookies with Peppermint Bark

Adapted from Pop Rocks Cookies

  • 1/2 cup (3 1/4 ounces) butter
  • 2/3 cup (4 3/4 ounces) sugar
  • 1/4 cup (2 ounces) buttermilk
  • 1 tablespoon vanilla
  • 2 cups (8 1/2 ounces) King Arthur Unbleached All-Purpose Flour
  • 1/2 teaspoon baking soda
  • 1/4 teaspoon salt


  1. In a large mixing bowl, beat together the butter and sugar till smooth. Add the buttermilk and vanilla, again beating till well-combined. The mixture may look a bit curdled; that's OK.
  2. Add the flour, baking soda and salt to the wet ingredients, and beat until the mixture forms a cohesive dough. Fold in the pieces of peppermint bark. Reserve some pieces to press on top of the cookies (they look cuter that way).
  3. Drop the dough in round blobs onto a parchment-lined or greased baking sheet. They should be a bit bigger than a ping-pong ball, a bit smaller than a golf ball. Using a cookie scoop (or, if you have one, a small ice cream scoop, one that will hold about 2 level tablespoons of liquid) makes this task extremely simple. Leave about 2 inches between the dough balls, as they'll spread as they bake. Let the cookies chill (on the sheet) in the fridge for about 30 minutes before baking. They'll be nicer looking than mine, which I didn't let chill and they spread quite a bit.
  4. Bake the cookies in a preheated 350°F oven for about 12-14 minutes, or when they are just starting to brown. Remove them from the oven, and cool on a rack.

Baker's Dozen: A Batch of Sweet Links!

Zebracorn and rainbow cake

My kind of cake pop: a two-parter, and cute to boot!

Here's a snowy snickerdoodle recipe from my mom.

How to pie someone in the face: thankfully, there is a tutorial.

Who invented baking powder? Shed some light, here.

Cupcake...chalk? How sweet! Perfect for doing stuff like this. (pictured: side)

Cute: Christmas Tree macaroons!

I googled "Christmas Dessert Pizza" and I found this. Doesn't it look good?

I am not gluten-free, but I occasionally enjoy cookies that are.

Curious about Native American recipes? You can find some here.

Book of the week: an adorable volume by The Novice Chef entitled Mini Donuts: 100 Bite-Sized Donut Recipes to Sweeten Your "Hole" Day.

I like it: Little chocolate cakes with rosewater frosting.

Pistachio cream cheese sugar cookies!!!!

OMG: you could still get free shipping on your order over $25! Use code AWESOME12 at cakespyshop.com.

A World in Which Chocolate Bars Cost $18

Expensive s'more

Recently, I was offered a sample of a new chocolate bar.

It's called Good & Evil, and it's a bar with a serious pedigree: it was designed by big names such as Eric Ripert, Tony Bourdain and Christopher Curtin of Éclat Chocolate. As I was informed, the bar is "made from extremely rare Peruvian cacao beans and studded with nibs, will make its official debut at the New York Chocolate Show on Friday, November 9."

Pricey chocolate

Oh, and did I mention...it's $18 per bar?

Yes. You heard me. This bar of chocolate is $18 at eclatchocolate.com

Would I like a sample? Heck yes. I want to know what an $18 chocolate bar tastes like!

Expensive chocolate

But while I waited for the bar to arrive, I had a good few days to fantasize about a world in which chocolate bars are $18. What else would happen in such a world, I wondered? Well, I was pretty sure that in this brave new world...


Currency Engagement ring doughnut Cake House Candy necklaces Pearl sugar Scrooge McDuck

Or maybe...just maybe...a world in which there are $18 bars of chocolate is an opportunity to make the most motherfluffin' amazing s'more of your life.

Which is exactly what I did when I received the sample. Since this was a fancy s'more, I decided to use some of my leftover Walkers shortbread. A chocolate like this was worthy of something more delicious and fancier than a commercial graham cracker, in my opinion. But the marshmallows...I just used regular jet-puffed ones. Don't judge me.

S'more

You guys. It is possible that this was the best s'more ever made in the history of the world. It was buttery and expensive and sweet, all at once. The cheap marshmallows made it a sort of "silver spoon and paper plate" type of experience.

S'more

I don't think I can ever eat a "regular" s'more ever again. Gosh, is this like flying first class--you can never go back to coach, comfortably?

S'more

Oh, I'm kidding. The chocolate is very, very good--but I'll be honest, I don't know if I ever would have tried it if it hadn't been offered. But I sure enjoyed it once they did offer it to me.

Pricey chocolate

It was a rather nice way to taste the "sweet life". Want a taste? It's available for $18 on eclatchocolate.com if you are curious.

Sweet Treats from Secret Marmalade

Dark Chocolate Sea Salt brownies

Their name is Secret Marmalade, but I want to go public with my love.

Let me tell you how it all happened. It all began over Twitter, where Secret Marmalade, a mail-order and special-order baking company based in California, asked how they might send samples to CakeSpy.

Well, let me tell you my little fingers couldn't type my address fast enough once I contacted them through their website. And a mere week or so later, along came a parcel of the most wonderful sort: one filled with candy and brownies.

Now, technically, although we're Twitter friends, we've never actually met in real life. Does this mean we're strangers? And in that case, was I accepting candy from a stranger?

Well, if that *is* the case, then my response is this: Avec plaisir. 

Candy was first up: Gingerbread Caramels. Believe it or not, I've never seen anyone do this (have you?) but I am so delighted that they did, because this is a killer flavor combo. Delightfully creamy-sticky caramel with a spicy kick? I love this stuff. Ideal gifting territory. And (cute) look at the ingredients!! They all had something like this--the last ingredient was "whimsy" or "joy" or something similarly cute.

Secret Marmalade

Next up: the brownies. I was alerted that I should "taste gently" as the brownies had arrived on Friday as opposed to the anticipated Wednesday. I can taste gently.

So, ok, they had a slight crisp around the edges, but they were not over the hill. The first one I tried, the dark chocolate sea salt (pictured top and below), which, by the way, did not have eyes at the time I tasted it, was pretty amazing. It tasted strangely familiar, though, and that's when I realized: this was the gourmet, grown up version of the Little Debbie Fudge Brownies I so adored growing up (and, you know, now). I say that as a very high compliment. 

Next up: the Dark Chocolate Spicy Bourbon. How could you not love a brownie that looks like this?Dark Chocolate Spicy Bourbon Brownies

Spicy with an almost caramelly tone, this was a very nice brownie. Good for adventurous sorts. 

Finally, Peanut Butter Brownies.

With a good brownie base, how could this chocolate nirvana not be improved with peanut butter? A fine version of a classic combination.

Well, Secret Marmalade has all these things and more--hit them up at secretmarmalade.com!

Almond Tuiles with Extra Virgin Olive Oil

Tuiles

If you're busting with sweet curiosity like I am, you're probably looking at the photo above and thinking: "what exactly are those thingies?".

Those lumpy little things are in fact a rather exquisite and refined cookie known as the Tuile.

Now, to say "Tuile", I have a cue to indicate how you should pronounce it. It rhymes with "wheel"; now, say it in your Frenchiest voice. 

Tuile of fortune

I googled "translation of tuile" and the resulting word was "tile". Perhaps this refers to the gentle shingle-like appearance the almond bits give the cookies? Whatever the meaning, these tiles are tastier than your typical siding or bit of caulked home decor.

The recipe was adapted by Alice Medrich (who you may recall I interviewed a while back) who adapted a recipe from The Essential James Beard Cookbook: 450 Recipes That Shaped the Tradition of American Cooking, with olive oil incorporated (you know how I love olive oil and sweets!). Here's what she has to say about it:

Tuile

Crispy crunchy and elegantly thin, these almond cookies were adapted from a recipe by James Beard, using California Olive Ranch Arbequina olive oil instead of butter, and with the addition of a bit of lemon zest and extra salt for a contemporary balance of flavors. Classic tuiles are cooled over a rolling pin to resemble the roof tiles they are named for, but you can skip that step and make them flat if you like, or use my shortcut for making curved tuiles.

Anyhow. As a tuile newbie, I found this recipe decidedly user-friendly. The olive oil makes them seem fancy, so if you have foodie people to impress this holiday season, definitely bring these cookies on. Gently sweet, they'd be just as at-home on a cheese plate as they would paired with ice cream. Now that's versatile.

The recipe below has my notes in BOLD. 

Ingredients Add Almonds Batter Cookies Cooling

Almond Tuiles with Extra Virgin Olive Oil

Makes about thirty 3- inch cookies I got 24 but mine were more like 3.5 inches

Ingredients:

  • 5 tablespoons (60 g) California Olive Ranch Arbequina extra virgin olive oil, plus more for the pan
  • 1/2 cup (100g) sugar  
  • 1 ½ teaspoon grated lemon zest
  • Scant ¼ teaspoon salt
  • 2 large egg whites
  • 1/4  (30 g) sifted* (before measuring) unbleached all purpose flour
  • 1 cup  (90 g) sliced almonds

*if you measure with a scale, there is no need to sift flour before measuring

Equipment:

  • Baking sheets
  • Heavy-duty foil (optional)
  • A rolling pin or cylinder for shaping ( optional)

Procedure

  1. Grease baking sheets with olive oil, or line them with foil, dull side facing up, and grease the foil.
  2. Mix the olive oil, sugar, grated zest, salt, and eggs whites together thoroughly (I used a whisk).  Add the flour and stir until well blended. Stir in the almonds.  Let the batter rest for while the oven heats or for at least 15 minutes.
  3. Position a rack in the center of the oven and heat the oven to 325 degrees.
  4. Drop teaspoons of batter 2 inches apart on a baking sheet.  Use the back of the spoon to smear the batter into a 2 ½ inch round. Bake, watching carefully, for 12-16 minutes, until the tuiles are deep golden brown at the edges and paler golden brown in the center. (If the cookies are not baked long enough, they will not be completely crisp when cool.) I was able to fit 8 cookies per sheet.
  5. As soon as you can push a slim metal spatula under the cookies without destroying them, transfer each cookie to a rolling pin (for curved cookies) or a cooling rack.  If using foil, you can simply slide the foil sheet onto a rack to cool flat, or (for curved) tuiles, grasp the edges of the foil when the sheet comes from the oven (without touching the hot pan or the cookies) and roll it into a fat cylinder, gently curving the attached cookies like potato chips (I think: cannoli shells!).  Crimp or secure the foil with a paper clip. When cool, unroll the foil carefully and remove the tuiles. Flat or curved, tuiles are always easiest to remove from the foil when they are either very hot or completely cool. Do not let them cool too much or they will crack when shaped. I found that it was easiest to bake one sheet at a time for this reason. I used a piece of foil around the round dowel-y part of several wooden spoons to curve them - I found that the curve around a rolling pin was awkward and they tended to break when cooled because they didn’t stack as well as the more curved, cannoli-shell esque ones.
  6. Repeat until all of the tuiles are baked.  To retain crispness, put the cookies in an airtight container as soon as they are cool.  May be stored airtight for at least 1 month.

Post-Thanksgiving Pumpkin Pie with Shortbread Cookie Crust

Pumpkin shortbread pie

It's considered good form to know when it's time to leave a party.

But what if you stayed and it ended up being mega-fun?

Sometimes erring on the side of caution is just no fun. I figure this is probably true when it comes to baked goods, too. Even though Thanksgiving was last week and in many people's minds, Pumpkin Pie Season has come to an end, I guess I'm just not ready to let the good times end. I still want to get high on pie.

...aaaand, I happened to have an extra can of pumpkin. So I decided to make a sort of cookie-pie hybrid with all of those Walkers shortbread cookies I still have on hand (they sent me samples and I've already made Million Dollar Shortbread Bars and Holiday Magic Bar Cookies).

So I followed a basic graham cracker crust recipe, but used crushed-up shortbread cookies instead. And then I filled it with my favorite (simple) pumpkin pie recipe, with a dash each of cinnamon, nutmeg, and cardamom. I sprinkled the top with almonds and baked it up. When it came out of the oven, I thought what the hey--and sprinkled it with more shortbread bits.

Pumpkin shortbread pie

Now, I've got to say, even after Pumpkin Pie Prime Time, this pie definitely knew how to warm up a cold winter night. Impatient, I served it still slightly warm--the sweetened condensed milk helps it stay kind of solid even while slightly warm--and topped with some ice cream which promptly began a beautiful melting process. Good Thanksgiving Spirt of the Mighty was this thing good! This is a fantastic pie-to-cookie-season hybrid. Enjoy. 

Pumpkin shortbread pie

Pumpkin Pie with Shortbread Cookie Crust

For the crust

  • 2 boxes crushed Walkers Highlander shortbread (or similar)
  • 3 tablespoons melted butter

For the filling

  • 1 can unsweetened unspiced pumpkin puree
  • 1 can (14 ounces) sweetened condensed milk
  • 2 eggs
  • a mighty dash of cinnamon
  • nutmeg and cardamom to taste
  • A handful of almonds, and a few more crushed shortbread cookies, for topping

Procedure

  1. Preheat the oven to 350 degrees F.
  2. In a medium bowl, stir together the cookie crumbs and melted butter. Press into the bottom and up the sides (as much as possible) of a 9-inch pie plate.
  3. In a large bowl, mix together the pumpkin, sweetened condensed milk, eggs, and spices until smooth and incorporated. Pour into the pie plate on top of the crust, taking care not to disturb the freshly pressed crust.
  4. Sprinkle the almonds on top. I added the shortbread cookies AFTER baking, but I don't think it would hurt to add them before baking.
  5. Bake for 30-40 minutes or until just jiggly in the center but set on the sides. 
  6. Let cool as much as you can before serving.

A Sweet Introduction to the Dundee Cake

CakeSpy Note: this is a guest post from Cake Gumshoe Corina, who was kind enough to introduce me to this wonderful holiday cake!

There’s Something about the Dundee Cake... 

“There’s something about Mary”...  I am sure everybody remembers this Cameron Diaz film that is meant to make one smile, laugh and think more of the beauty of this simple name: Mary. One could say something similar: There’s something about Scotland. Indeed, there’s the breathtaking landscape, the jolly people, the scotch, the kilts and the Dundee cake.  

Also known as the Scottish Christmas Cake, the Dundee cake became popular at the end of the 19th century, though the roots are even older than that. Fruit cakes already existed in Scotland. While children may enjoy a cake with proper Christmas decorations, adults will find the combination of cake and whiskey simply irresistible. It’s light, with a crumbly texture and a great alternative to the luxury cakes filled with buttercream.

But how did it all start?

One story says that Mary Queen of Scots did not like cherries in her fruit cakes, so almonds had to be used instead. Another story tells us that what we now enjoy as a fine, luxury Christmas cake, was initially a mass produced cake by the marmalade company called Keiller’s. Keiller’s marmalade is believed to have been the first commercial brand of marmalade produced in Dundee, Scotland. Not that related to our Dundee Cake, the marmalade story is interesting enough to be mentioned.

So, a humble Dundee grocer, James Keiller, took advantage of a Spanish ship taking refuge from a winter storm in Dundee harbour. The ship was loaded with Seville oranges so he bought a large quantity of oranges for a paltry sum. He wanted to sell them, make some profit, but couldn’t, as they turned out to be rather bitter, so his wife decided to use them. That’s how marmalade became popular.

Many years later, a marmalade factory was opened in Dundee. And while the Keillers may not have been the authentic creators of the Dundee Cake, they definitely made it commercially available.

The main ingredients are: flour, butter, caster sugar, mixed peel, currants, raisins, sultanas, eggs, lemon juice, a little bit of milk, almonds and whiskey.  There are quite many recipes that are worth trying; a classic one can be found here.  

But the most important thing to remember is the use of whiskey. Some recipes come up with alternatives like brandy, or other spirits, but the authentic Dundee cake is the one that uses Whiskey. So make an effort and try to use this ingredient. Also, remember to soak the fruit at least a day before. The better soaked they are, the more intense you can feel their scent and aroma.

If you want a more special Christmas, you should really try a Dundee cake, or a British Christmas Pudding. And if you are not in the mood for baking, you can always pay a visit to Dunn’s Bakery, a family owned British bakery that started back in 1872. They use traditional British recipes handed in from generation to generation and make sure that the art of baking still remains an art.

Photo: Dunn's Bakery. To find Dunn's, you'll have to go to England and find them at 6 The Broadway, Crouch End, London; however, all of us can find them online here!


Holiday Magic Cookie Bars with a Shortbread Crust

Magic Cookie Bars

It's been days, absolutely days, since the Thanksgiving feast, and you're looking awfully skinny.

Luckily, we have officially entered Christmas Cookie Season, so it won't be hard to remedy this situation. My esteemed sugary suggestion? Holiday Magic Cookie Bars with a Shortbread Crust. 

Baked

Now, if you already know what a Magic Cookie Bar (or 7-layer bar, or Hello Dolly Bar, etc) is, then you know that these decadent bar cookies, made with a buttery graham crust topped with a slurry of condensed milk, nuts, chocolate and/or butterscotch morsels, and coconut, are pretty much heaven on earth.

But there's always room for more magic, right? 

I got the idea for these bars when I spied Nestle Toll House Holiday Morsels (have you ever seen them? I hadn't!) in the grocery store, accompanied by recipe cards. Naturally I thought the bars would look adorable all dressed up for the holidays, and considering I still had a ton of shortbread from Walker's Shortbread (who sent me samples, and with which I've already made one of my new favorite things, Million Dollar Shortbread Bars), I decided to do a recipe mashup. 

Shortbread

And I can now report that yes, the bars get even better when you swap the graham crackers for crushed-up shortbread cookies in the crust. This magical union of shortbread, butter, and all of the delightful toppings makes for a sort of no-holds-barred extreme richness on all sides that will make your mouth and soul happy.

These are an ideal morsel for a cookie exchange or holiday party, as they're decadent to eat and festive to look at, too. As for the coconut haters? Sorry, but they're just not the same without!

Here's the recipe, adapted lovingly from "Yuletide Layer Bars" by Nestle Toll House.

Ready to bake Yum

Holiday Magic Cookie Bars with a Shortbread Crust

Makes about 24 - Active time 10 minutes, total time 1 hour 30 minutes, includes cooling

  • 1/2 cup (1 stick) butter
  • Shortbread crumbs (about 2-3 boxes' worth of Walkers Shortbread (I used this kind); less for a thinner crust, more for a nice fat crust)
  • 1 1/2 cup chopped nuts (I used a mix of almonds and walnuts)
  • 1 1/2 cup flaked coconut
  • One bag Nestle Toll House Holiday Morsels
  • 1 can (14 ounces) sweetened condensed milk

Procedure

  1. Preheat oven to 350 degrees F
  2. Melt butter in a 13x9" baking pan in oven; remove from oven. Sprinkle shortbread crumbs over the melted butter; stir well, and press onto bottom of the pan (it might get hot, so press with a sheet of waxed paper or the back of a rubber spatula). Sprinkle the nuts and coconut (make sure they are evenly distributed). Gently, so it doesn't disturb your carefully laid-out toppings, pour the sweetened condensed milk evenly over top in an even layer. If you need to distribute the milk, tilt the pan rather than stirring, as the crust might be torn up if you are too vigorous. Sprinkle the morsels on top.
  3. Bake for 25-30 minutes or until light golden brown. Transfer to a wire rack to cool completely before slicing into bars with a very sharp knife.

Southern Belle Cupcake from Dream Cakes Gourmet Cupcakes, Santa Fe

Dream Cakes, Santa Fe

Sometimes, a cupcake makes you want to purr. 

This is an experience I had recently (as in, there are probably still cake crumbs on my shirt) at a place called Dream Cakes Cupcakes in Santa Fe, New Mexico. 

The retail space is small, tucked in a mall just off of the city's Plaza (downtown area). It is somewhat unassuming when you walk in, and the prices are somewhat hefty--$4.50 per cupcake. 

But the cupcakes are serious fatties--I don't like sharing cupcakes (at all) but here's one that I'd consider cutting in half and saving part 2 for later (sort of like...sharing with my future self). Because it's not quite 2 times the size of a regular cupcake, but 1.6 times the size of a regular cupcake. 

This picture (from their facebook page) may not portray the size, but it will show you the unusual square-ish shape they have.

Here's the menu.

Menu, Dream Cakes

The menu is pretty immense, about 50 flavors, but only certain ones are available daily. Generally, those will include their two bestsellers, the Chocolate-chocolate cupcake (I forget the name) and the "Armadillo"--the red velvet. I wanted to get the "Santa Fe" - a cornbread cupcake with green chile topped with a honey buttercream--but alas they were out for the day. The friendly man behind the register removed that flavor from the daily menu after he realized this cupcake was not in attendance.

He did give me a frosting shooter to soothe my broken heart.

So I went for my second choice--the "Southern Belle", a pecan cupcake with praline filling topped with cream cheese frosting. 

Looking into the Chinese takeout-style container (filled with cupcake!) this is what I saw. The man behind the counter (one of the owners) commented that he thought it was the prettiest of their cupcakes, and I agree that it was quite a looker. I didn't want to shut the lid for fear of disrupting the frosting.

Dream Cakes, Santa Fe

I dug in to the container, using a fork. 

And after one bite, I wanted to go back and demand that they stop stuffing their cupcakes with crack, because that's just illegal.

Dream Cakes, Santa Fe

OK, so the cupcakes are not stuffed with crack. But this one had an unmistakably buttery, rich vanilla birthday cake-y flavor, studded with delicious, sweet-salty praline gobs. It was good enough based on these merits, but add the cream cheese frosting and you have a combo that can make CakeSpy swoon.

I'll confess: based on the tiny interior and the prices and location, I had been slightly wary about this place as a tourist trap. But now that I have been, I must say that I am very impressed, and I am looking forward to going back and trying at least a baker's dozen more flavors.

66 E. San Francisco Street, Santa Fe NM; find out more info here.

Cake Byte: New Pin Design for Sale!

Here's a sweet little bit of news: there's a new pin design for sale in the CakeSpy online shop!

I created this pin for one of my wholesale accounts, Salt & Straw Ice Cream in Portland, OR; but you, two, can buy into the magic, even if you don't live in Portland!

You can buy the pins online here.

Of course, I'd be remiss if I didn't remind you that there are also some other great products in the store (including my book, although you could also enter to win a copy here), and through tomorrow, all orders over $25 will ship for free if you use the code AWESOME12 !

Once again: shop online here.

Baker's Dozen: A Batch of Sweet Links!

Use your Thanksgiving Pie leftovers in cinnamon rolls!

Or put your leftovers in a shake! YEAH!

Or go classy and make these cranberry sauce bar cookies.

Sweet guilty pleasure: Honolulu cookies.

Pie-tastic: San Francisco's finest pies.

My new favorite thing: Apple Cake Crisp.

Dessert with eggplant? I am intrigued.

I need--don't want, NEED--this Poppyseed Cake.

Win a copy of my book! (Or, buy my book! CakeSpy Presents Sweet Treats for a Sugar-Filled Life!)

Probably the most important question ever.

I want to eat: Pumpkin Crumble Cake.

Important life skill: how to eat an entire birthday cake.

My favorite type of Christmas cookie is...this!